I had a bag of Halloween candy staring at me from the pantry shelf, and honestly? I wasn’t in the mood. The wrappers felt tired, the chocolate predictable. What I actually wanted was something that tasted like October—warm spice, buttery crust, that little hit of pumpkin that says fall is finally here. But I didn’t want to roll out a full pie crust or deal with a sticky mess at 10 p.m. on a Tuesday. So I grabbed a tube of pre-made sugar cookie dough (the kind that sits in the dairy case) and figured I’d just… see what happened. An hour later, I had a baking sheet full of tiny, golden pumpkin pie cookies that smelled like my grandmother’s kitchen—if her kitchen also had a ghost decorating station.
These little cookies solved a problem I didn’t know I had. They gave me the flavor of a classic pumpkin pie without the commitment of a whole pie. They were small enough to eat three of without guilt, sturdy enough to survive a toddler’s grab, and cute enough to actually bring to a Halloween party. I’ve made them every year since, and they’ve become the thing people ask for—not the candy, not the cupcakes, but these weirdly perfect mini pumpkin pie cookies that taste like someone spent hours in the kitchen. (They didn’t.)
The secret is in the shortcut. You don’t need to make dough from scratch. You don’t need a pastry blender or a food processor. You just need a few clever hacks and the right pumpkin filling, and suddenly you’ve got a cookie that looks bakery-made. That’s the kind of magic Halloween deserves—low stress, high reward, and just a little bit spooky.
Why You’ll Love This Recipe
Let me tell you why these cookies have earned a permanent spot in my fall rotation. They check every box a busy home cook needs, especially during the chaos of Halloween week.
- Quick & Easy: From start to finish, these cookies take about 30 minutes. That’s faster than a trip to the store for a pie, and way more satisfying. You can make them after work, before trick-or-treaters arrive, or even while the kids are still in their costumes.
- Simple Ingredients: You probably already have most of what you need. Refrigerated sugar cookie dough, canned pumpkin puree, pumpkin pie spice, and a few pantry staples. No fancy grocery trips, no hunting for obscure extracts.
- Perfect for Halloween Parties: These little cookies look like individual pumpkin pies. They’re adorable on a dessert table, easy to grab and go, and they don’t require plates or forks. I’ve brought them to school parties, office potlucks, and neighborhood gatherings, and they always disappear first.
- Crowd-Pleaser: Kids love the size and sweetness. Adults love the flavor. Even people who say they don’t like pumpkin pie end up reaching for a second one. (Honestly, it’s the buttery cookie base that wins them over.)
- Unbelievably Delicious: The combination of soft, chewy cookie and creamy pumpkin filling is pure comfort. The edges get slightly crisp, the centers stay tender, and every bite tastes like fall in miniature form.
What makes these different from every other pumpkin cookie out there? It’s the technique. Instead of mixing pumpkin into the dough (which often makes cookies cakey and bland), we use the cookie dough as a crust. We press it into mini muffin tins, fill the centers with a rich pumpkin custard, and bake until golden. The result is a cookie that actually tastes like a pie—crisp on the bottom, creamy on top, and perfectly portioned.
These cookies are the kind that make you close your eyes after the first bite. They’re comfort food reimagined—faster, simpler, but with the same soul-soothing satisfaction. Perfect for impressing guests without stress, or turning a simple Tuesday night into something memorable.
What Ingredients You Will Need
This recipe uses simple, wholesome ingredients to deliver big flavor without the fuss. Most of these are pantry staples or easy to find at any grocery store.
- 1 (16.5 oz) tube refrigerated sugar cookie dough — I prefer the Pillsbury brand for consistent results, but any brand works. Let it sit at room temperature for about 5 minutes so it’s soft enough to press into the pan without cracking.
- 3/4 cup canned pumpkin puree — Make sure you grab pure pumpkin, not pumpkin pie filling. The filling has added sugar and spices that throw off the balance. Libby’s is my go-to for reliable texture and flavor.
- 1/4 cup granulated sugar — Adds just enough sweetness to balance the earthy pumpkin.
- 1 large egg — Helps the filling set properly. Bring it to room temperature for the smoothest texture.
- 1 teaspoon pumpkin pie spice — You can use store-bought or make your own blend (1/2 teaspoon cinnamon, 1/4 teaspoon ginger, 1/4 teaspoon nutmeg, pinch of cloves).
- 1/2 teaspoon vanilla extract — Adds warmth and depth. Pure vanilla is best, but imitation works in a pinch.
- 1 tablespoon all-purpose flour — Helps thicken the filling so it doesn’t get runny during baking.
- Pinch of salt — Enhances all the flavors and prevents the cookies from tasting flat.
- Optional: Whipped cream or powdered sugar for topping — Not essential, but a tiny dollop of whipped cream makes them look extra special for Halloween.
For a gluten-free version, use a gluten-free sugar cookie dough (many brands make them now) and substitute the all-purpose flour with a gluten-free 1:1 blend. For a dairy-free option, most refrigerated sugar cookie doughs are dairy-free, but double-check the label. If you want to make these vegan, swap the egg for a flax egg (1 tablespoon ground flaxseed mixed with 3 tablespoons water, let sit for 5 minutes) and use a vegan cookie dough.
Equipment Needed
You don’t need a lot of fancy tools for this recipe, which is part of why I love it. Here’s what you’ll need:
- Mini muffin tin — A 24-cup mini muffin pan is ideal. If you only have a 12-cup pan, just bake in batches.
- Non-stick cooking spray — Essential for easy removal. Even if your pan is non-stick, spray it generously.
- Small cookie scoop or teaspoon — For portioning the cookie dough evenly. A 1-tablespoon scoop works perfectly.
- Shot glass or small measuring spoon — This is my secret weapon for pressing the dough into the cups. A flat-bottomed shot glass creates the perfect well every time.
- Mixing bowl and whisk — For the pumpkin filling. A small bowl is fine.
- Cooling rack — Lets the cookies cool evenly and prevents soggy bottoms.
If you don’t have a mini muffin tin, you can use a regular muffin tin and adjust the baking time (add about 5-7 minutes). The cookies will be larger, but just as delicious. A friend of mine used silicone mini muffin cups on a baking sheet once, and they worked surprisingly well—just make sure to spray them thoroughly.
Preparation Method
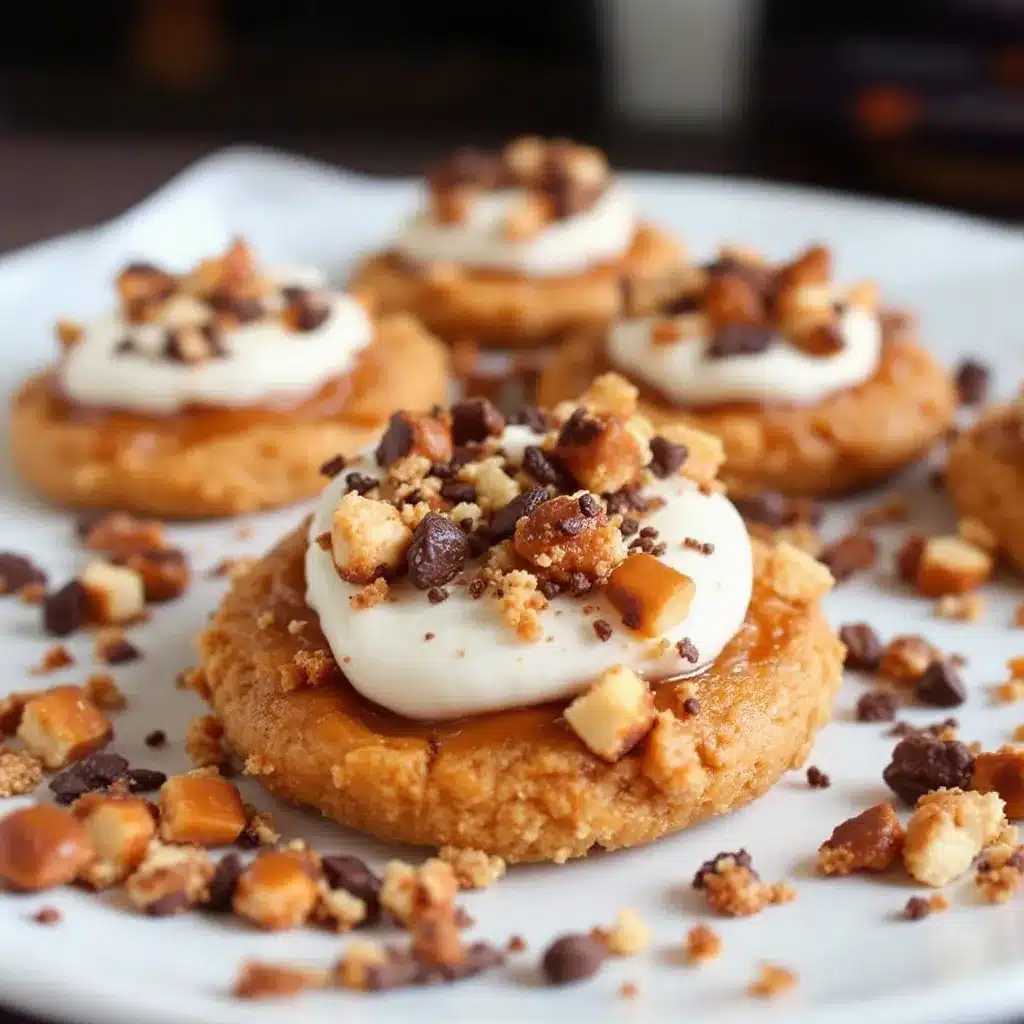
Let’s walk through this step by step. I’ll include all the little details I’ve learned from making these cookies dozens of times.
- Preheat your oven to 350°F (175°C). Position the rack in the center of the oven. Spray your mini muffin tin generously with non-stick cooking spray. Don’t skip this—even non-stick pans need help with sticky cookie dough.
- Prepare the cookie dough. Remove the sugar cookie dough from the tube and let it sit for 5 minutes at room temperature. Slice it into 24 even rounds (about 1/2-inch thick each). Roll each piece into a ball between your palms. Place one ball into each mini muffin cup.
- Press the dough into the cups. Using a shot glass, small measuring spoon, or your thumb, press each ball of dough firmly into the bottom and up the sides of the cup. You want to create a small well in the center, like a tiny pie crust. The dough should be about 1/4-inch thick on the bottom and sides. Don’t worry if the edges are a little uneven—that’s part of the charm.
- Make the pumpkin filling. In a small mixing bowl, whisk together the pumpkin puree, granulated sugar, egg, pumpkin pie spice, vanilla extract, flour, and salt. Whisk until completely smooth and combined. The mixture should be thick but pourable, like a loose pudding.
- Fill the cookie cups. Using a small spoon or a piping bag (a zip-top bag with the corner snipped off works great), fill each cookie cup with about 1 teaspoon of pumpkin filling. Don’t overfill—leave a tiny bit of space at the top because the filling will puff up slightly as it bakes. A little overflow is fine, but too much will make removal tricky.
- Bake. Place the muffin tin in the preheated oven and bake for 12-15 minutes. You’ll know they’re done when the cookie edges are golden brown and the pumpkin filling is set but still slightly jiggly in the center (it will firm up as it cools). The filling should look matte, not glossy.
- Cool in the pan. This is crucial. Let the cookies cool in the muffin tin for at least 10 minutes. The filling needs time to set, and the cookies need to firm up so they don’t fall apart when you remove them. After 10 minutes, run a thin knife or offset spatula around the edges of each cookie to loosen them, then gently lift them out.
- Transfer to a cooling rack. Place the cookies on a wire rack to cool completely. This takes about 15-20 more minutes. Don’t skip the rack—if you leave them on a plate, the bottoms can get soggy.
- Optional: Decorate. Once cooled, you can top each cookie with a tiny dollop of whipped cream, a dusting of powdered sugar, or even a mini ghost-shaped marshmallow for Halloween flair. I like to add a sprinkle of cinnamon on top for extra color.
One thing I’ve learned the hard way: don’t rush the cooling process. The first time I made these, I tried to pop them out after 5 minutes, and half of them broke apart. The filling was still too soft, and the cookie crust crumbled. Give them the full 10 minutes in the pan, and you’ll be rewarded with perfect little pies every time.
Cooking Tips & Techniques
After making these cookies more times than I can count, I’ve picked up a few tricks that make the process smoother and the results better.
Don’t overwork the cookie dough. Sugar cookie dough is delicate. If you handle it too much, it can become tough. Roll the balls gently and press them into the pan with a light hand. If the dough starts sticking to your fingers, dust them with a little flour.
Use a piping bag for the filling. A piping bag (or a zip-top bag with the corner snipped) gives you way more control than a spoon. You can fill each cup neatly without spilling, and the filling distributes evenly. I learned this after my third batch, when I got tired of wiping pumpkin goo off the edges of the pan.
Watch the bake time carefully. Ovens vary, and these cookies go from perfect to overdone quickly. Start checking at 11 minutes. The edges should be golden, not brown. If the tops of the cookies are browning too fast but the filling isn’t set, tent the pan loosely with foil for the last few minutes of baking.
Let them cool completely before storing. If you stack these cookies while they’re still warm, they’ll stick together and the crusts will get soft. Patience is hard, I know, but it pays off. If you’re in a hurry, pop them in the fridge for 10 minutes after they’ve cooled in the pan.
One mistake I made early on: I used pumpkin pie filling instead of pure pumpkin puree. The filling is pre-sweetened and spiced, so my cookies turned out overly sweet and the texture was gummy. Stick with pure pumpkin, and adjust the sugar and spice yourself. You’ll get a cleaner, more balanced flavor.
Variations & Adaptations
These cookies are incredibly flexible. Here are some ways I’ve adapted them over the years.
Chocolate Pumpkin Mini Pies: Swap the sugar cookie dough for chocolate chip cookie dough. The chocolate pairs beautifully with the pumpkin spice. My kids went crazy for this version—it’s like a pumpkin pie and a chocolate chip cookie had a baby.
Gluten-Free Version: Use a gluten-free sugar cookie dough (Sweet Loren’s makes a great one) and substitute the all-purpose flour in the filling with a gluten-free 1:1 blend. The texture is slightly more crumbly, but the flavor is spot-on. I’ve served these to gluten-sensitive friends, and they couldn’t tell the difference.
Vegan Version: Use a vegan sugar cookie dough and replace the egg with a flax egg (1 tablespoon ground flaxseed + 3 tablespoons water, let sit for 5 minutes). The filling will be slightly less firm, but still delicious. I tested this version for a friend’s vegan Halloween party, and they disappeared in minutes.
Savory-Sweet Twist: Add a pinch of cayenne pepper or chipotle powder to the pumpkin filling for a subtle heat. The spice cuts through the sweetness and gives the cookies a grown-up edge. I like to serve these with a glass of cold apple cider.
Halloween Decorations: Press a mini chocolate chip into the center of each cookie before baking to look like a spider. Or pipe a tiny ghost face on top with melted white chocolate. These little touches make them extra festive for Halloween parties.
Serving & Storage Suggestions
These mini pumpkin pie cookies are best served at room temperature or slightly warm. If you’ve added whipped cream, serve them immediately—the cream will melt if left out too long.
For a Halloween dessert table, arrange them on a platter with some black velvet Halloween cupcakes for a stunning color contrast. They also pair beautifully with a warm mug of pumpkin chai latte for a cozy fall afternoon treat.
Storage: Store the cookies in an airtight container in the refrigerator for up to 5 days. Layer them between sheets of parchment paper to prevent sticking. The filling will firm up even more as they chill, giving them a texture closer to a traditional pumpkin pie.
Freezing: These cookies freeze beautifully. Place them on a baking sheet in a single layer and freeze until solid (about 2 hours). Then transfer them to a freezer-safe bag or container. They’ll keep for up to 3 months. To serve, thaw them in the refrigerator overnight or at room temperature for about 30 minutes. The texture stays remarkably good—I’ve served frozen batches at Thanksgiving and no one knew they weren’t fresh.
Reheating: If you want that just-baked warmth, pop the cookies in a 300°F oven for 5 minutes. Don’t use the microwave—it makes the cookie crust soggy and the filling rubbery. The oven brings back the crisp edges and soft center perfectly.
One thing I’ve noticed: these cookies actually taste better the next day. The flavors meld together overnight, and the filling sets into a firmer, creamier texture. If you can resist eating them all on day one, you’re in for a treat on day two.
Nutritional Information & Benefits
Here’s a rough estimate for one mini cookie (without whipped cream topping). Values will vary based on your specific ingredients.
| Nutrient | Amount per Cookie |
|---|---|
| Calories | ~95 |
| Total Fat | 4g |
| Saturated Fat | 1.5g |
| Cholesterol | 12mg |
| Sodium | 75mg |
| Total Carbohydrates | 14g |
| Dietary Fiber | 1g |
| Sugars | 8g |
| Protein | 1.5g |
| Vitamin A | 35% DV |
| Iron | 3% DV |
Pumpkin is packed with vitamin A (from beta-carotene), which supports eye health and immune function. It’s also a good source of fiber, which helps with digestion and keeps you feeling full. The sugar cookie dough adds some refined carbs and sugar, but hey—it’s Halloween. Balance is key.
If you’re watching your sugar intake, you can reduce the granulated sugar in the filling to 2 tablespoons. The cookies will be less sweet, but the pumpkin flavor will shine through more. For a lower-calorie option, skip the whipped cream topping.
These cookies are vegetarian, but not vegan or gluten-free in their standard form. They contain dairy (in the cookie dough), eggs, and gluten. See the variations section above for dietary adaptations.
FAQs
Can I use homemade sugar cookie dough instead of refrigerated?
Absolutely. If you have a favorite sugar cookie recipe, use about 1 pound of dough. Just make sure it’s not too soft—chill it for 30 minutes if needed so it holds its shape in the muffin tin.
Why did my cookies stick to the pan?
This usually happens if you didn’t spray the pan well enough, or if you tried to remove the cookies before they cooled completely. Next time, use a generous amount of non-stick spray and wait the full 10 minutes before attempting to remove them.
Can I make these ahead of time for a party?
Yes! These cookies are perfect for make-ahead prep. You can bake them up to 2 days in advance and store them in the refrigerator. Or freeze them for up to 3 months. Just thaw and add any toppings right before serving.
My filling turned out runny. What went wrong?
A few possibilities: you used pumpkin pie filling instead of pure pumpkin, you didn’t whisk the filling long enough to incorporate the egg and flour, or you underbaked the cookies. Make sure your filling is smooth and thick before spooning it into the cups, and bake until the center is set but still slightly jiggly.
Can I use a different spice blend?
Of course. If you don’t have pumpkin pie spice, use a mix of cinnamon, nutmeg, ginger, and a tiny pinch of cloves. You can also try chai spice, apple pie spice, or even a pinch of cardamom for a unique twist.
Conclusion
These easy mini pumpkin pie cookies have become my go-to Halloween treat for good reason. They’re quick enough for a weeknight project, cute enough for a party, and delicious enough to make you forget all about the candy bowl. The combination of buttery cookie crust and creamy pumpkin filling hits every fall craving without the stress of a full pie.
I love that this recipe gives you permission to take shortcuts. You don’t need to prove anything by making dough from scratch. You just need a good idea and a little bit of time, and suddenly you’re the person who brought the best thing to the Halloween party. That’s the kind of kitchen magic I can get behind.
I’d love to hear how these turn out for you. Did you add any fun Halloween decorations? Did your kids help press the dough into the pan? Drop a comment below and let me know—your tweaks might inspire someone else’s batch. And if you’re looking for more easy Halloween recipes, don’t miss our mummy meatball Halloween pasta or these cream cheese mummy hand pies for a full spooky spread. Happy baking, and may your Halloween be full of tiny, perfect pumpkin pies!
Pin This Recipe!
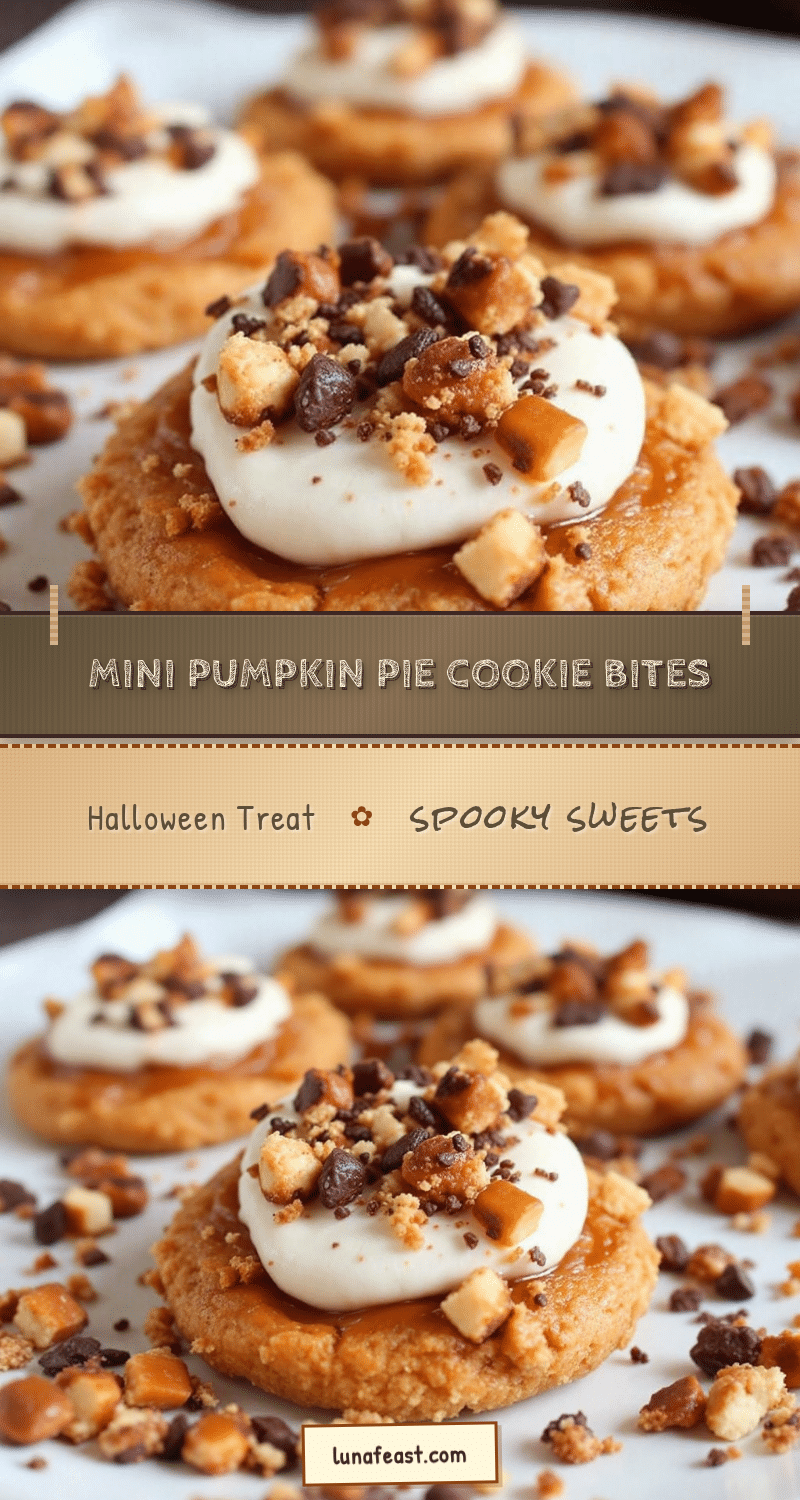
Easy Mini Pumpkin Pie Cookies for Perfect Halloween Treats
These easy mini pumpkin pie cookies combine a buttery sugar cookie crust with a creamy pumpkin filling for the perfect Halloween treat. Quick to make with simple ingredients, they’re adorable, delicious, and guaranteed to disappear at any party.
- Prep Time: 15 minutes
- Cook Time: 15 minutes
- Total Time: 30 minutes
- Yield: 24 cookies 1x
- Category: Dessert
- Cuisine: American
Ingredients
- 1 (16.5 oz) tube refrigerated sugar cookie dough
- 3/4 cup canned pumpkin puree
- 1/4 cup granulated sugar
- 1 large egg
- 1 teaspoon pumpkin pie spice
- 1/2 teaspoon vanilla extract
- 1 tablespoon all-purpose flour
- Pinch of salt
- Optional: Whipped cream or powdered sugar for topping
Instructions
- Preheat your oven to 350°F (175°C). Position the rack in the center of the oven. Spray your mini muffin tin generously with non-stick cooking spray.
- Remove the sugar cookie dough from the tube and let it sit for 5 minutes at room temperature. Slice it into 24 even rounds (about 1/2-inch thick each). Roll each piece into a ball between your palms. Place one ball into each mini muffin cup.
- Using a shot glass, small measuring spoon, or your thumb, press each ball of dough firmly into the bottom and up the sides of the cup to create a small well in the center, like a tiny pie crust. The dough should be about 1/4-inch thick on the bottom and sides.
- In a small mixing bowl, whisk together the pumpkin puree, granulated sugar, egg, pumpkin pie spice, vanilla extract, flour, and salt until completely smooth and combined. The mixture should be thick but pourable, like a loose pudding.
- Using a small spoon or a piping bag (a zip-top bag with the corner snipped off works great), fill each cookie cup with about 1 teaspoon of pumpkin filling. Don’t overfill—leave a tiny bit of space at the top.
- Place the muffin tin in the preheated oven and bake for 12-15 minutes. The cookies are done when the edges are golden brown and the pumpkin filling is set but still slightly jiggly in the center.
- Let the cookies cool in the muffin tin for at least 10 minutes. After 10 minutes, run a thin knife or offset spatula around the edges of each cookie to loosen them, then gently lift them out.
- Transfer the cookies to a wire rack to cool completely, about 15-20 more minutes.
- Optional: Once cooled, top each cookie with a tiny dollop of whipped cream, a dusting of powdered sugar, or a sprinkle of cinnamon.
Notes
Don’t rush the cooling process—let cookies cool in the pan for at least 10 minutes to prevent breaking. Use pure pumpkin puree, not pumpkin pie filling. For best results, use a piping bag for the filling. These cookies taste even better the next day after flavors meld overnight.
Nutrition
- Serving Size: 1 cookie
- Calories: 95
- Sugar: 8
- Sodium: 75
- Fat: 4
- Saturated Fat: 1.5
- Carbohydrates: 14
- Fiber: 1
- Protein: 1.5
Keywords: mini pumpkin pie cookies, Halloween cookies, pumpkin cookies, easy pumpkin dessert, fall cookies, sugar cookie pumpkin cups


