That first crackle of the pie crust as it hit the hot oven—the one that smelled like butter and promise—still takes me straight back to my tiny apartment kitchen in 2019. I was supposed to be making something spooky for a friend’s Halloween party, something that looked impressive but wouldn’t stress me out. I had a block of cream cheese in the fridge, a box of pre-made pie crusts in the freezer (no judgment here), and a sudden, stubborn idea that refused to let go. I wanted a handheld treat that was creepy-cute, not complicated. Something that looked like it took hours but actually came together in the time it took to watch one episode of a sitcom. So I started cutting out little ghost shapes, and then—on a whim—I sliced them into strips to wrap around a sweet, tangy filling. The first batch came out lopsided, the “bandages” were uneven, and one looked suspiciously like a sad, melted snowman. But the taste? That creamy, vanilla-kissed center against the flaky, golden crust? It was exactly what I was chasing. These Easy Cream Cheese Mummy Hand Pies are the result of that happy accident, and they’ve been a Halloween staple in my house ever since. They’re the kind of treat that makes you feel like a kitchen wizard with very little actual wizardry involved.
Why You’ll Love This Recipe
Let’s be real for a second. Halloween baking can feel like a lot of pressure. Between carving pumpkins and wrangling excited kids, who has time for a multi-day project? That’s exactly why these mummy hand pies are my go-to. They deliver all the festive fun without the fuss.
- Incredibly Easy: We’re talking store-bought pie crust and a simple, no-cook filling. This comes together in under 30 minutes flat. Honestly, if you can roll out dough and spread cream cheese, you’ve got this.
- Simple Ingredients: You probably already have everything you need. Cream cheese, sugar, vanilla, and pie crusts. No special trips to a fancy baking supply store required.
- Perfect for Halloween Parties: These are the ultimate crowd-pleaser at any spooky gathering. They’re handheld, mess-free, and way more fun than a regular cookie. Kids and adults both go crazy for them.
- Unbelievably Delicious: The contrast is what gets me every time. That flaky, buttery crust wrapped around a cool, creamy, and lightly sweet filling. It’s simple perfection.
- Customizable & Fun: You can make them as spooky or as silly as you want. Add a drop of food coloring to the filling, use different crust cutouts, or let the kids help “wrap” the mummies.
This isn’t just another Halloween dessert. It’s the one that disappears first from the dessert table. The one people ask for the recipe for. It’s comfort food with a costume on, and it’s honestly the most fun I’ve ever had with a pie crust. Close your eyes after that first bite—the creamy, sweet filling and the crunchy, golden crust just work.
What Ingredients You Will Need
This recipe uses simple, wholesome ingredients to deliver that perfect creamy-meets-flaky texture without any fuss. Most of these are pantry staples, which makes this a last-minute Halloween miracle.
- Two 9-inch Refrigerated Pie Crusts: The shortcut hero of this recipe. I prefer the Pillsbury brand for their consistent texture and buttery flavor, but any brand will work. Just make sure they are the rolled-up kind, not the pre-formed tin kind. Let them sit at room temperature for about 15 minutes before unrolling to prevent cracking.
- 8 ounces (226g) Full-Fat Cream Cheese: This is non-negotiable for the best texture. The fat content is what gives the filling that luscious, creamy mouthfeel. Low-fat or Neufchâtel cheese will work in a pinch, but the filling won’t be as rich. Make sure it’s completely softened to room temperature for a smooth, lump-free filling.
- 1/4 cup (50g) Granulated Sugar: Just enough to sweeten the tangy cream cheese. You can add an extra tablespoon if you have a serious sweet tooth.
- 1 teaspoon Pure Vanilla Extract: Use the real stuff if you have it. It adds a warm, aromatic depth that imitation vanilla just can’t match. It makes the filling taste like a dreamy vanilla cheesecake.
- 1 Large Egg: This is for the egg wash. It gives the pies that gorgeous, golden-brown, bakery-style shine. You’ll beat it with a tablespoon of water.
- Candy Eyes (Optional but Highly Recommended): These are the finishing touch that turns a hand pie into a mummy. You can find them at most craft stores or online. If you don’t have them, a tiny dab of icing with a chocolate chip works too.
Equipment Needed
You don’t need a fully stocked professional kitchen for this one. Here’s what you’ll need to get the job done.
- Baking Sheet: A standard half-sheet pan works perfectly. Line it with parchment paper for easy cleanup.
- Rolling Pin: Even though you’re using pre-made crusts, a light roll helps even out the thickness. If you don’t have one, a clean wine bottle works surprisingly well.
- Pizza Cutter or Sharp Knife: You’ll need this to cut the crust into strips for the mummy “bandages.” A pizza cutter makes quick, straight lines.
- Small Bowl: For mixing the filling and for the egg wash.
- Pastry Brush: For applying the egg wash. A silicone one is my favorite—it’s easy to clean and doesn’t shed bristles.
- Offset Spatula or Butter Knife: For spreading the cream cheese filling. An offset spatula gives you the smoothest, most even layer.
Preparation Method
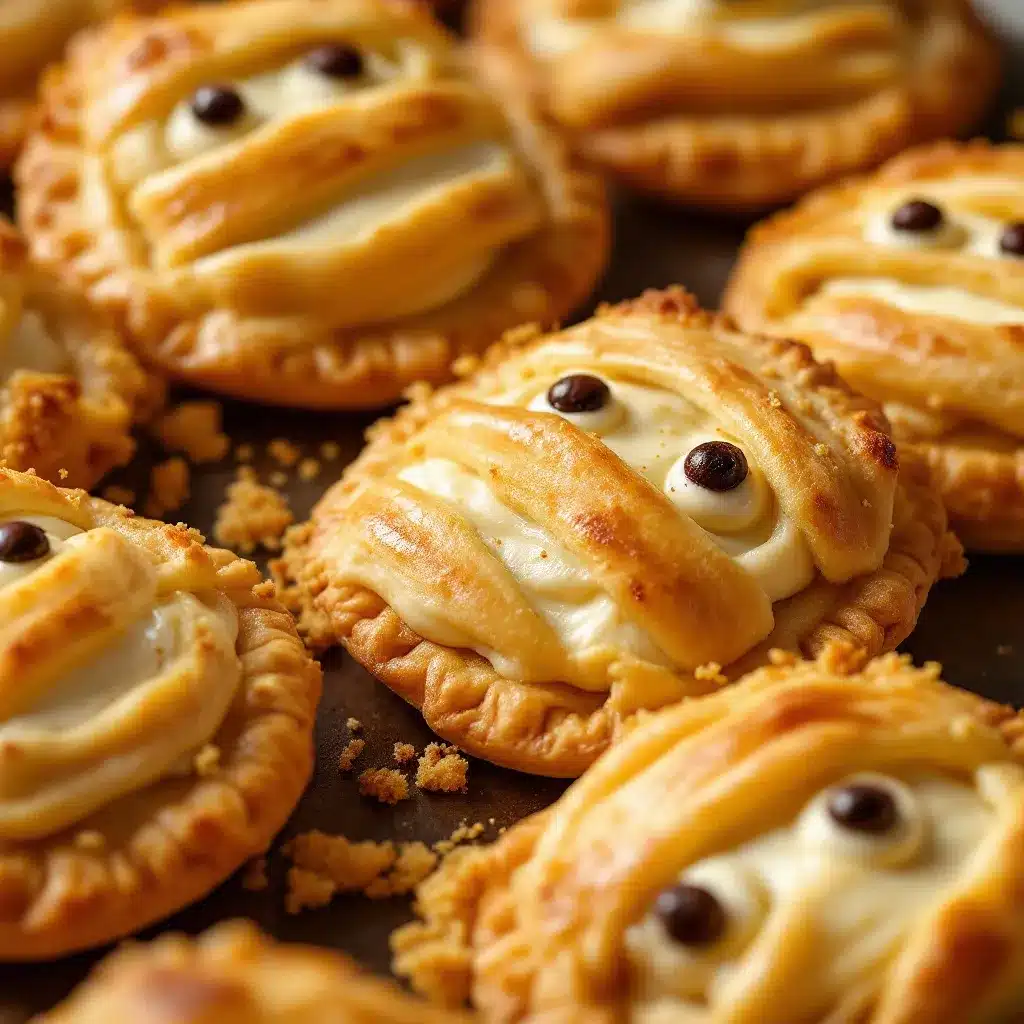
Alright, let’s get to the fun part. The whole process is surprisingly quick, so preheat your oven to 375°F (190°C) first. Line your baking sheet with parchment paper and set it aside.
- Make the Cream Cheese Filling: In a small bowl, combine the softened cream cheese, granulated sugar, and vanilla extract. Use a fork or a small spatula to mix it until it’s completely smooth and creamy. There should be no lumps. Give it a taste—it should be sweet, tangy, and utterly delicious. Set it aside.
- Prepare the Pie Crusts: Gently unroll one of the pie crusts onto a lightly floured surface. If it cracks a little at the edges, don’t panic. Just pinch it back together. Use your rolling pin to give it a few gentle rolls, just to even out the thickness and make it a little larger. You want it to be about 1/8-inch thick.
- Cut the Crust into Strips: Using your pizza cutter or a sharp knife, cut the crust into strips that are about 1/2-inch to 3/4-inch wide. The exact width doesn’t matter too much—some can be wider, some thinner. It adds to the “mummy” effect. You’ll need about 6-8 strips per pie. Repeat this process with the second pie crust.
- Assemble the Mummies (Part 1): Now, this is where you get creative. Take your first strip of pie crust. Place a generous teaspoon-sized dollop of the cream cheese filling about an inch from the top of the strip. Don’t overfill it, or it will leak out during baking.
- Assemble the Mummies (Part 2): Starting at the top, fold the crust strip over the filling. Then, continue wrapping the strip around itself, slightly overlapping as you go, to create the “bandaged” look. It doesn’t have to be perfect—in fact, a little messy looks more authentic. Pinch the end of the strip to seal it. The pie should look like a little wrapped bundle. Place it on your prepared baking sheet.
- Assemble the Remaining Mummies: Repeat the process with the remaining strips and filling. You should get about 8-10 mummy hand pies, depending on how much filling you use in each one. Leave about an inch of space between each pie on the baking sheet.
- Apply the Egg Wash: In your small bowl, beat the egg with one tablespoon of water. Using your pastry brush, gently brush the top of each mummy pie with the egg wash. This is what gives them that beautiful golden color. Don’t skip this step!
- Bake to Perfection: Place the baking sheet in your preheated oven and bake for 15-18 minutes, or until the crust is a deep golden brown and the filling is bubbly. The smell in your kitchen right now is absolutely incredible. Let them cool on the baking sheet for at least 10 minutes. The filling will be molten hot right out of the oven.
- Add the Eyes: Once the pies are cool enough to handle but still warm, gently press two candy eyes onto each mummy. If the pies have cooled completely, a tiny dab of frosting or even a little bit of the cream cheese filling will help the eyes stick.
Cooking Tips & Techniques
I’ve made these pies more times than I can count, and I’ve learned a few things the hard way so you don’t have to. Here are my best tips for perfect mummy hand pies every time.
Don’t Overfill. This is the number one mistake. A little dollop of filling goes a long way. If you use too much, it will bubble out during baking and make a sticky mess on your baking sheet. Trust me, I’ve scraped burnt cream cheese off a pan before—it’s not fun. A heaping teaspoon is the perfect amount.
Room Temperature is Key. Make sure your cream cheese is fully softened. Cold cream cheese will be lumpy and difficult to spread, and it won’t mix smoothly with the sugar. Let it sit on the counter for at least 30 minutes before you start. The same goes for your pie crusts—letting them sit for 15 minutes at room temperature prevents them from cracking when you unroll them.
Embrace the Imperfections. These are supposed to look like mummies, not perfectly wrapped gifts. If some of the crust strips overlap awkwardly or if the filling peeks out a little, that’s totally fine. It adds character. The more “mummy-like” and haphazard they look, the better they’ll turn out. I once made one that looked like a sad, squashed ghost, and it was everyone’s favorite.
Watch the Oven. All ovens are a little different. Start checking your pies at the 15-minute mark. You want them to be a beautiful, deep golden brown. If the edges are browning too quickly but the rest of the pie is still pale, you can loosely tent the baking sheet with foil for the last few minutes of baking.
Variations & Adaptations
One of the best things about this recipe is how easy it is to make it your own. Here are a few of my favorite ways to switch it up.
- Chocolate Lover’s Mummy: Add 1/4 cup of mini chocolate chips to the cream cheese filling. The melted chocolate chips create a fudgy, incredible surprise inside the flaky crust. It’s like a warm chocolate chip cheesecake bite.
- Pumpkin Spice Mummies: Swap the vanilla extract for 1/2 teaspoon of pumpkin pie spice and add 2 tablespoons of pumpkin puree to the filling. This is the perfect fall twist. It tastes like a mini pumpkin cheesecake wrapped in pie crust. So good.
- Fruit-Filled Mummies: Add a small spoonful of your favorite jam or preserves (strawberry, raspberry, or apricot work beautifully) on top of the cream cheese filling before wrapping. The sweet-tart fruit cuts through the richness of the cream cheese perfectly.
- Dairy-Free Option: Use a dairy-free cream cheese alternative (like Kite Hill or Tofutti) and a vegan pie crust. The texture will be slightly different, but it will still be delicious and creamy. Make sure to use a flax egg (1 tablespoon ground flaxseed mixed with 3 tablespoons water) for the egg wash.
- Gluten-Free Mummies: Use a gluten-free pie crust. I’ve had great success with the Wholly Gluten-Free brand. Just be gentle when handling the strips, as gluten-free crusts can be a bit more fragile.
Serving & Storage Suggestions
These little guys are best served warm, when the filling is still soft and the crust is at its flakiest. Let them cool for about 10 minutes after baking so the filling sets up a little, but serve them while they’re still warm. They’re perfect on their own, or you can dust them with a little powdered sugar for a snowy, “just-unwrapped” mummy look.
For a fun Halloween party spread, arrange them on a platter with some crispy bacon-wrapped jalapeno poppers and a bowl of easy crockpot chicken tacos for a sweet and savory mix. They also pair beautifully with a glass of cold milk or a warm apple cider.
To store leftovers (if you have any!), place them in an airtight container in the refrigerator for up to 3 days. The crust will soften a bit in the fridge, but they’ll still be delicious. To reheat, pop them in a 350°F (175°C) oven for about 5 minutes, or until they’re warm and the crust crisps back up. You can also microwave them for 15-20 seconds, but the crust won’t be as flaky. These pies also freeze beautifully. Place the baked and cooled pies on a baking sheet in the freezer for an hour, then transfer them to a freezer-safe bag for up to 3 months. Reheat directly from frozen in a 350°F oven for 10-12 minutes.
Nutritional Information & Benefits
While these are a treat, they’re not totally devoid of redeeming qualities. The cream cheese provides a good source of calcium and protein, which helps make these a little more satisfying than a plain sugar cookie. One hand pie (using the full-fat ingredients listed) contains approximately 220 calories, 14g of fat, 20g of carbohydrates, and 4g of protein.
For a slightly lighter version, you can use a low-fat cream cheese and a whole-wheat pie crust. The texture will be a little different, but the flavor will still be fantastic. These are a fun, portion-controlled way to enjoy a Halloween dessert without going overboard. They’re the perfect little bite of spooky sweetness.
Conclusion
These Easy Cream Cheese Mummy Hand Pies are more than just a Halloween dessert. They’re a little moment of joy, a tiny, delicious package that brings a smile to everyone’s face. They’re proof that you don’t need to be a professional baker to create something impressive and fun. The combination of that flaky, buttery crust and the cool, sweet, creamy filling is just absolutely perfect. I love making these every year because they remind me that the best recipes are often the simplest ones—the ones that come from a happy accident in a tiny kitchen. I really hope you give them a try. Don’t be afraid to get creative with the wrapping and make them your own. If you make them, I’d love to hear about it! Leave a comment below and let me know how your mummies turned out, or tag me in your photos on Pinterest. Happy Halloween, and happy baking!
Frequently Asked Questions
Can I make these mummy hand pies ahead of time?
Absolutely! You can assemble the pies completely (without the egg wash) up to 24 hours in advance. Keep them covered in the refrigerator. When you’re ready to bake, just brush them with the egg wash and pop them in the oven. You may need to add 2-3 minutes to the baking time since they’ll be starting from cold.
Can I use homemade pie crust instead of store-bought?
Yes, definitely! If you have a favorite homemade pie crust recipe, it will work beautifully here. Just make sure to roll it out to about 1/8-inch thickness before cutting it into strips. A homemade all-butter crust will make these pies even more flaky and delicious.
My cream cheese filling is lumpy. What did I do wrong?
This usually happens when the cream cheese isn’t fully softened to room temperature. Cold cream cheese won’t blend smoothly with the sugar. Next time, let your cream cheese sit on the counter for at least 30-45 minutes before you start. If you’re in a hurry, you can microwave it in a small bowl for 10-15 seconds to soften it quickly.
Can I use a different type of filling?
Absolutely! This recipe is a great base for all kinds of fillings. You can use a simple fruit jam, a nutella and cream cheese mixture, or even a savory filling like a leftover sausage and cheese breakfast casserole for a fun twist. Just make sure whatever you use isn’t too wet, or it will make the crust soggy.
How do I keep the candy eyes from falling off?
The best time to add the eyes is when the pies are still warm but not hot—about 10 minutes after they come out of the oven. The residual heat helps the eyes stick. If you’ve let them cool completely, just dab a tiny bit of the cream cheese filling or some royal icing on the back of the eye before pressing it onto the pie.
Pin This Recipe!
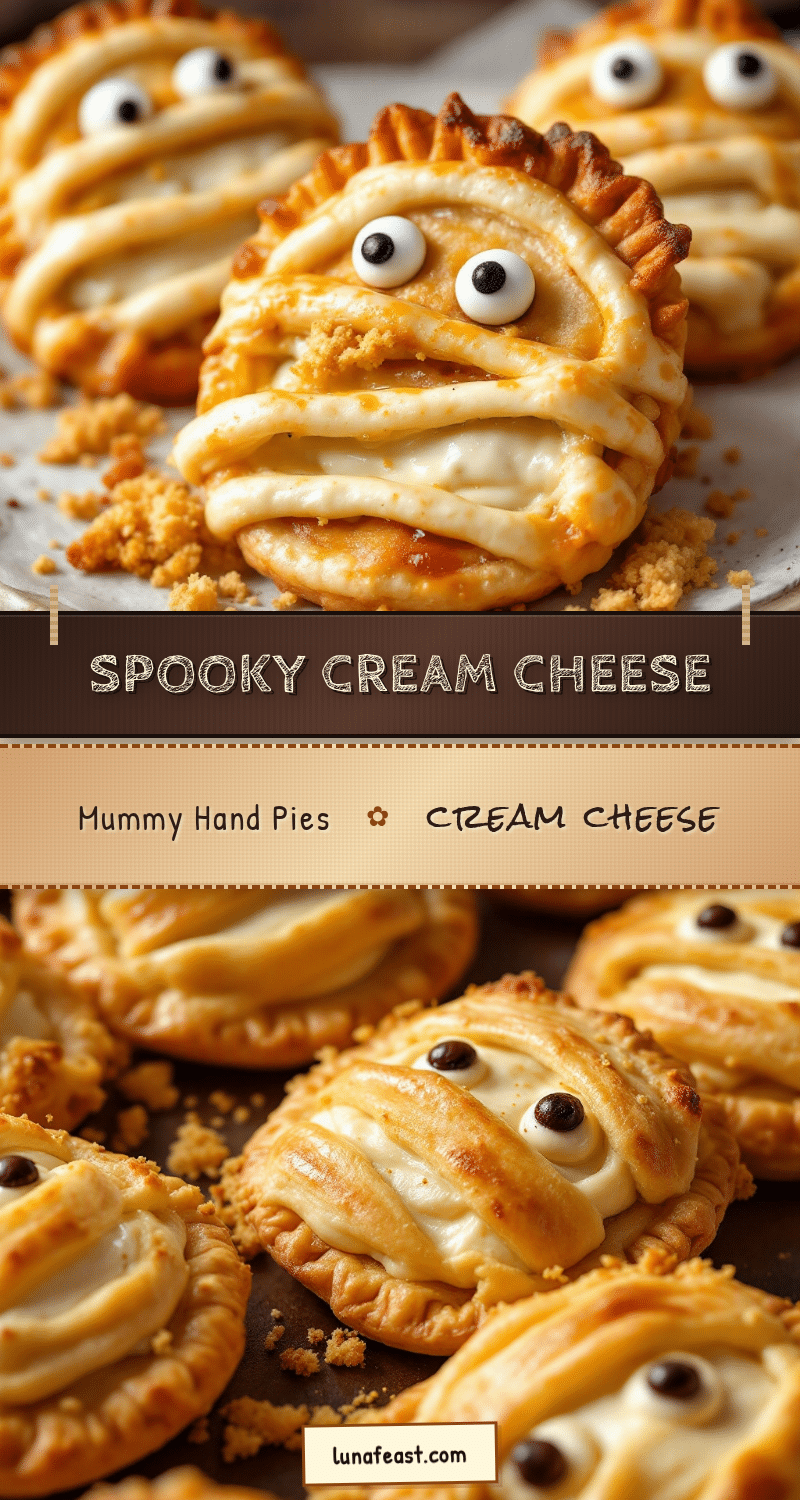
Easy Cream Cheese Mummy Hand Pies Recipe

These Easy Cream Cheese Mummy Hand Pies are a fun, spooky Halloween treat with a flaky, buttery crust wrapped around a creamy, sweet vanilla filling. They come together in under 30 minutes using simple ingredients and are perfect for parties.
- Prep Time: 15 minutes
- Cook Time: 18 minutes
- Total Time: 33 minutes
- Yield: 8-10 servings 1x
- Category: Dessert
- Cuisine: American
Ingredients
- Two 9-inch refrigerated pie crusts (e.g., Pillsbury)
- 8 ounces (226g) full-fat cream cheese, softened
- 1/4 cup (50g) granulated sugar
- 1 teaspoon pure vanilla extract
- 1 large egg (for egg wash)
- 1 tablespoon water (for egg wash)
- Candy eyes (optional, for decoration)
Instructions
- Preheat oven to 375°F (190°C). Line a baking sheet with parchment paper.
- In a small bowl, combine softened cream cheese, granulated sugar, and vanilla extract. Mix until smooth and creamy. Set aside.
- Gently unroll one pie crust onto a lightly floured surface. Roll lightly to even out thickness to about 1/8-inch.
- Using a pizza cutter or sharp knife, cut the crust into strips about 1/2 to 3/4 inch wide. Repeat with the second crust.
- Take one strip of pie crust. Place a generous teaspoon-sized dollop of cream cheese filling about 1 inch from the top of the strip.
- Fold the top of the strip over the filling, then continue wrapping the strip around itself, slightly overlapping, to create a bandaged mummy look. Pinch the end to seal. Place on prepared baking sheet.
- Repeat with remaining strips and filling, spacing pies about 1 inch apart on the baking sheet.
- In a small bowl, beat the egg with 1 tablespoon of water. Brush the top of each mummy pie with the egg wash.
- Bake for 15-18 minutes, until the crust is deep golden brown and the filling is bubbly. Let cool on the baking sheet for at least 10 minutes.
- While still warm, gently press two candy eyes onto each mummy. If cooled completely, use a dab of frosting or cream cheese filling to help the eyes stick.
Notes
Don’t overfill the pies to prevent leaking. Ensure cream cheese is fully softened for a smooth filling. Embrace imperfections for a more authentic mummy look. Start checking at 15 minutes to avoid overbrowning.
Nutrition
- Serving Size: 1 hand pie
- Calories: 220
- Sugar: 8
- Sodium: 200
- Fat: 14
- Saturated Fat: 7
- Carbohydrates: 20
- Protein: 4
Keywords: Halloween, mummy hand pies, cream cheese, easy dessert, hand pies, spooky treats, fall baking


