My husband looked at me last Tuesday with this expression I can only describe as “I’m hungry but I don’t want to admit I’m hungry.” It was 3:30 in the afternoon, that weird dead zone between lunch and dinner where snack cravings hit hardest. He opened the pantry, stared at it for a solid ten seconds, then closed it without grabbing anything. I knew that move. It meant nothing sounded good but he needed something. So I pulled out the oats, peanut butter, and honey, and started mixing. He watched me roll those little balls without saying a word. The first bite he took, his eyebrows went up. By the third one, he asked if I could make these every week.
That’s how these Easy No-Bake Peanut Butter Oat Energy Bites became a permanent fixture in our kitchen. They weren’t planned or Pinterest-perfect. They were just what happened when I needed something fast and he needed something good. And honestly? That’s the best kind of recipe to keep around.
These little bites have saved us more times than I can count. Late afternoon slumps, post-workout hunger, that 10 PM craving that won’t quit. They come together in about five minutes with zero baking involved. No oven, no stove, no complicated steps. Just mix, roll, and eat. I’ve made them so many times now I don’t even measure anymore. I just eyeball it and somehow they always turn out perfect.
If you’ve ever needed a snack that actually fills you up without making you feel heavy, this is it. These energy bites are the kind of recipe you’ll make without thinking twice.
Why You’ll Love This Recipe
Let me tell you why these Easy No-Bake Peanut Butter Oat Energy Bites have become my most-requested snack recipe. I’ve tested dozens of versions over the years, and this one wins every single time.
- Ready in 5 Minutes : No joke. You can have these mixed and rolled before your coffee finishes brewing. Perfect for those days when hunger strikes and you need something now.
- Simple Ingredients : Old-fashioned oats, peanut butter, honey, chocolate chips, flaxseed. That’s it. Things you probably already have in your pantry.
- No Baking Required : The name says it all. No oven, no stove, no waiting. Just mix and roll. Even my kids can make these without help.
- Perfect for Busy Days : Throw a few in your bag before heading out. They hold up great at room temperature and don’t get mushy or weird.
- Crowd-Pleaser : I’ve brought these to playdates, work gatherings, and road trips. Adults and kids alike devour them. They disappear fast.
- Actually Filling : The combination of oats, peanut butter, and flaxseed gives you protein, fiber, and healthy fats. One or two bites actually satisfy you, not just tide you over.
What makes this version different from all those other energy ball recipes out there? It’s the texture. I spent months tweaking the ratios to get that perfect balance — firm enough to hold together, soft enough to bite into without cracking a tooth, and just the right amount of chewiness. The flaxseed adds a subtle nuttiness that you don’t notice until it’s missing. And the mini chocolate chips? They melt slightly from the warmth of your hands as you roll, creating little pockets of chocolate in every bite.
I’ll be honest with you. I’ve made energy balls that tasted like cardboard. I’ve made ones that fell apart before they even made it to the fridge. This recipe is the result of all those failures. It’s the version I make when I want something that actually tastes good and works every single time.
What Ingredients You Will Need
This recipe uses simple, wholesome ingredients that come together to create something genuinely satisfying. No fancy health food store runs required. You probably have most of these in your kitchen right now.
- Old-Fashioned Rolled Oats – 1 ½ cups (150g). These provide the hearty base and chewy texture. I recommend Quaker Old-Fashioned Oats for consistent results. Quick oats work in a pinch but give a softer, less textured bite. Steel-cut oats won’t work here — they’re too hard and won’t soften enough.
- Creamy Peanut Butter – ½ cup (130g). Natural peanut butter works great, but make sure it’s well-stirred. The oil separation can throw off the consistency. I prefer Skippy Natural for its perfect balance of creaminess and stability. Crunchy peanut butter works too if you want extra texture.
- Honey – ⅓ cup (110g). This binds everything together and adds natural sweetness. Local honey is lovely if you have it. Maple syrup works as a substitute, though the flavor changes slightly and the texture becomes a touch stickier.
- Mini Chocolate Chips – ⅓ cup (60g). These little guys distribute evenly throughout each bite. Regular chocolate chips work too, but they tend to fall out more easily. I use Ghirardelli mini semi-sweet chips for that perfect chocolate-to-oat ratio.
- Ground Flaxseed – 2 tablespoons (14g). This is my secret weapon for texture and nutrition. It helps bind everything together while adding omega-3s and fiber. You can skip it if needed, but the bites won’t hold together as well. Chia seeds work as a substitute.
- Vanilla Extract – 1 teaspoon. It rounds out the flavors and makes everything taste more, well, complete. Don’t skip this one. It makes a difference.
- Pinch of Salt – Just a tiny pinch (about ⅛ teaspoon). Peanut butter already has salt, but that extra pinch balances the sweetness and makes the chocolate pop. Use flaky sea salt if you’re feeling fancy.
Ingredient Selection Tips : For the best texture, look for oats that are fresh and not stale. Give them a sniff test — they should smell toasty and neutral, not musty. For the peanut butter, avoid the super-runny natural brands that separate aggressively. You want something that’s spreadable at room temperature, not pourable.
Substitution Guidance : If you have peanut allergies, sunflower seed butter works beautifully. Just note that the color will turn slightly green from a natural reaction between sunflower seeds and baking soda (even though there’s no baking soda here, the chlorophyll still reacts). It’s totally safe and tastes great. For a nut-free version, use WowButter or another soy-based alternative. For a vegan option, swap honey with maple syrup or agave nectar.
Equipment Needed
You don’t need much for this recipe. That’s part of the beauty.
- Large Mixing Bowl – Any medium-to-large bowl works. I use a glass Pyrex bowl because it doesn’t hold onto smells or stains.
- Measuring Cups and Spoons – Standard set for dry ingredients. I’ve learned the hard way that eyeballing the peanut butter leads to disaster. Measure it.
- Rubber Spatula or Wooden Spoon – Something sturdy enough to mix thick, sticky dough. A rubber spatula makes scraping the bowl easier.
- Cookie Scoop or Tablespoon – For portioning even-sized bites. A 1-tablespoon cookie scoop is my favorite tool here. It makes the process so much faster and gives you uniform balls.
- Parchment Paper or Wax Paper – Line a baking sheet or plate so the bites don’t stick while they chill.
- Baking Sheet or Large Plate – Something flat to hold the bites while they set in the fridge.
- Small Bowl of Water – Wet your hands slightly before rolling. It prevents the mixture from sticking to your palms. Trust me on this one.
If you don’t have a cookie scoop, just use a regular tablespoon. The bites don’t need to be perfectly round. Imperfect ones have more personality anyway. I’ve made these with nothing but a bowl and my hands when camping, and they turned out just fine.
Preparation Method
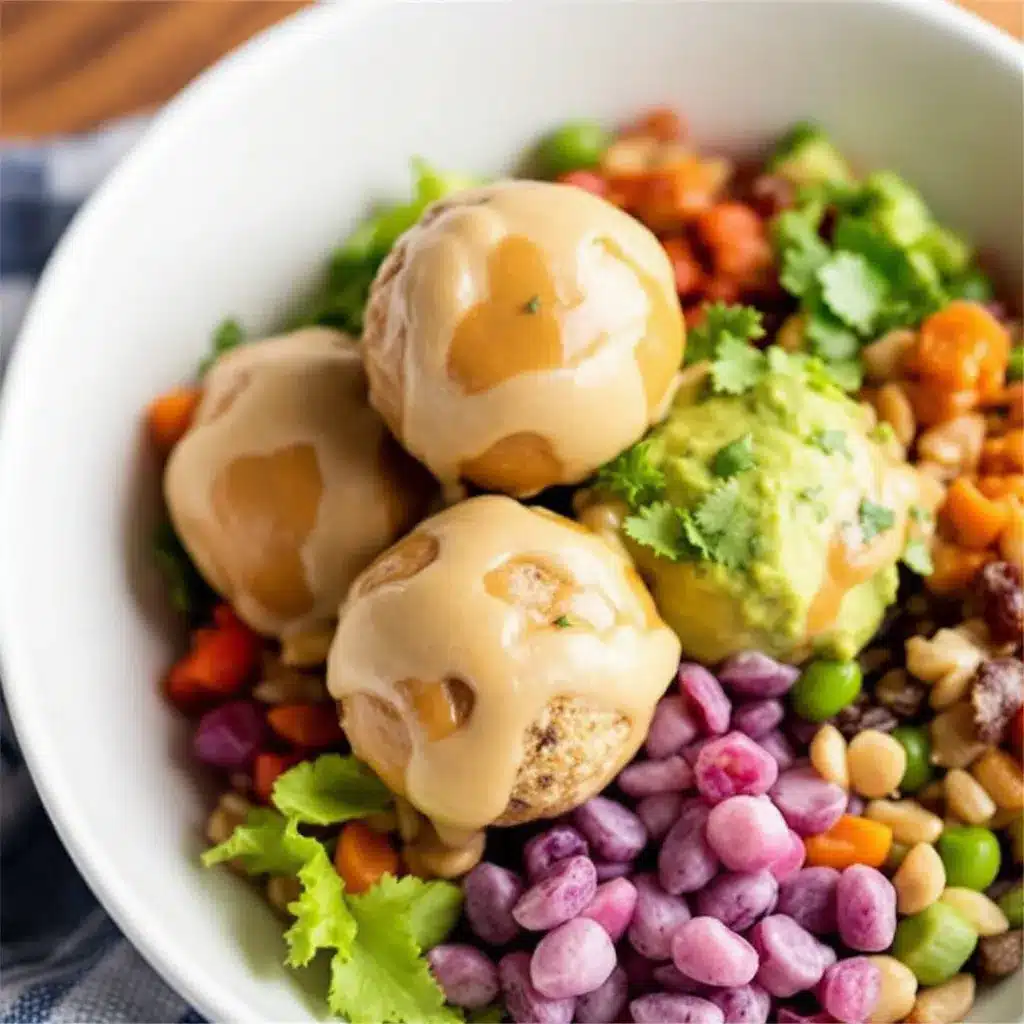
- Combine the dry ingredients. In your large mixing bowl, add 1 ½ cups old-fashioned rolled oats, ⅓ cup mini chocolate chips, and 2 tablespoons ground flaxseed. Give them a quick stir with your spatula to distribute everything evenly. This step takes about 30 seconds but makes a difference in the final texture.
- Add the wet ingredients. To the same bowl, add ½ cup creamy peanut butter, ⅓ cup honey, 1 teaspoon vanilla extract, and a pinch of salt. Don’t worry if the peanut butter seems stiff at first. It will loosen up as you mix.
- Mix until fully combined. This is where the arm workout happens. Stir everything together with firm, consistent strokes. The mixture will look crumbly at first, then slowly come together into a cohesive dough. Keep going until you see no dry spots and the chocolate chips are evenly distributed. This usually takes about 2 minutes of solid mixing. If the mixture seems too dry, add a teaspoon of honey or water. If it seems too wet, add a tablespoon of oats.
- Chill the mixture (optional but recommended). Pop the bowl in the fridge for 15-20 minutes. This step isn’t strictly necessary, but it makes the rolling process so much easier. The mixture firms up and becomes less sticky. If you’re in a hurry, skip it and move straight to rolling. Just know your hands will get a little messy.
- Prepare your workspace. Line a baking sheet or large plate with parchment paper or wax paper. Fill a small bowl with cool water. Set both nearby.
- Roll the bites. Using a cookie scoop or tablespoon, scoop out portions of the mixture. Dip your fingers in the water, then roll each portion between your palms into a smooth ball. The water prevents sticking without adding moisture to the bites. Aim for about 1-inch diameter balls. You should get roughly 18-20 bites from this recipe. Don’t over-roll them — just enough to shape them into rounds.
- Place on prepared sheet. As you finish each ball, set it on the parchment-lined sheet. Leave a little space between them so they don’t stick together.
- Chill to set. Refrigerate the bites for at least 30 minutes before serving. This allows them to firm up and hold their shape. The texture improves as they chill — they become chewier and more satisfying.
Sensory Cues : The mixture should feel like a thick, slightly sticky cookie dough. When you press it between your fingers, it should hold together without crumbling. If it falls apart, it needs more binding (add a little honey or peanut butter). If it feels greasy or slides apart, it needs more oats. The finished bites should be firm but yield slightly when squeezed.
Personal Tip : I always make a double batch because these disappear fast. The single batch takes the same amount of effort, so you might as well make more. They freeze beautifully, so there’s no waste.
Cooking Tips & Techniques
I’ve made these Easy No-Bake Peanut Butter Oat Energy Bites more times than I can count, and I’ve learned a few things along the way. Let me save you some trouble.
Sticky Hands Solution : The mixture will stick to your hands. That’s normal. The trick is to wet your hands with cool water before rolling each batch. Not soaking wet, just damp. Re-wet as needed. It makes the process so much smoother. I learned this after making a batch that left half the mixture stuck to my palms.
Don’t Overmix : Once everything comes together, stop mixing. Overworking the dough can make the bites dense and tough. You want them to be tender and chewy, not hard.
Chill Time Matters : These bites need at least 30 minutes in the fridge to set properly. If you eat them right away, they’ll be soft and might fall apart. The chilling step is what gives them that perfect energy bite texture. I’ve made the mistake of skipping this step when I was impatient, and the results were disappointing.
Consistency Check : Different peanut butters have different consistencies. Natural peanut butter that’s been sitting for a while can be oilier on top. Always stir it thoroughly before measuring. If your mixture seems too dry, add a teaspoon of honey. If it seems too wet, add a tablespoon of oats. Trust your instincts.
Temperature Matters : If your kitchen is warm, the mixture will be softer and stickier. Chill it for the full 20 minutes before rolling. If your kitchen is cool, you might be able to roll right away. I live in a warm climate, so I always chill first.
Size Consistency : Use a cookie scoop for uniform bites. This isn’t just about looks — it ensures they all chill at the same rate and have the same texture. Uneven sizes mean some bites will be too soft while others are too firm.
My Biggest Failure : I once tried to make these with almond butter and forgot to adjust the liquid. The mixture was so dry it wouldn’t hold together at all. I ended up adding honey tablespoon by tablespoon until it finally came together. The bites were way too sweet and still crumbly. Stick with peanut butter for the first time, then experiment once you know what the right consistency looks like.
Variations & Adaptations
One of the best things about this recipe is how adaptable it is. I’ve tried dozens of variations over the years, and here are my favorites.
Chocolate Peanut Butter Bliss : Add 1 tablespoon of cocoa powder to the dry ingredients. Use milk chocolate chips instead of semi-sweet for a sweeter bite. This version tastes like a healthier version of a peanut butter cup. My kids go crazy for this one.
Trail Mix Bites : Replace the chocolate chips with a mix of dried cranberries, chopped almonds, and unsweetened coconut flakes. The tartness of the cranberries balances the sweet honey and salty peanut butter perfectly. I make these for hiking trips because they hold up well in warm weather.
Vegan Version : Swap the honey for maple syrup or agave nectar. Use dairy-free chocolate chips (Enjoy Life makes great ones). Everything else stays the same. The texture will be slightly different — maple syrup makes the bites a touch softer — but they’re still delicious.
Protein-Packed Bites : Add 1 scoop of vanilla or chocolate protein powder. Reduce the oats by 2 tablespoons to compensate. You might need an extra tablespoon of honey to balance the dryness from the protein powder. These are great for post-workout snacks.
Seasonal Twist : In the fall, add ½ teaspoon of pumpkin pie spice and swap the chocolate chips for white chocolate chips. In the summer, add 2 tablespoons of freeze-dried strawberry powder for a fruity version. In the winter, add a pinch of cinnamon and nutmeg for a cozy flavor.
Nut-Free Option : Use sunflower seed butter or WowButter. The texture will be slightly different, and the color might turn green from a natural reaction, but the taste is still great. I’ve made these for school events where nut allergies are a concern, and they’ve always been a hit.
Serving & Storage Suggestions
These Easy No-Bake Peanut Butter Oat Energy Bites are best served cold or at room temperature. I prefer them straight from the fridge — they’re firmer and chewier that way. If you’re packing them for later, let them sit at room temperature for about 5 minutes before eating. They soften up just enough to be perfect.
Serving Ideas : Serve them as an after-school snack, a pre-workout energy boost, or a healthy dessert. They pair beautifully with a glass of cold milk or a warm cup of coffee. For a fun presentation, arrange them on a wooden board with fresh fruit and nuts. They’re great for parties, playdates, and road trips.
Complementary Dishes : These bites go wonderfully with creamy healthy overnight oats with peanut butter and banana for a complete breakfast. They also pair nicely with a creamy protein smoothie bowl with crunchy granola topping for a post-workout meal.
Storage Instructions : Store the bites in an airtight container in the refrigerator for up to 2 weeks. Layer them between sheets of parchment paper to prevent sticking. They actually get better after a day or two — the flavors meld together and the texture becomes perfectly chewy.
Freezer Storage : These freeze beautifully for up to 3 months. Place them in a single layer on a baking sheet and freeze for 1 hour, then transfer to a freezer-safe bag or container. This prevents them from clumping together. To thaw, just leave them in the fridge overnight or at room temperature for 15 minutes. I always keep a stash in the freezer for emergencies.
Reheating Note : These don’t need reheating, but if you prefer them softer, microwave one for 5-10 seconds. Be careful not to overheat — the chocolate chips can get too melty and the texture becomes mushy.
Flavor Development : The flavors deepen after a day in the fridge. The honey and peanut butter meld together, and the oats absorb moisture and become softer. If you can wait, make these a day ahead for the best flavor.
Nutritional Information & Benefits
Per serving (1 bite, based on 18 bites per batch):
- Calories: 145
- Total Fat: 8g
- Saturated Fat: 2g
- Carbohydrates: 16g
- Fiber: 2g
- Sugar: 9g
- Protein: 5g
- Sodium: 60mg
These numbers are estimates. They’ll vary based on the specific brands you use and whether you adjust the ingredients.
Health Benefits : These bites pack a surprising nutritional punch. The oats provide slow-release carbohydrates for sustained energy. The peanut butter offers protein and healthy monounsaturated fats that keep you full. The flaxseed adds omega-3 fatty acids and extra fiber for digestive health. The chocolate chips? Well, they’re just there to make you happy. Dark chocolate does contain antioxidants, so there’s that.
Dietary Considerations : This recipe is naturally vegetarian and can be made vegan with maple syrup. It’s gluten-free if you use certified gluten-free oats (regular oats are often processed in facilities that handle wheat). For nut-free, use sunflower seed butter. For lower sugar, use sugar-free chocolate chips and reduce the honey to ¼ cup.
Potential Allergens : Peanuts, tree nuts (if using alternative nut butters), gluten (from oats, though some are gluten-free), and dairy (from chocolate chips, though dairy-free options exist). Check your labels if serving to someone with allergies.
My Wellness Perspective : I don’t believe in labeling foods as “good” or “bad.” These bites are a snack that happens to have some nutritional benefits. They’re not a health food, but they’re a whole lot better than most packaged snacks. They satisfy a craving while giving you actual energy. That’s a win in my book.
Conclusion
These Easy No-Bake Peanut Butter Oat Energy Bites have become a staple in our house for good reason. They’re fast, simple, and genuinely delicious. No fancy ingredients, no complicated steps, no waiting around. Just mix, roll, and enjoy.
What I love most about this recipe is how forgiving it is. You can swap ingredients, adjust the sweetness, add whatever mix-ins you have on hand, and they still turn out great. It’s the kind of recipe that builds confidence in the kitchen because it’s practically impossible to mess up.
I encourage you to make these your own. Add dried fruit if that’s your thing. Use dark chocolate chips instead of semi-sweet. Throw in some shredded coconut. The base recipe is solid, but the variations are endless. That’s the beauty of a simple recipe done right.
If you try these, I’d love to hear how they turned out. Drop a comment below and let me know what variations you tried. Did you add cinnamon? Use almond butter? Make them with white chocolate chips? I’m genuinely curious. Your version might inspire someone else’s next batch.
Go ahead and make a batch. You deserve a snack that’s this easy and this good.
Frequently Asked Questions
Can I use quick oats instead of old-fashioned oats?
Yes, you can. Quick oats will give you a softer, less textured bite. The energy balls will be a bit more uniform in texture and slightly less chewy. They’ll still taste great, just different. I prefer old-fashioned oats for their heartier texture, but quick oats work in a pinch.
How long do these energy bites last at room temperature?
They can sit at room temperature for up to 2 hours without issue. Any longer and they might get too soft or melt slightly, especially if it’s warm. For best results, keep them refrigerated until you’re ready to eat them. If you’re packing them for a lunchbox or road trip, they’ll be fine for a few hours.
Can I freeze these energy bites?
Absolutely. Freeze them in a single layer on a baking sheet for 1 hour, then transfer to a freezer-safe bag or container. They’ll keep for up to 3 months. Thaw them in the fridge overnight or at room temperature for 15 minutes. I always keep a stash in the freezer for busy weeks.
My mixture seems too dry. What should I do?
Add a tablespoon of honey or a teaspoon of water and mix again. Do it gradually — you can always add more, but you can’t take it out. The mixture should hold together when pinched between your fingers. If it crumbles, it needs more moisture. Different peanut butters have different consistencies, so this is normal.
Can I make these without chocolate chips?
Of course! Replace them with dried cranberries, raisins, chopped nuts, shredded coconut, or just leave them out entirely. The recipe is flexible. If you omit the chocolate chips, you might want to add a tablespoon of something else to keep the texture balanced, but it’s not strictly necessary.
Pin This Recipe!
Easy No-Bake Peanut Butter Oat Energy Bites: Best 5-Minute Snack

These Easy No-Bake Peanut Butter Oat Energy Bites are a quick, healthy snack made with simple ingredients like oats, peanut butter, honey, and chocolate chips. Ready in just 5 minutes, they’re perfect for busy days, post-workout hunger, or late afternoon slumps.
- Prep Time: 5 minutes
- Cook Time: 0 minutes
- Total Time: 5 minutes
- Yield: 18-20 bites 1x
- Category: Snack
- Cuisine: American
Ingredients
- 1 ½ cups (150g) old-fashioned rolled oats
- ½ cup (130g) creamy peanut butter
- ⅓ cup (110g) honey
- ⅓ cup (60g) mini chocolate chips
- 2 tablespoons (14g) ground flaxseed
- 1 teaspoon vanilla extract
- ⅛ teaspoon salt
Instructions
- Combine the dry ingredients: In a large mixing bowl, add 1 ½ cups old-fashioned rolled oats, ⅓ cup mini chocolate chips, and 2 tablespoons ground flaxseed. Stir to distribute evenly.
- Add the wet ingredients: To the same bowl, add ½ cup creamy peanut butter, ⅓ cup honey, 1 teaspoon vanilla extract, and a pinch of salt.
- Mix until fully combined: Stir with firm, consistent strokes until the mixture forms a cohesive dough with no dry spots and chocolate chips evenly distributed (about 2 minutes). If too dry, add a teaspoon of honey or water; if too wet, add a tablespoon of oats.
- Chill the mixture (optional but recommended): Refrigerate the bowl for 15-20 minutes to make rolling easier.
- Prepare your workspace: Line a baking sheet or large plate with parchment paper or wax paper. Fill a small bowl with cool water.
- Roll the bites: Using a cookie scoop or tablespoon, scoop portions of the mixture. Dip fingers in water, then roll each portion between palms into a smooth ball about 1 inch in diameter. You should get 18-20 bites.
- Place on prepared sheet: Set each ball on the parchment-lined sheet, leaving a little space between them.
- Chill to set: Refrigerate the bites for at least 30 minutes before serving to firm up and improve texture.
Notes
Wet hands with cool water before rolling to prevent sticking. Chill mixture for 15-20 minutes for easier rolling. For best texture, refrigerate at least 30 minutes before serving. These freeze well for up to 3 months.
Nutrition
- Serving Size: 1 bite
- Calories: 145
- Sugar: 9
- Sodium: 60
- Fat: 8
- Saturated Fat: 2
- Carbohydrates: 16
- Fiber: 2
- Protein: 5
Keywords: no-bake energy bites, peanut butter oat balls, healthy snack, 5-minute snack, energy balls, no-bake snack, peanut butter snack


