I had this whole plan for a sophisticated Halloween party spread. Charcuterie boards shaped like spiders, a bubbling cauldron of spiced cider, maybe some elegant black velvet cupcakes. Then my nephew showed up at 4 PM on Halloween, already in his costume (a surprisingly detailed avocado), asking what we were making. The elaborate plans went out the window. What we actually needed—what we always need for Halloween—was something fast, fun, and that kids could actually help with. Something that didn’t require me to temper chocolate or pipe intricate designs while a tiny avocado tugged on my sleeve. These Easy Mummy Hot Dog Bites were born from that exact moment of panic and practicality. They’re the snack that saves Halloween.
Look, I’m not going to pretend these are gourmet. They’re hot dogs wrapped in crescent roll bandages with little mustard eyes. But honestly? That’s their whole charm. They’re the kind of recipe that makes everyone smile the second they see them. The kind of snack that disappears before you can even put out the napkins. And the best part? From fridge to table in under 20 minutes. That’s a Halloween miracle right there.
Why You’ll Love This Recipe
Let me tell you why these little guys have become my go-to for every Halloween gathering, from classroom parties to spooky movie nights.
- Incredibly Quick & Easy: We’re talking 15 minutes of prep and about 12 minutes in the oven. That’s it. You can make a whole platter of these between answering the door for trick-or-treaters.
- Simple, Kid-Friendly Ingredients: Hot dogs, refrigerated crescent roll dough, and a squirt of mustard. You probably have these in your kitchen right now. No special trips to the store for obscure ingredients.
- Perfect for Halloween Parties: They’re the star of the show at any Halloween gathering. Kids love the mummy theme, and adults appreciate how easy they are to grab and eat while mingling.
- Crowd-Pleaser: I’ve brought these to school Halloween parties, neighborhood potlucks, and family gatherings. They always get gobbled up first. Even picky eaters can’t resist a hot dog wrapped in flaky, buttery dough.
- Unbelievably Fun: There’s something about food that looks like little monsters that makes everyone happy. The first time you pull a tray of these out of the oven and see their little mustard eyes staring back at you, you’ll understand.
What makes these different from every other mummy dog recipe out there? It’s the technique. I’ve tested this a dozen times to get the wrapping just right—not too tight, not too loose. The crescent dough needs to puff up and turn golden while still leaving little gaps that look like mummy wrappings. Too much dough and they look like sad bread rolls. Too little and they’re just hot dogs with a stripe. These are just right. They’re the kind of snack that makes you close your eyes after the first bite—flaky, savory, and just a little bit ridiculous. Perfect for impressing your kids without any stress.
What Ingredients You Will Need
This recipe uses simple, pantry-friendly ingredients to deliver maximum Halloween fun with minimal fuss. You likely have everything you need already, which is the whole point when you’re juggling costumes and candy.
- 8 hot dogs (standard size, about 1.6 oz each) — I prefer all-beef hot dogs for better flavor, but any brand works. Turkey or chicken hot dogs are great lighter options. Look for ones that are plump and juicy.
- 1 can (8 oz) refrigerated crescent roll dough — This is the magic ingredient. The Pillsbury brand is my go-to for consistent results. The dough is soft, buttery, and puffs up beautifully in the oven. You’ll get 8 triangles in one can, which is perfect for 8 mummies.
- Yellow mustard (for the eyes) — The classic choice for that creepy, jaundiced mummy look. You can also use ketchup, sriracha, or even small dots of cream cheese for a milder option. I’ve also used black gel food coloring mixed with a tiny bit of water for truly spooky eyes.
- Optional: Cooking spray or olive oil — For greasing the baking sheet if your pan isn’t non-stick. I use a silicone baking mat and skip this entirely.
Ingredient Selection Tips: For the best texture, use hot dogs that are fully cooked and plump. Avoid the jumbo or bun-length ones—they’re too big and the dough won’t wrap evenly. If you can find them, mini hot dogs or cocktail sausages work great for bite-sized appetizers. Just reduce the baking time by a few minutes.
Substitution Guidance: For a gluten-free version, use gluten-free crescent roll dough (it’s available at most major grocery stores) or wrap the hot dogs in gluten-free puff pastry sheets cut into strips. For a lower-carb option, use cheese slices cut into thin strips as the “bandages”—they melt and crisp up beautifully. For a vegetarian version, use plant-based hot dogs or veggie sausages. They work exactly the same way.
Equipment Needed
You don’t need any fancy kitchen gadgets for this recipe. That’s part of the beauty of it.
- Baking sheet — A standard half-sheet pan works perfectly. I’ve used everything from a beat-up old cookie sheet to a fancy insulated one, and they all work fine.
- Parchment paper or silicone baking mat — This makes cleanup a breeze. The crescent dough can get a little sticky, and parchment paper prevents any sticking without needing extra grease.
- Sharp knife or pizza cutter — For cutting the crescent roll dough into strips. A pizza cutter gives you nice, clean edges. A sharp knife works just as well.
- Small bowl — For the mustard. You’ll dip a toothpick or the end of a chopstick into it to dot the eyes.
- Toothpick or chopstick — For applying the mustard eyes. A toothpick gives you precise control. A chopstick works for slightly larger dots.
- Cooling rack (optional) — For letting the mummy dogs cool slightly before serving. This helps the dough stay crispy rather than getting steamy on the bottom.
Budget-Friendly Option: If you don’t have parchment paper, you can lightly grease your baking sheet with butter or cooking spray. I’ve done it this way for years before I discovered silicone mats. They work, just watch the bottoms to make sure they don’t burn.
Preparation Method
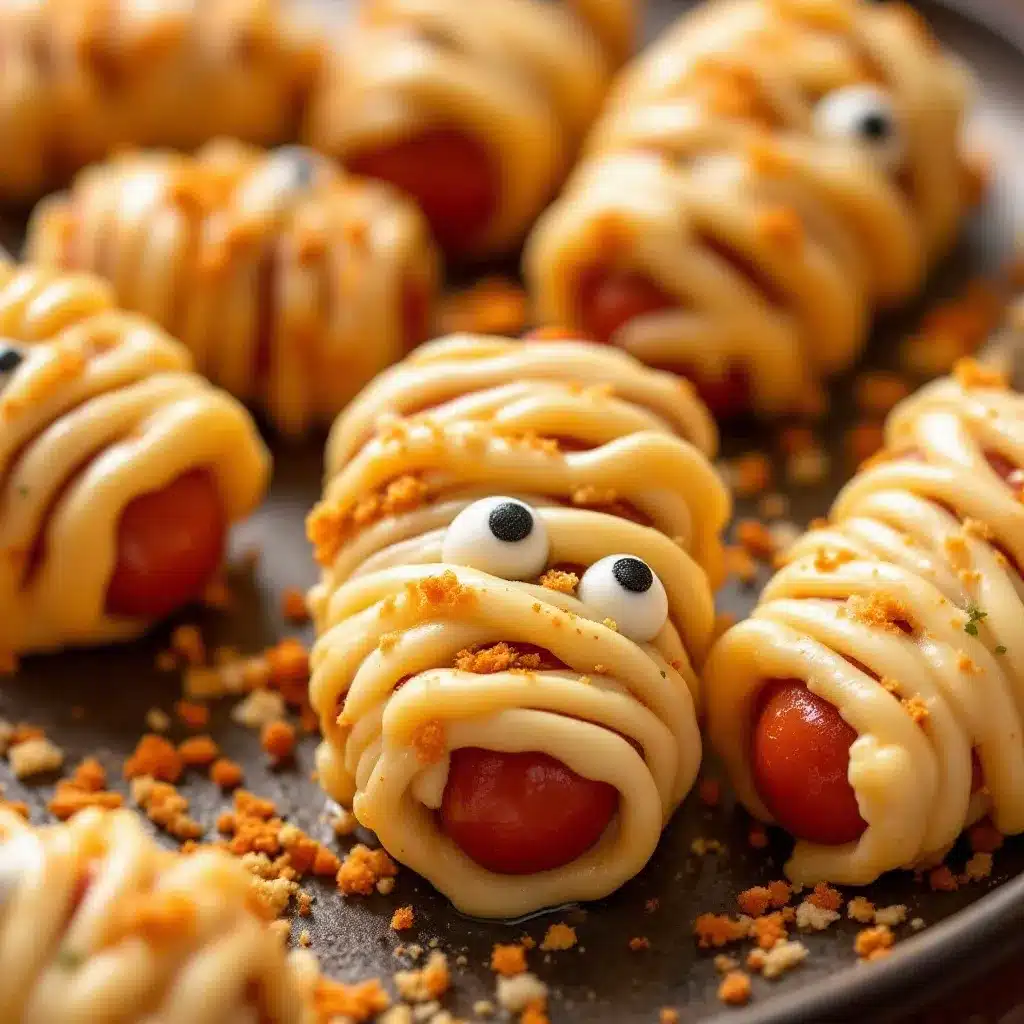
Let’s make some mummies. This is where the fun really starts.
- Preheat your oven to 375°F (190°C). Line a baking sheet with parchment paper or a silicone baking mat. Give it a light spray of cooking spray if you’re worried about sticking, though parchment usually does the job on its own.
- Unroll the crescent roll dough. Open the can carefully—I’ve had those things pop open dramatically and startle me more times than I’d like to admit. Unroll the dough onto a clean cutting board. You’ll see 8 triangles of dough separated by perforated lines. Press the perforations together gently with your fingers to seal them. You want a solid sheet of dough.
- Cut the dough into strips. Using a sharp knife or pizza cutter, cut the dough lengthwise into thin strips. Aim for strips about 1/4 to 1/2 inch wide. You want them thin enough to look like mummy bandages but thick enough that they don’t tear when you wrap them. I usually get about 6-8 strips per triangle. Don’t worry if they’re not perfectly uniform—mummies are supposed to look a little messy.
- Wrap the hot dogs. Take one hot dog and start wrapping a strip of dough around it, leaving a small gap near the top for the eyes. The wrapping should be slightly loose—the dough will puff up as it bakes, so you don’t want it too tight. Overlap the strips slightly as you go. Leave about a 1-inch section at the top uncovered for the mummy’s face. Tuck the end of the dough strip underneath the hot dog to secure it.
- Place on the baking sheet. Arrange the wrapped hot dogs on the prepared baking sheet, leaving about an inch of space between each one. They won’t spread much, but a little breathing room helps them brown evenly.
- Bake for 10-12 minutes. Pop the baking sheet into the preheated oven. Bake until the dough is golden brown and puffed. The hot dogs should be heated through and starting to sizzle slightly. Keep an eye on them after 10 minutes—ovens vary, and you don’t want the dough to get too dark.
- Let them cool slightly. Remove the baking sheet from the oven and let the mummy dogs cool on the pan for about 2-3 minutes. This is crucial—the dough is fragile right out of the oven and the hot dogs are piping hot. Moving them too soon can cause the dough to tear.
- Add the eyes. While the mummy dogs are cooling, pour a small amount of yellow mustard into a small bowl. Dip the tip of a toothpick into the mustard and dot two small eyes onto the uncovered section of each hot dog. You can make them look surprised, sleepy, or a little creepy depending on how you angle them. I like making one eye slightly bigger than the other for a quirky look.
- Serve immediately. Arrange the mummy dogs on a platter and watch them disappear. They’re best served warm, when the dough is still flaky and the hot dog is juicy.
Pro Tip: If you’re making these for a party, you can prep them ahead of time. Wrap the hot dogs with the dough strips, arrange them on the baking sheet, and cover with plastic wrap. Refrigerate for up to 4 hours. When you’re ready to serve, just pop them in the oven. Add the mustard eyes after baking.
Cooking Tips & Techniques
I’ve made these mummy dogs more times than I can count, and I’ve learned a few things along the way. Here’s what I wish someone had told me the first time.
The Dough Situation: Crescent roll dough is sticky. Like, really sticky. If your hands are getting gummed up while you’re wrapping, lightly dust them with a little flour. It makes a huge difference. Also, work quickly—the dough gets softer and harder to handle the longer it sits at room temperature.
The Wrapping Technique: Don’t wrap the dough too tightly. I made this mistake the first time, and the dough split open in the oven as it expanded. Leave a little breathing room. Think of it like wrapping a gift—you want it snug but not strangling. The dough should overlap slightly, not stretch across the hot dog.
Don’t Skip the Cooling Step: I know it’s tempting to add the mustard eyes right away, but trust me on this. The hot dogs are extremely hot right out of the oven, and the mustard will just slide off or get absorbed. Give them at least 2-3 minutes to cool. The dough will still be warm and flaky, but the surface of the hot dog will be cool enough to hold the mustard dots.
The Mustard Consistency: If your mustard is too runny, it will blob instead of dot. Give it a quick stir in the bowl before dipping your toothpick. If it’s still too thin, you can add a tiny pinch of cornstarch to thicken it up. I’ve also used a piping bag with a very small tip for perfectly round eyes.
Baking Sheet Placement: For even browning, place your baking sheet on the middle rack of the oven. Too close to the top and the dough will brown before the hot dogs are heated through. Too close to the bottom and you’ll get burnt bottoms.
Timing is Everything: These are best served immediately. The dough starts to lose its crispness after about 20 minutes. If you’re serving them at a party, time the baking so they come out right when guests are arriving. You can keep them warm in a 200°F oven for up to 15 minutes, but the texture won’t be quite as good.
Variations & Adaptations
Once you’ve mastered the basic mummy dog, the possibilities are endless. Here are some of my favorite variations.
Spicy Mummy Dogs: Before wrapping, brush the hot dogs with a little sriracha or your favorite hot sauce. Use sriracha for the eyes instead of mustard for a fiery look. These are great for adults who want a little heat with their Halloween fun.
Cheesy Mummy Dogs: Cut a slit lengthwise in each hot dog and stuff it with a strip of cheddar or mozzarella cheese before wrapping. The cheese melts and oozes out slightly as they bake, creating a deliciously gooey center. Use a dab of melted cheese for the eyes instead of mustard.
Breakfast Mummy Dogs: Use breakfast sausage links instead of hot dogs. Wrap them in crescent roll strips and bake as directed. Serve with maple syrup for dipping. These are a hit at Halloween morning breakfasts or brunch parties.
Veggie Mummy Dogs: Use plant-based hot dogs or veggie sausages. They work exactly the same way. I’ve used both the field roast and beyond meat varieties, and both were delicious. The dough wrapping is the same, just swap the hot dog.
Mini Mummy Bites: Use cocktail sausages or mini hot dogs instead of full-size ones. Cut the crescent roll strips even thinner (about 1/8 inch wide) and wrap each mini sausage with a single strip. Bake for 8-10 minutes instead of 10-12. These are perfect for appetizer platters or kids’ lunchboxes.
Gluten-Free Mummy Dogs: Use gluten-free crescent roll dough or gluten-free puff pastry sheets cut into strips. The texture will be slightly different, but they still taste amazing. Just follow the package directions for baking times, as gluten-free doughs can vary.
Serving & Storage Suggestions
These mummy dogs are best served warm, right out of the oven. Arrange them on a platter with a bowl of ketchup or mustard for dipping. They’re perfect for Halloween parties, spooky movie nights, or as a fun after-school snack on Halloween afternoon.
What to Serve With Them: These pair beautifully with other Halloween-themed snacks. I love serving them alongside Easy One-Pot Mummy Meatball Halloween Pasta for a full spooky dinner. For a party spread, add some Buffalo Chicken Dip with spider-shaped crackers or No-Bake Chocolate Peanut Butter Protein Balls shaped like eyeballs. For drinks, a pitcher of Pumpkin Cream Cold Foam Coffee or Pumpkin Chai Latte adds to the cozy Halloween vibe.
Storage Instructions: If you have leftovers (unlikely, but possible), store them in an airtight container in the refrigerator for up to 3 days. The dough will soften, but they’re still tasty. To reheat, place them on a baking sheet in a 350°F oven for 5-7 minutes, or until heated through. The microwave works in a pinch, but the dough will be soft and chewy rather than flaky.
Freezer Instructions: You can freeze the unbaked mummy dogs. Wrap them with the dough strips, arrange them on a baking sheet, and freeze until solid. Transfer to a freezer bag and store for up to 2 months. When you’re ready to bake, place them on a baking sheet straight from the freezer and add 2-3 minutes to the baking time. Add the mustard eyes after baking.
Flavor Development: These are truly best fresh. The magic is in the contrast between the warm, flaky dough and the juicy hot dog. That said, I’ve eaten them cold the next day straight from the fridge, and they’re still pretty good. The dough gets a little dense, but the flavor is still there.
Nutritional Information & Benefits
Let’s be real—these are a treat, not a health food. But here’s what you need to know.
Estimated Nutritional Values (per serving, 1 mummy dog):
- Calories: 180-220
- Protein: 7-9g
- Carbohydrates: 14-18g
- Fat: 11-14g
- Sodium: 450-550mg
Health Benefits: Hot dogs are a source of protein, which helps keep you full and satisfied. The crescent roll dough provides carbohydrates for quick energy—perfect for fueling a night of trick-or-treating. If you use turkey or chicken hot dogs, you’ll reduce the fat content significantly. For a slightly healthier version, use whole wheat crescent roll dough (if you can find it) or wrap the hot dogs in thin strips of whole wheat tortillas brushed with a little olive oil before baking.
Dietary Considerations: This recipe contains wheat/gluten (from the crescent roll dough) and may contain dairy (check your crescent roll ingredients). For a gluten-free version, use gluten-free dough. For a dairy-free version, check that your crescent roll dough is dairy-free (some brands use butter, others use vegetable oils). Hot dogs can contain various allergens, so check the labels if you have concerns.
My Personal Wellness Perspective: Halloween is one night a year. I firmly believe in enjoying treats in moderation and not stressing about every calorie. These mummy dogs are about fun, not nutrition. Make them, enjoy them, and don’t overthink it. Balance comes from the rest of the year, not from one spooky snack.
Conclusion
These Easy Mummy Hot Dog Bites are the definition of Halloween perfection. They’re quick, fun, and guaranteed to make everyone smile. The flaky crescent roll dough, the juicy hot dog, the little mustard eyes staring up at you—it’s everything you want in a Halloween snack without any of the stress.
I love this recipe because it’s flexible. You can make it as simple or as fancy as you want. Stick with the classic version for a no-fuss treat, or try one of the variations for something a little different. The kids can help wrap the dough, dot the eyes, and arrange them on the platter. It’s a recipe that brings people together, which is what Halloween is really about.
I’d love to hear how yours turn out. Did you make any fun variations? Did the kids help? Drop a comment below and let me know. And if you’re looking for more Halloween inspiration, check out my Mummy Meatball Pasta for a full spooky dinner spread. Happy Halloween, and happy snacking!
Frequently Asked Questions
Can I make these mummy hot dog bites ahead of time?
Yes! You can wrap the hot dogs with the dough strips up to 4 hours ahead of time. Keep them covered in the refrigerator until you’re ready to bake. Add the mustard eyes after baking for the best presentation.
What if I don’t have crescent roll dough?
No problem! You can use puff pastry sheets cut into strips, refrigerated pizza dough rolled thin and cut into strips, or even flour tortillas cut into thin strips and brushed with butter. Each option gives a slightly different texture, but they all work.
Can I use different types of mustard for the eyes?
Absolutely! Yellow mustard gives the classic look, but you can use Dijon, honey mustard, or even sriracha for a spicy kick. For a milder option, use small dots of cream cheese or mayonnaise. For truly spooky eyes, use black gel food coloring mixed with a tiny bit of water.
How do I keep the dough from tearing while wrapping?
Work with the dough at room temperature—it’s more pliable and less likely to crack. If the dough is too cold, let it sit at room temperature for 5-10 minutes before cutting. Also, don’t wrap too tightly. Leave a little slack so the dough can expand without tearing.
Can I make these in an air fryer?
Yes! Preheat your air fryer to 350°F (175°C). Place the wrapped hot dogs in the basket in a single layer (you may need to work in batches). Cook for 6-8 minutes, or until the dough is golden brown and the hot dogs are heated through. Add the mustard eyes after cooking. The air fryer gives an extra crispy texture to the dough.
Pin This Recipe!
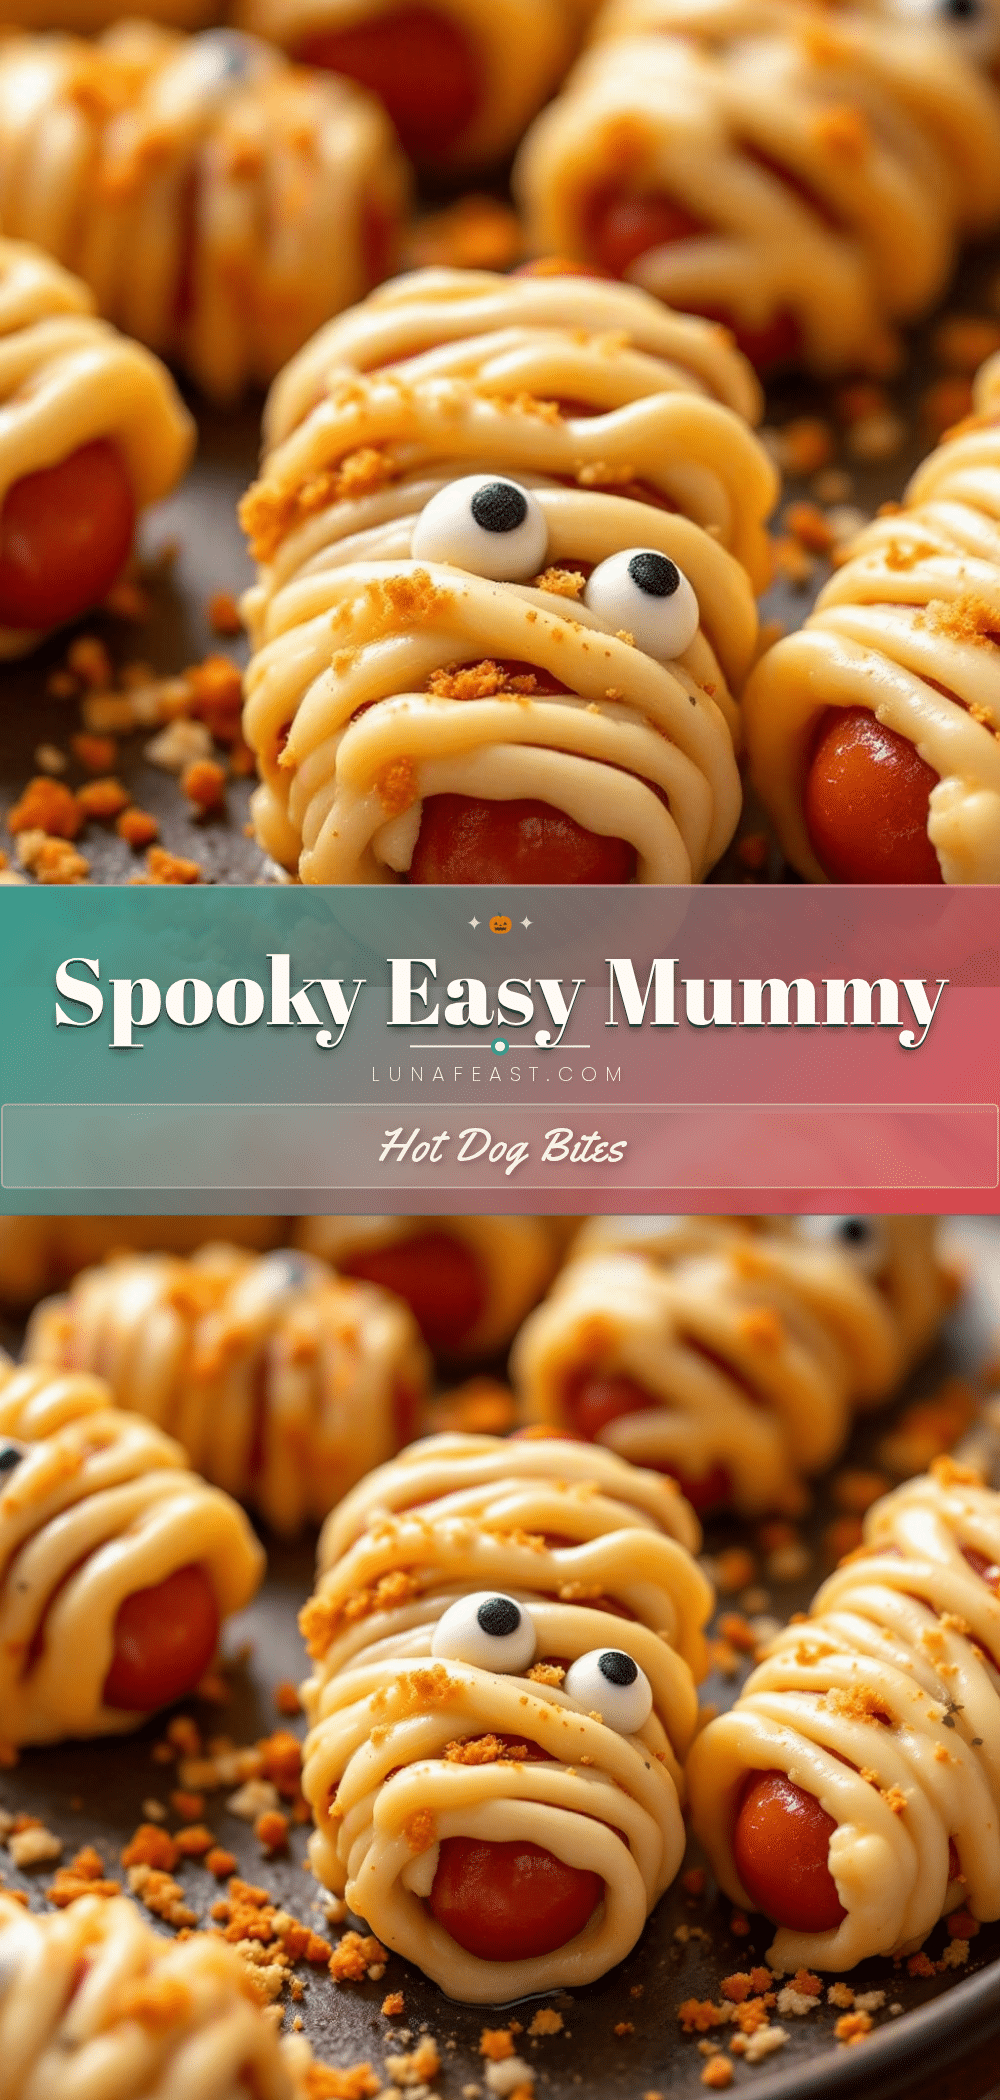
Easy Mummy Hot Dog Bites: Perfect Halloween Snack
These Easy Mummy Hot Dog Bites are the perfect Halloween snack—hot dogs wrapped in crescent roll bandages with little mustard eyes. Quick, fun, and kid-friendly, they go from fridge to table in under 20 minutes.
- Prep Time: 15 minutes
- Cook Time: 12 minutes
- Total Time: 27 minutes
- Yield: 8 servings 1x
- Category: Appetizer
- Cuisine: American
Ingredients
- 8 hot dogs (standard size, about 1.6 oz each)
- 1 can (8 oz) refrigerated crescent roll dough
- Yellow mustard (for the eyes)
- Optional: Cooking spray or olive oil
Instructions
- Preheat your oven to 375°F (190°C). Line a baking sheet with parchment paper or a silicone baking mat.
- Unroll the crescent roll dough onto a clean cutting board. Press the perforations together gently with your fingers to seal them into a solid sheet.
- Using a sharp knife or pizza cutter, cut the dough lengthwise into thin strips about 1/4 to 1/2 inch wide.
- Take one hot dog and start wrapping a strip of dough around it, leaving a small gap near the top for the eyes. Wrap slightly loosely, overlapping the strips slightly. Leave about a 1-inch section at the top uncovered for the mummy’s face. Tuck the end of the dough strip underneath the hot dog to secure it.
- Arrange the wrapped hot dogs on the prepared baking sheet, leaving about an inch of space between each one.
- Bake for 10-12 minutes, until the dough is golden brown and puffed, and the hot dogs are heated through.
- Remove from the oven and let the mummy dogs cool on the pan for about 2-3 minutes.
- While cooling, pour a small amount of yellow mustard into a small bowl. Dip the tip of a toothpick into the mustard and dot two small eyes onto the uncovered section of each hot dog.
- Serve immediately.
Notes
For best results, don’t wrap the dough too tightly—it will puff up as it bakes. Let the mummy dogs cool for 2-3 minutes before adding mustard eyes so the mustard doesn’t slide off. You can prep them ahead by wrapping the hot dogs with dough strips and refrigerating for up to 4 hours before baking. For an air fryer version, cook at 350°F (175°C) for 6-8 minutes.
Nutrition
- Serving Size: 1 mummy dog
- Calories: 200
- Sugar: 3
- Sodium: 500
- Fat: 12
- Saturated Fat: 4
- Carbohydrates: 16
- Protein: 8
Keywords: Halloween snack, mummy hot dogs, easy appetizer, kid-friendly, party food, crescent roll recipe


