Dropped the entire bag of chocolate chips onto the kitchen floor while my toddler screamed for a snack and the oven timer beeped like a frantic robot. That’s when I realized—I didn’t have time for individual cookies. Not today, not with a hangry three-year-old and a deadline looming. So I scraped up what I could, dumped the rest of the dough into a buttered baking dish, and pressed it flat with my palms. Thirty minutes later, I pulled out golden-edged chewy gooey chocolate chip cookie bars that smelled like a bakery exploded in my kitchen. My daughter ate three while still warm, and I ate two standing over the counter. Honestly? Best accident I’ve ever made.
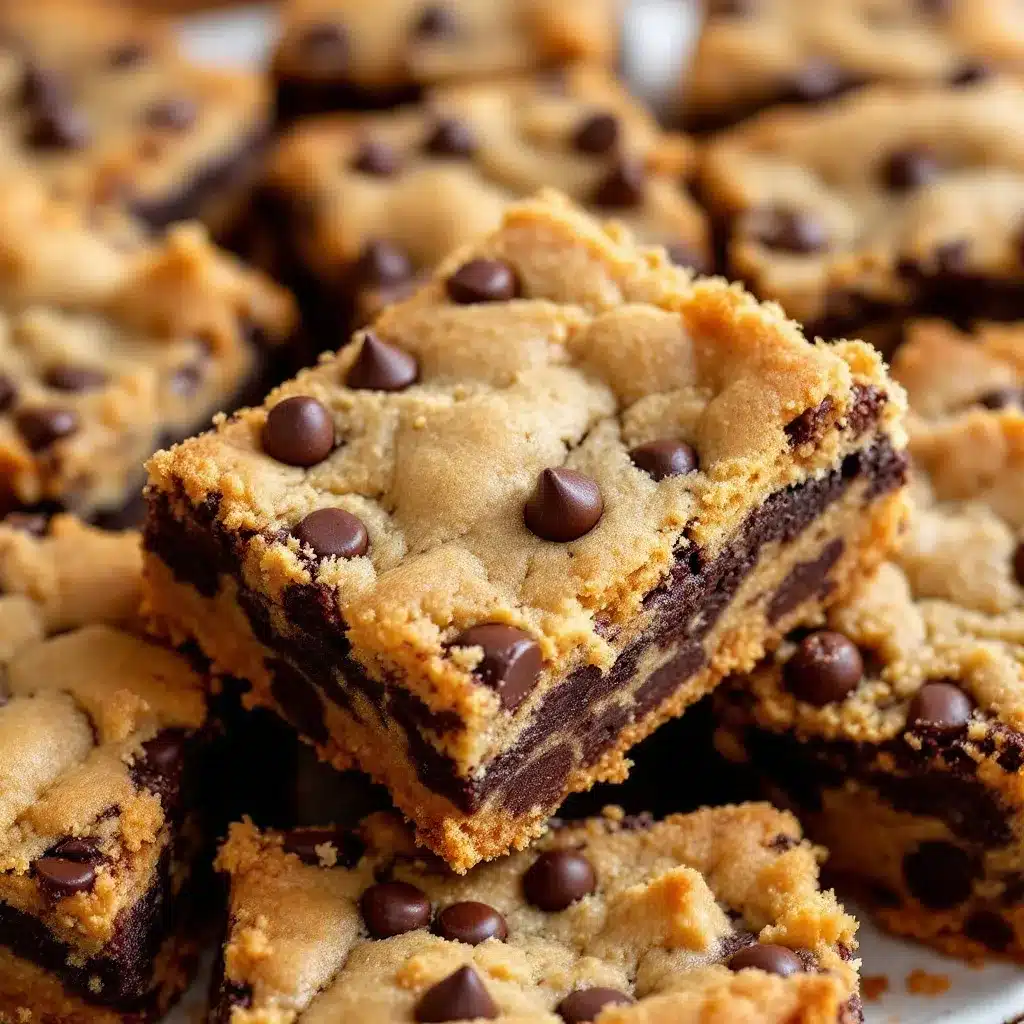
There’s something about a cookie bar that just works. No scooping, no chilling, no rotating baking sheets. You mix everything in one bowl, spread it in a pan, and let the oven do the heavy lifting. These chewy gooey chocolate chip cookie bars have crispy edges, soft centers, and that melty chocolate pull that makes you close your eyes for a second. They’re the kind of dessert that feels special but takes almost no effort—which is exactly what I need on a Tuesday afternoon when I’m running on caffeine and chaos.
I’ve made this recipe at least a dozen times since that first frantic afternoon. It’s become my go-to for playdates, potlucks, and those evenings when I need something sweet but don’t have the energy for a project. The texture is consistently perfect—chewy without being dry, gooey without being raw. And the best part? You probably have everything you need right now.
Why You’ll Love These Chewy Gooey Chocolate Chip Cookie Bars
Let me tell you why these bars have earned a permanent spot in my recipe rotation. I’ve tested this recipe more times than I care to admit—some batches came out too cakey, others spread into thin crispy sheets. But this version? It’s the Goldilocks of cookie bars. Just right every single time.
- Quick & Easy: From mixing bowl to your mouth in under 30 minutes. No chilling, no rolling, no fuss.
- Simple Ingredients: Butter, sugar, eggs, flour, chocolate chips—all pantry staples you probably already have.
- Perfect for Sharing: Great for bake sales, potlucks, game days, or just a Tuesday night treat. I’ve brought these to more than one game day gathering and they disappear fast.
- Crowd-Pleaser: Kids love them, adults love them, and they’re impossible to eat just one.
- Unbelievably Delicious: The edges get perfectly crispy while the centers stay soft and gooey. That first bite where the chocolate is still slightly warm? Pure magic.
What makes these different from every other cookie bar recipe out there? It’s the ratio. I played around with butter-to-flour ratios for weeks until I found the sweet spot. Too much butter and they spread into greasy puddles. Too much flour and they turn into hockey pucks. This recipe uses melted butter (not softened) and an extra egg yolk for that perfect chewy texture that stays soft for days. Plus, I press the dough into the pan with slightly damp hands—a trick I learned from my grandmother that prevents sticking and gives you that perfectly even surface.
These bars are the kind of dessert that makes people think you spent hours in the kitchen when really, you just wanted something good without the hassle. And honestly? That’s my favorite kind of recipe.
What Ingredients You Will Need
This recipe uses simple, straightforward ingredients that work together to create that perfect chewy-gooey texture. Nothing fancy here—just smart choices that deliver big flavor.
For the Cookie Bars
- Unsalted butter – ½ cup (1 stick), melted and slightly cooled. Melting the butter gives these bars that dense, chewy texture you can’t get from creaming cold butter. I use Land O’Lakes or Kerrygold for the best flavor.
- Light brown sugar – 1 cup, packed. Brown sugar is the secret to chewiness. The molasses content keeps these bars soft and gives them that deep, caramel-like sweetness. Dark brown sugar works too, but the flavor will be more intense.
- Granulated sugar – ¼ cup. Just enough to balance the brown sugar and help with spreading. Don’t skip it—the combination of both sugars is key.
- Large egg – 1 whole egg plus 1 egg yolk, room temperature. The extra yolk adds richness and tenderness without making the bars too cakey. Let your eggs sit out for 15 minutes before starting.
- Vanilla extract – 2 teaspoons. Pure vanilla makes a difference here. I’ve used imitation in a pinch and it works, but pure vanilla adds a warmth that elevates the whole bar.
- All-purpose flour – 1 ¾ cups, spooned and leveled. Too much flour makes dry bars. Spoon it into your measuring cup and level with a knife—don’t scoop straight from the bag.
- Baking soda – ½ teaspoon. Helps the bars rise just slightly without making them puffy.
- Salt – ½ teaspoon. Don’t skip this. Salt balances the sweetness and makes the chocolate flavor pop. I use fine sea salt.
- Semi-sweet chocolate chips – 1 ½ cups. I prefer Ghirardelli or Toll House for consistent melting. You can use milk chocolate if you like things sweeter, or dark chocolate for a more grown-up flavor. For a fun twist, try a mix of milk and semi-sweet.
Optional Add-Ins
- Flaky sea salt – for sprinkling on top before baking. That salty-sweet combo is irresistible.
- Chopped nuts – ½ cup walnuts or pecans, toasted. Adds crunch and depth.
- White chocolate chips or peanut butter chips – swap half the chocolate chips for variety.
One thing I’ve learned from testing this recipe over and over: ingredient temperature matters more than you’d think. Room temperature eggs mix into melted butter more smoothly, creating a cohesive batter instead of a greasy mess. And please, please don’t substitute margarine or spreadable butter—real butter gives these bars that rich flavor and perfect texture that makes them unforgettable.
Equipment Needed
You don’t need fancy equipment for these chewy gooey chocolate chip cookie bars. That’s honestly one of my favorite things about this recipe. Here’s what you’ll need:
- 8×8-inch baking pan – Glass, metal, or ceramic all work. I prefer metal because it conducts heat more evenly and gives you those crispy edges. If you’re using glass, reduce the oven temperature by 25°F to prevent over-browning.
- Parchment paper or aluminum foil – Lining your pan makes lifting the bars out so much easier. Leave a little overhang on two sides for handles.
- Large mixing bowl – Any bowl works. I use a glass Pyrex bowl because it’s sturdy and easy to clean.
- Whisk and rubber spatula – A whisk for the wet ingredients and a spatula for folding in the chocolate chips.
- Measuring cups and spoons – For accuracy. Eyeballing ingredients in baking leads to disappointment.
- Cooling rack – Optional but helpful. Letting the bars cool in the pan for 10 minutes, then transferring to a rack prevents soggy bottoms.
Budget-friendly tip: If you don’t have an 8×8 pan, a 9×9 works fine—just check the bars a few minutes early since they’ll be slightly thinner. And if you’re like me and hate washing dishes, line that pan with parchment. Trust me, scrubbing baked-on chocolate is nobody’s idea of a good time.
Preparation Method
Let’s make these chewy gooey chocolate chip cookie bars. I’ve broken this down so even a beginner baker can nail it on the first try.
- Preheat your oven to 350°F (175°C). Line your 8×8 baking pan with parchment paper or foil, leaving overhang on two opposite sides. Lightly grease the parchment with butter or nonstick spray. This step saves you from the heartbreak of stuck bars.
- Melt the butter. Place ½ cup (1 stick) unsalted butter in a microwave-safe bowl and heat in 20-second intervals until just melted. Stir between intervals. You want it melted but not hot—if it’s too hot, it’ll cook the egg. Let it cool for 2-3 minutes while you gather your other ingredients.
- Mix the sugars. Add 1 cup packed light brown sugar and ¼ cup granulated sugar to the melted butter. Whisk vigorously for about 30 seconds until the mixture looks like wet sand and smells amazing. This step dissolves some of the sugar, which helps create that crackly top.
- Add the egg and yolk. Crack in 1 whole egg and 1 egg yolk. Add 2 teaspoons vanilla extract. Whisk until smooth and glossy, about 20 seconds. The mixture should look thick and slightly lighter in color. If it looks separated, keep whisking—it’ll come together.
- Combine dry ingredients. In a separate small bowl, whisk together 1 ¾ cups all-purpose flour, ½ teaspoon baking soda, and ½ teaspoon salt. This ensures the baking soda and salt are evenly distributed so you don’t get a pocket of salt in one bite.
- Fold in the flour mixture. Add the dry ingredients to the wet ingredients. Use your rubber spatula to fold gently—just until you can’t see any more white streaks. Over-mixing develops gluten and makes tough bars. Stop when it’s just combined, even if there are a few floury spots.
- Add the chocolate chips. Fold in 1 ½ cups semi-sweet chocolate chips. Reserve about ¼ cup to press into the top later—this makes them look bakery-beautiful. The dough will be thick and slightly sticky. That’s exactly what you want.
- Press into the pan. Transfer the dough to your prepared pan. Wet your hands slightly with cold water (this prevents sticking) and press the dough into an even layer. Don’t press too hard—you want it level, not compacted. Sprinkle those reserved chocolate chips on top and press them in gently.
- Bake for 22-26 minutes. Place the pan on the middle rack. Bake until the edges are golden brown and the center looks set but still slightly soft. A toothpick inserted in the center should come out with a few moist crumbs—not wet batter. The top should be golden and slightly crackly. Every oven is different, so start checking at 22 minutes. I pull mine at 24 minutes for maximum gooeyness.
- Cool before cutting. Let the bars cool in the pan on a wire rack for at least 15 minutes. This is the hardest part, I know. But cutting them too early turns them into a crumbly mess. Use the parchment overhang to lift the whole block out onto a cutting board. Slice into 9 or 16 squares, depending on how generous you’re feeling.
Sensory cue: When these bars are done, your kitchen will smell like a warm hug. The edges will be deep golden, the top will have that signature crackle, and if you peek through the oven window, you’ll see the chocolate chips bubbling slightly. That’s your cue that something magical is about to happen.
Cooking Tips & Techniques
After making these chewy gooey chocolate chip cookie bars more times than I can count, I’ve collected a few tips that make the difference between good and unforgettable.
Don’t over-bake. This is the number one mistake I see. Cookie bars continue to bake from residual heat after they come out of the oven. If they look perfectly done in the oven, they’ll be overdone by the time they cool. Pull them when the center still looks slightly underdone—it’ll set as it cools. I learned this the hard way after a batch of dry, crumbly bars that nobody wanted to eat.
Use room temperature eggs. Cold eggs seize up melted butter, creating a lumpy batter. Let your eggs sit on the counter for 15 minutes, or place them in a bowl of warm water for 5 minutes. This small step makes a huge difference in texture.
Press chocolate chips into the top. This is my favorite trick for bakery-style bars. After spreading the dough, press a handful of extra chips into the surface. They stay visible and create those gorgeous chocolate puddles on top. It’s purely cosmetic, but it makes the bars look so much more appealing.
Line your pan properly. I cannot stress this enough. Use parchment paper with overhang on two sides. This creates “handles” that let you lift the entire block of bars out cleanly. No scraping, no broken bars, no tears. Worth the extra 30 seconds.
Let them cool completely. I know, I know. Warm cookie bars are heavenly. But if you cut them while they’re still hot, you’ll get a gooey mess instead of clean squares. Let them cool for at least 15 minutes, or better yet, an hour. The texture improves as they set, and the flavors meld together beautifully.
Multitasking tip: While the bars bake, wash your dishes and wipe down the counter. By the time they’re done, your kitchen is clean and you can enjoy your treat without staring at a mess. That’s my kind of efficiency.
Variations & Adaptations
One of the best things about these chewy gooey chocolate chip cookie bars is how adaptable they are. I’ve experimented with all sorts of variations, and here are my favorites:
Peanut Butter Swirl: Drop spoonfuls of creamy peanut butter (about ¼ cup) onto the dough before baking. Use a knife to swirl it through the batter. The peanut butter gets slightly caramelized on top and creates these gorgeous ribbons throughout. I made this version for a potluck and got three requests for the recipe.
Double Chocolate: Replace ¼ cup of the flour with unsweetened cocoa powder. Use white chocolate chips instead of semi-sweet for a striking black-and-white look. Or go full decadent with dark chocolate chips and a sprinkle of flaky sea salt. This version tastes like a brownie-cookie hybrid, and it’s dangerous.
Gluten-Free Option: Substitute the all-purpose flour with a 1:1 gluten-free baking flour blend. I’ve tested this with Bob’s Red Mill and King Arthur Measure-for-Measure, and both work beautifully. Don’t use almond flour or coconut flour—they’ll change the texture completely.
Funfetti Style: Fold in ¼ cup rainbow sprinkles along with the chocolate chips. The sprinkles add a pop of color and a slight crunch. Kids absolutely love this version, and it’s perfect for birthday parties or holidays.
Mint Chocolate: Add ½ teaspoon peppermint extract along with the vanilla. Use dark chocolate chips or chop up a dark chocolate bar for a more sophisticated flavor. This is my go-to during the holiday season.
I once made a s’mores version by pressing mini marshmallows and graham cracker pieces into the top before baking. The marshmallows got all toasty and golden, and the graham crackers added that signature crunch. It was messy but absolutely worth it.
Serving & Storage Suggestions
These chewy gooey chocolate chip cookie bars are delicious at every temperature, but let me walk you through the best ways to serve and store them.
Serving: I love these bars warm with a glass of cold milk or a scoop of vanilla ice cream. For a fancier presentation, warm individual bars in the microwave for 10-15 seconds and drizzle with melted chocolate or caramel sauce. They’re also fantastic at room temperature—perfect for packing in lunchboxes or taking to a picnic. If you’re serving them for a party, cut them into small squares and arrange on a platter with fresh berries for color.
Complementary dishes: These bars pair beautifully with a cup of coffee or a brown sugar oat milk shaken espresso for an afternoon pick-me-up. For a dessert spread, serve them alongside maple pecan pumpkin cheesecake bars for variety—your guests will think you spent all day baking.
Storage: Store leftover bars in an airtight container at room temperature for up to 5 days. Layer them between sheets of parchment paper to prevent sticking. Do not refrigerate them—the fridge dries out baked goods and makes them stale faster. If your kitchen runs warm, you can store them in a cool, dark cabinet.
Freezing: These bars freeze beautifully. Wrap individual bars tightly in plastic wrap, then place them in a freezer-safe bag or container. They’ll keep for up to 3 months. To thaw, leave them at room temperature for about 30 minutes, or microwave for 15-20 seconds for that just-baked warmth.
Flavor development: Here’s a little secret—these bars actually taste better the next day. The flavors meld together overnight, and the texture becomes even more chewy and cohesive. I often make them a day ahead for parties. Just don’t tell anyone they’re not fresh from the oven.
Nutritional Information & Benefits
Let’s be real—these chewy gooey chocolate chip cookie bars are a treat, not a health food. But that doesn’t mean they can’t fit into a balanced lifestyle. Here’s the breakdown per bar (based on 16 servings):
- Calories: Approximately 240-260 per bar
- Fat: 12-14g (mostly from butter and chocolate)
- Carbohydrates: 32-35g
- Protein: 3-4g
- Fiber: 1-2g
- Sugar: 20-22g
Health highlights: Dark chocolate (if you use semi-sweet or dark chips) contains antioxidants called flavonoids, which may support heart health. The butter provides vitamin A, and eggs offer protein and B vitamins. Plus, there’s something to be said for the mental health benefits of enjoying a homemade treat without guilt.
Dietary considerations: This recipe contains gluten, dairy, and eggs. For a gluten-free version, use a 1:1 gluten-free flour blend. For dairy-free, substitute the butter with vegan butter (I like Miyoko’s) and use dairy-free chocolate chips. For egg-free, use a flax egg (1 tablespoon ground flaxseed mixed with 3 tablespoons water, let sit for 5 minutes).
My perspective: I believe in enjoying food without apology. These bars are a celebration—of simple ingredients, of a quick baking project, of sharing something delicious with people you love. One bar won’t derail your health goals, but it might just make your day a little sweeter. And that counts for something.
Conclusion
These chewy gooey chocolate chip cookie bars have become my emergency dessert, my potluck hero, and my go-to when I need something that feels special without the fuss. They’re the kind of recipe that makes you look like a baking genius when really, you just followed a simple formula that works.
What I love most about this recipe is how forgiving it is. You can over-mix a little, use slightly warm butter, or forget to line your pan—and they’ll still be delicious. But when you follow the steps carefully, when you pull them at exactly the right moment and let them cool properly? That’s when they become truly unforgettable. The edges crackle, the centers stay soft, and every bite has that perfect chocolate-to-dough ratio.
I’d love to hear how these turn out for you. Did you add any fun mix-ins? Did you serve them warm with ice cream? Drop a comment below and let me know your favorite variation. And if you share them on social media, tag me—I want to see your beautiful bars!
Go ahead, preheat that oven. You deserve something warm, sweet, and completely wonderful.
Frequently Asked Questions
Can I use salted butter instead of unsalted?
Yes, you can. Just reduce the added salt to ¼ teaspoon instead of ½ teaspoon. The bars will still turn out great, but they might be slightly saltier. I prefer unsalted butter because it gives me more control over the salt level, but in a pinch, salted butter works fine.
Why did my cookie bars turn out cakey instead of chewy?
Cakey cookie bars usually mean too much flour or over-mixing. Make sure you’re spooning and leveling your flour—scooping directly from the bag packs in too much. Also, mix just until the flour disappears. Over-mixing develops gluten, which gives you a cake-like texture instead of that dense, chewy chew.
Can I double this recipe for a 9×13 pan?
Absolutely. Double all ingredients and bake in a 9×13-inch pan. The baking time will increase slightly—start checking at 28 minutes. You might need to bake for 30-35 minutes total. The bars will be slightly thinner, so keep an eye on them toward the end.
How do I get clean, even cuts without crumbling?
Let the bars cool completely—at least 1 hour. Use a sharp chef’s knife and wipe it clean between cuts with a damp paper towel. For the cleanest edges, refrigerate the bars for 30 minutes before slicing. This firms them up without making them hard, and you’ll get perfect squares every time.
Can I make these ahead of time for a party?
Yes, and I actually recommend it. These bars taste even better the next day. Bake them up to 2 days ahead, store them in an airtight container at room temperature, and they’ll be perfectly chewy and delicious. You can also freeze them for up to 3 months—just thaw at room temperature before serving.
Pin This Recipe!
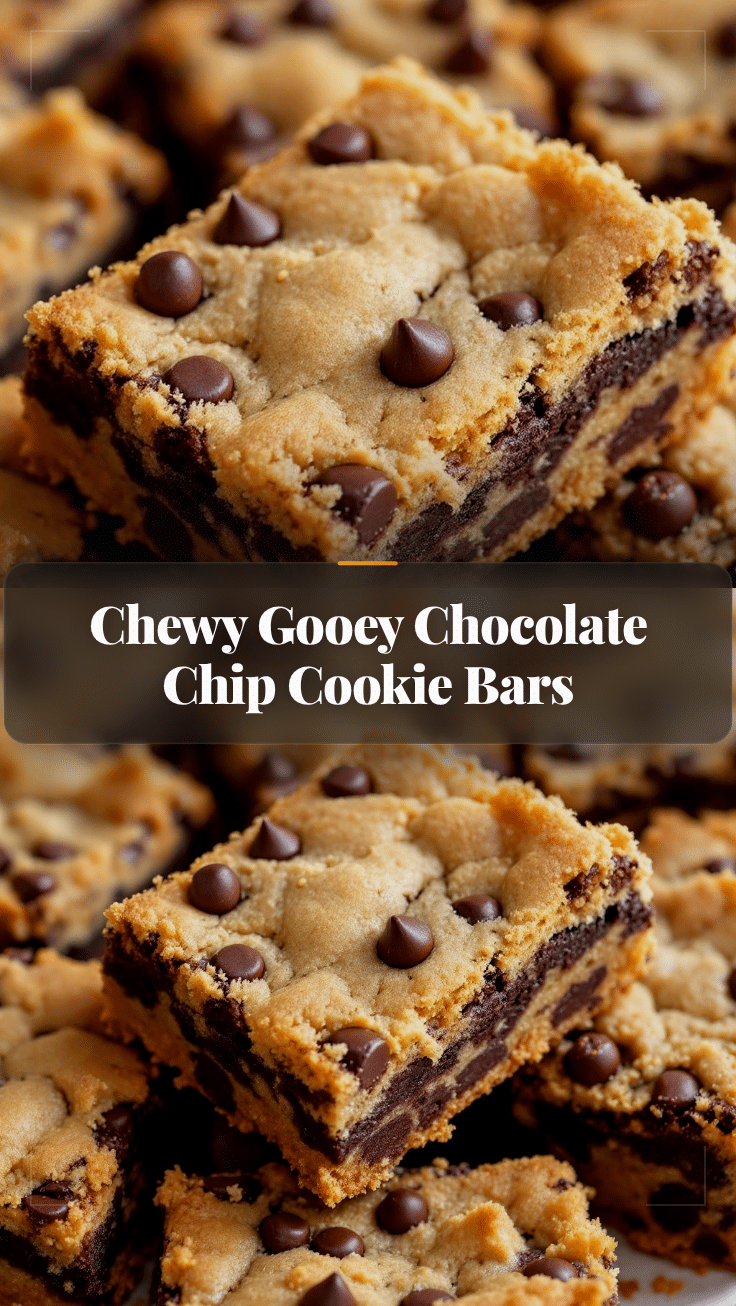
Chewy Gooey Chocolate Chip Cookie Bars: Easy 30-Min Recipe
These chewy gooey chocolate chip cookie bars have crispy edges, soft centers, and melty chocolate pull. Made in one bowl and ready in under 30 minutes, they’re the perfect quick dessert for any occasion.
- Prep Time: 10 minutes
- Cook Time: 22-26 minutes
- Total Time: 30 minutes
- Yield: 16 servings 1x
- Category: Dessert
- Cuisine: American
Ingredients
- ½ cup (1 stick) unsalted butter, melted and slightly cooled
- 1 cup packed light brown sugar
- ¼ cup granulated sugar
- 1 large egg plus 1 egg yolk, room temperature
- 2 teaspoons vanilla extract
- 1 ¾ cups all-purpose flour, spooned and leveled
- ½ teaspoon baking soda
- ½ teaspoon salt
- 1 ½ cups semi-sweet chocolate chips
- Flaky sea salt for sprinkling (optional)
- ½ cup chopped walnuts or pecans, toasted (optional)
- White chocolate chips or peanut butter chips (optional)
Instructions
- Preheat oven to 350°F (175°C). Line an 8×8-inch baking pan with parchment paper or foil, leaving overhang on two opposite sides. Lightly grease with butter or nonstick spray.
- Melt ½ cup unsalted butter in a microwave-safe bowl in 20-second intervals until just melted. Let cool for 2-3 minutes.
- Add 1 cup packed light brown sugar and ¼ cup granulated sugar to the melted butter. Whisk vigorously for about 30 seconds until the mixture looks like wet sand.
- Add 1 whole egg, 1 egg yolk, and 2 teaspoons vanilla extract. Whisk until smooth and glossy, about 20 seconds.
- In a separate small bowl, whisk together 1 ¾ cups all-purpose flour, ½ teaspoon baking soda, and ½ teaspoon salt.
- Add the dry ingredients to the wet ingredients. Fold gently with a rubber spatula until just combined—do not over-mix.
- Fold in 1 ½ cups semi-sweet chocolate chips. Reserve about ¼ cup to press into the top later.
- Transfer the dough to the prepared pan. Wet your hands slightly with cold water and press the dough into an even layer. Sprinkle reserved chocolate chips on top and press them in gently.
- Bake for 22-26 minutes, until edges are golden brown and the center looks set but still slightly soft. A toothpick inserted in the center should come out with a few moist crumbs.
- Let the bars cool in the pan on a wire rack for at least 15 minutes. Use the parchment overhang to lift the block out onto a cutting board. Slice into 9 or 16 squares.
Notes
Don’t over-bake; pull when center still looks slightly underdone. Use room temperature eggs. Press extra chocolate chips into the top for a bakery look. Let cool completely before cutting for clean squares. Bars taste even better the next day.
Nutrition
- Serving Size: 1 bar (based on 16 s
- Calories: 250
- Sugar: 21
- Sodium: 150
- Fat: 13
- Saturated Fat: 8
- Carbohydrates: 34
- Fiber: 2
- Protein: 3
Keywords: chocolate chip cookie bars, chewy cookie bars, easy dessert, 30-minute recipe, one-bowl recipe


