By the third time I made these maple pecan pumpkin cheesecake bars in a single week, I started wondering if I had a problem. Or maybe I’d just stumbled onto something that made absolutely everything else in my kitchen feel irrelevant. The first batch came out okay—good enough to bring to a friend’s dinner party where they disappeared before the main course even hit the table. The second batch? I tweaked the ratio, added a little more maple to the glaze, and suddenly I couldn’t stop thinking about that layer where the creamy cheesecake meets the spiced pumpkin. By batch three, I was taking notes like a mad scientist, measuring the thickness of the pecan crust with a ruler (yes, a ruler), and timing how long the bars needed to chill before the top layer set perfectly. This wasn’t just baking anymore. It was a full-blown obsession, and honestly, I wasn’t looking for a cure.
What kept pulling me back wasn’t just the taste—though that part is dangerously good. It was the way these bars solved a problem I didn’t know I had. I love pumpkin cheesecake, but a full-sized one feels like a commitment. You need an occasion, a crowd, a reason. These bars? They’re the kind of treat you make on a random Tuesday because you want something that feels special without the three-hour production. The maple pecan crust adds this buttery crunch that contrasts with the silky filling, and the maple glaze on top ties everything together like a warm hug in dessert form. Every time I made them, I found myself thinking about the texture, the sweetness balance, the way the pecans toasted just right. It became this little project that paid off in the most delicious way possible.
I think what finally made these bars stick—what made me stop tweaking and start sharing—was the moment I realized they weren’t just good for a pumpkin dessert. They were the pumpkin dessert I’d been looking for all along. The kind that feels indulgent but not heavy, impressive but not complicated, and just sweet enough to make you close your eyes after the first bite. If you’ve ever wanted a fall dessert that delivers on every level without the stress of a full cheesecake, these bars are about to become your new favorite thing. Trust me on this one.
Why You’ll Love This Recipe
These maple pecan pumpkin cheesecake bars aren’t just another pumpkin recipe floating around the internet. They’re the result of multiple rounds of testing, a few kitchen failures (that first crust was way too crumbly), and a genuine love for balancing flavors. Here’s why they work so well:
- Quick & Easy : Comes together in about 45 minutes of active time, with most of the work happening in the oven. No water bath, no complicated techniques—just straightforward baking that delivers restaurant-quality results.
- Simple Ingredients : You probably have most of these in your pantry already. Canned pumpkin, cream cheese, eggs, sugar, maple syrup, and pecans. Nothing fancy, nothing hard to find.
- Perfect for Fall Gatherings : Whether it’s Thanksgiving, a Friendsgiving potluck, or just a cozy Sunday dessert, these bars travel well, slice cleanly, and impress everyone who tries them. I brought a batch to a cheesy sausage breakfast casserole brunch last month, and they were gone before the main dish even cooled down.
- Crowd-Pleaser : Kids love the sweetness, adults appreciate the sophisticated flavor profile, and even folks who claim they’re “not pumpkin people” have been converted. The maple pecan element really sells it.
- Unbelievably Delicious : That moment when the creamy cheesecake layer meets the spiced pumpkin filling, all sitting on a buttery pecan crust—it’s the kind of texture combination that makes you wonder why you ever bothered with regular cheesecake.
What makes these bars different from other pumpkin cheesecake recipes is the attention to detail. I spent time figuring out the exact ratio of pumpkin to cream cheese so the bars stay firm but silky. The maple glaze isn’t an afterthought—it’s a key component that brings everything together. And the crust? It’s sturdy enough to hold up to the filling but tender enough to melt in your mouth. This isn’t just another version of pumpkin cheesecake bars. It’s the version you’ll come back to year after year.
What Ingredients You Will Need
This recipe uses simple, wholesome ingredients to deliver bold fall flavor and satisfying texture without the fuss. Most items are pantry staples, and the ones that aren’t are easy to find at any grocery store during the autumn months.
- For the Pecan Crust
- 1 ½ cups pecan halves (toasted for extra flavor, or raw if you prefer)
- 1 cup all-purpose flour
- ¼ cup packed light brown sugar
- ½ teaspoon salt
- 6 tablespoons unsalted butter, melted (I use Kerrygold for its rich flavor)
- 1 teaspoon vanilla extract
The crust is where the magic starts. Toasting the pecans beforehand really brings out their natural oils and deepens the nutty flavor. If you’re short on time, raw pecans work fine, but toasting makes a noticeable difference. I’ve tried using pecans from different brands, and honestly, the fresher they are, the better the crust turns out.
- For the Pumpkin Cheesecake Filling
- 16 ounces cream cheese, softened (two 8-ounce blocks, full-fat for best texture)
- ¾ cup granulated sugar
- 2 large eggs, room temperature
- 1 teaspoon vanilla extract
- 1 cup canned pumpkin puree (not pumpkin pie filling)
- 2 tablespoons all-purpose flour
- 1 teaspoon ground cinnamon
- ½ teaspoon ground ginger
- ½ teaspoon ground nutmeg
- ¼ teaspoon ground cloves
- Pinch of salt
Using full-fat cream cheese is non-negotiable here if you want that silky, rich texture. Low-fat versions contain more water, which can make the filling runny. Let the cream cheese sit out for at least an hour before you start—cold cream cheese creates lumps that are nearly impossible to smooth out. I learned that the hard way during my first attempt.
- For the Maple Glaze
- ½ cup powdered sugar
- 3 tablespoons pure maple syrup (not pancake syrup—use the real stuff)
- 1 tablespoon heavy cream or milk
- ¼ teaspoon vanilla extract
- Pinch of salt
The maple glaze is what takes these bars over the top. I recommend using Grade A dark amber maple syrup for the strongest maple flavor. The heavy cream gives the glaze a luxurious thickness, but regular milk works in a pinch. Just go slow when adding the liquid—you want a pourable consistency, not a runny mess.
- Optional Toppings
- ¼ cup toasted pecan pieces for garnish
- Extra maple syrup drizzle for presentation
- Flaky sea salt (trust me on this one—it balances the sweetness beautifully)
Equipment Needed
You don’t need a professional bakery setup to make these bars, but having the right tools makes the process smoother. Here’s what you’ll need:
- 9×9-inch baking pan : This is the ideal size for getting thick, satisfying bars. An 8×8 pan works too, but your bars will be slightly taller and may need a few extra minutes of baking time.
- Parchment paper : Line the pan with parchment, leaving overhang on two sides. This creates “handles” that let you lift the entire block of bars out cleanly for slicing.
- Food processor : For grinding the pecans into a fine meal for the crust. A blender works, but a food processor gives you more control over the texture.
- Electric hand mixer or stand mixer : Creaming the cream cheese and sugar by hand is possible, but a mixer saves time and ensures a smooth, lump-free filling.
- Large mixing bowls : You’ll need one for the crust, one for the cheesecake filling, and one for the glaze.
- Rubber spatula : For scraping down the sides of the bowl and spreading the filling evenly.
- Measuring cups and spoons : Precision matters in baking, so use proper measuring tools rather than eyeballing it.
- Cooling rack : Allows air to circulate around the pan, preventing the bottom from getting soggy as the bars cool.
If you don’t have a food processor, you can crush the pecans by placing them in a zip-top bag and pounding them with a rolling pin. It’s a little more work, but it gets the job done. I’ve done it that way when mine was in the dishwasher, and it worked fine—just expect some uneven pieces, which actually adds a nice rustic texture to the crust.
Preparation Method
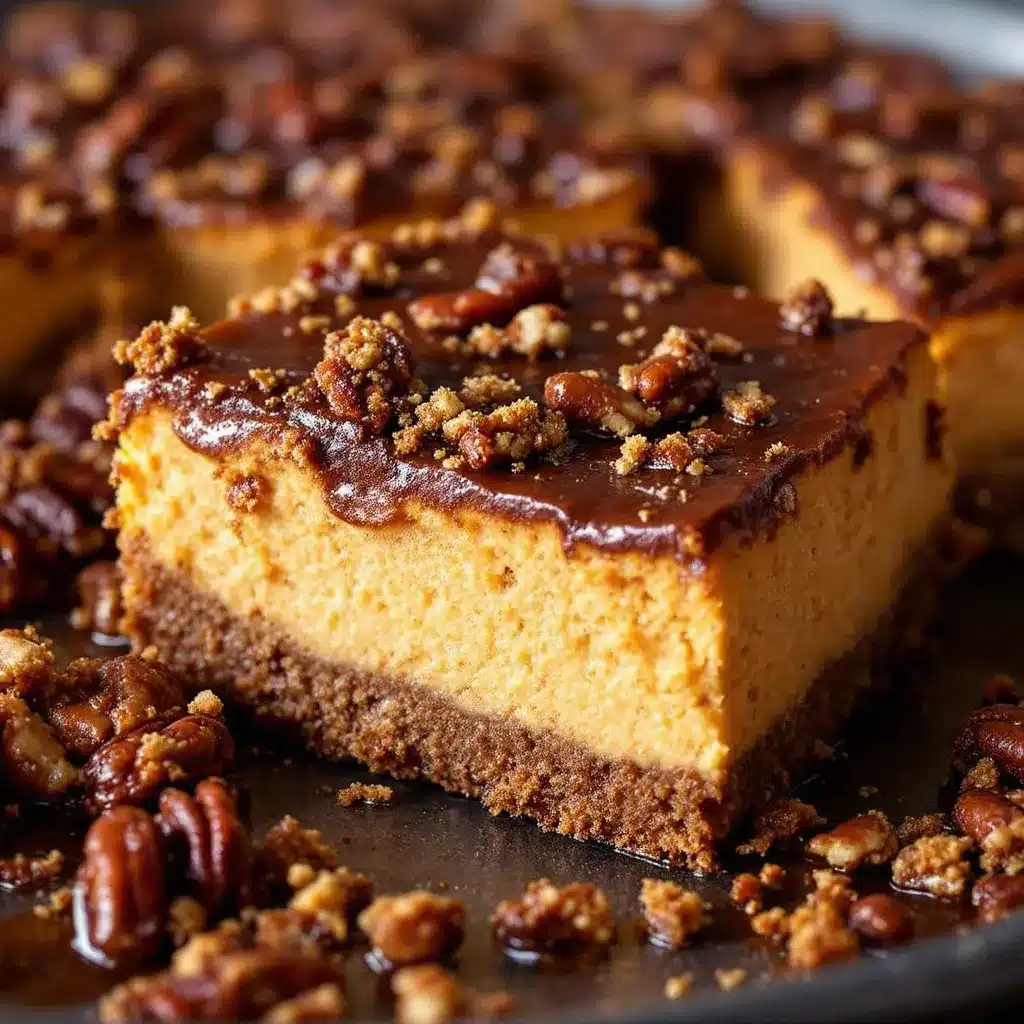
Let’s get baking! Follow these steps carefully, and you’ll have a pan of the most incredible maple pecan pumpkin cheesecake bars you’ve ever tasted.
- Preheat and Prep : Preheat your oven to 350°F (175°C). Line a 9×9-inch baking pan with parchment paper, leaving about 2 inches of overhang on two opposite sides. This will make lifting the bars out much easier later. Lightly grease the parchment with butter or non-stick spray.
- Make the Pecan Crust : In a food processor, pulse the pecan halves until they’re finely ground—about the texture of coarse sand. Be careful not to over-process, or you’ll end up with pecan butter. Transfer the ground pecans to a medium bowl and add the flour, brown sugar, and salt. Stir to combine. Pour in the melted butter and vanilla extract, then mix with a fork until the mixture looks like wet sand and holds together when pressed. Press the mixture firmly and evenly into the bottom of the prepared pan. I use the bottom of a flat measuring cup to get it really compact. Bake for 12-15 minutes, until the edges are lightly golden and the crust smells toasty. Set aside to cool slightly while you make the filling.
- Prepare the Cheesecake Filling : In a large mixing bowl, beat the softened cream cheese with an electric mixer on medium speed until smooth and creamy—about 2 minutes. Scrape down the sides and bottom of the bowl with a rubber spatula. Add the granulated sugar and beat for another 2 minutes until light and fluffy. Add the eggs one at a time, beating on low speed after each addition just until combined. Over-mixing at this stage can incorporate too much air, which may cause cracks in the finished bars. Add the vanilla extract and mix briefly.
- Add the Pumpkin Layer : In a separate small bowl, whisk together the pumpkin puree, flour, cinnamon, ginger, nutmeg, cloves, and salt. Add this pumpkin mixture to the cream cheese mixture and fold gently with a spatula until just combined. You want a uniform color with no streaks of white cream cheese, but don’t over-mix. Pour the filling over the pre-baked crust and spread it evenly with the spatula. Give the pan a gentle tap on the counter to release any air bubbles.
- Bake the Bars : Place the pan in the preheated oven and bake for 35-40 minutes. The edges should look set and slightly puffed, while the center will still have a slight jiggle when you gently shake the pan. That’s exactly what you want—the residual heat will finish cooking the center as the bars cool. If the top starts browning too quickly, tent the pan loosely with foil during the last 10 minutes of baking.
- Cool Completely : Remove the pan from the oven and place it on a cooling rack. Let the bars cool at room temperature for 1 hour, then transfer the pan to the refrigerator and chill for at least 4 hours, preferably overnight. This step is crucial—the bars need time to set properly so they slice cleanly. I know it’s tempting to rush, but trust me, the wait is worth it.
- Make the Maple Glaze : While the bars chill, prepare the glaze. In a small bowl, whisk together the powdered sugar, maple syrup, heavy cream, vanilla extract, and salt until smooth. The consistency should be thick but pourable—if it’s too thick, add a few drops more cream; if too thin, add a little more powdered sugar. Cover and refrigerate until ready to use.
- Slice and Serve : Once the bars are fully chilled and firm, use the parchment overhang to lift the entire block out of the pan and onto a cutting board. Using a sharp knife, slice into 16 equal squares (4 rows by 4 rows). For clean cuts, wipe the knife clean between each slice. Drizzle the maple glaze over the bars and sprinkle with toasted pecan pieces and a pinch of flaky sea salt if desired.
Cooking Tips & Techniques
After making these bars more times than I care to admit, I’ve picked up a few tricks that make the process smoother and the results more consistent. Here’s what I’ve learned:
Room temperature ingredients matter more than you think. Cold cream cheese creates lumps that no amount of mixing will fully eliminate. Cold eggs can cause the batter to curdle. Set everything out on the counter at least an hour before you start. If you’re in a hurry, you can soften cream cheese in the microwave in 10-second bursts, but watch it carefully—you want it soft, not melted.
Don’t over-bake the bars. This is the most common mistake I see with cheesecake-style desserts. The center should still jiggle slightly when you take the pan out of the oven. Over-baking leads to a dry, cracked surface and a dense texture. Remember, the bars will continue to cook from residual heat as they cool.
Chill time is non-negotiable. I know you want to eat these immediately, but slicing into warm bars will give you a gooey mess. The 4-hour minimum chill time allows the cream cheese to firm up and the flavors to meld together. Overnight chilling is even better—the texture becomes incredibly smooth and the maple flavor deepens.
Use a sharp knife for clean slices. Run the knife under hot water, dry it off, then slice. Wipe the blade clean between each cut. This gives you those beautiful, bakery-style edges that make the bars look as good as they taste.
Toast your pecans. This adds so much depth to the crust. Spread the pecans on a baking sheet and toast at 350°F (175°C) for 5-7 minutes, shaking the pan halfway through. Let them cool completely before grinding. The difference in flavor is noticeable—the nuts become more aromatic and the crust tastes almost caramelized.
Variations & Adaptations
One of the best things about this recipe is how easily it adapts to different tastes and dietary needs. Here are some variations I’ve tried and loved:
Gluten-Free Version : Substitute the all-purpose flour in the crust with a 1:1 gluten-free baking flour blend. For the filling, use a gluten-free all-purpose flour or cornstarch instead of regular flour. The texture holds up beautifully—I tested this for a friend with celiac disease, and she couldn’t tell the difference.
Dairy-Free Adaptation : Use dairy-free cream cheese (like Kite Hill or Tofutti) and substitute the butter in the crust with coconut oil or a plant-based butter. The heavy cream in the glaze can be replaced with full-fat coconut milk. The flavor changes slightly, but the bars are still incredibly creamy and satisfying.
Pumpkin Spice Twist : If you don’t have individual spices on hand, substitute 2 teaspoons of pumpkin pie spice for the cinnamon, ginger, nutmeg, and cloves. It’s a convenient shortcut that still delivers great flavor.
Extra Maple Flavor : Add 2 tablespoons of maple syrup to the cheesecake filling along with the vanilla extract. This makes the maple flavor more prominent throughout, not just in the glaze. I tried this in batch four, and it was a game-changer for maple lovers.
Nut-Free Option : Replace the pecans in the crust with an equal amount of crushed graham crackers or shortbread cookies. The texture will be different—more crunchy than buttery—but it’s still delicious. Just reduce the melted butter to 4 tablespoons since graham crackers absorb less fat than nuts.
Bite-Sized Version : Press the crust into a mini muffin tin (lined with mini parchment cups) and fill with the cheesecake mixture. Bake for 12-15 minutes. These are perfect for parties or holiday cookie trays. I brought a batch to a crockpot chicken tacos party last fall, and they were a huge hit.
Serving & Storage Suggestions
These bars are incredibly versatile when it comes to serving. Here’s how to get the most out of them:
Serving Temperature : I prefer these bars cold, straight from the refrigerator. The texture is firm and creamy, and the flavors are clean and bright. If you prefer a softer texture, let them sit at room temperature for 15-20 minutes before serving. Some people even like them slightly warm—just microwave a single bar for 10 seconds.
Presentation Ideas : Arrange the bars on a platter and drizzle the maple glaze in a zigzag pattern. Top with a few extra toasted pecans and a light sprinkle of flaky sea salt. The salt is optional, but it really balances the sweetness and adds a professional touch. For a festive look, garnish with a small cinnamon stick or a star anise on the side.
Complementary Dishes : These bars pair beautifully with a cup of hot coffee, spiced chai, or a glass of cold milk. For a dessert spread, serve them alongside chewy chocolate chip cookies or a simple vanilla ice cream. The contrast between the cold, creamy bars and the warm ice cream is divine.
Storage Instructions : Store the bars in an airtight container in the refrigerator for up to 5 days. Place a sheet of parchment paper between layers if stacking to prevent sticking. The bars actually improve after a day or two as the flavors continue to meld together.
Freezing Instructions : These bars freeze beautifully. Once fully chilled and sliced, arrange the bars in a single layer on a baking sheet and freeze for 1 hour. Transfer the frozen bars to a freezer-safe container or zip-top bag, separating layers with parchment paper. They’ll keep for up to 3 months. To thaw, transfer to the refrigerator overnight or let sit at room temperature for 30 minutes.
Reheating Tips : If you prefer warm bars, microwave a single serving for 15-20 seconds. For a larger batch, place the bars on a baking sheet and warm in a 300°F (150°C) oven for 5-7 minutes. Add a fresh drizzle of maple glaze after reheating for the best presentation.
Nutritional Information & Benefits
While these maple pecan pumpkin cheesecake bars are definitely a treat, they do offer some nutritional benefits worth noting. Here’s a rough estimate per bar (based on 16 servings):
- Calories: 285
- Total Fat: 18g
- Saturated Fat: 8g
- Cholesterol: 65mg
- Sodium: 180mg
- Total Carbohydrates: 28g
- Dietary Fiber: 2g
- Sugars: 20g
- Protein: 5g
Health Highlights : Pumpkin is packed with vitamin A (in the form of beta-carotene), which supports eye health and immune function. Pecans provide healthy monounsaturated fats, fiber, and minerals like magnesium and zinc. Cream cheese offers calcium and protein, though it’s also higher in saturated fat, so moderation is key. The maple syrup contains antioxidants and minerals like zinc and manganese, though it’s still sugar, so enjoy it in balance.
Dietary Considerations : This recipe contains gluten, dairy, eggs, and tree nuts (pecans). For allergen-friendly adaptations, see the variations section above. The bars are vegetarian-friendly and can be made gluten-free or dairy-free with simple substitutions.
Personal Note : I don’t believe in labeling desserts as “healthy” or “guilty.” Food is about enjoyment, and these bars bring a lot of it. That said, using real ingredients like pumpkin, pecans, and maple syrup means you’re getting more nutritional value than you would from a boxed mix or processed dessert. Balance is everything—enjoy a bar, savor every bite, and don’t overthink it.
Conclusion
These maple pecan pumpkin cheesecake bars are everything I want in a fall dessert—rich, creamy, nutty, and just sweet enough to satisfy that craving without overwhelming you. They’ve become my go-to for holiday gatherings, cozy weekends, and those random Tuesdays when I need a little something special. The combination of textures—crunchy pecan crust, silky cheesecake filling, and glossy maple glaze—is honestly addictive.
What I love most about this recipe is how forgiving it is. You don’t need to be a professional baker to get beautiful results. The steps are straightforward, the ingredients are accessible, and the payoff is enormous. Whether you’re making them for Thanksgiving, a potluck, or just because you deserve a treat, these bars deliver every single time.
I’d love to hear how yours turn out! Did you try any of the variations? Add your own twist? Leave a comment below and let me know—I read every single one and I’m always looking for new ideas to test in my kitchen. And if you share a photo on social media, tag me so I can see your beautiful creations. Happy baking, friends!
Frequently Asked Questions
Can I use fresh pumpkin instead of canned?
Yes, you can use fresh pumpkin puree, but it requires some extra steps. Roast a small sugar pumpkin until tender, scoop out the flesh, and puree it in a food processor. Then strain the puree through a cheesecloth-lined sieve to remove excess water—fresh pumpkin has much more moisture than canned, and too much liquid will make the filling runny. For best results, stick with canned pumpkin puree (not pumpkin pie filling) since it’s consistent and reliable.
Why did my cheesecake bars crack on top?
Cracks usually happen for one of three reasons: over-mixing the batter (which incorporates too much air), over-baking (which dries out the filling), or sudden temperature changes (like moving the hot pan to a cold counter). To prevent cracks, mix the filling on low speed, bake just until the edges are set and the center still jiggles slightly, and cool the bars gradually at room temperature before refrigerating.
Can I make these bars ahead of time?
Absolutely. In fact, I recommend it. These bars taste even better after a day or two in the refrigerator because the flavors have time to meld together. You can make them up to 3 days in advance and store them in an airtight container in the fridge. Just add the maple glaze and any toppings right before serving for the best presentation.
How do I get clean, neat slices?
The key is patience. Make sure the bars are fully chilled—at least 4 hours, preferably overnight. Use a sharp chef’s knife and run it under hot water before each cut, drying it off with a clean towel. The warmth helps the knife glide through the cheesecake without dragging or sticking. Wipe the blade clean between each slice for the neatest results.
Can I double this recipe for a larger pan?
Yes, you can double the ingredients and bake the bars in a 9×13-inch pan. The baking time will be similar—start checking at 35 minutes. You may need to extend the baking time by 5-10 minutes since the filling is thicker. The crust will be slightly thinner, so press it firmly into the pan. For clean slicing, cut into 24 bars (6 rows by 4 rows) instead of 16.
Pin This Recipe!
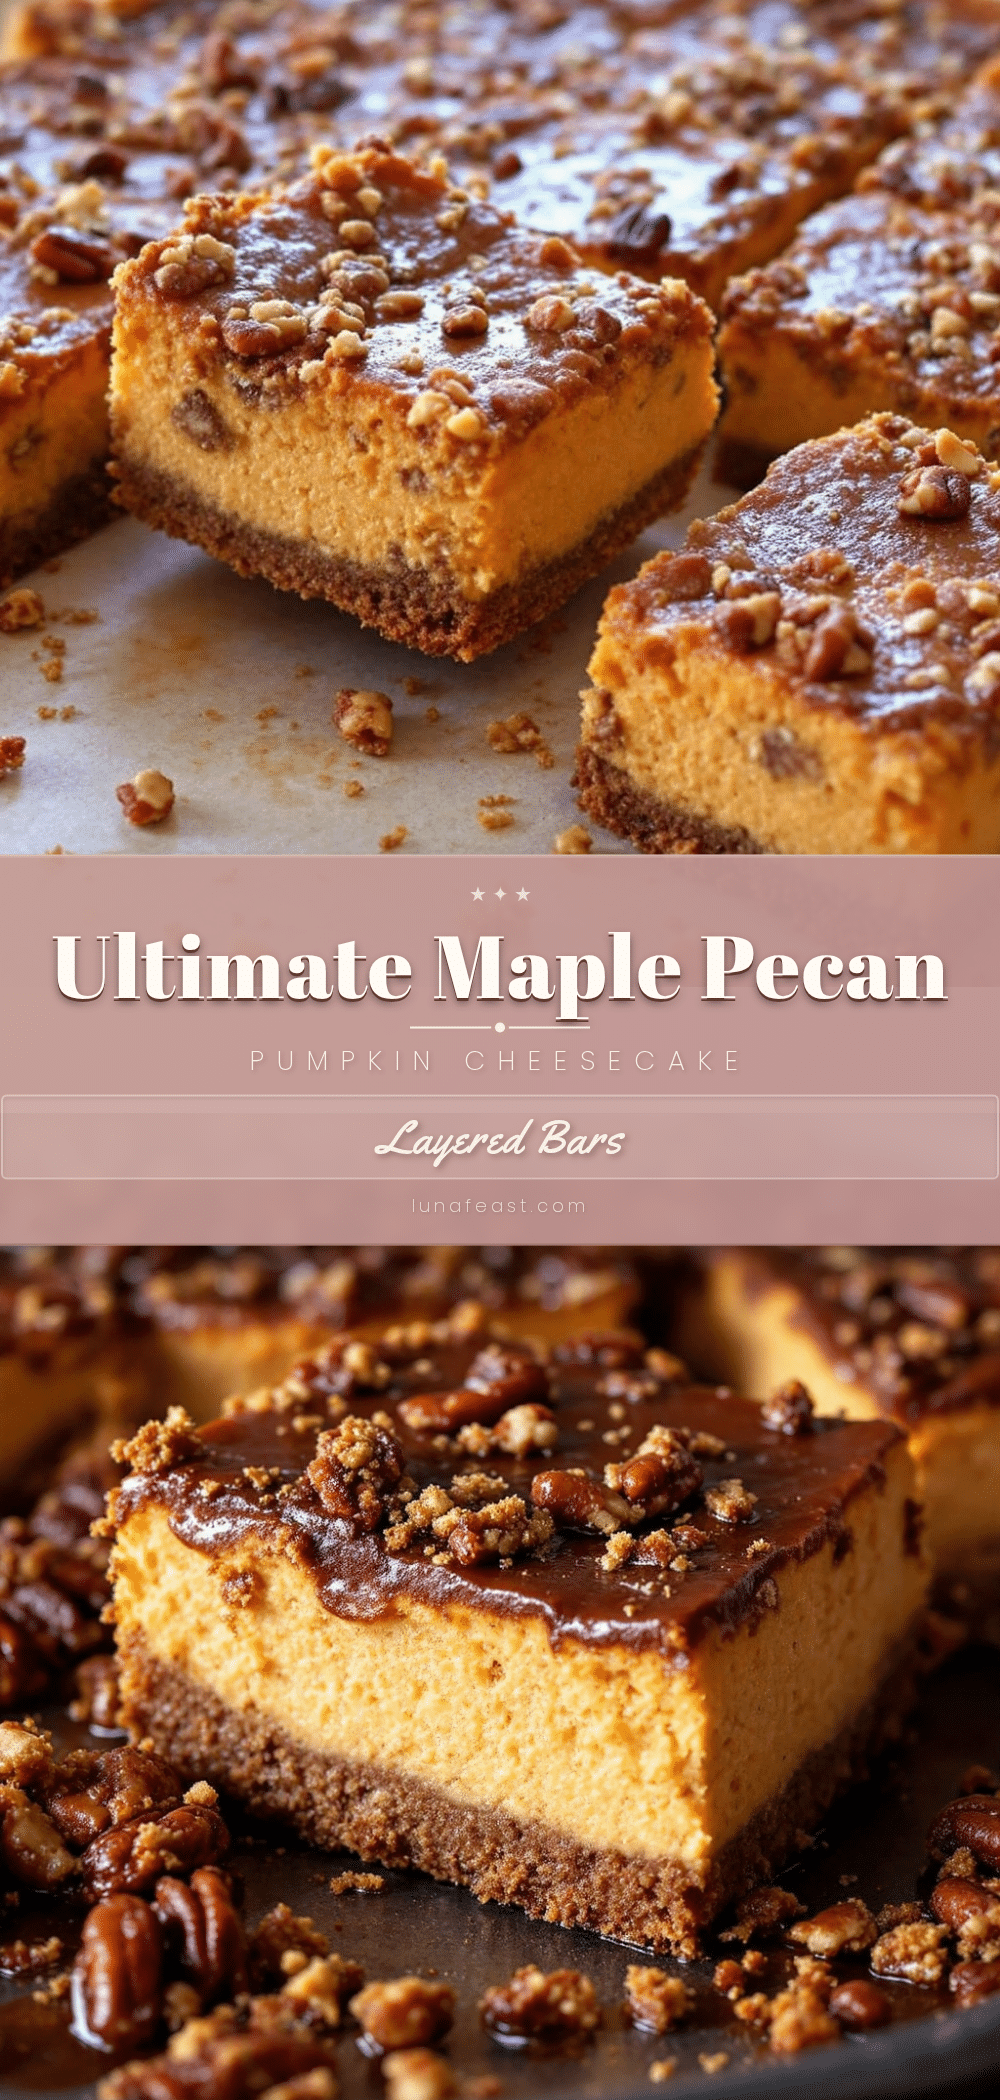
Best Maple Pecan Pumpkin Cheesecake Bars Recipe
These maple pecan pumpkin cheesecake bars feature a buttery pecan crust, a creamy spiced pumpkin cheesecake filling, and a glossy maple glaze. They’re the perfect fall dessert that’s easy to make and sure to impress.
- Prep Time: 45 minutes
- Cook Time: 35-40 minutes
- Total Time: 5 hours 20 minutes (includes chilling)
- Yield: 16 bars 1x
- Category: Dessert
- Cuisine: American
Ingredients
- 1 ½ cups pecan halves (toasted for extra flavor, or raw if you prefer)
- 1 cup all-purpose flour
- ¼ cup packed light brown sugar
- ½ teaspoon salt
- 6 tablespoons unsalted butter, melted
- 1 teaspoon vanilla extract
- 16 ounces cream cheese, softened (two 8-ounce blocks, full-fat)
- ¾ cup granulated sugar
- 2 large eggs, room temperature
- 1 teaspoon vanilla extract
- 1 cup canned pumpkin puree (not pumpkin pie filling)
- 2 tablespoons all-purpose flour
- 1 teaspoon ground cinnamon
- ½ teaspoon ground ginger
- ½ teaspoon ground nutmeg
- ¼ teaspoon ground cloves
- Pinch of salt
- ½ cup powdered sugar
- 3 tablespoons pure maple syrup
- 1 tablespoon heavy cream or milk
- ¼ teaspoon vanilla extract
- Pinch of salt
- ¼ cup toasted pecan pieces for garnish (optional)
- Extra maple syrup drizzle for presentation (optional)
- Flaky sea salt (optional)
Instructions
- Preheat your oven to 350°F (175°C). Line a 9×9-inch baking pan with parchment paper, leaving about 2 inches of overhang on two opposite sides. Lightly grease the parchment with butter or non-stick spray.
- Make the Pecan Crust: In a food processor, pulse the pecan halves until finely ground (coarse sand texture). Transfer to a medium bowl and add flour, brown sugar, and salt. Stir to combine. Pour in melted butter and vanilla extract, mix with a fork until the mixture looks like wet sand and holds together when pressed. Press firmly and evenly into the bottom of the prepared pan. Bake for 12-15 minutes, until edges are lightly golden and crust smells toasty. Set aside to cool slightly.
- Prepare the Cheesecake Filling: In a large mixing bowl, beat softened cream cheese with an electric mixer on medium speed until smooth and creamy (about 2 minutes). Scrape down sides. Add granulated sugar and beat for another 2 minutes until light and fluffy. Add eggs one at a time, beating on low speed after each addition just until combined. Add vanilla extract and mix briefly.
- Add the Pumpkin Layer: In a separate small bowl, whisk together pumpkin puree, flour, cinnamon, ginger, nutmeg, cloves, and salt. Add this pumpkin mixture to the cream cheese mixture and fold gently with a spatula until just combined (uniform color, no streaks). Pour filling over pre-baked crust and spread evenly. Tap pan gently on counter to release air bubbles.
- Bake the Bars: Place pan in preheated oven and bake for 35-40 minutes. Edges should look set and slightly puffed, center will still have a slight jiggle. If top browns too quickly, tent loosely with foil during last 10 minutes.
- Cool Completely: Remove pan from oven and place on a cooling rack. Cool at room temperature for 1 hour, then transfer to refrigerator and chill for at least 4 hours, preferably overnight.
- Make the Maple Glaze: In a small bowl, whisk together powdered sugar, maple syrup, heavy cream, vanilla extract, and salt until smooth. Consistency should be thick but pourable. Cover and refrigerate until ready to use.
- Slice and Serve: Once bars are fully chilled and firm, use parchment overhang to lift entire block out of pan onto a cutting board. Slice into 16 equal squares (4 rows by 4 rows) using a sharp knife, wiping clean between each slice. Drizzle maple glaze over bars and sprinkle with toasted pecan pieces and flaky sea salt if desired.
Notes
Room temperature ingredients are crucial for a smooth filling. Do not over-bake; the center should still jiggle slightly. Chill for at least 4 hours (preferably overnight) for clean slices. Toast pecans for deeper flavor. Use a sharp knife run under hot water for neat cuts.
Nutrition
- Serving Size: 1 bar
- Calories: 285
- Sugar: 20
- Sodium: 180
- Fat: 18
- Saturated Fat: 8
- Carbohydrates: 28
- Fiber: 2
- Protein: 5
Keywords: pumpkin cheesecake bars, maple pecan, fall dessert, Thanksgiving dessert, cheesecake bars, pumpkin dessert, maple glaze, pecan crust


