The Tupperware lid snapped shut on the last granola bar, and my son looked at me with that specific kind of panic only a hungry seven-year-old can muster. “But that’s the emergency one,” he said. I stared back at the empty cookie jar, the crumb-dusted counter, and the crumpled wrapper of the store-bought bar he’d just devoured. It was the third one that day. And honestly, I was tired of paying five bucks for a box of things that tasted more like cardboard and corn syrup than actual food.
That afternoon, I raided my pantry with a mission. I had oats, a jar of peanut butter that was down to its last sticky spoonful, and a bottle of honey that was crystallizing at the bottom. I wasn’t trying to invent anything fancy. I just needed something that would actually fill him up, keep him from crashing before dinner, and maybe—just maybe—not cost a small fortune. What came out of that messy, slightly desperate experiment was a recipe so simple it almost felt like cheating.
These easy no-bake granola bars for healthy snacks have become our kitchen’s quiet hero. They’re the kind of thing you make on a Sunday afternoon while the laundry spins, and then forget about until Tuesday, when you’re scrambling for lunchbox fillers or a pre-workout bite. They don’t crumble into a million pieces in your bag. They don’t taste like sawdust. And they actually keep you full—which, let’s be honest, is the whole point. This is the recipe that stuck, not because it’s flashy, but because it just works.
Why You’ll Love This Recipe
I’ve tested this recipe more times than I care to admit. I’ve made it too sticky, too dry, too crumbly to hold together. I’ve tried different binders, different mix-ins, and different chilling times. After all those trials, this version came out on top—and it’s the one I keep coming back to, week after week. Here’s why I think you’ll feel the same way.
- No Oven Required: It’s summer. It’s hot. The last thing you want to do is turn on your oven. These bars come together on the stovetop in about ten minutes, and the fridge does the rest of the work.
- Simple Pantry Ingredients: You probably have everything you need right now. Oats, peanut butter, honey, maybe some chocolate chips or dried fruit. No weird flours or specialty sweeteners.
- Perfect for Meal Prep: Make a batch on Sunday, and you’ve got snacks for the whole week. They’re great for lunchboxes, afternoon slumps, or even a quick breakfast when you’re running late.
- Actually Filling: Unlike those flimsy store-bought bars that leave you hungry an hour later, these have staying power. The oats and peanut butter provide steady energy, not a sugar spike.
- Completely Customizable: This is a base recipe that loves being played with. Swap the nut butter, change the mix-ins, add a drizzle of chocolate—it’s forgiving and flexible.
What really sets these apart is the texture. They’re chewy but not tough, firm but not hard, and they hold their shape without feeling like you’re eating a hockey puck. I’ve brought them to playdates, packed them for road trips, and even snuck one into my purse for a movie. They’ve never let me down.
What Ingredients You Will Need
This recipe relies on a handful of humble ingredients that work together to create something genuinely satisfying. Each one plays a specific role, from binding to flavor to texture. Let’s break it down.
- Rolled Oats (2 cups / 180g): Not quick oats, not steel-cut. Rolled oats give these bars the perfect chewy texture and hold their shape during mixing. I prefer Bob’s Red Mill or Quaker Old-Fashioned. Quick oats will make the bars too soft, and steel-cut oats will be too crunchy.
- Creamy Peanut Butter (1 cup / 250g): This is the main binder and the backbone of flavor. Use a natural, no-stir peanut butter for the best results—the kind that’s just peanuts and maybe a little salt. Avoid the super oily natural kind that separates, as it can make the bars greasy. If you’re allergic to peanuts, almond butter or sunflower seed butter work beautifully.
- Honey (½ cup / 170g): Honey adds sweetness and acts as the glue that holds everything together. It also helps the bars stay chewy rather than hard. Maple syrup is a great vegan alternative, though the bars will be slightly softer.
- Coconut Oil (¼ cup / 60ml): A little coconut oil helps the bars set firmly in the fridge and adds a subtle richness. You can substitute butter if you prefer, but coconut oil keeps them dairy-free and adds a nice hint of flavor.
- Vanilla Extract (1 teaspoon): Pure vanilla extract rounds out the flavors and makes everything taste a little more special. Skip the imitation stuff if you can.
- Salt (¼ teaspoon): Salt balances the sweetness and makes the peanut butter flavor pop. If your peanut butter is already salted, you can reduce this to a pinch.
- Mix-Ins (1 cup total): This is where you get to have fun. I usually do ½ cup dark chocolate chips (60g) and ½ cup chopped dried cranberries (60g). You could also use chopped nuts, seeds, shredded coconut, or mini M&Ms. Just keep the total to about a cup so the bars don’t fall apart.
One thing I’ve learned: measure your oats by weight if you have a kitchen scale. It makes a real difference in consistency. Too many oats and the bars are dry; too few and they’re sticky messes. A scale takes the guesswork out.
Equipment Needed
You don’t need a fancy kitchen to make these bars. Here’s what you’ll need, plus a few tips from my own trial and error.
- Medium Saucepan: For melting the peanut butter, honey, and coconut oil together. A heavy-bottomed pan works best to prevent scorching.
- 8×8-inch Baking Pan: This is the perfect size for thick, satisfying bars. Line it with parchment paper, leaving some overhang on two sides—this makes lifting the whole block out so much easier.
- Large Mixing Bowl: For combining the dry ingredients with the wet mixture. A glass or stainless steel bowl works fine.
- Silicone Spatula: For stirring and pressing the mixture into the pan. A silicone spatula is flexible enough to scrape every last bit of the sticky mixture out of the bowl.
- Measuring Cups and Spoons: Accurate measurements matter here, especially for the wet ingredients. Use dry measuring cups for the oats and liquid measuring cups for the honey and oil.
- Parchment Paper: Absolutely essential for easy removal. Wax paper will stick and foil will tear. Parchment is your friend.
If you don’t have an 8×8 pan, a 9×9 will work—your bars will just be slightly thinner. A 9×13 will make them too thin to hold together well. I learned that one the hard way.
Preparation Method
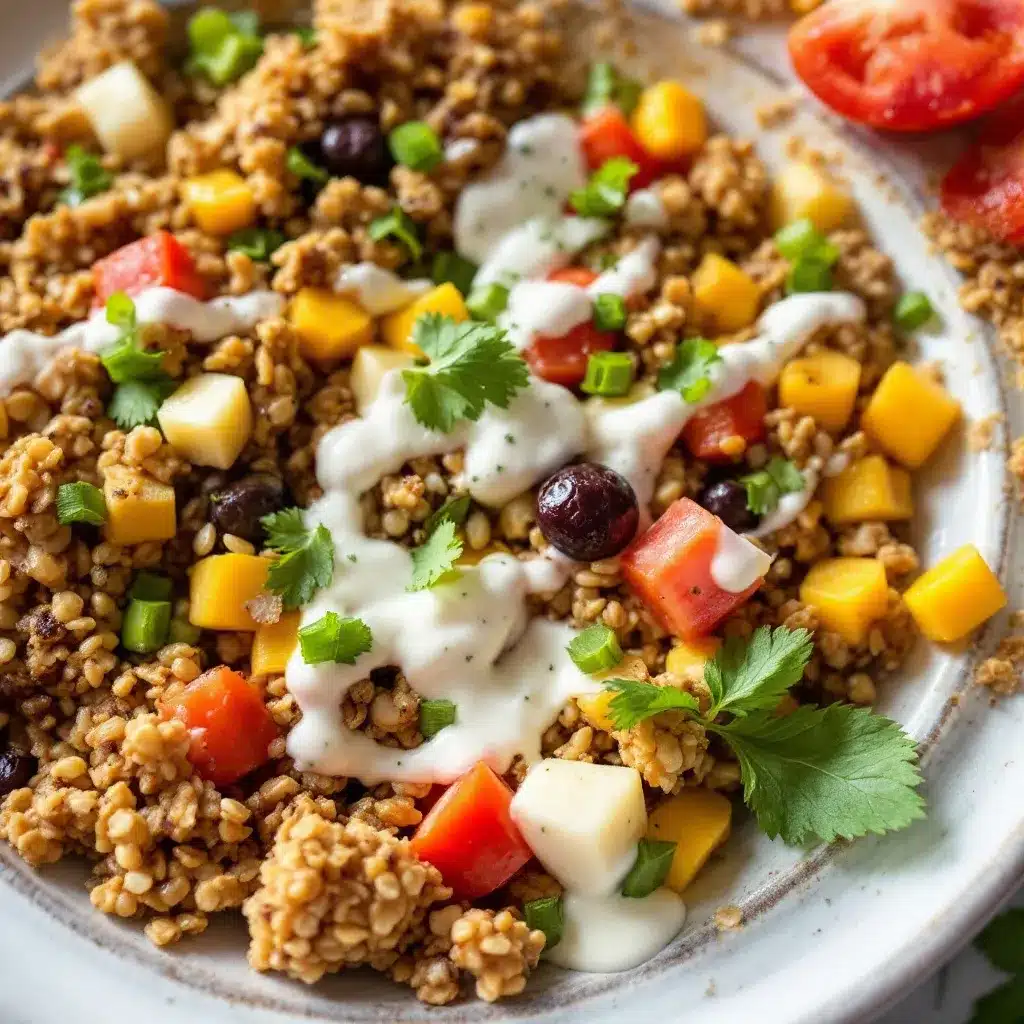
This recipe moves fast, so I like to have everything measured and ready before I start. Trust me on this—the mixture cools quickly, and you don’t want to be scrambling for chocolate chips while it stiffens up.
- Line your pan. Take your 8×8 baking pan and line it with parchment paper, leaving about 2 inches of overhang on two opposite sides. This creates handles that let you lift the entire block out later. Set the pan aside.
- Combine the wet ingredients. In a medium saucepan over low heat, combine 1 cup creamy peanut butter, ½ cup honey, and ¼ cup coconut oil. Stir constantly with a silicone spatula until everything is melted and smooth. This takes about 3-4 minutes. Don’t walk away—peanut butter burns easily, and burnt peanut butter smells awful. The mixture should be glossy and pourable.
- Add the vanilla and salt. Remove the saucepan from the heat. Stir in 1 teaspoon vanilla extract and ¼ teaspoon salt. The mixture will bubble a little and smell amazing.
- Mix the dry ingredients. In a large mixing bowl, combine 2 cups rolled oats and your chosen mix-ins. I use ½ cup dark chocolate chips and ½ cup dried cranberries. Give them a quick stir to distribute everything evenly.
- Combine wet and dry. Pour the warm peanut butter mixture over the oats and mix-ins. Use your silicone spatula to fold everything together until every oat is coated. This takes a little elbow grease—the mixture is thick and sticky. Make sure there are no dry pockets of oats hiding at the bottom of the bowl.
- Press into the pan. Transfer the mixture to your prepared pan. Here’s the trick: don’t just dump it in and hope for the best. Use the back of a spoon or a flat-bottomed measuring cup to press the mixture down firmly and evenly. Really lean into it. The more you compress it, the better the bars will hold together. I press for a solid minute, making sure the corners are filled and the surface is level.
- Chill. Place the pan in the refrigerator for at least 2 hours. Overnight is even better. The bars need time to set completely. If you try to cut them too early, they’ll fall apart.
- Cut and store. Once the bars are firm, use the parchment overhang to lift the block out of the pan. Place it on a cutting board. Use a sharp chef’s knife to cut into 12 even bars (3 rows by 4 rows). Wipe the knife clean between cuts for neat edges.
One more thing: if the mixture starts to stiffen before you’ve pressed it into the pan, pop it back on the stove over low heat for 30 seconds. It’ll loosen right up.
Cooking Tips & Techniques
I’ve made this recipe at least two dozen times, and I’ve collected a few hard-won lessons along the way. Here are the tips that made the biggest difference.
Don’t skip the parchment paper. I know it seems like an extra step, but I promise it’s worth it. The first time I made these, I greased the pan with cooking spray. The bars stuck like cement. I ended up eating granola crumbles with a spoon for three days. Parchment paper with overhang is the only way to get a clean lift.
Press firmly and evenly. This is the most common mistake I see. If you don’t press the mixture down hard enough, the bars will be crumbly and fall apart. I use the bottom of a dry measuring cup to really compress the mixture. You want it to feel dense and compact before it goes into the fridge.
Let them chill completely. I know you’re hungry. I know the kitchen smells like peanut butter and honey. But cutting these bars before they’ve had a full 2 hours in the fridge is a recipe for disaster. They need time for the coconut oil and honey to solidify and bind everything together. Patience pays off here.
Use room temperature mix-ins. If your chocolate chips are cold from the fridge, they can cause the warm peanut butter mixture to seize up slightly. Let your mix-ins sit at room temperature for a bit before adding them. It makes mixing easier and more even.
Wipe your knife between cuts. This is a small thing that makes a big difference. The sticky mixture will cling to your knife, making messy, jagged cuts. A quick wipe with a damp paper towel between each slice gives you clean, professional-looking bars.
I once tried to rush the chilling process by sticking the pan in the freezer for 30 minutes. The edges were frozen, the middle was still soft, and the bars cracked when I tried to cut them. Don’t be like me. Give them the full time in the fridge.
Variations & Adaptations
This recipe is a chameleon. Once you’ve mastered the base, you can tweak it to fit any craving or dietary need. Here are a few variations I’ve tried and loved.
- Vegan Version: Swap the honey for maple syrup or brown rice syrup. Use dairy-free chocolate chips. The bars will be slightly softer but just as delicious.
- Nut-Free Version: Replace the peanut butter with sunflower seed butter or tahini. Sunflower seed butter can react with baking soda (not an issue here since we’re not baking), but it can turn slightly green over time. It’s completely safe to eat, just a little unexpected looking.
- Protein-Packed Version: Add ¼ cup of your favorite vanilla or chocolate protein powder. Reduce the oats by ¼ cup to compensate. You might need an extra tablespoon of honey to balance the dryness of the protein powder.
- Trail Mix Bars: Swap the chocolate chips and cranberries for a mix of chopped almonds, pumpkin seeds, dried apricots, and a pinch of cinnamon. These are my go-to for hiking trips.
- Chocolate Drizzle: After the bars have set, melt ¼ cup of chocolate chips with 1 teaspoon of coconut oil and drizzle it over the top. Let it set in the fridge for another 15 minutes. It’s a small touch that makes them feel like a treat.
My personal favorite variation is a tropical version with chopped macadamia nuts, dried pineapple, and white chocolate chips. It tastes like vacation, and it’s the perfect snack for those gray winter afternoons when you need a little sunshine.
Serving & Storage Suggestions
These bars are incredibly versatile when it comes to serving. They’re great straight from the fridge, but I actually prefer them at room temperature—the texture softens slightly and the flavors open up. If you’re packing them for a lunchbox, just pull them out of the fridge in the morning and they’ll be perfect by snack time.
For a more indulgent treat, try warming one up in the microwave for about 10 seconds. The chocolate chips get melty and the bar becomes almost like a warm oatmeal cookie. It’s my secret afternoon pick-me-up.
Storage: Place the bars in an airtight container, separated by layers of parchment paper so they don’t stick together. They’ll keep in the refrigerator for up to 2 weeks. I’ve also frozen them successfully for up to 3 months—just wrap each bar individually in plastic wrap, then place them in a freezer bag. Thaw overnight in the fridge or for about 15 minutes at room temperature.
One thing I’ve noticed: the flavors actually get better after a day or two in the fridge. The honey and peanut butter have time to meld together, and the oats soften just a little. They’re good on day one, but they’re incredible on day three.
These bars also travel beautifully. I’ve taken them on road trips, hikes, and even on a long flight. They don’t melt, they don’t crumble, and they don’t need refrigeration for a few hours. They’re the ultimate grab-and-go snack.
Nutritional Information & Benefits
These bars aren’t just delicious—they’re genuinely good for you. Here’s a rough breakdown per bar (based on 12 servings, using peanut butter, chocolate chips, and cranberries).
- Calories: Approximately 280
- Protein: 8g
- Fiber: 4g
- Fat: 16g (mostly healthy fats from peanut butter and coconut oil)
- Carbohydrates: 30g
- Sugar: 18g (natural sugars from honey and dried fruit)
The real benefits go beyond the numbers. Rolled oats are packed with soluble fiber, which helps keep your digestion regular and your blood sugar stable. Peanut butter provides protein and healthy monounsaturated fats that keep you full and satisfied. Honey offers natural energy without the crash of refined sugar. And the dark chocolate chips? They’re rich in antioxidants. Honestly, you could do a lot worse for a snack.
These bars are naturally dairy-free (if you use dairy-free chocolate chips) and can easily be made gluten-free by using certified gluten-free oats. They’re also free of refined sugars, artificial flavors, and preservatives. They’re the kind of snack you can feel good about giving your kids—or eating yourself.
Conclusion
These easy no-bake granola bars for healthy snacks have become a staple in my kitchen for a reason. They’re simple, reliable, and endlessly adaptable. They solve the real problem of what to eat when you’re hungry but don’t have time to cook, and they do it without any fuss or fancy ingredients. If you’re looking for a snack that actually works for real life—lunchboxes, road trips, afternoon slumps, post-workout refueling—this is it.
I’d love to hear how these turn out for you. Did you stick with the classic version, or did you go wild with mix-ins? Did you find a combination that blew your mind? Drop a comment below and share your creation. And if you’re looking for more easy, wholesome snacks, you might also enjoy these no-bake peanut butter oat energy bites or this quick ham and cheese roll-ups for another lunchbox-friendly option. Happy snacking—you’ve got this.
Frequently Asked Questions
Can I use quick oats instead of rolled oats?
You can, but the texture will be different. Quick oats are more finely chopped, so they absorb moisture faster and create a softer, almost cake-like bar. Rolled oats give you that classic chewy texture that holds up better. If you only have quick oats, reduce the honey by a tablespoon to compensate for the extra absorption.
Why are my granola bars crumbly?
This usually happens for one of three reasons: you didn’t press the mixture firmly enough into the pan, you didn’t chill them long enough, or your peanut butter was too oily. Next time, really lean into the pressing step and give them a full 2 hours in the fridge. If your peanut butter has a lot of separated oil, stir it well before measuring.
Can I make these without coconut oil?
Absolutely. You can substitute the coconut oil with an equal amount of butter (salted or unsalted) or even a neutral oil like avocado oil. Butter will give a slightly richer flavor, while avocado oil keeps them dairy-free. Just note that the bars may be slightly softer without the coconut oil’s firming properties.
How long do these bars last at room temperature?
They’re best stored in the fridge, but they’ll hold up at room temperature for about 24 hours without issues. If you’re taking them on a picnic or road trip, they’ll be fine for the day. Just don’t leave them in a hot car—the coconut oil will melt and the bars will lose their shape.
Can I double this recipe?
Yes, and I do it all the time. Just use a 9×13 pan instead of an 8×8, and double every ingredient. The chilling time stays the same. You’ll get about 24 bars, which is perfect for a busy family or for stocking the freezer. I often make a double batch on Sunday and we’re set for two weeks.
Pin This Recipe!
Easy No-Bake Granola Bars: Best Healthy Snack Recipe
These easy no-bake granola bars are a healthy, filling snack made with simple pantry ingredients like oats, peanut butter, and honey. They’re perfect for meal prep, lunchboxes, or a quick breakfast, and they stay chewy and delicious without any baking.
- Prep Time: 15 minutes
- Cook Time: 5 minutes
- Total Time: 2 hours 20 minutes (includes chilling)
- Yield: 12 bars 1x
- Category: Snack
- Cuisine: American
Ingredients
- 2 cups (180g) rolled oats
- 1 cup (250g) creamy peanut butter (natural, no-stir)
- ½ cup (170g) honey
- ¼ cup (60ml) coconut oil
- 1 teaspoon vanilla extract
- ¼ teaspoon salt
- ½ cup (60g) dark chocolate chips
- ½ cup (60g) dried cranberries
Instructions
- Line an 8×8-inch baking pan with parchment paper, leaving about 2 inches of overhang on two opposite sides. Set aside.
- In a medium saucepan over low heat, combine peanut butter, honey, and coconut oil. Stir constantly with a silicone spatula until melted and smooth, about 3-4 minutes.
- Remove from heat and stir in vanilla extract and salt.
- In a large mixing bowl, combine rolled oats, chocolate chips, and dried cranberries. Stir to distribute evenly.
- Pour the warm peanut butter mixture over the oat mixture. Fold together with a silicone spatula until every oat is coated and no dry pockets remain.
- Transfer the mixture to the prepared pan. Use the back of a spoon or a flat-bottomed measuring cup to press the mixture down firmly and evenly, especially into the corners.
- Refrigerate for at least 2 hours, or overnight, until firm.
- Lift the block out using the parchment overhang. Place on a cutting board and cut into 12 even bars (3 rows by 4 rows) with a sharp chef’s knife, wiping the knife clean between cuts.
Notes
Press the mixture firmly into the pan to prevent crumbly bars. Chill for at least 2 hours before cutting. For cleaner cuts, wipe the knife between slices. The bars can be stored in the refrigerator for up to 2 weeks or frozen for up to 3 months.
Nutrition
- Serving Size: 1 bar
- Calories: 280
- Sugar: 18
- Sodium: 120
- Fat: 16
- Saturated Fat: 6
- Carbohydrates: 30
- Fiber: 4
- Protein: 8
Keywords: no-bake granola bars, healthy snack, peanut butter granola bars, easy granola bars, homemade granola bars


