“Are you sure this won’t be a sticky mess?” my friend asked as I pulled the pan from the oven, the golden edges bubbling and a sweet marshmallow aroma filling the kitchen. Honestly, I wasn’t totally sure either—s’mores have this unpredictable charm when you move them from campfire sticks to a baking dish. But something about the gooey layers and that toasty marshmallow top just whispered ‘try me.’
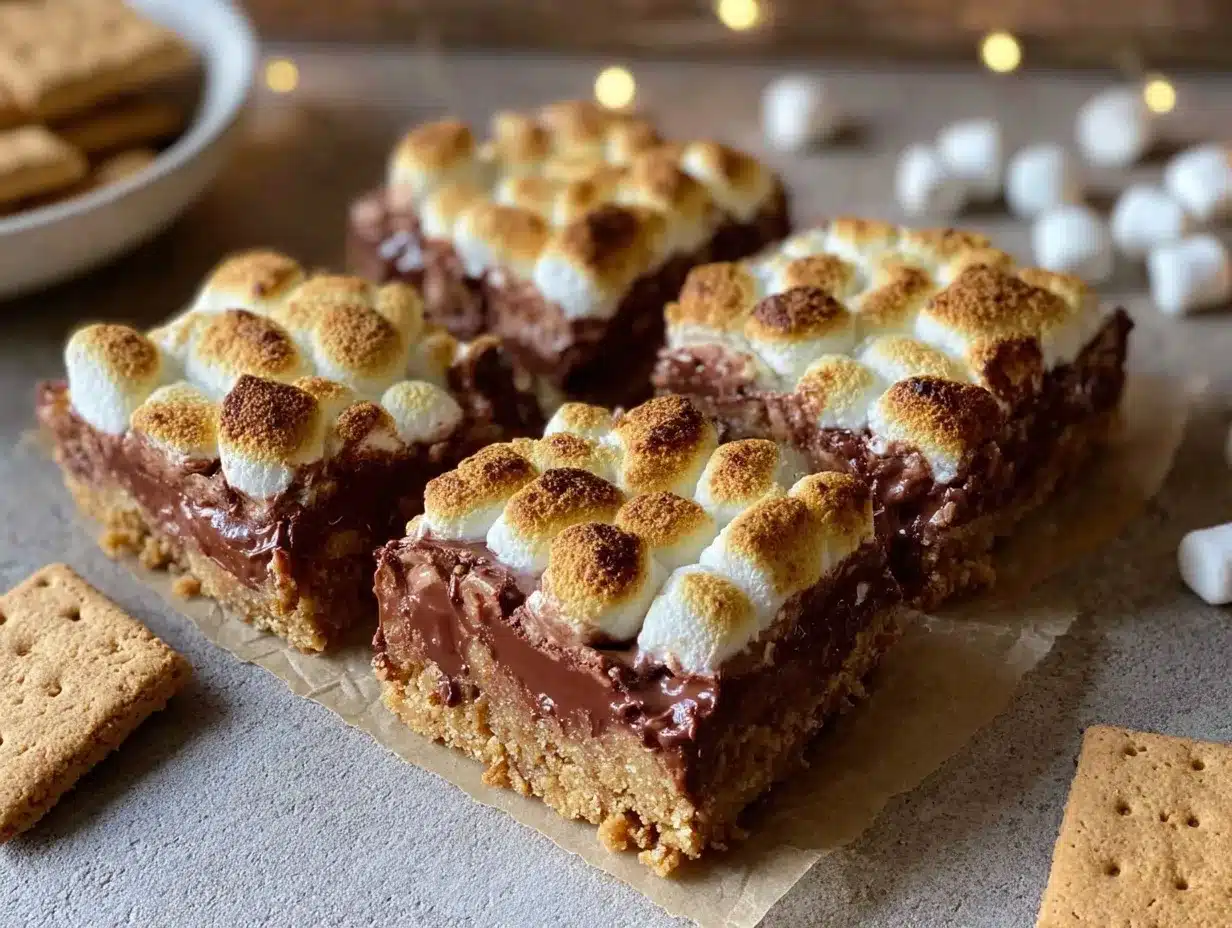
There was a moment, right as I cut the first bar, where the chocolate melted perfectly into the crunchy graham cracker crust and the marshmallow stretched just so, and I knew this was going to be a new obsession. I couldn’t stop making these Ultimate Gooey S’mores Bars. They’ve saved more than one low-energy evening and turned a lazy weekend into a cozy celebration. And don’t get me started on how they’ve become the surprise hit at casual get-togethers—friends keep asking if I’ll bring them again.
It’s funny how a simple craving for a campfire classic led to this homemade dessert bar that’s just the right mix of nostalgia and mess-free indulgence. No campfire needed—just a handful of ingredients and a little patience. What’s stuck with me, though, is that quiet moment when a gooey bite reminds you that comfort food doesn’t have to be complicated. This recipe is that kind of sweet, a little messy, and entirely worth it.
Why You’ll Love This Recipe
After countless batches and tweaks, I can say the Ultimate Gooey S’mores Bars recipe is a keeper. Here’s why it’s become my go-to dessert for everything from casual nights in to last-minute party contributions:
- Quick & Easy: It comes together in under 30 minutes, perfect for when you want something sweet without the fuss.
- Simple Ingredients: You probably have all the essentials already—graham crackers, marshmallows, chocolate, butter—no special trips required.
- Perfect for Any Occasion: Whether it’s an impromptu gathering or a cozy night with a good book, these bars hit the spot.
- Crowd-Pleaser: Kids, adults, picky eaters—everyone always asks for seconds.
- Unbelievably Delicious: The texture is just right: crispy edges, a chewy graham base, and that ooey-gooey marshmallow topping.
What really sets this recipe apart is the balance—no soggy bottom, no burnt marshmallows, just perfectly toasted fluff that melts into rich chocolate layers. I use a mix of semi-sweet and milk chocolate chips to get that deep, comforting flavor that feels indulgent but not overwhelming.
Honestly, this isn’t just another s’mores bar recipe. It’s the one that makes you pause, close your eyes, and savor every bite. I’ve even brought these to potlucks alongside other treats, like my favorite mini lemon blueberry cheesecakes, and they always steal the show. It’s comfort food, reimagined with a simple, fuss-free twist that feels just right.
What Ingredients You Will Need
This recipe uses simple, wholesome ingredients to deliver bold flavor and satisfying texture without the fuss. These pantry staples come together to create a nostalgic dessert that’s easy to customize.
- Graham Crackers: About 2 cups of finely crushed graham crackers, which form the crunchy, slightly sweet base. I prefer Honey Maid for a classic flavor.
- Unsalted Butter: 6 tablespoons (85g), melted, to bind the graham crust and add richness.
- Light Brown Sugar: 1/4 cup (50g), for a hint of molasses sweetness that deepens the crust flavor.
- Semi-Sweet Chocolate Chips: 1 1/2 cups (270g), the star of the show. Using a blend with milk chocolate chips can add creaminess.
- Large Marshmallows: About 3 cups (approx. 50 mini marshmallows or large marshmallows cut in halves). These give the gooey, toasty top layer.
- Vanilla Extract: 1 teaspoon for warmth and depth.
- Salt: A pinch to balance sweetness and bring out the flavors.
Substitution Tips: For a gluten-free option, swap the graham crackers for gluten-free ones or almond flour. If you want a dairy-free version, use dairy-free butter and chocolate chips, plus coconut-based marshmallows. In summer, tossing in fresh berries here or there adds a fresh twist, though it’s not traditional.
Equipment Needed
- 8×8 Inch Baking Pan: This size is perfect for these bars—if you don’t have one, a 9×9 pan works but expect thinner bars.
- Mixing Bowls: A couple of medium bowls for combining ingredients.
- Measuring Cups and Spoons: Precision helps, especially with sugar and butter.
- Spatula or Wooden Spoon: For mixing and spreading the crust evenly.
- Food Processor or Plastic Bag and Rolling Pin: To crush graham crackers finely. I’ve done it both ways; using a rolling pin and bag is just as effective and less cleanup.
- Oven Mitts: Safety first when handling the hot pan!
If you’re on a budget, the basic tools you already own will do just fine. No fancy equipment needed here—just a willingness to get a little messy with melted marshmallows (worth it, though). For cleanup, a non-stick spray or parchment paper in the pan can save some scrubbing.
Preparation Method
- Preheat your oven to 350°F (175°C). This gets things ready without waiting around. Line your 8×8 pan with parchment paper, leaving an overhang on the sides for easy bar removal.
- Make the graham cracker crust: Crush about 2 cups (200g) of graham crackers finely using a food processor or a plastic bag and rolling pin. In a medium bowl, mix the crushed graham crackers with 6 tablespoons (85g) melted unsalted butter and 1/4 cup (50g) light brown sugar. Add a pinch of salt and stir until the mixture resembles wet sand.
- Press the crust mixture firmly into the bottom of the prepared pan. I find using the back of a measuring cup helps pack it evenly and tightly. Bake for 10 minutes until lightly golden and fragrant. This step prevents sogginess later.
- Sprinkle 1 1/2 cups (270g) of semi-sweet chocolate chips evenly over the warm crust. The residual heat softens the chocolate slightly, making it easier to spread.
- Top with marshmallows: Use about 3 cups worth—mini marshmallows or large marshmallows cut in halves. Spread them evenly to cover the chocolate layer.
- Bake again for 12-15 minutes. Watch closely—the marshmallows should puff up and turn a golden brown, not burn. Oven temperatures vary, so keep an eye on that toasty top.
- Remove from oven and let cool completely. This usually takes around 30 minutes but is key for the bars to set and slice cleanly. Use the parchment paper overhang to lift the bars out of the pan.
- Cut into squares using a sharp knife. For cleaner cuts, wipe the knife between slices to avoid marshmallow sticking.
If you want to add a sprinkle of flaky sea salt on top right after baking, it adds a lovely contrast to the sweetness. Also, a quick tip: if your marshmallows start browning too fast before puffing, tent loosely with foil.
Cooking Tips & Techniques
Getting the perfect gooey texture isn’t magic—it’s about timing and a few tricks I learned the hard way. First off, don’t skip pre-baking the crust. I once tried skipping that step and ended up with a soggy bottom that nobody wanted to eat.
When spreading the marshmallows, don’t press them down; they need room to puff and get that golden top. If you want an extra toasty surface, you can finish the bars under the broiler for 30 seconds—but watch carefully, because marshmallows burn in a flash.
Using a mix of chocolate chips (semi-sweet and milk) balances sweetness and richness, but you can adjust to your preference. Also, don’t rush the cooling step; cutting when hot turns the bars into sticky blobs rather than neat squares.
Multitasking tip: while the crust is pre-baking, prep your chocolate and marshmallows so you’re ready to assemble right away. This keeps the oven time efficient.
And if you’re wondering about storage, these bars hold up well at room temperature for a day or two but are best refrigerated for longer freshness. Just bring them back to room temp before serving to get that gooey magic back.
Variations & Adaptations
This recipe is friendly to tweaks, so feel free to get creative. Here are a few ideas I’ve enjoyed:
- Peanut Butter Twist: Swirl a few tablespoons of peanut butter into the graham crust before baking for a nutty depth.
- Vegan Version: Use dairy-free butter, vegan marshmallows, and dark chocolate chips that don’t contain milk. I tried this for a friend once, and it was surprisingly just as gooey!
- Berry Boost: Add fresh raspberries or strawberries between the chocolate and marshmallow layers for a juicy pop of flavor.
- Salted Caramel: Drizzle caramel sauce over the marshmallows before baking, then sprinkle with sea salt after baking. It’s a decadent upgrade.
- Microwave Shortcut: If you’re pressed for time, assemble the layers in a microwave-safe dish and heat in short bursts, watching closely. It won’t brown the marshmallows but still gets warm and melty.
One of my favorite experiments was adding crushed pretzels to the crust for a salty crunch that contrasts the sweet layers. It’s a fun twist if you want to surprise your guests.
Serving & Storage Suggestions
These Ultimate Gooey S’mores Bars are best served at room temperature when the marshmallow topping is soft and stretchy. For a crowd, slice into small squares—people love little bites that pack a flavorful punch.
Pairing these bars with a cold glass of milk or a creamy coffee balances the sweetness nicely. They also make a fun dessert alongside lighter treats if you’re hosting, like the delicate mini lemon blueberry cheesecakes I recently baked.
For storage, keep the bars in an airtight container at room temperature for up to 2 days. After that, refrigeration keeps them fresh for about a week. When reheating, a quick 10-15 second zap in the microwave revives the gooey texture without melting the bars apart.
Flavors actually mellow and meld if you let the bars sit overnight, making them even tastier the next day. Just don’t wait too long—or you’ll run out!
Nutritional Information & Benefits
Each bar contains roughly 250-300 calories depending on size, with a mix of carbohydrates from the graham crackers and sugars, plus fats from butter and chocolate. While this isn’t a health food, the recipe uses real ingredients without artificial additives.
Graham crackers provide some fiber, and the dark chocolate chips offer antioxidants. Marshmallows are mostly sugar, so enjoy these bars as an occasional treat. If you want to lighten the recipe, try swapping half the butter for unsweetened applesauce or use reduced-fat chocolate chips.
This dessert fits nicely into a balanced diet when eaten mindfully, and honestly, sometimes you just need that indulgent, nostalgic bite to brighten the day.
Conclusion
The Ultimate Gooey S’mores Bars recipe has become one of those treats I reach for when I want simple, satisfying comfort food that feels a little special. It’s easy enough for a weeknight dessert but impressive enough to bring to a friend’s house or party. The gooey marshmallow top, melty chocolate, and crunchy graham crust come together in a way that just works—no fuss, just pure enjoyment.
Feel free to make it your own, experiment with flavors, or keep it classic. This recipe has stuck with me because it’s honest, approachable, and reminds me that sometimes the best desserts come from the simplest ideas—plus a bit of patience while the marshmallows get that perfect golden toast.
If you give it a try, I’d love to hear how you tweaked it or what memories it brought up. Sharing recipes like this is what makes cooking fun, don’t you think?
FAQs
Can I use regular marshmallows instead of mini marshmallows?
Yes! Simply cut large marshmallows in halves or thirds to spread evenly. The baking time stays the same, but watch for browning closely.
How do I prevent the bars from sticking to the pan?
Line your baking pan with parchment paper, leaving an overhang on the sides. This makes lifting the bars out easy and keeps them from sticking.
Can I prepare these bars ahead of time?
Absolutely. Bake the bars and store them in an airtight container at room temperature for up to 2 days or refrigerate for up to a week. Reheat briefly before serving for best texture.
Is there a gluten-free version of this recipe?
Yes, replace graham crackers with gluten-free alternatives or almond flour. Just make sure all other ingredients are gluten-free certified.
What’s the best way to cut the bars without making a mess?
Let the bars cool completely before cutting. Use a sharp knife and wipe it clean between cuts to prevent marshmallow sticking.
Pin This Recipe!
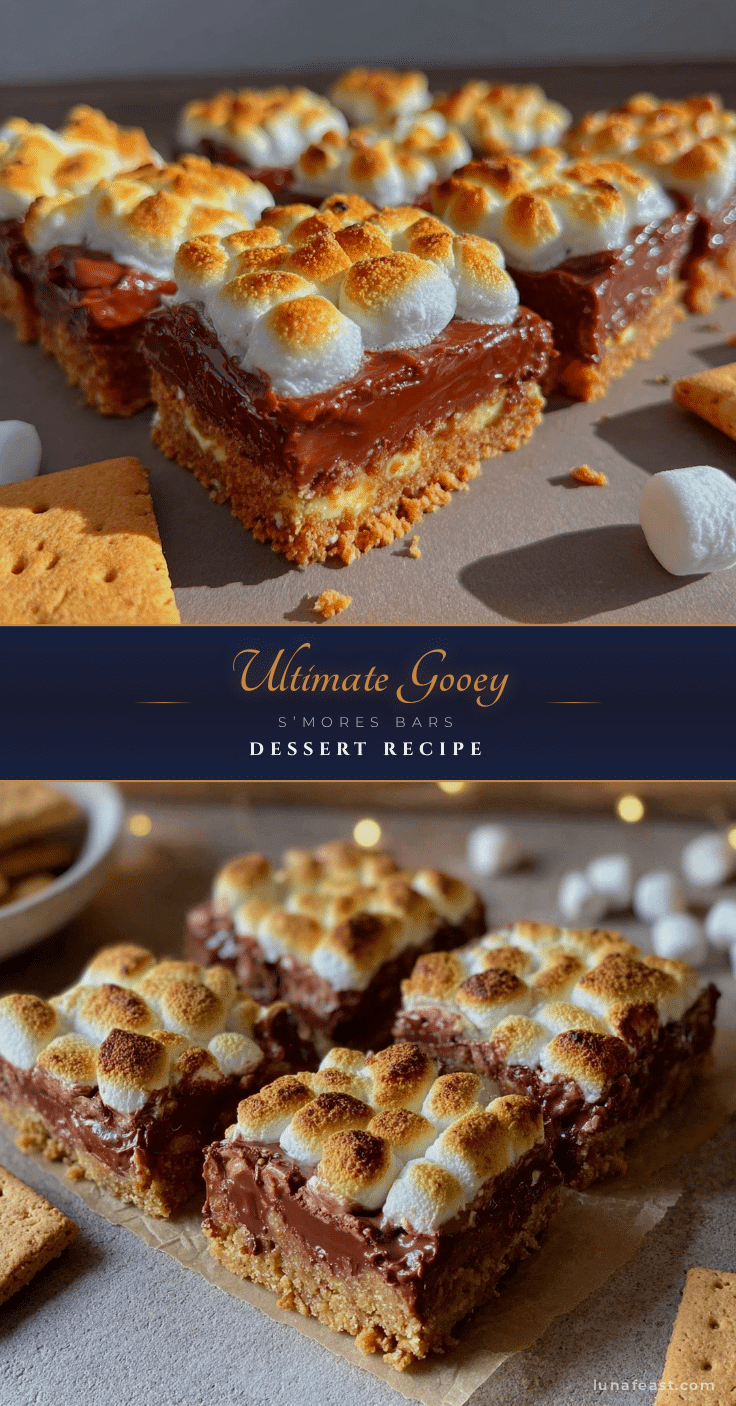
Ultimate Gooey S’mores Bars

These Ultimate Gooey S’mores Bars are a nostalgic, mess-free twist on the classic campfire treat, featuring a crunchy graham cracker crust, melty chocolate, and a toasty marshmallow topping.
- Prep Time: 10 minutes
- Cook Time: 25 minutes
- Total Time: 35 minutes
- Yield: 16 bars 1x
- Category: Dessert
- Cuisine: American
Ingredients
- 2 cups finely crushed graham crackers (about 200g)
- 6 tablespoons (85g) unsalted butter, melted
- 1/4 cup (50g) light brown sugar
- 1 1/2 cups (270g) semi-sweet chocolate chips (mix with milk chocolate chips if desired)
- 3 cups large marshmallows (or about 50 mini marshmallows, or large marshmallows cut in halves)
- 1 teaspoon vanilla extract
- Pinch of salt
Instructions
- Preheat your oven to 350°F (175°C). Line an 8×8 inch baking pan with parchment paper, leaving an overhang on the sides for easy removal.
- Crush the graham crackers finely using a food processor or a plastic bag and rolling pin.
- In a medium bowl, mix the crushed graham crackers with melted butter, light brown sugar, and a pinch of salt until the mixture resembles wet sand.
- Press the crust mixture firmly into the bottom of the prepared pan using the back of a measuring cup to pack it evenly and tightly.
- Bake the crust for 10 minutes until lightly golden and fragrant.
- Sprinkle the semi-sweet chocolate chips evenly over the warm crust.
- Top with marshmallows, spreading them evenly to cover the chocolate layer.
- Bake again for 12-15 minutes, watching closely until marshmallows puff up and turn golden brown but do not burn.
- Remove from oven and let cool completely (about 30 minutes) to set the bars.
- Use the parchment paper overhang to lift the bars out of the pan and cut into squares with a sharp knife, wiping the knife between slices to avoid sticking.
Notes
Pre-bake the crust to avoid sogginess. Do not press marshmallows down to allow puffing. Watch marshmallows closely to prevent burning. Let bars cool completely before cutting for clean slices. For extra toasty marshmallows, broil for 30 seconds but watch carefully. Store in airtight container at room temperature for up to 2 days or refrigerate for up to a week. Reheat briefly in microwave to restore gooey texture.
Nutrition
- Serving Size: 1 bar (if cut into 1
- Calories: 275
- Sugar: 22
- Sodium: 120
- Fat: 14
- Saturated Fat: 8
- Carbohydrates: 35
- Fiber: 2
- Protein: 3
Keywords: s’mores bars, gooey dessert, easy dessert bars, homemade s’mores, marshmallow bars, chocolate dessert, graham cracker crust