My seven-year-old stared at the empty counter with the intensity of a bomb disposal expert. It was 4:30 PM on a Tuesday, and the school Halloween party was tomorrow morning. We had zero decorations, zero cookies, and absolutely zero time to go to the store before the early drop-off window closed. The fridge was a sad landscape of wilted spinach and a half-empty tub of chocolate pudding mix. Honestly, panic started to set in, but then I remembered the bag of Oreo cookies hiding in the back of the pantry and the jar of gummy worms I’d bought for a craft project three years ago. We didn’t have time for baking. We didn’t have time for fancy frosting piping. We just needed something that looked like a grave, tasted like dessert, and could be assembled in the time it takes to boil water. That frantic afternoon birthed the spooky Halloween dirt cups with gummy worms that would soon become the star of the classroom party. It wasn’t planned. It was a rescue mission fueled by stale cookies and sheer desperation. But you know what? It worked.
These cups are the perfect solution when your creative energy is low but your need for seasonal fun is high. They look incredibly complicated, which is exactly what you want when dealing with judgmental third graders. The visual of dark “dirt” with squiggly worms poking out is instantly recognizable and endlessly fun. Plus, they are completely mess-free for the kids to eat, which is a huge win for any parent trying to avoid a sugar-induced meltdown in the minivan. I remember standing in the kitchen, crumbling cookies with a rolling pin while my kid watched like a hawk, waiting for the magic to happen. When we finished, the look of triumph on their face was worth every crumb. It’s a recipe that saves the day when you least expect it.
The real magic happens when you add that layer of creamy cheesecake filling. It balances the dryness of the cookie crumbs and gives the dessert a rich, tangy profile that feels indulgent. We tried using just pudding first, but it was too sweet and lacked body. The cream cheese adds that necessary structure. It’s a small detail that makes a big difference. Now, every time October hits, I think of that chaotic Tuesday. It taught me that the best recipes aren’t always the most elegant ones; sometimes they are the ones that save your sanity. And honestly, who doesn’t love a dessert that lets them pretend they are gardening while eating cake?
Why You’ll Love This Recipe
This spooky Halloween dirt cups with gummy worms recipe isn’t just a quick snack; it’s a tested and true classroom favorite that has survived countless parties. As someone who has spent years developing recipes for busy families, I know that time is your most valuable currency. This recipe delivers maximum impact with minimal effort. I’ve tested this with everything from boxed pudding mixes to scratch-made cheesecake fillings, and the version below hits the sweet spot between convenience and gourmet taste. It’s not just about speed; it’s about reliability. You won’t end up with a soupy mess or a dry crumble if you follow these steps. It’s the kind of dessert that feels homemade but requires zero baking skills.
- Quick & Easy: This comes together in under 15 minutes. No oven required, no standing over a stove, and no intricate piping bags. It is perfect for busy weeknights or last-minute party prep when you realize you forgot to buy treats.
- Simple Ingredients: You likely already have everything in your kitchen right now. Oreos, cream cheese, pudding mix, and milk. No fancy grocery trips needed, no obscure spices, and no special ordering online. It uses pantry staples that most people keep on hand.
- Perfect for Halloween Parties: Great for classroom celebrations, trick-or-treat exchanges, or spooky movie nights. The presentation is inherently festive, so you don’t need to buy extra decorations. The cups speak for themselves.
- Crowd-Pleaser: Always gets rave reviews from kids and adults alike. The texture contrast between the crunchy dirt and the smooth cream is universally liked. Even picky eaters who usually refuse “fun” foods will dive into this.
- Unbelievably Delicious: The texture and flavor combo is next-level comfort food. The tang of the cream cheese cuts through the sweetness of the chocolate, creating a balanced bite that isn’t cloying. It feels like a mini cheesecake disguised as dirt.
What makes this recipe different from the rest is the ratio of the filling to the crumbs. Many recipes online use too much pudding, making it runny. I recommend using a thicker cheesecake-style filling that holds its shape. This ensures that when you scoop it, it stays on the spoon. It’s a small technical adjustment that elevates the entire experience. Connect emotionally by tapping into the joy of simple pleasures. This recipe isn’t just good—it is the kind that makes you close your eyes after the first bite. It’s comfort food reimagined for the spooky season. Perfect for impressing guests without stress, or turning a simple Tuesday dinner into something memorable.
What Ingredients You Will Need
This recipe uses simple, wholesome ingredients to deliver bold flavor and satisfying texture without the fuss. The beauty of these dirt cups lies in the quality of your base ingredients. Since there are only a few components, each one plays a critical role in the final taste and texture. You don’t need organic, artisanal products, but using good quality chocolate cookies and full-fat dairy makes a noticeable difference. Here is what you will need to create your spooky masterpiece.
- Oreo Cookies (or similar chocolate sandwich cookies): You will need about 20-24 cookies. These form the “dirt.” For the best texture, look for standard Oreos. If you need a gluten-free option, you can substitute with gluten-free chocolate sandwich cookies, though they may be slightly drier. I personally recommend using the original flavor for that classic dark look.
- Cream Cheese (Full Fat): Use 8 ounces of block-style cream cheese, softened to room temperature. Avoid the tub-style whipped cream cheese, as it contains too much air and water, which will make your filling runny. Brands like Philadelphia are reliable for their consistency. This provides the rich, tangy base that mimics a cheesecake.
- Heavy Cream or Whipping Cream: You need 1 cup of cold heavy cream to whip into soft peaks. This adds volume and lightness to the filling. If you want a lighter version, you can use half-and-half, but the texture won’t be as fluffy. Make sure your bowl and beaters are chilled for best results.
- Instant Chocolate Pudding Mix: A 3.4-ounce box of instant pudding mix adds intense chocolate flavor and helps thicken the filling. Jell-O is a trusted brand for this. Do not use the “cook and serve” variety; it requires boiling and changes the texture entirely. The instant mix dissolves quickly in the cold cream.
- Milk: You will need 2 cups of cold milk to mix with the pudding powder. Whole milk works best for richness, but 2% or even almond milk can be used if dairy intake is limited. Keep it cold to help the cream whip properly.
- Vanilla Extract: Add 1 teaspoon of pure vanilla extract to enhance the sweetness and round out the chocolate flavors. Artificial vanilla can taste harsh, so try to use a real extract if you have it.
- Gummy Worms: A standard bag of gummy worms is all you need for garnish. You can use sour worms for a tart kick or regular sweet worms for a classic look. Just ensure they are clean and fresh. They are the visual hook that makes the dessert fun.
- Clear Plastic Cups or Jars: While not an ingredient, the vessel matters. Use small, clear plastic cups or mason jars so the layers are visible. This allows the “dirt” effect to shine through. Avoid opaque containers, as the visual appeal is half the fun.
Substitution guidance: If you are avoiding dairy, you can use dairy-free cream cheese blocks (like Miyoko’s or Kite Hill) and coconut cream instead of heavy cream. The texture will be slightly different but still delicious. For a nut-free environment, ensure your cookies are certified nut-free, as some chocolate processors share equipment with nut facilities.
Equipment Needed
You don’t need a professional kitchen to make these dirt cups, but having the right tools will save you time and frustration. The most important piece of equipment is a sturdy mixing bowl. A large glass or stainless steel bowl is ideal because it is heavy and won’t slide around while you are whipping the cream. If you are using an electric hand mixer, make sure it has beaters that are long enough to reach the bottom of the bowl. A mixer is highly recommended because whipping the cream and cream cheese by hand takes significant effort and arm strength. Your average wrist isn’t built for that kind of repetitive motion.
Next, you need a way to crush the cookies. A food processor is the fastest option, giving you perfectly uniform crumbs in seconds. However, if you don’t have one, a heavy-duty blender works well too. For a budget-friendly, no-electricity option, a heavy glass mason jar with a tight lid is perfect. Toss the cookies in and shake it like crazy. It’s surprisingly effective and adds a bit of exercise to your prep. You will also need a rolling pin or a heavy-bottomed pan if you choose to crush them by hand inside a Ziploc bag. Lay the bag flat on a counter and roll over it firmly.
A whisk is useful for combining the pudding mix with the milk before adding it to the cream cheese mixture. Make sure your whisk is clean and dry. Finally, you need measuring cups and spoons for accuracy. While baking is precise, this recipe is forgiving, but getting the milk-to-pudding ratio right ensures the filling sets properly. If you skip measuring, you might end up with a soup. So, grab your tools, and let’s get started. It’s simple, straightforward, and requires very little cleanup.
Preparation Method
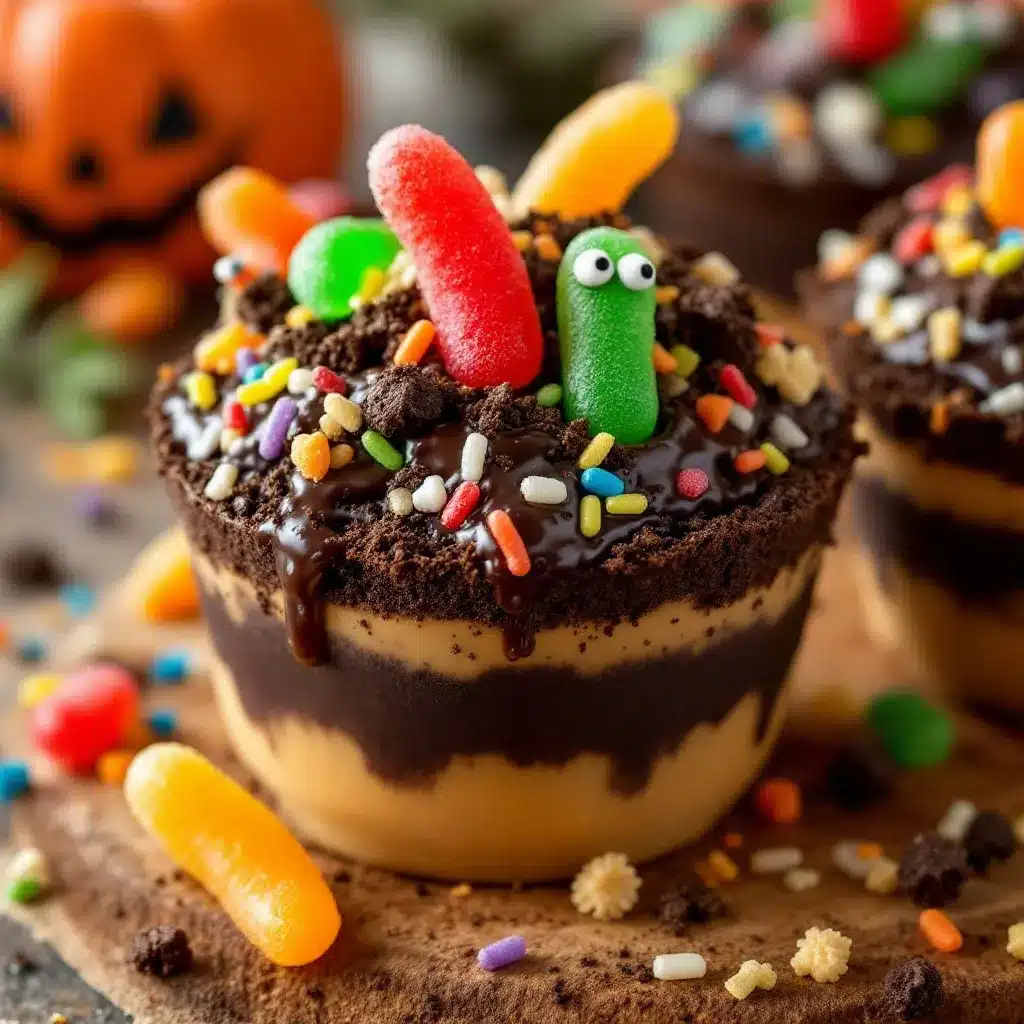
Making these dirt cups is a process of assembly, but the order matters. We want distinct layers and a filling that is thick enough to hold its shape. Follow these steps carefully for the best results. Don’t rush the whipping step; that is where the texture is created.
- Crush the Cookies: Take 20-24 Oreo cookies and place them in a food processor. Pulse until they are fine crumbs. If you don’t have a processor, put them in a Ziploc bag, seal it tight, and crush them with a rolling pin until no large chunks remain. You want about 2 cups of crumbs. Transfer the crumbs to a bowl and set aside. (Time: 2 minutes)
- Whip the Heavy Cream: In a large, chilled bowl, pour 1 cup of cold heavy cream. Using an electric mixer on medium-high speed, whip the cream until soft peaks form. This means when you lift the beater, the cream should hold a shape that droops slightly. Do not over-whip it into butter. (Time: 3-4 minutes)
- Prepare the Cream Cheese Base: In a separate medium bowl, beat the softened 8-ounce block of cream cheese until it is smooth and creamy. Add the instant chocolate pudding mix and the vanilla extract. Beat on low speed until combined. The mixture will look thick and dense at this stage. (Time: 2 minutes)
- Mix the Pudding and Milk: In a third bowl, whisk together the remaining instant pudding mix (if you haven’t added it all to the cheese) with 2 cups of cold milk. Wait for 2 minutes as directed on the box to let it thicken. If you added the pudding to the cream cheese in step 3, skip this and just whisk the milk separately. Actually, the best method is to whisk the pudding mix with the milk first, let it thicken for 2 minutes, then fold it into the cream cheese and whipped cream. Let’s stick to that: Whisk pudding mix with 2 cups milk. Let sit for 2 minutes until thick. (Time: 3 minutes including wait)
- Combine the Filling: Gently fold the thickened pudding mixture into the whipped cream. Then, fold in the cream cheese mixture. Use a spatula and be gentle. You want to keep the air in the cream so the filling stays fluffy. Fold until just combined and no white streaks remain. The final consistency should be like a thick mousse. (Time: 2 minutes)
- Assemble the Cups: Take your clear plastic cups. Add a layer of the chocolate cream filling to the bottom, about 1/3 of the way up. Then, add a layer of the cookie crumbs on top. Repeat this layering process until the cup is full, ending with a layer of crumbs on top. You want the “dirt” to be the top layer so the worms can stick out. (Time: 5 minutes)
- Add the Worms: Take your gummy worms and poke them into the top layer of cookie crumbs. You can push them in vertically or twist them for a spookier look. Add as many as you like. (Time: 2 minutes)
- Chill and Serve: Place the cups in the refrigerator for at least 30 minutes before serving. This helps the layers set and the flavors meld together. Remove from the fridge just before the party starts. (Time: 30 minutes chill)
If your filling seems too thin, you can add a bit more pudding mix or chill it longer. If it’s too thick, add a splash more milk. Trust your eyes during the folding process.
Cooking Tips & Techniques
There are a few professional tricks that separate a good dirt cup from a great one. The biggest mistake people make is using whipped topping (like Cool Whip) instead of whipped cream. While convenient, it lacks the rich mouthfeel of real dairy. If you must use it, mix it with a little cream cheese to add body. Another key technique is ensuring your cream cheese is truly softened. If it has little lumps, they won’t blend into the smooth filling, and you’ll get gritty bites. Leave it on the counter for at least an hour before you start.
When crushing the cookies, don’t crush them into dust. You want some small chunks left in the crumbs. This adds texture and mimics real dirt better than fine powder. Think of it as gravel, not sand. Also, keep your equipment cold. If your bowl is warm, the heavy cream will not whip up properly. Pop your mixing bowl in the freezer for 10 minutes before you start. This small step ensures a light, airy filling. I learned this the hard way when I made these on a hot summer day and ended up with dense, heavy cups. Never again.
Timing is also crucial. If you assemble the cups too early, the bottom layer of cream can make the bottom layer of crumbs soggy. Try to assemble them no more than 4-5 hours before serving. If you need to make them a day ahead, keep the components separate and assemble right before the party. This maintains the crunch. Multitasking helps here: start crushing cookies while the cream chills. It keeps the workflow smooth and reduces stress. Consistency is key, so measure your milk accurately. Too much milk makes the pudding runny; too little makes it stiff.
Variations & Adaptations
While the classic chocolate version is a hit, you can easily adapt this recipe to suit different tastes or dietary needs. Here are a few variations I’ve tried with success.
- Green Witch Dirt: Swap the chocolate pudding for vanilla or banana pudding. Add a few drops of green food coloring to the cream cheese mixture. Use chocolate cookies for the “dirt” and add gummy bats or spiders instead of worms. This creates a swampy, green aesthetic that is perfect for Halloween.
- Strawberry Shortcake Dirt: Use strawberry pudding mix and vanilla cream cheese. Use strawberry Oreos if you can find them, or regular Oreos. Garnish with fresh strawberry slices and mini gummy worms. This adds a fruity twist that is lighter and less chocolate-heavy.
- Gluten-Free Option: Use certified gluten-free chocolate sandwich cookies. Most major brands now offer GF versions. Ensure your cream cheese and pudding mix are also labeled gluten-free, as some pudding mixes contain modified food starch that may be derived from wheat (though usually corn). Double-check labels.
- Dairy-Free Version: Use coconut cream (the hard part from a can of full-fat coconut milk) instead of heavy cream. Use dairy-free cream cheese blocks. Use dairy-free cookies. The flavor will be more coconut-forward, which pairs surprisingly well with chocolate.
I once tried making these with pumpkin spice pudding for autumn. It was good, but the texture was a bit grainy. The chocolate version remains the gold standard for a reason. You can also customize the worms. Sour worms add a nice tang that cuts the sweetness. For a non-candy option, use pretzel sticks broken in half to look like bones. It’s a fun way to involve kids in the customization process.
Serving & Storage Suggestions
These dirt cups are best served chilled. The cold temperature enhances the flavor of the chocolate and keeps the cream firm. Present them on a platter with a spooky tablecloth. You can add fake cobwebs around the cups for extra ambiance. They pair well with cold milk or hot chocolate. For a party setting, arrange them in rows like a graveyard.
If you have leftovers, store them in the refrigerator in an airtight container. They will keep for up to 3 days. However, the cookie crumbs will absorb moisture from the cream over time, so they will lose their crunch. For best quality, consume within 24 hours. Do not freeze them, as the cream cheese filling will separate and become watery when thawed. Reheating is not recommended; this is a cold dessert. If the tops look dry, you can add a fresh sprinkle of crumbs before serving. The flavors develop slightly overnight, becoming more cohesive.
Nutritional Information & Benefits
While these are definitely a treat, understanding the nutritional profile helps you plan accordingly. Each cup contains approximately 350-400 calories, depending on the size of the cup and the amount of cream used. The primary sources of calories are the sugar in the cookies and pudding, and the fat in the cream cheese and heavy cream. They are high in carbohydrates and sugars, so portion control is wise.
On the positive side, the cream cheese provides calcium and protein, which helps balance the sugar spike slightly. The cookies offer some iron. For those with dietary restrictions, be aware that this recipe contains dairy, gluten, and soy (in the pudding mix and cookies). It is not suitable for vegans or those with severe allergies. Personally, I view this as a fun, occasional indulgence rather than a health food. It brings joy and fits perfectly into the Halloween tradition. Enjoy it in moderation and share the love.
Conclusion
Spooky Halloween dirt cups with gummy worms are the perfect blend of fun, flavor, and ease. They require minimal effort but deliver maximum satisfaction, making them ideal for any Halloween celebration. I hope you try this recipe and create some happy memories in your kitchen. Feel free to customize the colors and toppings to match your theme. I love this recipe because it brings out the inner child in all of us. It’s simple, effective, and delicious. Please leave a comment below with your variations or photos of your creations. I love seeing how you make it your own. Share this with a friend who needs a last-minute party idea. Happy Halloween!
FAQs
Can I make these dirt cups ahead of time?
Yes, you can assemble them up to 24 hours in advance. Store them in the refrigerator covered with plastic wrap. Keep in mind that the cookie crumbs may soften slightly over time, so they might not be as crunchy the next day. For best texture, assemble closer to serving time.
What can I use instead of Oreos?
You can use any chocolate sandwich cookies, such as Nilla Wafers (for a lighter color), chocolate chip cookies, or gluten-free chocolate cookies. The key is to have a chocolate cookie that crumbles well. Dark chocolate cookies will give a richer, less sweet flavor.
Can I use homemade whipped cream?
Absolutely. Homemade whipped cream works beautifully. Just ensure it is whipped to stiff peaks so it can support the weight of the pudding and cream cheese mixture. You may need to adjust the amount of milk in the pudding if the cream is very firm.
How many dirt cups does this recipe make?
This recipe typically makes 8-10 individual cups, depending on the size of the cups you use. If you use small shot-glass sized cups, you might get 12-15. It’s a flexible recipe that can be doubled easily for larger parties.
Why is my filling runny?
If the filling is runny, it is likely because the cream cheese wasn’t fully incorporated, the pudding didn’t thicken enough, or the heavy cream wasn’t whipped properly. Make sure to use cold heavy cream and whip it until peaks form. Also, ensure the cream cheese is smooth before adding other ingredients.
Pin This Recipe!
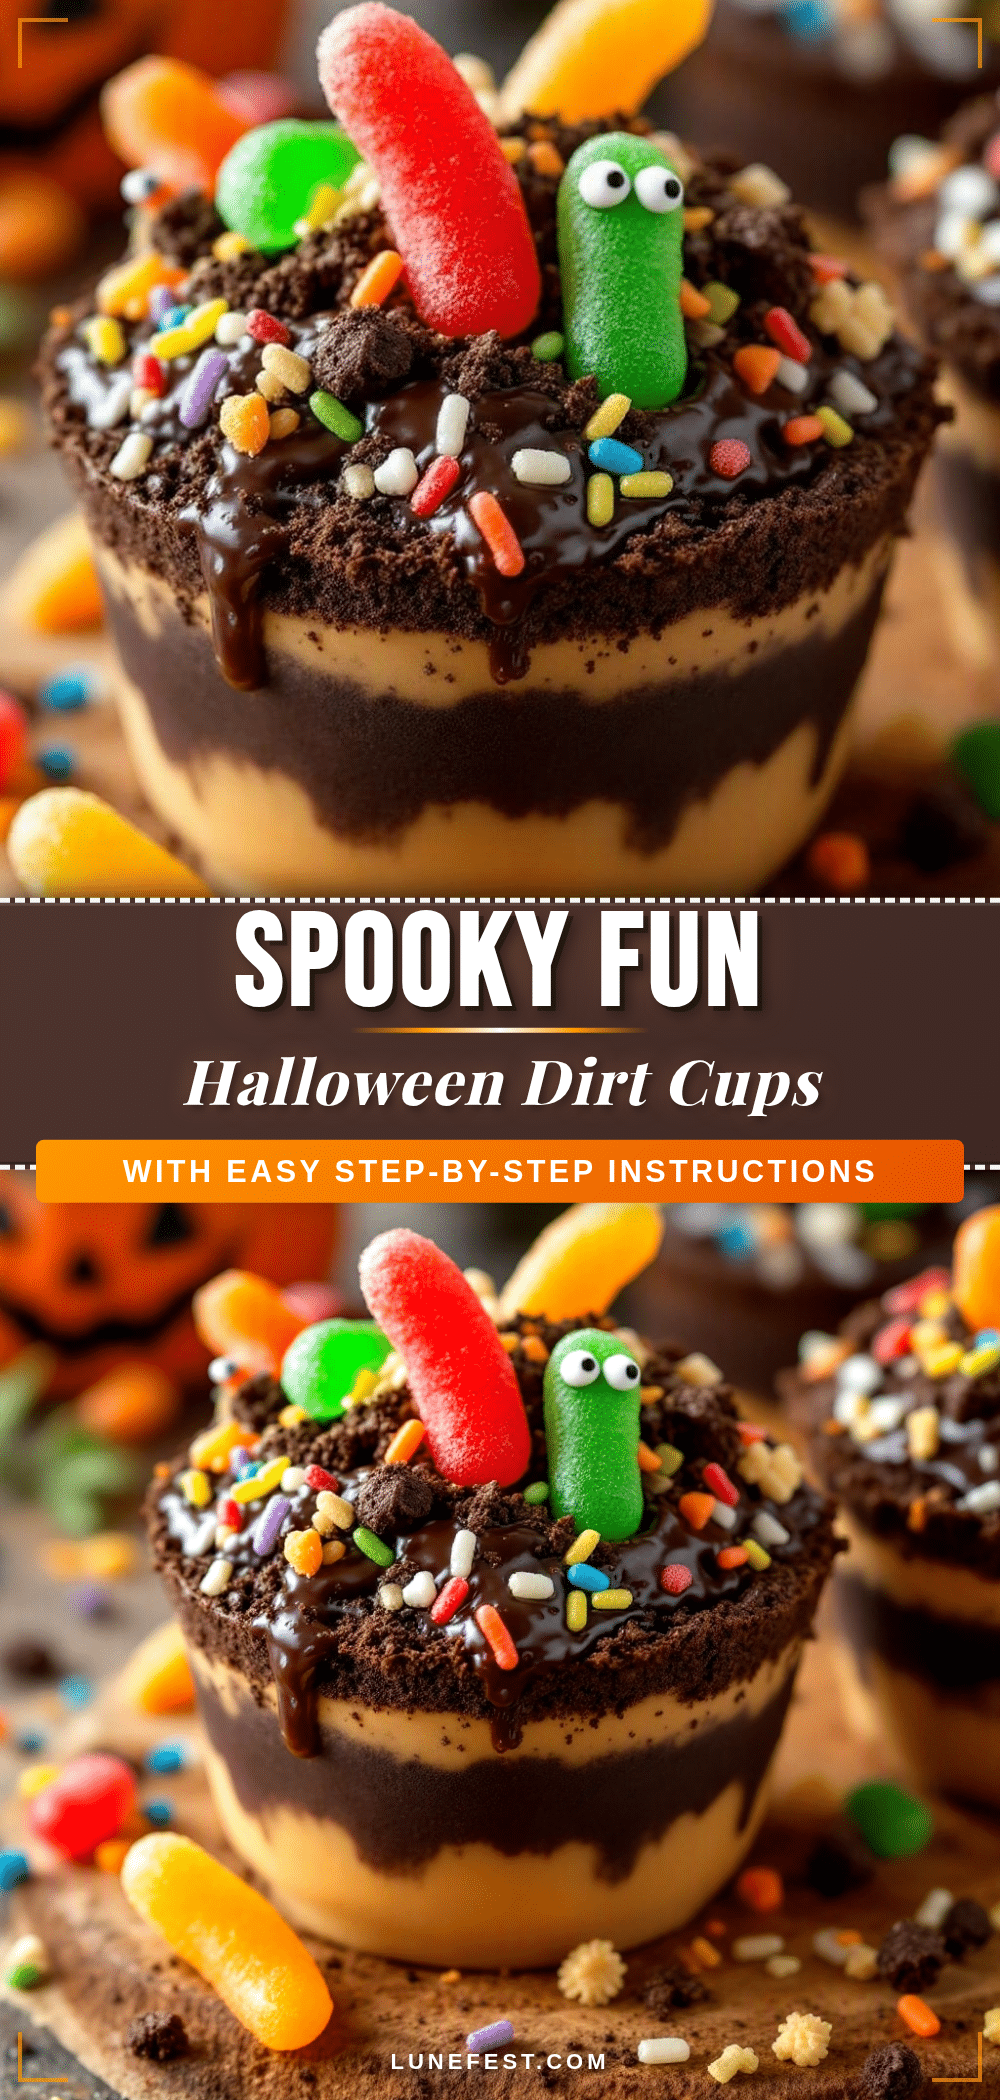
Spooky Halloween Dirt Cups with Gummy Worms

A quick, no-bake Halloween dessert featuring layers of chocolate cookie ‘dirt’ and a creamy cheesecake-style pudding filling, topped with gummy worms. Perfect for last-minute parties and kid-friendly fun.
- Prep Time: 15 minutes
- Cook Time: 0 minutes
- Total Time: 45 minutes
- Yield: 8-10 servings 1x
- Category: Dessert
- Cuisine: American
Ingredients
- 20–24 Oreo cookies (or similar chocolate sandwich cookies)
- 8 ounces full-fat block cream cheese, softened to room temperature
- 1 cup cold heavy cream or whipping cream
- 3.4-ounce box instant chocolate pudding mix
- 2 cups cold milk
- 1 teaspoon pure vanilla extract
- 1 bag gummy worms (for garnish)
- Clear plastic cups or mason jars (for serving)
Instructions
- Crush the cookies: Place 20-24 Oreo cookies in a food processor and pulse until fine crumbs form (about 2 cups). Alternatively, crush them in a sealed Ziploc bag using a rolling pin. Set aside.
- Whip the heavy cream: In a large, chilled bowl, whip 1 cup of cold heavy cream on medium-high speed until soft peaks form. Do not over-whip.
- Prepare the cream cheese base: In a separate medium bowl, beat the softened cream cheese until smooth. Add the instant chocolate pudding mix and vanilla extract, beating on low until combined.
- Mix the pudding and milk: In a third bowl, whisk the instant pudding mix with 2 cups of cold milk. Let sit for 2 minutes until thickened.
- Combine the filling: Gently fold the thickened pudding mixture into the whipped cream. Then, fold in the cream cheese mixture until just combined and no white streaks remain. The consistency should be like a thick mousse.
- Assemble the cups: Add a layer of the chocolate cream filling to the bottom of each cup (about 1/3 full). Top with a layer of cookie crumbs. Repeat layers until the cup is full, ending with a layer of crumbs on top.
- Add the worms: Poke gummy worms into the top layer of cookie crumbs.
- Chill and serve: Refrigerate for at least 30 minutes before serving to allow layers to set.
Notes
Ensure cream cheese is fully softened to avoid lumps. Keep equipment cold to help the heavy cream whip properly. For best texture, assemble no more than 4-5 hours before serving to prevent soggy crumbs. Store leftovers in the refrigerator for up to 3 days, though they are best consumed within 24 hours.
Nutrition
- Serving Size: 1 cup
- Calories: 375
- Sugar: 30
- Sodium: 250
- Fat: 22
- Saturated Fat: 12
- Carbohydrates: 42
- Fiber: 2
- Protein: 5
Keywords: Halloween dessert, no-bake treats, dirt cups, gummy worms, Oreo cookies, kid-friendly snacks, classroom party ideas, quick desserts


