The crackle of a gingersnap crust under a fork — that’s the whole point of these bars. Not the creamy pumpkin layer, not the swirl of cheesecake on top, though those are important. No, what I was chasing that first chilly October afternoon was that specific, sandy-snapping sound when the fork tines hit the crust and it gives way with a little crunch. Everything else is secondary.
I was standing in my kitchen, staring at a can of pumpkin puree I’d bought on impulse. It was one of those days where the air had that sharp, turning-leaf smell, and I wanted something that felt like fall but didn’t require pulling out my springform pan and fussing with a water bath. I’d made pumpkin cheesecake before — the full, tall version — and honestly, I love it. But sometimes you want the same flavors without the ceremony. You want a slice of something that feels special but doesn’t demand a clean kitchen afterward.
So I grabbed a box of gingersnaps (store-bought, no shame), a block of cream cheese, and started playing around. The first batch was too soft. The second had a crust that crumbled into sad little bits. But the third — the third had that crackle. That perfect, snappy bottom layer that held everything together while the pumpkin cheesecake sat on top like a little pillow of autumn. It felt like I’d cracked a code nobody asked me to solve.
These bars are the kind of thing you make when you want to impress without the stress. They look like you spent hours, but the truth is, they come together faster than you’d think. And that first bite, where the gingersnap crunch meets the silky pumpkin filling? That’s the moment you’ll know why I kept testing.
Why You’ll Love This Recipe
I’ve tested this recipe more times than I care to admit, and here’s what I’ve learned: these bars hit that sweet spot between impressive and doable. They’re not fussy, but they look like you fussed. Here’s why they’ll become your go-to fall dessert.
- Quick & Easy: The whole thing comes together in about 45 minutes of active time. No water bath, no springform pan, no stress. You mix, press, pour, and bake.
- Simple Ingredients: You probably have most of this stuff already. Pumpkin puree, cream cheese, eggs, sugar, spices. The gingersnaps are the only “special” ingredient, and they’re in every grocery store this time of year.
- Perfect for Fall Gatherings: These bars are basically made for Thanksgiving, Friendsgiving, or any cozy fall get-together. They travel well, they slice cleanly, and they disappear fast.
- Crowd-Pleaser: I’ve served these to kids, adults, and that one picky friend who “doesn’t like pumpkin.” They all went back for seconds. The gingersnap crust is the secret weapon — it’s spicy and sweet in a way that even non-pumpkin people can get behind.
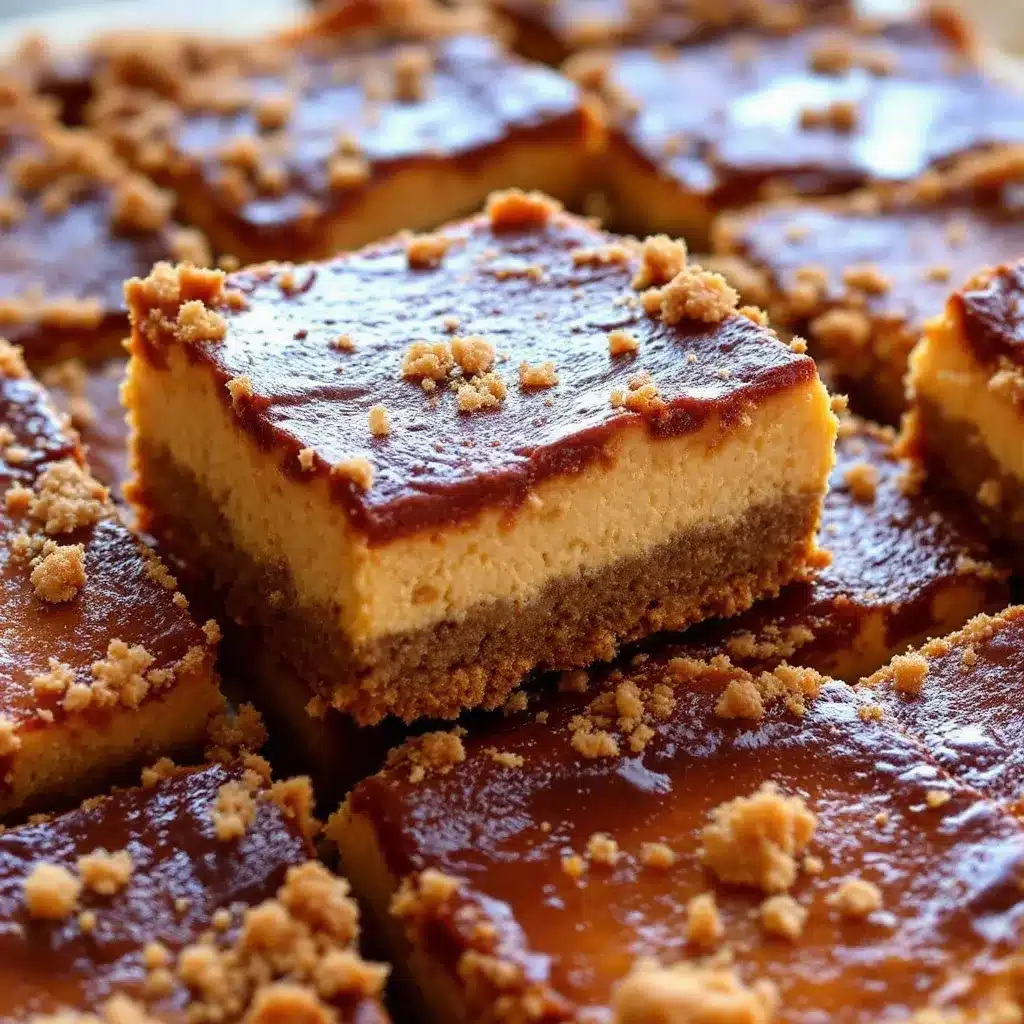
- Unbelievably Delicious: The texture is what gets me every time. The crust stays crunchy (no soggy bottoms here), the pumpkin layer is creamy but firm, and the cheesecake swirl on top adds that tangy richness that makes it feel indulgent.
What makes this recipe different from the hundred other pumpkin cheesecake bars out there? It’s the crust, honestly. Most recipes use a graham cracker base, which is fine, but it’s also a little boring. The gingersnaps bring warmth and a tiny bit of heat that plays perfectly with the pumpkin. And the cheesecake-to-pumpkin ratio is dialed in — you get enough tang to cut through the sweetness without losing that pumpkin pie feeling.
This is the kind of dessert that makes you close your eyes after the first bite. It’s comfort food reimagined — faster, easier, but with the same soul-soothing satisfaction. Perfect for impressing guests without stress, or turning a simple Tuesday into something memorable.
What Ingredients You Will Need
This recipe uses simple, wholesome ingredients to deliver bold flavor and satisfying texture without the fuss. Most are pantry staples, especially if you’ve been doing any fall baking. Let me walk you through what you need and why it matters.
For the Gingersnap Crust
- 2 cups (about 8 oz) gingersnap cookies, finely crushed — I use Nabisco or store-brand gingersnaps. You want the crunchy kind, not the soft bakery style. Pulse them in a food processor or smash them in a bag with a rolling pin. Fine crumbs are key for a crust that holds together.
- 6 tablespoons (85g) unsalted butter, melted — Salted butter works too, just skip the added salt in the crust. The butter binds the crumbs and helps them crisp up in the oven.
- 2 tablespoons (25g) granulated sugar — Gingersnaps are already sweet, but this little extra helps the crust caramelize and get that crackly texture.
- ¼ teaspoon salt — Just a pinch to balance the sweetness. Omit if you’re using salted butter.
For the Pumpkin Layer
- 1 cup (245g) pumpkin puree — Not pumpkin pie filling. Make sure you grab 100% pure pumpkin. Libby’s is my go-to, but any brand works. If your puree looks watery, blot it with paper towels before mixing.
- 8 oz (226g) cream cheese, softened — Full-fat is best here for texture and flavor. Let it sit on the counter for at least 30 minutes before you start. Cold cream cheese makes lumpy filling.
- ½ cup (100g) granulated sugar — Just enough to sweeten the pumpkin without making it cloying.
- ¼ cup (55g) packed brown sugar — Light or dark works. Dark gives a deeper molasses flavor that plays nicely with the gingersnaps.
- 2 large eggs, room temperature — If you forget to set them out, put them in a bowl of warm water for 5 minutes. Cold eggs can seize the batter.
- 1 teaspoon vanilla extract — Pure vanilla, not imitation, if you have it.
- 1½ teaspoons pumpkin pie spice — Store-bought is fine, but I make my own with cinnamon, ginger, nutmeg, allspice, and cloves. It’s fresher and you can adjust the ratios.
- ½ teaspoon cinnamon — Because you can never have too much cinnamon in a pumpkin recipe.
- ¼ teaspoon salt — Salt makes everything taste more like itself.
For the Cheesecake Swirl
- 4 oz (113g) cream cheese, softened — Another half block. This gets mixed separately and dolloped on top for those beautiful swirls.
- ¼ cup (50g) granulated sugar — Keeps the swirl sweet but not overpowering.
- 1 large egg yolk — The yolk adds richness and helps the swirl set up creamy. Save the white for another recipe or scramble it for breakfast.
- ½ teaspoon vanilla extract — Same rule as above — pure is best.
Equipment Needed
You don’t need a fancy kitchen to make these bars. Here’s what you’ll actually use:
- 8×8-inch baking pan — A 9×9 works too, but your bars will be slightly thinner. Line it with parchment paper, leaving overhang on two sides for easy lifting. I learned this the hard way after wrestling bars out of a pan with a spatula.
- Food processor or zip-top bag and rolling pin — For crushing the gingersnaps. The food processor is faster and gives you more consistent crumbs, but the bag-and-rolling-pin method works fine. It’s also a great stress reliever.
- Electric hand mixer or stand mixer — You can mix by hand, but a mixer gives you that smooth, lump-free texture. I’ve done it both ways, and the mixer is worth the extra 30 seconds of cleanup.
- Mixing bowls — You’ll need at least three: one for the crust, one for the pumpkin layer, and one for the cheesecake swirl.
- Rubber spatula — For scraping every last bit of filling into the pan. Don’t waste that goodness.
- Measuring cups and spoons — Standard set. Nothing fancy.
- Small offset spatula or butter knife — For swirling the cheesecake into the pumpkin layer. A butter knife works, but an offset spatula gives you more control.
If you don’t have an 8×8 pan, you can use a 9-inch pie plate or even a small cast-iron skillet. Just keep an eye on the baking time — it might be a few minutes shorter or longer.
Preparation Method
Let’s make these bars. I’ll walk you through each step with the details I wish someone had told me the first time I tried this.
- Preheat your oven to 350°F (175°C). Line an 8×8-inch baking pan with parchment paper, leaving a couple inches of overhang on two opposite sides. This is your lifting handle later. Spray the parchment lightly with nonstick spray — just a quick mist.
- Make the crust. In a food processor, pulse the gingersnap cookies until they’re fine crumbs. You should have about 2 cups. Pour them into a medium bowl, add the sugar and salt, and stir with a fork. Pour in the melted butter and mix until every crumb is coated. It should look like wet sand. Press this mixture firmly into the bottom of your prepared pan. Use the bottom of a measuring cup or a flat glass to really pack it down. A loose crust will crumble when you cut the bars. Bake for 10 minutes, then set aside to cool slightly while you make the filling.
- Start the pumpkin layer. In a large bowl, beat the softened cream cheese with an electric mixer on medium speed until smooth, about 1 minute. Add both sugars and beat until fluffy, another 2 minutes. Scrape down the sides of the bowl. Add the eggs one at a time, beating on low after each just until combined. Overmixing at this stage can incorporate too much air, which makes the filling puff up and crack. Add the pumpkin puree, vanilla, pumpkin pie spice, cinnamon, and salt. Mix on low until everything is smooth and uniform. The batter will be thick and orange, smelling like autumn in a bowl.
- Make the cheesecake swirl. In a separate small bowl, beat the remaining 4 ounces of cream cheese with the ¼ cup sugar until smooth. Add the egg yolk and vanilla and mix until combined. That’s it — this is your swirl mixture. It should be pale and creamy, a little thicker than the pumpkin batter.
- Assemble the bars. Pour the pumpkin mixture over the pre-baked crust and spread it into an even layer with your spatula. Drop spoonfuls of the cheesecake swirl on top — about 8 to 10 dollops spaced evenly. Now the fun part: take a butter knife or offset spatula and drag it through the dollops in a figure-eight pattern. Don’t over-swirl or you’ll lose the distinction between the two layers. A few passes is all you need.
- Bake. Place the pan on the middle rack of your preheated oven. Bake for 35 to 40 minutes, or until the edges are set and the center jiggles slightly when you gently shake the pan. It will look puffed and golden around the edges, with a slight wobble in the middle. That wobble is good — it means your bars will be creamy, not dry. If the top starts browning too fast, tent loosely with foil for the last 10 minutes.
- Cool completely. This is the hardest part, I know. Let the bars cool on a wire rack for at least 1 hour at room temperature. Then transfer the pan to the refrigerator and chill for at least 4 hours, or overnight. Do not skip this. Warm bars are soft and messy. Chilled bars slice cleanly and hold their shape. I’ve made the mistake of cutting too early, and I ended up with pumpkin soup on a plate. Patience pays off here.
- Slice and serve. Lift the bars out of the pan using the parchment overhang. Place on a cutting board and use a sharp chef’s knife to slice into 16 squares. Wipe the knife clean between cuts for the neatest edges. Serve cold or at room temperature — both are delicious.
Cooking Tips & Techniques
I’ve made these bars about a dozen times now, and I’ve picked up a few tricks that make a real difference. Here’s what I wish I knew from the start.
Don’t skip the parchment paper. I know it seems like an extra step, but trust me on this. The first time I made these, I greased the pan and hoped for the best. I spent 20 minutes trying to get the first bar out without destroying it. Parchment with overhang turns the whole process into a simple lift-and-cut operation. It’s worth the 30 seconds.
Room temperature ingredients matter. Cold cream cheese creates lumps that no amount of mixing will fully smooth out. Cold eggs can cause the batter to seize and become grainy. Set everything on the counter 30 to 45 minutes before you start. If you forget, you can soften cream cheese in the microwave in 10-second bursts, but be careful — you want it soft, not melted.
The crust is your foundation. Press it firmly and evenly. I use the bottom of a flat measuring cup to really compact it. If the crust is loose, it will crumble when you cut the bars. Also, don’t overbake the crust on its own. Ten minutes at 350°F is enough to set it without burning the spices in the gingersnaps.
Watch for the jiggle. The biggest mistake people make with cheesecake-style desserts is overbaking. You want the center to have a slight wobble when you shake the pan. If it’s completely firm, it will be dry and cracked. The residual heat will finish cooking the center as it cools. I learned this after baking a batch that turned into pumpkin-flavored cardboard.
Chill overnight if you can. Four hours is the minimum, but overnight is better. The flavors meld, the texture sets up perfectly, and the bars slice like a dream. I’ve made these a day ahead for Thanksgiving and they were actually better the next day.
Variations & Adaptations
One of the things I love about this recipe is how flexible it is. Here are a few ways to make it your own.
Gluten-free version: Use gluten-free gingersnap cookies for the crust. Most brands are actually gluten-free, but double-check the label. The rest of the ingredients are naturally gluten-free, so this is an easy swap.
Dairy-free option: Use dairy-free cream cheese and a plant-based butter alternative. I’ve tested this with Kite Hill cream cheese and Miyoko’s butter, and it worked well. The texture is slightly softer, so chill the bars extra long before slicing.
Pecan crust twist: Swap half the gingersnaps for finely chopped pecans. Toast the pecans first for deeper flavor. The crust will be crunchier and a little more rustic. I did this for a Friendsgiving once and everyone asked for the recipe.
Extra spice: If you like your pumpkin desserts on the bold side, add ¼ teaspoon of ground ginger and a pinch of cloves to the pumpkin layer. You can also use fresh grated ginger — about 1 teaspoon — for a little heat.
Chocolate swirl: Melt ¼ cup of semi-sweet chocolate chips and drizzle it into the pumpkin layer before adding the cheesecake swirl. It sounds weird, but chocolate and pumpkin are actually great together. Try it once and thank me later.
Mini bar version: Press the crust into a mini muffin tin (lined with paper liners) and fill with the pumpkin mixture. Bake for about 15 minutes. These are perfect for parties or portion control. Or both.
Serving & Storage Suggestions
These bars are versatile when it comes to serving. Here’s how I like to do it.
Serving temperature: I prefer them cold, straight from the fridge. The texture is firmer and the flavors are more pronounced. But they’re also wonderful at room temperature, especially if you’re serving them after a big meal and want something that feels a little softer. Let them sit out for 15 to 20 minutes before serving if you go that route.
Toppings: A dollop of lightly sweetened whipped cream is classic and never fails. For extra crunch, sprinkle a few crushed gingersnaps on top. A drizzle of caramel sauce takes it over the top — I use store-bought because I’m honest about my limits. A dusting of cinnamon or pumpkin pie spice before serving adds a pretty finish.
What to serve with them: These bars pair beautifully with a hot cup of coffee or a chai latte. For a full fall dessert spread, serve them alongside some small batch pumpkin chocolate chip cookies or a slice of cozy brown butter pumpkin bundt cake with maple glaze. If you’re in the mood for a drink, try a perfect copycat Starbucks pumpkin cream cold brew on the side.
Storage: Keep the bars in an airtight container in the refrigerator for up to 5 days. Place a sheet of parchment paper between layers if you’re stacking them. They actually get better after a day or two as the flavors meld.
Freezing: These freeze beautifully. Wrap individual bars tightly in plastic wrap, then place them in a freezer-safe bag or container. They’ll keep for up to 3 months. Thaw in the refrigerator overnight before serving. I always keep a stash in my freezer for unexpected guests or late-night cravings.
Reheating: I don’t recommend reheating these — they’re meant to be served cold or at room temperature. But if you want a warm dessert, pop a bar in the microwave for 10 to 15 seconds. It will soften the texture and make it almost pudding-like. Not traditional, but delicious in its own way.
Nutritional Information & Benefits
Let’s be real — these are a treat, not a health food. But here’s what you’re getting in each bar, based on 16 servings.
| Nutrient | Amount per Serving |
|---|---|
| Calories | 245 |
| Total Fat | 15g |
| Saturated Fat | 9g |
| Cholesterol | 65mg |
| Sodium | 210mg |
| Total Carbohydrates | 25g |
| Dietary Fiber | 1g |
| Sugars | 17g |
| Protein | 4g |
| Vitamin A | 45% DV |
| Calcium | 4% DV |
| Iron | 6% DV |
The pumpkin brings a solid dose of Vitamin A, which is great for eye health and immune function. The cream cheese adds calcium and a little protein. The gingersnaps contribute a small amount of iron from the molasses. Are these a superfood? No. But they’re a dessert that makes you feel a tiny bit better about indulging.
Dietary considerations: This recipe contains dairy, gluten, and eggs. For a gluten-free version, use GF gingersnaps. For dairy-free, use plant-based cream cheese and butter. The egg in the swirl can be replaced with 1 tablespoon of cornstarch mixed with 2 tablespoons of water, but the texture will be slightly less rich.
Frequently Asked Questions
Can I use fresh pumpkin instead of canned?
You can, but you’ll need to roast and puree it first, then drain off any excess liquid. Fresh pumpkin has more water than canned, so your bars might be softer. I recommend canned for consistency, especially if you’re making these for a special occasion.
Why did my crust fall apart?
Two likely reasons: you didn’t press it firmly enough into the pan, or you didn’t use enough butter. The mixture should look like wet sand and hold together when squeezed in your fist. Use the bottom of a measuring cup to really pack it down before baking.
Can I make these without a mixer?
Yes, but your arm will get a workout. Beat the cream cheese with a wooden spoon until smooth, then whisk in the other ingredients. It takes longer and you might have a few small lumps, but the bars will still taste great. I’ve done it when my mixer was in the shop.
How do I know when the bars are done?
The edges should be set and slightly puffed, and the center should jiggle like firm Jell-O when you shake the pan. If the center is completely still, you’ve overbaked them. A toothpick inserted near the center should come out with a few moist crumbs, not wet batter.
Can I double this recipe?
Absolutely. Use a 9×13-inch pan and double all the ingredients. Bake for 45 to 50 minutes instead of 35 to 40. You might need to tent the top with foil halfway through to prevent over-browning. The bars will be slightly thicker, so chill them extra well before slicing.
Conclusion
These Perfect Pumpkin Cheesecake Bars with Gingersnap Crust are everything I want in a fall dessert — crunchy, creamy, spiced, and just sweet enough. They’re the kind of treat that feels special without requiring a special occasion. Make them for Thanksgiving, make them for a Tuesday, make them just because you found a can of pumpkin in the back of your cabinet.
The gingersnap crust is the star, honestly. That crackly, spicy base is what sets these apart from every other pumpkin bar out there. And the swirl on top? It’s almost too pretty to eat. Almost.
I’d love to hear how yours turn out. Did you add a twist? Did you double the swirl? Did you eat three in one sitting like I definitely did not do? Drop a comment below and let me know. And if you’re looking for more fall inspiration, check out this creamy no-bake pumpkin pie or these easy apple cider donut muffins with cinnamon sugar.
Now go make some bars. Your kitchen is about to smell incredible.
Pin This Recipe!
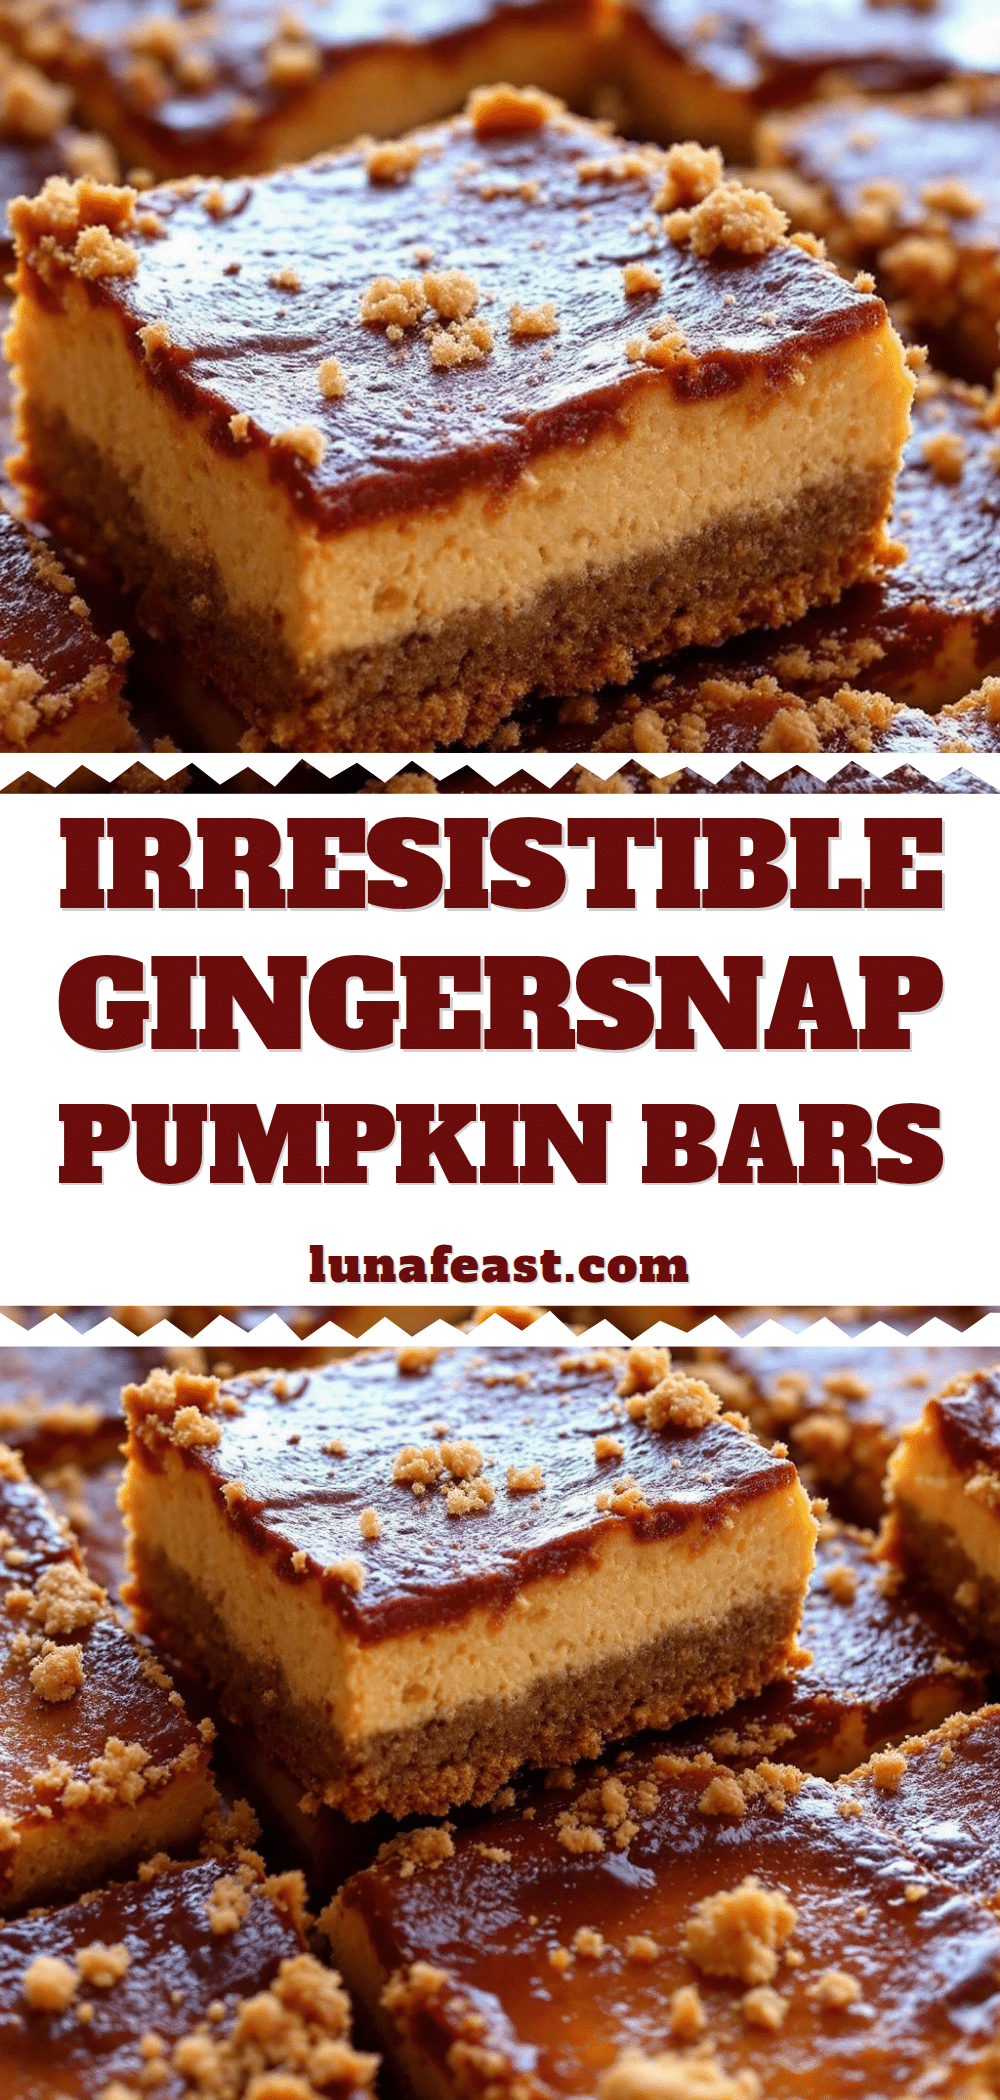
Perfect Pumpkin Cheesecake Bars with Gingersnap Crust
These pumpkin cheesecake bars feature a crunchy gingersnap crust, a creamy pumpkin layer, and a tangy cheesecake swirl. They’re easy to make, perfect for fall gatherings, and deliver that satisfying crackle with every bite.
- Prep Time: 45 minutes
- Cook Time: 35-40 minutes
- Total Time: 5 hours 20 minutes (includes chilling)
- Yield: 16 servings 1x
- Category: Dessert
- Cuisine: American
Ingredients
- 2 cups (about 8 oz) gingersnap cookies, finely crushed
- 6 tablespoons (85g) unsalted butter, melted
- 2 tablespoons (25g) granulated sugar
- ¼ teaspoon salt
- 1 cup (245g) pumpkin puree
- 8 oz (226g) cream cheese, softened
- ½ cup (100g) granulated sugar
- ¼ cup (55g) packed brown sugar
- 2 large eggs, room temperature
- 1 teaspoon vanilla extract
- 1½ teaspoons pumpkin pie spice
- ½ teaspoon cinnamon
- ¼ teaspoon salt
- 4 oz (113g) cream cheese, softened
- ¼ cup (50g) granulated sugar
- 1 large egg yolk
- ½ teaspoon vanilla extract
Instructions
- Preheat your oven to 350°F (175°C). Line an 8×8-inch baking pan with parchment paper, leaving overhang on two sides. Spray lightly with nonstick spray.
- Make the crust: In a food processor, pulse gingersnap cookies into fine crumbs. In a medium bowl, combine crumbs, 2 tablespoons sugar, and ¼ teaspoon salt. Stir in melted butter until mixture resembles wet sand. Press firmly into the bottom of the prepared pan. Bake for 10 minutes, then set aside to cool slightly.
- Start the pumpkin layer: In a large bowl, beat 8 oz cream cheese with an electric mixer on medium until smooth, about 1 minute. Add ½ cup granulated sugar and brown sugar; beat until fluffy, about 2 minutes. Scrape down sides. Add eggs one at a time, beating on low after each. Add pumpkin puree, 1 teaspoon vanilla, pumpkin pie spice, cinnamon, and ¼ teaspoon salt. Mix on low until smooth.
- Make the cheesecake swirl: In a small bowl, beat 4 oz cream cheese with ¼ cup granulated sugar until smooth. Add egg yolk and ½ teaspoon vanilla; mix until combined.
- Assemble the bars: Pour pumpkin mixture over pre-baked crust and spread evenly. Drop spoonfuls of cheesecake swirl on top (8-10 dollops). Use a butter knife or offset spatula to swirl in a figure-eight pattern; do not over-swirl.
- Bake on the middle rack for 35-40 minutes, until edges are set and center jiggles slightly. If top browns too fast, tent with foil for the last 10 minutes.
- Cool completely on a wire rack for at least 1 hour at room temperature. Then refrigerate for at least 4 hours, or overnight.
- Slice and serve: Lift bars out using parchment overhang. Place on a cutting board and slice into 16 squares with a sharp knife, wiping clean between cuts. Serve cold or at room temperature.
Notes
Don’t skip the parchment paper for easy removal. Room temperature ingredients are crucial for a smooth batter. Press the crust firmly to prevent crumbling. Watch for the jiggle in the center to avoid overbaking. Chill overnight for best texture and flavor.
Nutrition
- Serving Size: 1 bar
- Calories: 245
- Sugar: 17
- Sodium: 210
- Fat: 15
- Saturated Fat: 9
- Carbohydrates: 25
- Fiber: 1
- Protein: 4
Keywords: pumpkin cheesecake bars, gingersnap crust, fall dessert, pumpkin bars, cheesecake bars, Thanksgiving dessert


