I want a snickerdoodle. No—I want that snickerdoodle. The one that hits the back of your throat with warm cinnamon and something deeper, nuttier, almost buttery in a way that regular butter never quite pulls off. And I want it to taste like fall without screaming pumpkin spice from a rooftop. I’ve got the butter browning on the stove before I’ve even fully decided on the recipe, which is how most of my good baking decisions start—impulsively, with a pan and a prayer.
The thing is, I’ve made a lot of pumpkin cookies. Some were too cakey (fine for a muffin, wrong for a cookie), some were too flat (soggy sadness), and some just tasted like cinnamon had a bad day. But brown butter? That changes everything. It adds this toasty, almost caramelized depth that makes pumpkin actually taste like pumpkin—not just a vehicle for pie spice. And when you roll the dough in cinnamon sugar that’s been punched up with a little clove and ginger? Honestly, it’s the kind of cookie that makes you close your eyes after the first bite without even realizing you’re doing it.
These cookies aren’t fussy. They don’t require a stand mixer or a chill time that ruins your evening plans. They come together in one bowl (plus a pan for the butter), and they bake up soft in the center with slightly crisp edges that crinkle just right. The brown butter does the heavy lifting, the pumpkin keeps them tender, and the sugar coating gives them that signature snickerdoodle crackle. I’ve made four batches in two weeks, which is either dedication or a problem. I’m calling it research.
This is the cookie I’ll be making for every fall gathering, every “can you bring dessert?” text, and every Tuesday that feels like it needs a little warmth. You’re going to want these in your rotation.
Why You’ll Love This Recipe
Let me be real with you—I’ve tested this recipe six times to get the texture exactly right. The first batch was too puffy (I blamed the pumpkin), the second was too flat (I blamed myself), and somewhere around batch four, I realized the secret was browning the butter just until the milk solids turned amber and smelled like toasted hazelnuts. That’s the kind of detail that makes a recipe work, and I’m not above admitting I learned it the hard way.
- Quick & Easy: From start to finish, these cookies take about 30 minutes. No chilling required, no complicated steps.
- Simple Ingredients: You probably already have butter, sugar, flour, cinnamon, and pumpkin purée in your pantry. The brown butter is the only “extra step,” and it’s worth every second.
- Perfect for Fall: These cookies are made for cozy afternoons, Halloween parties, Thanksgiving dessert tables, or just a Tuesday that needs a little warmth.
- Crowd-Pleaser: I brought a batch to a friend’s pumpkin carving party, and they disappeared before the first jack-o’-lantern was finished.
- Unbelievably Delicious: The brown butter adds a nutty, caramelized depth that regular butter simply can’t match. Combined with pumpkin and warm spices, it’s next-level comfort food.
What makes this recipe different from every other pumpkin cookie out there? It’s the brown butter, plain and simple. That one extra step transforms the flavor from “pretty good” to “I need the recipe right now.” Plus, the texture is spot-on—soft, chewy centers with slightly crisp edges and a crinkly cinnamon-sugar top that looks as good as it tastes. This isn’t just another pumpkin cookie. It’s the one you’ll make every single fall.
What Ingredients You Will Need
This recipe uses simple, wholesome ingredients to deliver big flavor without any fuss. Most of these are pantry staples, especially if you’re already in fall baking mode.
For the Brown Butter
- Unsalted butter: ½ cup (1 stick / 113g). I use unsalted so I can control the salt level. Kerrygold is my go-to for its rich flavor, but any good-quality butter works.
- Note: You’ll brown the butter first, then let it cool slightly before using. Don’t skip this step—it’s the heart of the recipe.
For the Cookie Dough
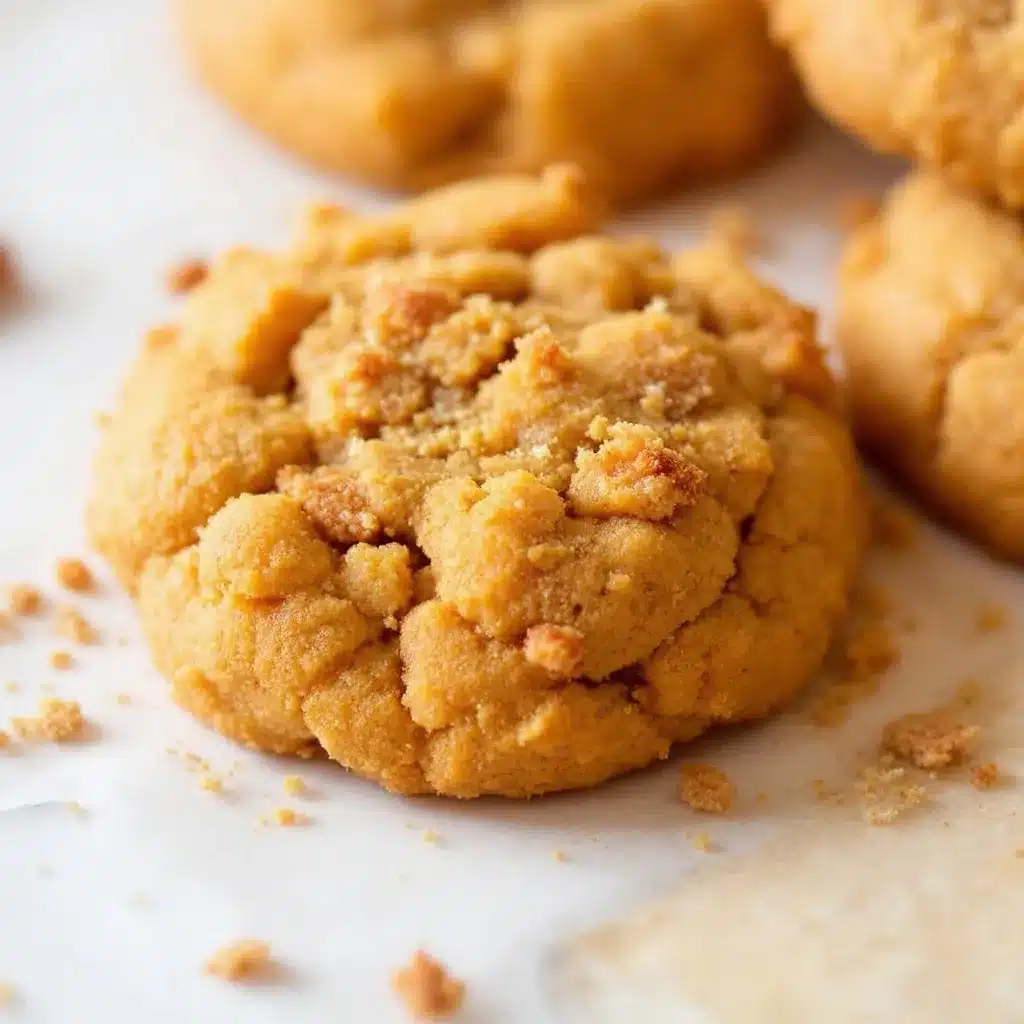
- Brown butter: The ½ cup you just browned, cooled to warm but not hot.
- Granulated sugar: ¾ cup (150g). Adds sweetness and helps create that crackly top.
- Light brown sugar: ¼ cup (50g), packed. Adds moisture and a hint of molasses depth.
- Pumpkin purée: ⅓ cup (80g). Not pumpkin pie filling—make sure it’s 100% pumpkin. Libby’s is reliable and consistent.
- Large egg: 1, room temperature. Helps bind the dough and adds structure.
- Vanilla extract: 1 teaspoon. Pure vanilla, not imitation, for the best flavor.
- All-purpose flour: 1 ¾ cups (220g). Spoon and level for accuracy—don’t scoop directly from the bag.
- Baking soda: ½ teaspoon. Helps the cookies spread just enough.
- Cream of tartar: ½ teaspoon. The secret to that classic snickerdoodle tang and chewy texture.
- Salt: ½ teaspoon. Balances the sweetness and enhances the brown butter.
- Ground cinnamon: 1 teaspoon. Warm and essential.
- Ground ginger: ½ teaspoon. Adds a little bite.
- Ground nutmeg: ¼ teaspoon. Freshly grated if you have it—it makes a difference.
- Ground cloves: ⅛ teaspoon. Just a whisper for depth.
For the Cinnamon Sugar Coating
- Granulated sugar: ¼ cup (50g).
- Ground cinnamon: 1 tablespoon. Yes, a full tablespoon—we’re not holding back.
Ingredient Selection Tip: For the best brown butter, use a light-colored pan so you can see the milk solids turn amber. Dark pans make it hard to judge the color, and you might end up with burnt butter instead of browned butter.
Substitution Guidance: If you’re out of cream of tartar, you can substitute 1 teaspoon of lemon juice or white vinegar mixed into the wet ingredients, but the texture won’t be quite as tender. For a dairy-free version, use vegan butter (I like Miyoko’s), though the browning will be slightly different.
Equipment Needed
You don’t need a fancy kitchen to make these cookies, but a few tools make the process smoother.
- Medium saucepan: For browning the butter. Light-colored metal is best so you can see the color change.
- Large mixing bowl: For the dough. Any bowl works, but a wider one makes mixing easier.
- Whisk: For combining wet ingredients and dry ingredients separately.
- Rubber spatula: For folding the dough together without overmixing.
- Cookie scoop: A 1.5-tablespoon scoop gives consistent-sized cookies. I use a #40 scoop, and it’s perfect every time.
- Baking sheets: Two standard half-sheet pans. Line with parchment paper for easy cleanup.
- Cooling rack: Lets the cookies cool evenly so the bottoms don’t get soggy.
- Small shallow bowl: For the cinnamon sugar coating.
Budget-Friendly Tip: No cookie scoop? Use two spoons to portion the dough, then roll into balls by hand. It takes a little longer, but the cookies will still be perfect. And if you don’t have a cooling rack, just transfer the cookies to a clean cutting board after a few minutes on the sheet.
Preparation Method
Let’s make some cookies. This method is broken down into clear steps with time estimates and sensory cues so you know exactly what to look for at each stage.
Step 1: Brown the Butter (5 minutes)
Place the ½ cup unsalted butter in a medium saucepan over medium heat. Stir occasionally with a rubber spatula or wooden spoon. The butter will melt, then foam, then start to crackle and pop. After about 3–4 minutes, the foam will subside, and you’ll see tiny brown specks forming at the bottom of the pan. Sensory cue: It should smell nutty and toasty, like toasted hazelnuts. The color should be a deep amber, not dark brown. Immediately remove from heat and pour into a heatproof bowl to stop the cooking. Let it cool for 10–15 minutes until warm but not hot.
Personal Tip: I’ve burned butter more times than I’d like to admit. The trick is to keep stirring and watch closely once the foam starts to subside. It goes from perfect to burnt in about 30 seconds, so don’t walk away.
Step 2: Mix the Wet Ingredients (3 minutes)
In a large mixing bowl, combine the cooled brown butter, ¾ cup granulated sugar, and ¼ cup packed light brown sugar. Whisk until smooth and well combined—about 1 minute. Add the ⅓ cup pumpkin purée, 1 large egg, and 1 teaspoon vanilla extract. Whisk vigorously until the mixture is smooth, glossy, and fully emulsified. Sensory cue: It should look like a thick, shiny caramel sauce with no streaks of egg or butter.
Step 3: Mix the Dry Ingredients (2 minutes)
In a separate medium bowl, whisk together 1 ¾ cups all-purpose flour, ½ teaspoon baking soda, ½ teaspoon cream of tartar, ½ teaspoon salt, 1 teaspoon ground cinnamon, ½ teaspoon ground ginger, ¼ teaspoon ground nutmeg, and ⅛ teaspoon ground cloves. Whisk for about 30 seconds to aerate and distribute the spices evenly.
Step 4: Combine Wet and Dry (2 minutes)
Add the dry ingredients to the wet ingredients in two additions, folding gently with a rubber spatula after each addition. Mix just until no streaks of flour remain. Warning: Overmixing will make the cookies tough. Stop as soon as the dough comes together—a few small lumps are fine. The dough will be soft and slightly sticky, which is exactly what you want.
Step 5: Prepare the Cinnamon Sugar Coating (1 minute)
In a small shallow bowl, mix ¼ cup granulated sugar with 1 tablespoon ground cinnamon. Stir until evenly combined.
Step 6: Shape and Coat the Cookies (5 minutes)
Preheat your oven to 350°F (175°C). Line two baking sheets with parchment paper. Using a 1.5-tablespoon cookie scoop (or a heaping tablespoon), portion the dough into balls. Roll each ball between your palms until smooth, then roll generously in the cinnamon sugar mixture. Place on the prepared baking sheets, spacing them about 2 inches apart—these cookies spread slightly but not dramatically.
Personal Note: I always roll the dough balls a second time in the cinnamon sugar if the first coating looks thin. More cinnamon sugar = more crackle, and that’s never a bad thing.
Step 7: Bake (10–12 minutes)
Bake one sheet at a time on the middle rack of the oven. Bake for 10–12 minutes, or until the edges are set and lightly golden but the centers still look slightly soft and puffy. Sensory cue: The kitchen should smell like brown butter, cinnamon, and fall. The cookies will look underdone in the center—that’s exactly what you want. They’ll continue to set as they cool.
Step 8: Cool and Enjoy (10 minutes)
Remove the baking sheet from the oven and let the cookies cool on the sheet for 5 minutes. This allows them to firm up slightly without overbaking. Then transfer to a wire cooling rack to cool completely—or eat one warm, because you deserve it. They’re amazing warm, but the texture really shines once they’ve cooled to room temperature.
Cooking Tips & Techniques
I’ve made enough mistakes in the kitchen to fill a cookbook, so let me save you some trouble with these tips.
Don’t Skip the Cream of Tartar: This is what gives snickerdoodles their signature tangy flavor and chewy texture. Without it, you’re just making a sugar cookie with pumpkin. I once forgot to add it, and the cookies were flat and one-dimensional. Never again.
Brown Butter Timing is Everything: The butter will go from melted to foamy to amber in about 4–5 minutes. Watch for the milk solids to turn a deep golden brown, and smell for that nutty aroma. If you see black specks, you’ve gone too far. Pour it into a bowl immediately to stop the cooking—don’t leave it in the hot pan.
Room Temperature Egg Matters: Cold egg can seize the brown butter and make the dough stiff. Let your egg sit on the counter for 15–20 minutes before starting, or place it in a bowl of warm water for 5 minutes.
Pumpkin Purée vs. Pumpkin Pie Filling: This is a common mistake. Pumpkin pie filling is pre-sweetened and spiced, which will throw off the sugar and spice balance in this recipe. Always use 100% pumpkin purée. Libby’s is my trusted brand because it’s consistently thick and not watery.
Multitasking Strategy: While the brown butter cools, measure your dry ingredients and line your baking sheets. While the cookies bake, wash the dishes. It keeps the process efficient and the mess manageable.
Consistency Check: If your dough feels too sticky to roll, refrigerate it for 15 minutes. If it feels too dry (which can happen if your pumpkin purée was extra thick), add a teaspoon of milk or water. The dough should be soft and slightly tacky but not unmanageable.
Variations & Adaptations
One of the best things about this recipe is how adaptable it is. Here are a few ways I’ve tweaked it depending on my mood or what’s in the pantry.
Gluten-Free Version
Substitute the all-purpose flour with a 1:1 gluten-free baking flour blend (I like King Arthur Measure for Measure). The texture will be slightly more tender, but the flavor is still spot-on. Add an extra tablespoon of flour if the dough feels too wet.
Vegan Version
Use vegan butter for browning (Miyoko’s works well), and replace the egg with a flax egg (1 tablespoon ground flaxseed mixed with 3 tablespoons water, let sit for 5 minutes). The cookies will be slightly less chewy but still delicious.
Spice Variations
Swap the cinnamon-ginger-nutmeg-clove blend for 1 ½ teaspoons of pumpkin pie spice if that’s what you have. Or go rogue with a pinch of cardamom for a more aromatic, almost floral note—I tried this on a whim and it was fantastic.
Add-In Options
Fold in ½ cup of white chocolate chips, chopped pecans, or dried cranberries after mixing the dough. I made a batch with white chocolate and pecans that disappeared at a Friendsgiving potluck faster than the turkey.
Small Batch Version
Halve all the ingredients for a smaller batch (about 8–10 cookies). The brown butter step stays the same—just use ¼ cup butter and watch it carefully since less butter browns faster.
Serving & Storage Suggestions
These cookies are best served at room temperature, but I won’t judge you for eating one straight off the baking sheet (I do it every time).
Serving Temperature: Room temperature is ideal for the best texture—soft centers, slightly crisp edges. If you’re serving them at a party, arrange them on a pretty plate with a dusting of extra cinnamon sugar for visual appeal.
Complementary Pairings: These cookies are amazing with a hot cup of coffee, a chai latte, or a glass of cold milk. For a fall dessert spread, serve them alongside a brown butter pumpkin bundt cake with maple glaze or a creamy no-bake pumpkin pie for a full pumpkin-themed dessert table.
Storage Instructions: Store in an airtight container at room temperature for up to 5 days. The cookies will soften slightly over time, but the flavor actually gets better on day two as the spices meld. To keep them extra soft, add a slice of bread to the container—it absorbs excess air and keeps the cookies tender.
Freezer Instructions: You can freeze the baked cookies for up to 3 months. Place them in a single layer in a freezer-safe bag or container, separating layers with parchment paper. Thaw at room temperature for about 30 minutes before serving. You can also freeze the unbaked dough balls (coated in cinnamon sugar) on a baking sheet, then transfer to a freezer bag. Bake from frozen, adding 2–3 minutes to the baking time.
Reheating Tip: Pop a cookie in the microwave for 10 seconds for that just-baked warmth. Or heat in a 300°F oven for 5 minutes if you’re reviving a whole batch.
Nutritional Information & Benefits
Let’s be honest—these are cookies, not health food. But they’re made with real ingredients, and that counts for something.
Estimated Nutritional Values (per cookie, based on 24 cookies):
- Calories: 145
- Fat: 7g
- Carbohydrates: 20g
- Protein: 2g
- Fiber: 1g
- Sugar: 12g
Health Benefits of Key Ingredients: Pumpkin purée is packed with vitamin A (from beta-carotene), fiber, and antioxidants. Cinnamon has anti-inflammatory properties and may help regulate blood sugar. Brown butter is still butter, but hey—it makes you happy, and that counts as self-care.
Dietary Considerations: This recipe is vegetarian. For gluten-free or vegan options, see the variations section above. It contains dairy (butter) and gluten (flour), so it’s not suitable for those with allergies to those ingredients without substitutions.
Personal Wellness Perspective: I believe in balance. These cookies are a treat, and they should be enjoyed without guilt. Make a batch, share some with friends, freeze some for later, and eat one warm with a cup of tea. Life is short—have the cookie.
Conclusion
These Perfect Brown Butter Pumpkin Snickerdoodle Cookies are everything I want in a fall dessert. They’re soft, chewy, warmly spiced, and that brown butter flavor is honestly addictive. I’ve made them for friends, family, neighbors, and myself (multiple times), and every single person has asked for the recipe.
What I love most is that they’re not fussy. No chilling, no complicated techniques—just one extra step (browning the butter) that makes all the difference. They’re the kind of cookie you can whip up on a random Wednesday evening and feel like you’ve done something special for yourself.
I’d love to hear how these turn out for you. Did you add white chocolate chips? Try the cardamom variation? Bake them for a fall party? Leave a comment below and let me know—I read every single one, and your feedback helps me create better recipes. And if you loved them, share this recipe with a friend who needs a little fall cheer.
Happy baking, and may your kitchen smell like brown butter and cinnamon all season long.
Frequently Asked Questions
Can I use pumpkin pie spice instead of individual spices?
Absolutely. Substitute 1 ½ teaspoons of pumpkin pie spice for the cinnamon, ginger, nutmeg, and cloves. The flavor will be slightly different (pumpkin pie spice often includes allspice), but it’s a great shortcut.
Why did my cookies turn out flat?
Flat cookies usually mean the butter was too warm or the dough wasn’t mixed enough. Make sure your brown butter has cooled to warm (not hot) before adding the other ingredients. Also, check that your baking soda is fresh—old baking soda loses its leavening power.
Can I make the dough ahead of time?
Yes! You can refrigerate the dough (unbaked) for up to 3 days. Let it sit at room temperature for 10–15 minutes before scooping and rolling in cinnamon sugar, as cold dough is harder to work with. You can also freeze the dough balls for up to 3 months.
Do I have to brown the butter? Can I use regular melted butter?
You can use regular melted butter in a pinch, but the cookies won’t have that nutty, caramelized depth that makes this recipe special. Browning the butter takes only 5 minutes and completely transforms the flavor. I promise it’s worth it.
How do I know when the cookies are done baking?
The edges should be set and lightly golden, but the centers will still look soft and slightly puffy. They’ll continue to set as they cool on the baking sheet. If you wait until the centers look fully baked, they’ll be overdone and dry. Trust the 10–12 minute mark and the visual cues.
Pin This Recipe!
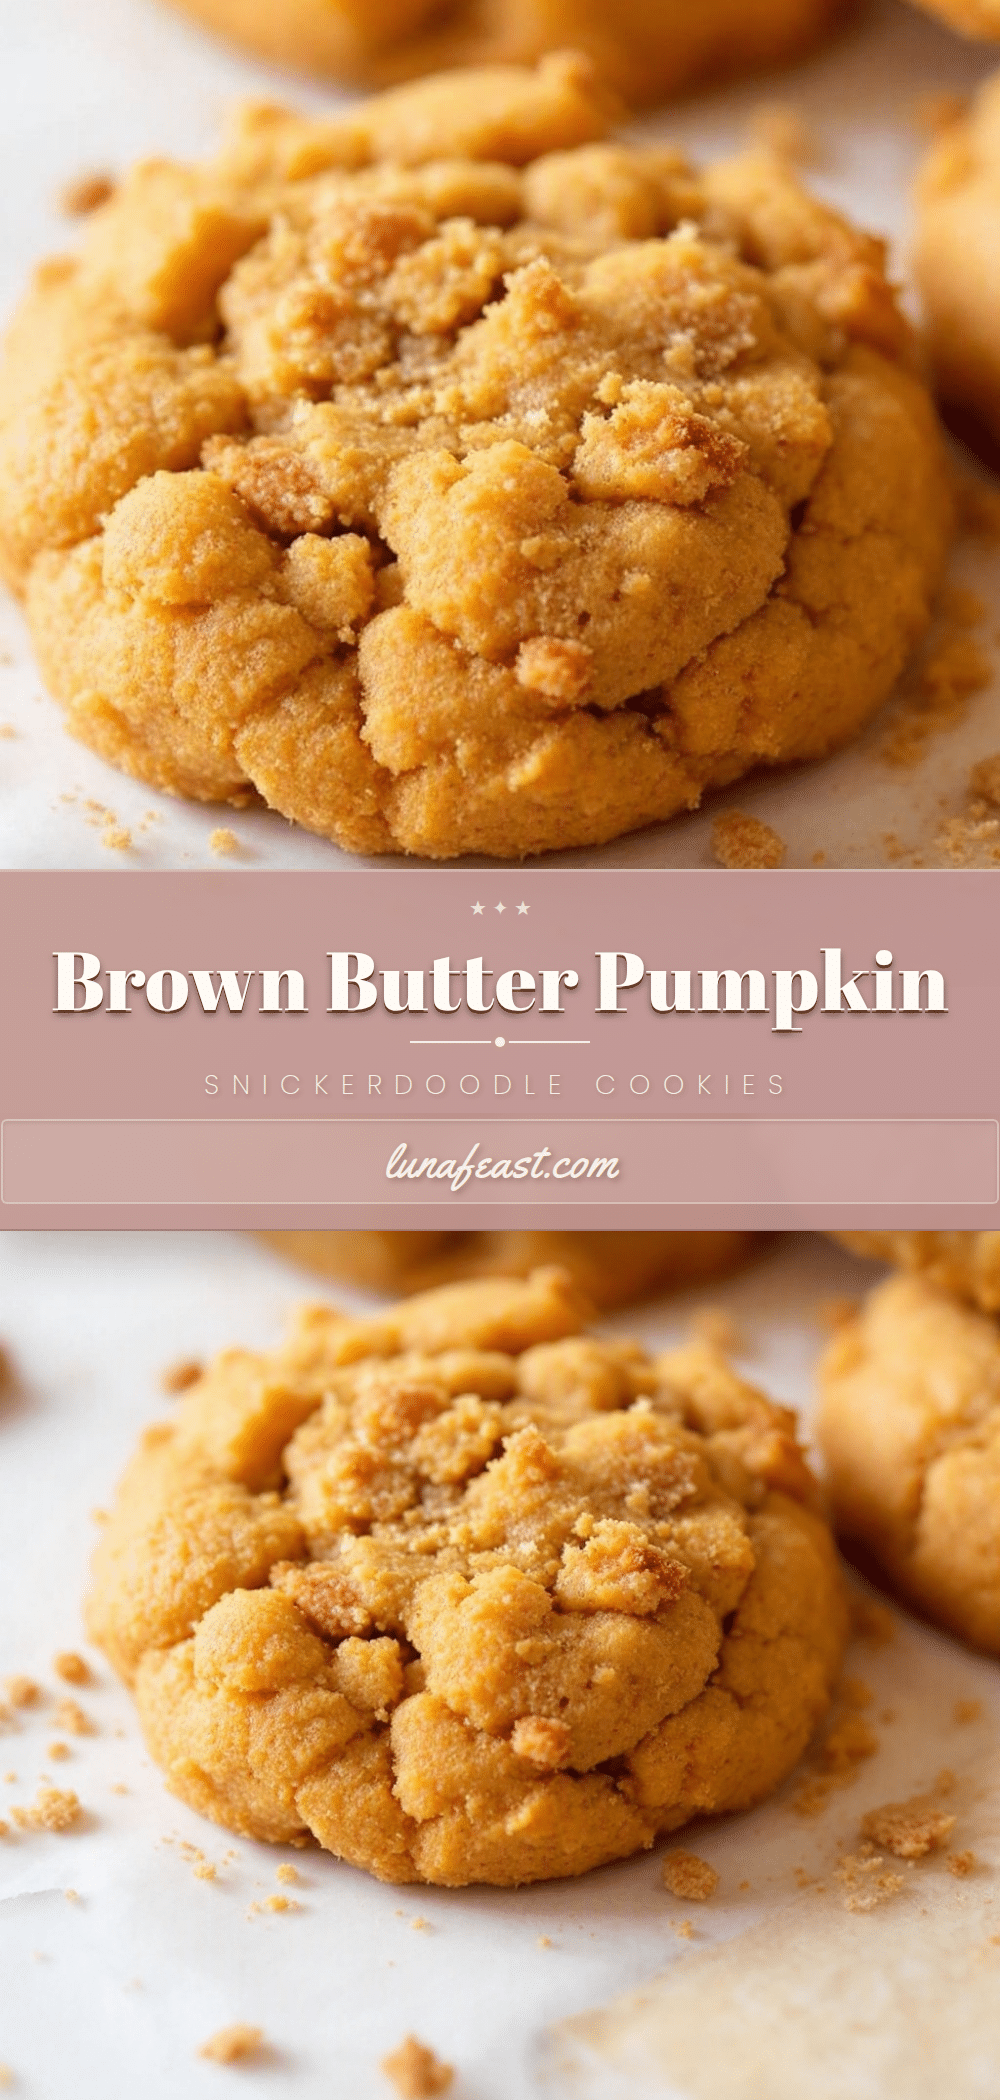
Perfect Brown Butter Pumpkin Snickerdoodle Cookies: Easy Fall Recipe
These soft and chewy snickerdoodle cookies are made with brown butter and pumpkin purée, rolled in a spiced cinnamon-sugar coating. They come together in one bowl with no chilling required, delivering a nutty, caramelized depth that makes them the ultimate fall treat.
- Prep Time: 15 minutes
- Cook Time: 12 minutes
- Total Time: 27 minutes
- Yield: 24 cookies 1x
- Category: Dessert
- Cuisine: American
Ingredients
- ½ cup (1 stick / 113g) unsalted butter
- ¾ cup (150g) granulated sugar
- ¼ cup (50g) light brown sugar, packed
- ⅓ cup (80g) pumpkin purée (100% pumpkin, not pie filling)
- 1 large egg, room temperature
- 1 teaspoon vanilla extract
- 1 ¾ cups (220g) all-purpose flour
- ½ teaspoon baking soda
- ½ teaspoon cream of tartar
- ½ teaspoon salt
- 1 teaspoon ground cinnamon
- ½ teaspoon ground ginger
- ¼ teaspoon ground nutmeg
- ⅛ teaspoon ground cloves
- ¼ cup (50g) granulated sugar (for coating)
- 1 tablespoon ground cinnamon (for coating)
Instructions
- Brown the butter: Place ½ cup unsalted butter in a medium saucepan over medium heat. Stir occasionally. After 3–4 minutes, the butter will foam, then the foam will subside and brown specks will appear. When it smells nutty and is deep amber, remove from heat and pour into a heatproof bowl. Cool for 10–15 minutes until warm but not hot.
- Mix wet ingredients: In a large bowl, whisk together the cooled brown butter, ¾ cup granulated sugar, and ¼ cup packed light brown sugar until smooth. Add ⅓ cup pumpkin purée, 1 large egg, and 1 teaspoon vanilla extract. Whisk until glossy and fully emulsified.
- Mix dry ingredients: In a separate bowl, whisk together 1 ¾ cups all-purpose flour, ½ teaspoon baking soda, ½ teaspoon cream of tartar, ½ teaspoon salt, 1 teaspoon cinnamon, ½ teaspoon ginger, ¼ teaspoon nutmeg, and ⅛ teaspoon cloves.
- Combine: Add dry ingredients to wet in two additions, folding gently with a rubber spatula until just combined. Do not overmix. Dough will be soft and slightly sticky.
- Prepare coating: In a small shallow bowl, mix ¼ cup granulated sugar with 1 tablespoon cinnamon.
- Shape and coat: Preheat oven to 350°F (175°C). Line two baking sheets with parchment. Using a 1.5-tablespoon cookie scoop, portion dough into balls. Roll each ball smooth, then roll generously in cinnamon sugar. Place 2 inches apart on prepared sheets.
- Bake: Bake one sheet at a time on the middle rack for 10–12 minutes, until edges are set and lightly golden but centers still look soft and puffy.
- Cool: Let cookies cool on the baking sheet for 5 minutes, then transfer to a wire rack to cool completely. Enjoy warm or at room temperature.
Notes
Don’t skip the cream of tartar—it gives snickerdoodles their signature tang and chewy texture. Brown butter timing is critical: watch for amber color and nutty aroma, then remove from heat immediately. Use room temperature egg to prevent seizing the butter. Always use 100% pumpkin purée, not pumpkin pie filling. If dough is too sticky, refrigerate 15 minutes; if too dry, add 1 teaspoon milk or water. For best texture, serve at room temperature.
Nutrition
- Serving Size: 1 cookie
- Calories: 145
- Sugar: 12
- Sodium: 95
- Fat: 7
- Saturated Fat: 4
- Carbohydrates: 20
- Fiber: 1
- Protein: 2
Keywords: brown butter pumpkin snickerdoodle cookies, easy fall recipe, pumpkin cookies, snickerdoodle, brown butter cookies, fall dessert


