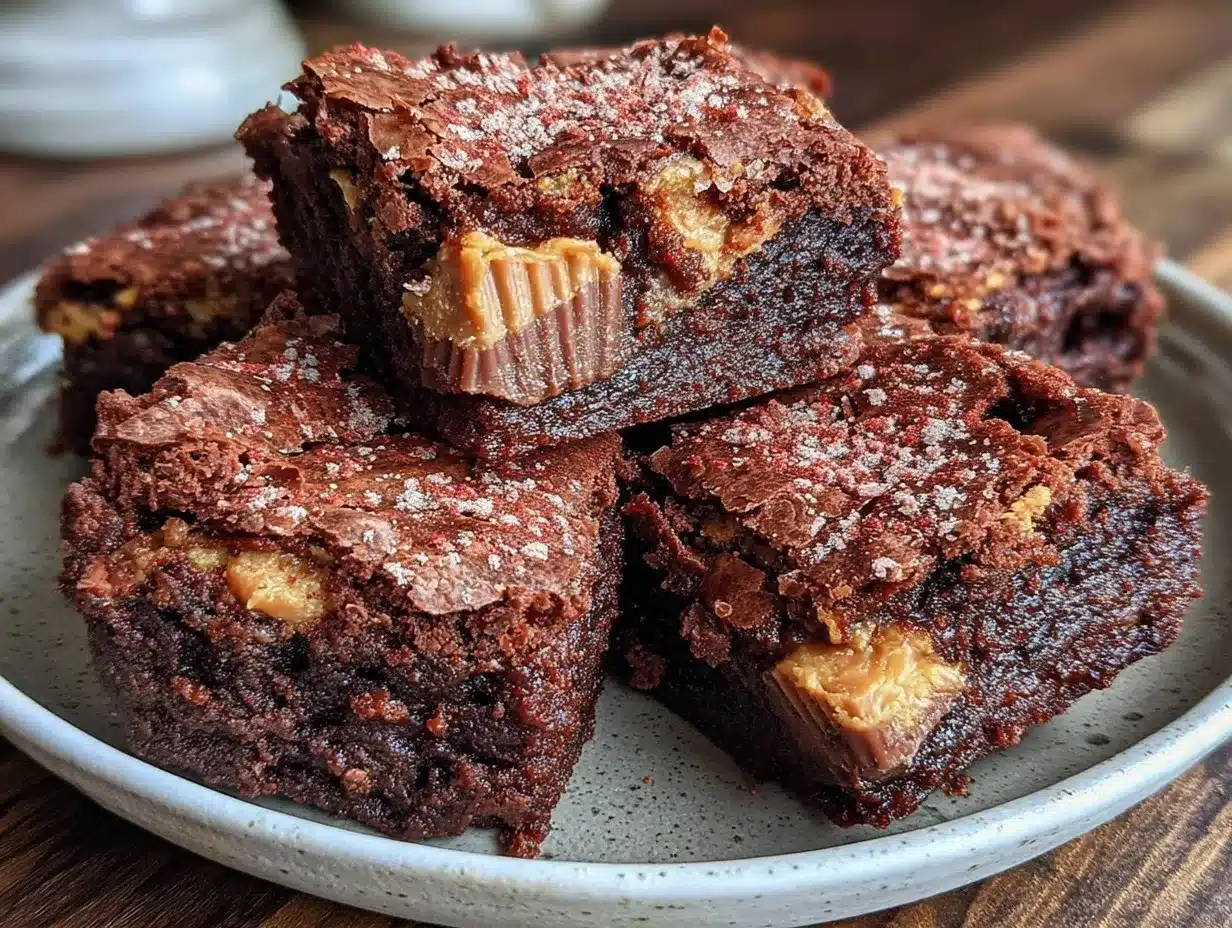
“Wait, did you just put peanut butter cups inside brownies?” a friend asked me one evening as I pulled this batch from the oven. Honestly, I was a bit skeptical myself. This recipe for fudgy peanut butter cup brownies with gooey centers wasn’t exactly planned—it started as a happy accident during a late-night baking session fueled by a chocolate craving and a forgotten stash of peanut butter cups.
I was scrambling to whip something up after a long day that left me too exhausted to fuss over complicated desserts. In a pinch, I dropped chopped peanut butter cups into my usual brownie batter, not expecting much beyond a messy, sweet surprise. But when I sliced into those brownies, the gooey, melty peanut butter centers caught me off guard—in the best way possible.
That sticky, rich middle combined with the dense, chocolatey fudge was the kind of comforting treat you want to savor slowly, maybe with a glass of cold milk or a warm cup of coffee. Since that night, I’ve made these brownies multiple times—sometimes tweaking the peanut butter cup ratio, sometimes sneaking in a sprinkle of sea salt. It’s become my go-to dessert when I want something quick but unforgettable.
Honestly, it’s not just about the peanut butter cups or the gooey centers. It’s the way the chocolate and peanut butter play off each other, the texture that’s fudgy but not too dense, and that little moment when you bite in and get a melty surprise that makes this recipe stick in my heart (and my kitchen). If you’re someone who likes a bit of indulgence without fuss, this recipe will quietly win you over too.
Why You’ll Love This Recipe
This fudgy peanut butter cup brownies with gooey centers recipe isn’t just another chocolate treat; it’s a tried-and-true favorite that’s been tested and perfected through many late-night cravings and weekend baking marathons. Here’s why it stands out:
- Quick & Easy: Comes together in under 40 minutes, making it perfect for those spontaneous dessert moments or busy weeknights.
- Simple Ingredients: No need for exotic items—just pantry staples and your favorite peanut butter cups. I personally prefer Reese’s for that classic peanut butter and chocolate combo.
- Perfect for Gatherings: Ideal for potlucks, casual hangouts, or cozy nights in. They’re always a hit—think ooey, gooey bites that melt in your mouth.
- Crowd-Pleaser: Kids and adults alike ask for seconds. The peanut butter cup surprise inside makes these brownies unforgettable.
- Unbelievably Delicious: The fudgy texture combined with the gooey peanut butter centers makes these brownies a little slice of heaven.
What sets this recipe apart is the way the peanut butter cups remain delightfully gooey inside, not just melted but still holding their shape enough to create that perfect surprise in each bite. I’ve found that slightly underbaking the brownies helps keep those centers soft and luscious—something I’ve learned after a few trial batches. It’s a subtle trick but makes all the difference.
Honestly, these brownies feel like a small indulgence that can soothe a hectic day or make a gathering feel special without much effort. They’re comfort food with a twist—rich and chocolatey, yet with that salty, nutty peanut butter kick that you didn’t know you needed. Once you try these, you might find yourself making them as often as I do (and maybe even pairing them with a fresh dessert like these mini lemon blueberry cheesecakes for variety!).
What Ingredients You Will Need
This recipe uses straightforward, wholesome ingredients to deliver a rich, fudgy chocolate experience with that irresistible gooey peanut butter cup center. Most of these are pantry staples, and the peanut butter cups add that extra flair without any fuss.
- Unsalted butter, 1 cup (227g), melted (adds richness and fudgy texture)
- Granulated sugar, 1 ½ cups (300g)
- Brown sugar, ¼ cup (50g), packed (for deeper flavor)
- Large eggs, 3, room temperature (for structure and moisture)
- Pure vanilla extract, 2 teaspoons (enhances overall flavor)
- All-purpose flour, 1 cup (125g) (for classic brownie texture)
- Cocoa powder, ¾ cup (75g), unsweetened (I recommend Ghirardelli for a rich, smooth taste)
- Salt, ½ teaspoon (balances sweetness)
- Baking powder, ¼ teaspoon (just enough lift without drying out)
- Peanut butter cups, about 16 mini (or 8 regular size, chopped) (the star ingredient – Reese’s are my favorite, but feel free to try other brands)
If you want to switch things up, you can use almond flour for a gluten-free option, or swap the peanut butter cups for nutella-filled chocolates if you prefer hazelnut. For a dairy-free version, use coconut oil instead of butter and pick dairy-free peanut butter cups.
Equipment Needed
- 8×8 inch (20×20 cm) baking pan: Ideal size for thick, gooey brownies. I’ve also used a 9×9 pan but the brownies turn out slightly thinner.
- Mixing bowls: One large for wet ingredients, another for dry ingredients.
- Whisk and rubber spatula: For mixing and folding the batter without overworking it.
- Measuring cups and spoons: Accuracy here helps keep the brownies consistent.
- Cooling rack: Essential for letting brownies cool evenly to set those gooey centers just right.
If you don’t have an 8×8 pan, a similar-sized oven-safe dish will work. I once used a glass pie dish in a pinch, and while the edges cooked a bit differently, the gooey centers were still spot on. For budget-friendly options, silicone baking pans are great for easy release and clean-up, though I prefer classic metal pans for even heat distribution.
Preparation Method
- Preheat your oven to 350°F (175°C) and grease your 8×8 inch pan or line it with parchment paper for easy removal. This should take about 10 minutes.
- Mix the wet ingredients: In a large bowl, whisk together the melted butter, granulated sugar, and brown sugar until smooth and slightly glossy (about 2-3 minutes). Add the eggs one at a time, mixing well after each addition. Stir in the vanilla extract. This step sets the base for a fudgy texture.
- Combine the dry ingredients: In a separate bowl, sift together the all-purpose flour, cocoa powder, salt, and baking powder. This ensures no lumps and an even chocolate flavor.
- Fold dry into wet: Gently fold the dry ingredients into the wet using a rubber spatula until just combined. The batter will be thick and glossy—don’t overmix, or the brownies will be cakey instead of fudgy.
- Prepare the peanut butter cups: Chop mini peanut butter cups into halves or quarters depending on size. Reserve about half for layering and fold the rest into the batter.
- Layer the batter and peanut butter cups: Pour half the batter into the pan and spread evenly. Sprinkle half of the chopped peanut butter cups over the batter. Pour the remaining batter on top and gently spread. Finally, scatter the remaining peanut butter cups over the surface for gooey pockets in every bite.
- Bake for 30-35 minutes: Start checking around 30 minutes. The edges should be set and the center slightly soft but not liquid. Insert a toothpick; it should come out with moist crumbs but not wet batter. This timing keeps those centers nice and gooey.
- Cool completely: Let the brownies cool in the pan on a rack for at least an hour before slicing. This step is crucial—cutting too soon means the gooey centers might run, but waiting lets them firm up just right.
Pro tip: If you want extra gooey centers, slightly underbake by a minute or two and cool the brownies in the fridge for 20 minutes before cutting. It’ll be a bit messier but oh-so-worth it.
Cooking Tips & Techniques
Getting the perfect balance of fudgy brownie and gooey peanut butter centers takes a few trusted techniques and lessons learned from some messy kitchen experiments.
- Don’t overmix: Overworking the batter develops gluten and makes the brownies cakey. Fold gently until just combined.
- Use quality cocoa powder: I swear by Ghirardelli for that deep, rich chocolate flavor. It makes a noticeable difference.
- Watch your baking time: Oven temps vary, so start checking at 30 minutes. The center should wobble slightly but not be wet.
- Chop the peanut butter cups unevenly: Some bigger chunks give gooey pockets, while smaller bits throughout the batter add surprise bites.
- Cooling is key: I’ve learned the hard way that cutting warm brownies results in a melty mess. Patience pays off.
- Multitask smart: While the brownies bake, clean your prep area or prep a cold drink to pair with these indulgent treats.
One time, I baked these on a whim before guests arrived, forgetting the cooling step. The result was a deliciously gooey mess—but it taught me to plan ahead next time. Now, I always let them cool fully, and sometimes chill, for neat slices and perfect texture.
Variations & Adaptations
These brownies are quite versatile, and you can easily tweak them to suit your preferences or dietary needs.
- Nut-free version: Skip the peanut butter cups and add white chocolate chips or caramel bits instead for gooey pockets.
- Vegan adaptation: Use dairy-free butter, flax eggs (1 tbsp ground flaxseed + 3 tbsp water per egg), and vegan peanut butter cups or chopped vegan chocolates.
- Seasonal twist: Swap peanut butter cups for chopped peppermint bark around the holidays or add a swirl of raspberry jam for a fruity surprise.
- Extra fudgy: Use half butter and half cream cheese in the batter for a rich, cheesecake-like fudginess.
- Personal favorite: I once tried adding a pinch of cayenne pepper to the cocoa powder for a subtle heat that paired unbelievably well with the peanut butter cups’ sweetness.
Oven baking isn’t the only way—if you’re feeling adventurous, try making these as microwave mug brownies (adjusting ingredients accordingly) for a quick treat. Or bake in muffin tins for individual fudgy bites perfect for parties or lunchboxes.
Serving & Storage Suggestions
These brownies are best enjoyed at room temperature or slightly warmed to revive the gooey centers. I like to serve them with a scoop of vanilla ice cream or a drizzle of chocolate sauce for extra indulgence.
For parties, cut into small squares and arrange on a platter with fresh berries or nuts to balance the richness. A cold glass of milk or a cup of strong coffee pairs beautifully.
To store, keep brownies in an airtight container at room temperature for up to 3 days. For longer storage, refrigerate for up to a week or freeze for up to 3 months. When reheating, warm gently in the microwave or oven to soften the centers without drying out the edges.
Interestingly, the flavors deepen after a day or two, making leftovers even more irresistible. Just be sure to let them come back to room temperature before serving to get that perfect gooey texture again.
Nutritional Information & Benefits
Each serving of these fudgy peanut butter cup brownies with gooey centers provides a satisfying indulgence with an estimated 280-320 calories, depending on the size of your cut. They contain roughly 15g of fat, 35g of carbohydrates, and 4g of protein per piece.
Key ingredients like cocoa powder bring antioxidants that support heart health, while peanut butter cups add protein and healthy fats (albeit with some sugar). For those watching carbs, using almond flour and sugar alternatives can reduce the glycemic impact.
Allergen note: This recipe contains nuts, dairy, eggs, and gluten. Substitutions are possible to accommodate dietary needs.
From my experience, these brownies strike a nice balance between indulgence and satisfaction, making them a go-to when I want something comforting but not overly complicated.
Conclusion
These fudgy peanut butter cup brownies with gooey centers have become a trusted favorite in my kitchen for good reason. They’re quick, simple, and deliver that perfect bite of rich chocolate combined with a melty peanut butter surprise that makes every slice feel special.
Feel free to tweak the peanut butter cup amount, experiment with add-ins, or try one of the variations to make this recipe your own. I love how flexible it is—whether for a casual treat or an unexpected guest, it always impresses.
If you try this recipe, I’d love to hear how it turns out or what twist you add. Sharing those little moments makes cooking even more fun and rewarding. Here’s to many gooey, fudgy bites ahead!
Frequently Asked Questions
Can I use regular-sized peanut butter cups instead of mini ones?
Yes! Just chop them into smaller pieces so they distribute evenly throughout the batter and create gooey pockets.
How do I keep the centers gooey without underbaking the whole batch?
Watch the baking time closely and look for slight wobbling in the center. Letting the brownies cool completely also helps the centers set without overcooking.
Can I make these brownies ahead of time?
Absolutely! They store well in an airtight container for up to 3 days at room temperature or longer in the fridge or freezer.
What if I don’t have cocoa powder?
Cocoa powder is key for that fudgy texture and chocolate flavor, but you could try melted dark chocolate as a substitute, adjusting sugar accordingly.
Are these brownies gluten-free?
Not as written, but you can swap all-purpose flour for a gluten-free blend or almond flour to make them gluten-free.
Pin This Recipe!
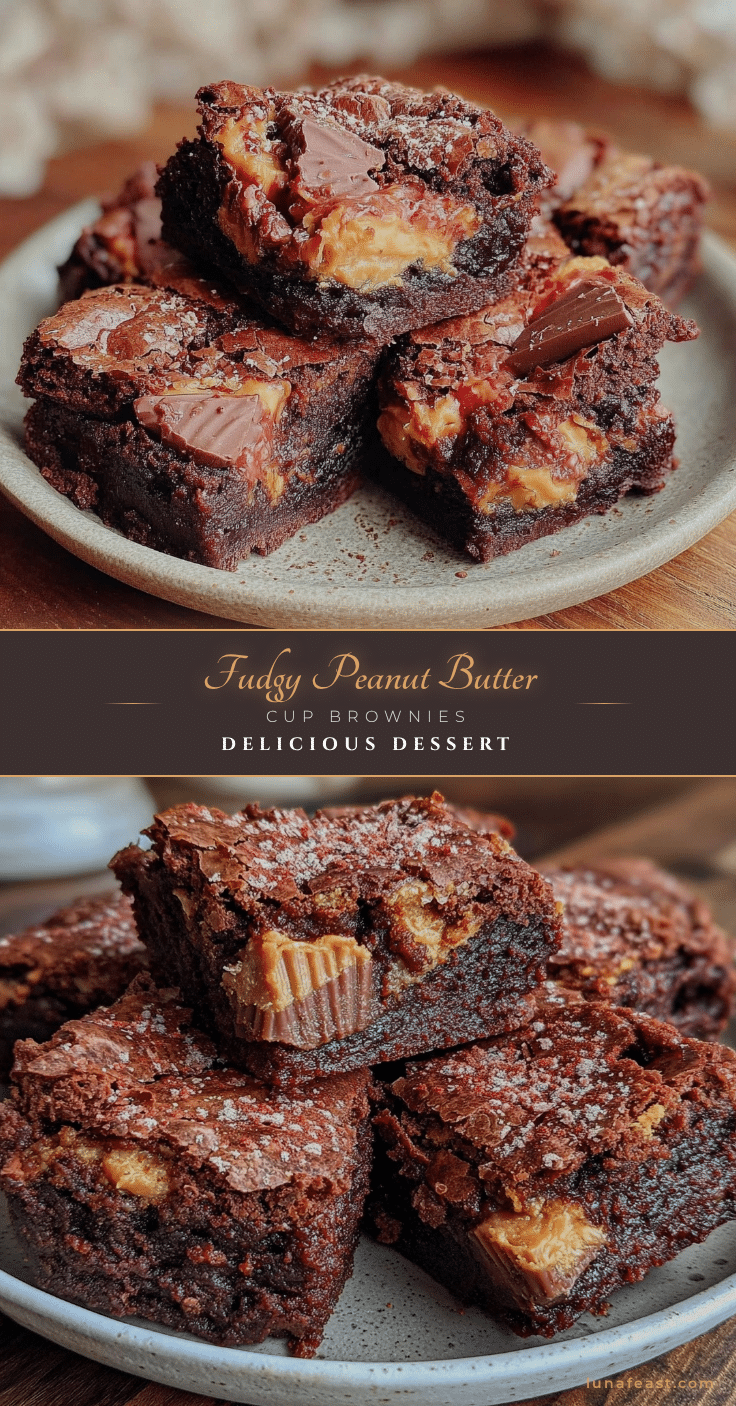
Fudgy Peanut Butter Cup Brownies Easy Homemade Recipe with Gooey Centers
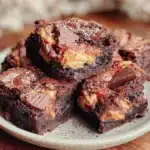
These fudgy peanut butter cup brownies feature gooey centers with melty peanut butter cups inside, delivering a rich chocolate and peanut butter indulgence that’s quick and easy to make.
- Prep Time: 15 minutes
- Cook Time: 30-35 minutes
- Total Time: 45-50 minutes
- Yield: 16 servings 1x
- Category: Dessert
- Cuisine: American
Ingredients
- 1 cup (2 sticks, 227g) unsalted butter, melted
- 1 ½ cups (300g) granulated sugar
- ¼ cup (50g) packed brown sugar
- 3 large eggs, room temperature
- 2 teaspoons pure vanilla extract
- 1 cup (125g) all-purpose flour
- ¾ cup (75g) unsweetened cocoa powder
- ½ teaspoon salt
- ¼ teaspoon baking powder
- About 16 mini peanut butter cups or 8 regular size, chopped
Instructions
- Preheat your oven to 350°F (175°C) and grease an 8×8 inch baking pan or line it with parchment paper.
- In a large bowl, whisk together the melted butter, granulated sugar, and brown sugar until smooth and slightly glossy (about 2-3 minutes).
- Add the eggs one at a time, mixing well after each addition. Stir in the vanilla extract.
- In a separate bowl, sift together the all-purpose flour, cocoa powder, salt, and baking powder.
- Gently fold the dry ingredients into the wet ingredients using a rubber spatula until just combined. Do not overmix.
- Chop the peanut butter cups into halves or quarters depending on size. Reserve about half for layering and fold the rest into the batter.
- Pour half the batter into the prepared pan and spread evenly. Sprinkle half of the chopped peanut butter cups over the batter.
- Pour the remaining batter on top and gently spread. Scatter the remaining peanut butter cups over the surface.
- Bake for 30-35 minutes, starting to check at 30 minutes. The edges should be set and the center slightly soft but not liquid. A toothpick inserted should come out with moist crumbs but not wet batter.
- Cool the brownies completely in the pan on a cooling rack for at least an hour before slicing.
Notes
Do not overmix the batter to avoid cakey brownies. Slightly underbake by 1-2 minutes for extra gooey centers and chill before cutting. Use quality cocoa powder for best flavor. Let brownies cool completely before slicing to set gooey centers.
Nutrition
- Serving Size: 1 brownie (assuming
- Calories: 300
- Sugar: 25
- Sodium: 150
- Fat: 15
- Saturated Fat: 7
- Carbohydrates: 35
- Fiber: 3
- Protein: 4
Keywords: brownies, peanut butter cups, fudgy brownies, gooey centers, chocolate dessert, easy brownies, homemade brownies