For a while, I just accepted that store-bought pan de muerto wasn’t going to taste like the ones my abuela used to make. You know the kind I mean. The ones from the bakery that were slightly dry, overly sweet, and completely lacking that soft, pillowy texture that makes you want to tear into it with your hands. I had been looking for a fluffy pan de muerto that actually tasted like home, not just a hollow shell of sugar and yeast.
It wasn’t until I started experimenting with hydration levels and proofing times that things finally clicked. The gap was real. I wanted something that honored the tradition but fit into my modern kitchen without requiring a degree in fermentation science. Honestly, I thought I’d have to settle for dense, bready loaves that felt more like punishment than celebration.
But then came the batch that changed everything. It was soft. It was aromatic with orange blossom water and anise. It smelled like October in Mexico City, even though I was standing in my kitchen in November. That’s when I knew I had found the right balance.
Now, I make this recipe every year. It’s become a quiet ritual. There’s something grounding about kneading the dough and watching it rise, knowing that hours later, I’ll have something warm and comforting to share with family. It’s not about perfection. It’s about connection. And if you’ve been struggling to find that elusive softness, you’re in the right place.
Why You’ll Love This Recipe
This isn’t just another bread recipe you’ll find buried on page five of a search result. This fluffy pan de muerto is the result of years of tweaking, tasting, and sometimes failing, before getting it just right. I’ve tested this dough with different flours, different yeasts, and even different temperatures, and this version is the one that consistently delivers that cloud-like texture everyone craves.
Here is why this recipe stands out:
* **Quick & Easy**: While bread usually takes time, this recipe is streamlined. From start to finish, you’re looking at about 3 hours, mostly for rising. It’s perfect for a weekend project or a quiet afternoon when you need to decompress.
* **Simple Ingredients**: You likely have most of these in your pantry right now. Flour, sugar, yeast, butter, eggs, and milk. No obscure spices or hard-to-find ingredients. It’s wholesome, honest cooking.
* **Perfect for Día de los Muertos**: This is the centerpiece of the ofrenda. It’s not just food; it’s a tribute. Sharing this bread with loved ones, whether they are here or remembered, adds a layer of meaning to the meal.
* **Crowd-Pleaser**: Even people who don’t typically like sweet breads love this. The subtle hint of orange and anise is sophisticated but approachable. Kids love the bone shapes, and adults love the soft crumb.
* **Unbelievably Delicious**: The combination of the sweet, crumbly topping and the tender interior is next-level comfort food. It’s the kind of bread that makes you close your eyes after the first bite and just sigh.
What makes this recipe different is the technique. We use a slightly higher hydration dough, which creates those air pockets that make it fluffy. Plus, brushing it with orange marmalade while it’s still warm locks in moisture and adds that glossy, professional finish. It’s not just a recipe; it’s a tradition you can master.
What Ingredients You Will Need
This recipe uses simple, wholesome ingredients to deliver bold flavor and satisfying texture without the fuss. The beauty of pan de muerto lies in how few ingredients it takes to create something so complex in taste and appearance. Most of these are pantry staples, which means you don’t need a special grocery trip to make this happen.
Here is what you’ll need to get started:
* **All-Purpose Flour (4 cups / 500g)**: The foundation of the dough. I recommend a high-protein brand like King Arthur for the best structure, but standard all-purpose works fine if that’s what you have.
* **Granulated Sugar (1/2 cup / 100g)**: Feeds the yeast and adds sweetness. Don’t skip this; it helps with browning too.
* **Instant Yeast (2 1/4 tsp / 1 packet)**: Fast-rising yeast is key for a lighter texture. Active dry yeast works, but you’ll need to bloom it first.
* **Unsalted Butter (1/2 cup / 113g, softened)**: Adds richness and tenderness. Room temperature butter mixes in easier, creating a smoother dough.
* **Whole Milk (1 cup / 240ml, warm)**: Warm milk activates the yeast. Make sure it’s not too hot, or you’ll kill the yeast. It should feel like baby bathwater temperature.
* **Large Eggs (2, room temperature)**: Adds structure and richness. Room temperature eggs emulsify better into the dough.
* **Orange Zest (1 large orange)**: Fresh zest is non-negotiable. Bottled zest lacks that bright, essential oil punch that defines this bread.
* **Anise Seeds (1 tsp)**: Crushed slightly to release flavor. This is the secret note that makes it taste authentic.
* **Salt (1 tsp)**: Balances the sweetness and strengthens the gluten.
* **Orange Marmalade (1/4 cup)**: For brushing on top. Adds shine and extra orange flavor.
* **Confectioners’ Sugar (for dusting)**: Optional, but adds a pretty, snowy finish.
For the decorative “bones” and “skull” on top, you can roll extra dough or buy pre-made dough strips if you’re short on time. But honestly, making them by hand is part of the fun. Look for firm, small-curd cottage cheese if you want to add a protein boost, but traditional recipes skip it. In summer, you might swap the anise for a hint of cinnamon, but stick to tradition for Día de los Muertos.
Equipment Needed
You don’t need a fancy kitchen to make this bread. A few basic tools will get you the best results.
* **Large Mixing Bowl**: A glass or stainless steel bowl is ideal. You need enough space for the dough to expand.
* **Stand Mixer with Dough Hook**: This is my go-to for kneading. It saves your arms and ensures consistent kneading. If you don’t have one, a wooden spoon and a bit of elbow grease work too.
* **Measuring Cups and Spoons**: Precision matters in baking. Level off your flour.
* **Digital Kitchen Scale**: Highly recommended. Measuring flour by volume can lead to inconsistent results. Weighing gives you accuracy every time.
* **Parchment Paper**: For lining your baking sheet. Prevents sticking and makes cleanup easy.
* **Pastry Brush**: For applying the egg wash and marmalade. Silicone brushes are durable and easy to clean.
* **Oven**: Obviously. Make sure it’s calibrated correctly. An oven thermometer helps if you suspect it’s running hot or cold.
If you don’t have a stand mixer, be prepared to knead by hand for about 10-12 minutes. It’s a workout, but you’ll feel the dough change under your fingers. Also, keep a clean towel handy for covering the dough during rising.
Preparation Method
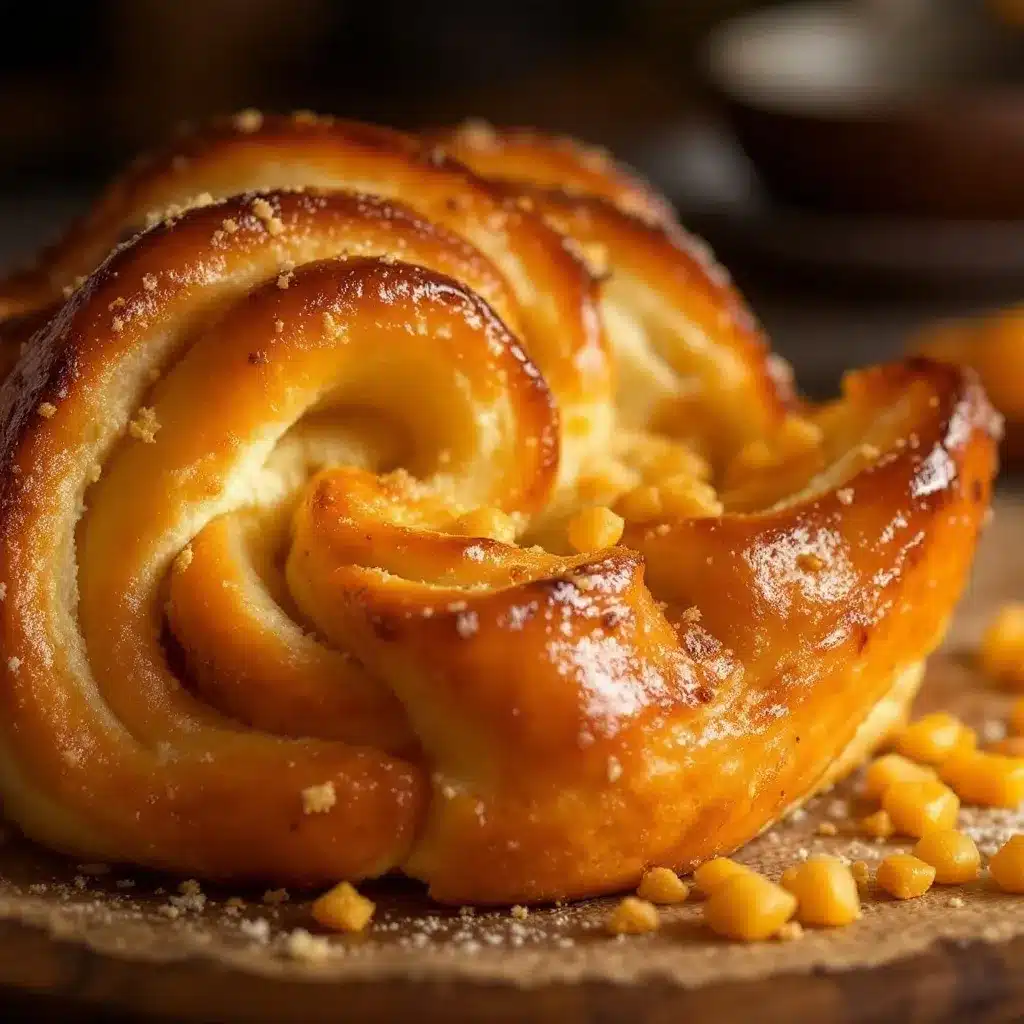
Making fluffy pan de muerto is a process of patience and care. Here is how to bring it all together.
1. **Activate the Yeast**: In a small bowl, mix the warm milk with 1 tablespoon of sugar and the yeast. Let it sit for 5-10 minutes until it becomes foamy. This step ensures your yeast is alive and ready to work. If it doesn’t foam, start over with new yeast.
2. **Mix Dry Ingredients**: In a large bowl, whisk together the flour, remaining sugar, salt, orange zest, and crushed anise seeds. This distributes the flavor evenly throughout the dough.
3. **Combine Wet and Dry**: Add the softened butter, eggs, and the foamy yeast mixture to the dry ingredients. If using a stand mixer, attach the dough hook and mix on low speed for 2 minutes. If mixing by hand, stir until a shaggy dough forms.
4. **Knead the Dough**: Increase the mixer speed to medium-low and knead for 5-7 minutes. The dough should become smooth, elastic, and slightly sticky. If it’s too sticky, add flour 1 tablespoon at a time. If it’s too dry, add milk 1 teaspoon at a time. The dough should pass the “windowpane test”—stretch a small piece thin enough to see light through it without tearing.
5. **First Rise**: Shape the dough into a ball and place it in a lightly oiled bowl. Cover with plastic wrap or a damp towel. Let it rise in a warm, draft-free area for 1-1.5 hours, or until doubled in size. This is when the magic happens.
6. **Shape the Bread**: Punch down the dough to release air. Divide it into portions. One large portion for the main loaf, and smaller portions for the bones and skull. Roll the main portion into a circle. Roll out the smaller portions into long strips for bones and a small ball for the skull. Arrange them on a parchment-lined baking sheet.
7. **Second Rise**: Cover the shaped bread and let it rise again for 30-45 minutes. It should look puffy and jiggly. Preheat your oven to 350°F (175°C) during the last 15 minutes of rising.
8. **Bake**: Brush the bread with beaten egg wash. Bake for 25-30 minutes until golden brown. If the top browns too quickly, tent with foil.
9. **Glaze**: While the bread bakes, warm the orange marmalade with a teaspoon of water. Once the bread is out of the oven, brush it generously with the warm marmalade. This keeps it moist and adds shine.
10. **Cool**: Let the bread cool on a wire rack for at least 30 minutes before slicing. This allows the crumb to set.
Cooking Tips & Techniques
Getting that fluffy texture isn’t just about following steps; it’s about understanding the dough. Here are some pro tips to ensure success.
* **Temperature Matters**: Your milk should be warm, not hot. If it’s too hot, it kills the yeast. If it’s too cold, the yeast won’t activate. Aim for 105-110°F (40-43°C).
* **Don’t Overflour**: It’s tempting to add more flour if the dough feels sticky, but this leads to dense bread. The dough should be soft and tacky. Use the windowpane test to check gluten development instead.
* **Proofing Environment**: Yeast loves warmth. If your kitchen is cold, place the dough in an oven with just the light turned on. The residual heat creates a perfect rising environment.
* **Kneading Time**: Under-kneading results in a dense loaf. Over-kneading can make the bread tough. Stop when the dough is smooth and elastic.
* **Egg Wash Application**: Brush the egg wash gently to avoid deflating the risen dough. A light coat is enough for a nice golden color.
* **Marmalade Glaze**: Apply the marmalade while the bread is still hot. This helps it adhere and penetrate slightly, keeping the crust soft.
I once rushed the second rise and ended up with brick-like bread. Don’t make my mistake. Give it the time it needs. It’s worth the wait.
Variations & Adaptations
While the traditional recipe is beloved, there are ways to tweak it to suit your taste or dietary needs.
* **Gluten-Free Option**: Use a 1:1 gluten-free flour blend that includes xanthan gum. The texture will be slightly different but still delicious. Add an extra egg for structure.
* **Vegan Adaptation**: Swap butter for vegan butter or coconut oil. Use flax eggs (1 tbsp ground flaxseed + 3 tbsp water per egg) instead of regular eggs. Use plant-based milk.
* **Citrus Variations**: Swap orange zest for lemon or lime zest for a different citrus profile. You can also add a tablespoon of vanilla extract for a sweeter aroma.
* **Spiced Version**: Add a pinch of nutmeg or cinnamon to the dough for a warmer, fall-like flavor. This pairs well with coffee or hot chocolate.
* **Mini Loaves**: Divide the dough into smaller portions to make individual rolls. These bake faster and are great for gifts or single servings.
I once tried adding chocolate chips to the dough, and it was surprisingly good. The bitterness of the chocolate balanced the sweetness of the bread. Feel free to experiment, but stick to the traditional version for the most authentic experience.
Serving & Storage Suggestions
Pan de muerto is best enjoyed fresh, but it stores well if you handle it correctly.
* **Serving**: Serve warm with a cup of hot chocolate, café de olla, or coffee. It’s traditionally eaten during breakfast or afternoon snack time. Break it apart with your hands rather than slicing it for the best experience.
* **Storage**: Store leftovers in an airtight container at room temperature for up to 3 days. The marmalade glaze helps keep it moist.
* **Freezing**: Wrap individual loaves or portions tightly in plastic wrap and then in foil. Freeze for up to 2 months. Thaw at room temperature or warm in the oven at 300°F for 10 minutes.
* **Reheating**: To refresh day-old bread, sprinkle it with a little water and warm it in the oven for 5-7 minutes. This restores the soft texture.
The flavors meld over time, so it often tastes even better on the second day. Just don’t let it sit out too long, or it will dry out.
Nutritional Information & Benefits
This fluffy pan de muerto is a treat, so enjoy it in moderation. Each slice (approx. 1/8 of the loaf) contains about 250-300 calories, depending on size and toppings.
* **Carbohydrates**: The flour and sugar provide energy, making it a good source of quick carbs.
* **Fats**: Butter and eggs contribute healthy fats, which help with satiety.
* **Protein**: Eggs and flour provide a modest amount of protein.
* **Allergens**: Contains gluten, eggs, and dairy. Use substitutions for allergies.
While it’s not a health food, the orange zest and anise offer antioxidants and digestive benefits. It’s a comforting, soul-soothing bread that brings people together, and that’s worth more than any nutritional label.
Conclusion
Making fluffy pan de muerto is more than just baking; it’s an act of love and remembrance. This recipe has become a cornerstone of my holiday traditions, and I hope it becomes one of yours too. The soft texture, the aromatic spices, and the beautiful shapes make it a standout dish.
I encourage you to try this recipe and make it your own. Add your favorite citrus, experiment with the shapes, or share it with someone you miss. Cooking is about connection, and this bread is a perfect vehicle for that.
If you make this recipe, please leave a comment below. I’d love to hear how it turned out for you. Share your photos on social media and tag me—I love seeing your creations. And don’t forget to share this recipe with friends and family who might be looking for a new holiday tradition.
Happy baking, and happy Día de los Muertos.
Frequently Asked Questions
Can I make this bread ahead of time?
Yes! You can shape the bread and let it rise in the fridge overnight. In the morning, let it come to room temperature and rise for an additional hour before baking. This can actually improve the flavor.
Why is my pan de muerto dense?
This usually happens if the yeast was inactive or if the dough was over-kneaded. Ensure your milk is warm but not hot, and check that your yeast is fresh. Also, avoid adding too much flour during kneading.
Can I use active dry yeast instead of instant yeast?
Yes, but you’ll need to bloom it in warm milk with a pinch of sugar for 5-10 minutes before adding it to the flour. The rising time may be slightly longer.
How do I keep the bread soft?
Brushing with orange marmalade immediately after baking is the key. Also, store it in an airtight container at room temperature. Avoid refrigerating, as it can dry out the bread.
What does the skull and bone shape represent?
The skull represents the departed souls, and the bones represent their remains. The circular loaf represents the cycle of life. It’s a symbolic bread that honors ancestors and celebrates their memory.
Pin This Recipe!

Fluffy Pan de Muerto: 5 Easy Mexican Sweet Bread Recipes

A traditional Mexican sweet bread for Día de los Muertos, featuring a soft, pillowy texture infused with orange blossom and anise, topped with decorative dough shapes and a glossy orange marmalade glaze.
- Prep Time: 45 minutes
- Cook Time: 30 minutes
- Total Time: 3 hours
- Yield: 1 large loaf (8 servings) 1x
- Category: Dessert
- Cuisine: Mexican
Ingredients
- 4 cups (500g) All-Purpose Flour
- 1/2 cup (100g) Granulated Sugar
- 2 1/4 tsp (1 packet) Instant Yeast
- 1/2 cup (113g) Unsalted Butter, softened
- 1 cup (240ml) Whole Milk, warm
- 2 Large Eggs, room temperature
- Zest of 1 large Orange
- 1 tsp Anise Seeds, crushed
- 1 tsp Salt
- 1 tbsp Sugar (for yeast activation)
- 1/4 cup Orange Marmalade
- 1 tsp Water (for marmalade glaze)
- Confectioners’ Sugar (for dusting, optional)
Instructions
- In a small bowl, mix warm milk with 1 tablespoon of sugar and the yeast. Let sit for 5-10 minutes until foamy.
- In a large bowl, whisk together flour, remaining sugar, salt, orange zest, and crushed anise seeds.
- Add softened butter, eggs, and the foamy yeast mixture to the dry ingredients. Mix on low speed with a dough hook for 2 minutes, or stir by hand until a shaggy dough forms.
- Knead on medium-low speed for 5-7 minutes until smooth, elastic, and slightly sticky. Perform the windowpane test to check gluten development.
- Shape dough into a ball, place in a lightly oiled bowl, cover, and let rise in a warm area for 1-1.5 hours until doubled.
- Punch down dough. Divide into portions: one large for the main loaf, smaller ones for bones and skull. Roll main portion into a circle and shape decorations.
- Arrange on a parchment-lined baking sheet. Cover and let rise again for 30-45 minutes until puffy. Preheat oven to 350°F (175°C) during the last 15 minutes.
- Brush bread with beaten egg wash. Bake for 25-30 minutes until golden brown. Tent with foil if browning too quickly.
- While baking, warm marmalade with a teaspoon of water. Brush generously over the hot bread immediately after removing from oven.
- Cool on a wire rack for at least 30 minutes before slicing.
Notes
Ensure milk is warm (105-110°F) but not hot to avoid killing yeast. The dough should be soft and tacky; avoid adding too much extra flour. For best results, use a high-protein flour like King Arthur. The marmalade glaze locks in moisture and adds shine. Can be made ahead by shaping and refrigerating overnight for a second rise in the morning.
Nutrition
- Serving Size: 1 slice (approx. 1/8
- Calories: 275
- Sugar: 15
- Sodium: 350
- Fat: 10
- Saturated Fat: 5
- Carbohydrates: 40
- Fiber: 2
- Protein: 6
Keywords: pan de muerto, mexican sweet bread, dia de los muertos, orange bread, anise bread, holiday baking, traditional bread


