I figured a no-bake pumpkin pie would be a compromise—something you make when you don’t have the energy for the real deal. It took about one slice for that assumption to collapse completely. The filling set up with this incredible silky density that no oven-baked version has ever given me, and the cold graham cracker crust stayed shatteringly crisp against the creamy custard. I stood there, fork halfway to my mouth, genuinely annoyed that I hadn’t tried this sooner. That’s the thing about shortcuts sometimes—they aren’t shortcuts at all. They’re just a better path you didn’t know existed.
This easy no-bake pumpkin pie with graham cracker crust started as a desperate Thanksgiving backup plan when my oven decided to play games. I needed a dessert that wouldn’t judge me for my appliance failures, and honestly, what came out of the fridge that night was so good I’ve never gone back to the baked version. The texture is what gets everyone—it’s somehow lighter than traditional pumpkin pie but richer at the same time, if that makes any sense. No cracking, no water bath, no checking for doneness. Just stir, pour, chill, and try not to eat the whole thing before dinner.
Why You’ll Love This Recipe
Let me tell you why this particular pie has earned a permanent spot in my fall rotation. I’ve tested this recipe through three different Thanksgiving dinners, two Friendsgiving gatherings, and one very skeptical mother-in-law who swore she “only likes baked pumpkin pie.” She asked for the recipe before she left.
- No Oven Required : This is the real deal—no baking, no water baths, no temperature watching. Your oven can be busy with other dishes or completely broken, and this pie won’t care.
- Make-Ahead Dream : You can prep this the day before (or two days before) and just pull it out when you’re ready. The filling actually gets better after 24 hours in the fridge.
- Silky, Not Jiggly : The texture is what makes this pie stand out. It’s creamy and firm without being heavy, thanks to a clever combination of cream cheese and whipped topping.
- Simple Ingredients : Everything on the ingredient list is something you can find at any grocery store. No specialty items, no hunting down obscure spices.
- Crowd-Pleasing Flavor : The pumpkin spice hits just right—warm and aromatic without overwhelming the actual pumpkin taste. Even non-pumpkin people have been converted at my table.
- No Stress Presentation : Because there’s no baking, there’s no cracking, no sinking, no uneven browning. It looks gorgeous with minimal effort.
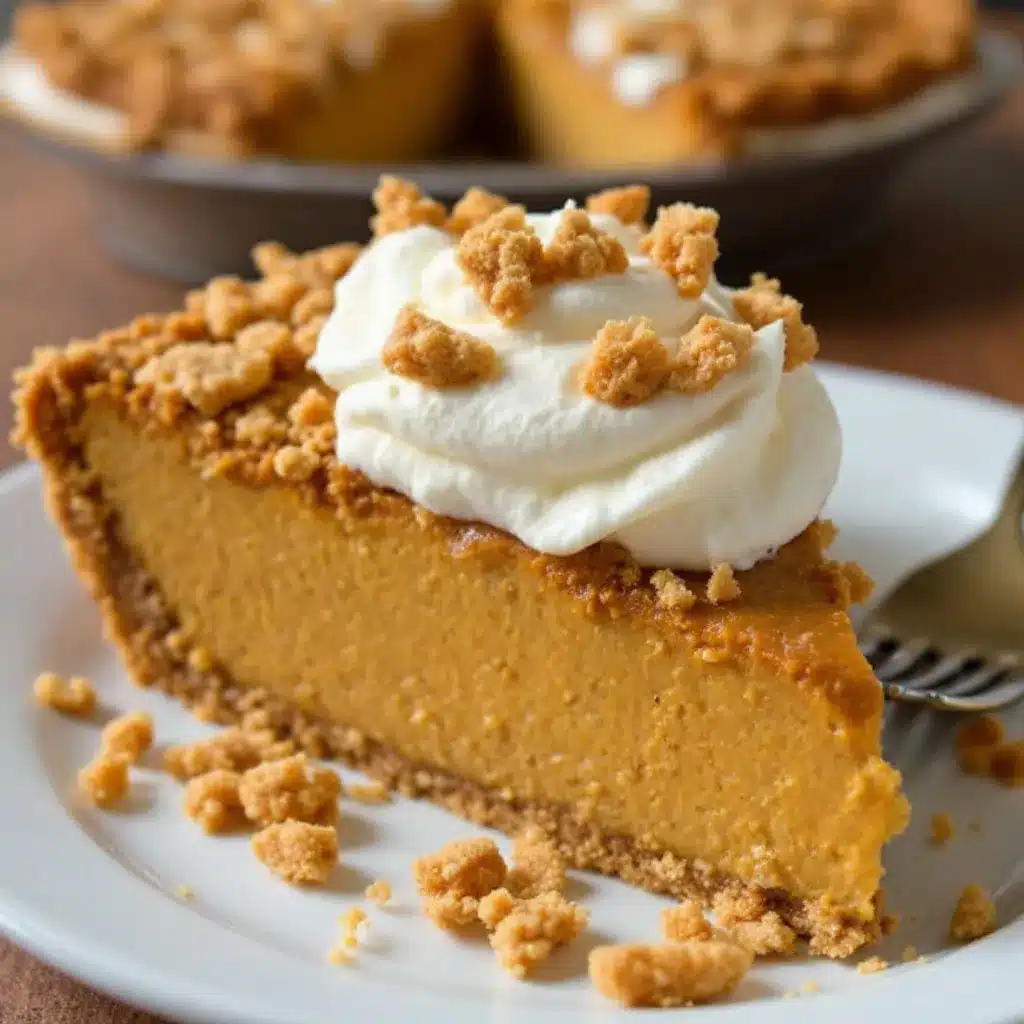
What sets this apart from other no-bake pumpkin pies is the texture. Most versions end up either too soft (like pudding in a crust) or too dense (like cheesecake that forgot to be light). This one hits that sweet spot because we’re using room temperature cream cheese beaten until fluffy, then folding in the pumpkin and spices before gently incorporating the whipped topping. The result is a filling that slices cleanly but melts on your tongue.
This is the kind of dessert that makes people close their eyes after the first bite. It’s comfort food reimagined—faster, easier, but with the same soul-soothing satisfaction that makes pumpkin pie a holiday staple. Perfect for when you want to impress without the stress.
What Ingredients You Will Need
This recipe uses simple, wholesome ingredients that come together to create something genuinely special. Most of these are pantry staples during fall, but they’re easy enough to find year-round if a pumpkin pie craving strikes in July.
For the Graham Cracker Crust
- 1 ½ cups graham cracker crumbs (about 12 full sheets, crushed finely—I use a food processor for the most consistent texture)
- ⅓ cup granulated sugar
- 6 tablespoons unsalted butter, melted (salted butter works too, just reduce the added salt in the filling slightly)
- ¼ teaspoon ground cinnamon (optional, but adds a nice warmth to the crust)
For the Pumpkin Filling
- 8 ounces cream cheese, softened to room temperature (this is crucial—cold cream cheese will leave you with lumps)
- ½ cup granulated sugar
- ¼ cup packed light brown sugar
- 1 cup pumpkin puree (not pumpkin pie filling—make sure you grab the 100% pure pumpkin)
- 1 teaspoon vanilla extract
- 1 ½ teaspoons pumpkin pie spice (I prefer homemade pumpkin spice blend, but store-bought works perfectly)
- ½ teaspoon ground cinnamon
- ¼ teaspoon salt
- 1 ½ cups frozen whipped topping, thawed (like Cool Whip—or you can use homemade whipped cream stabilized with gelatin)
For the Topping (Optional but Recommended)
- 1 cup heavy whipping cream
- 2 tablespoons powdered sugar
- ½ teaspoon vanilla extract
- Ground cinnamon or pumpkin pie spice for dusting
A quick note on the cream cheese: I’ve tested this with both full-fat and reduced-fat versions, and full-fat gives you the best texture hands down. The reduced-fat version works in a pinch but the filling won’t set up quite as firmly. For the pumpkin puree, Libby’s is my go-to brand because it’s consistently thick and not watery. If your pumpkin puree looks wet, pat it dry with a paper towel before adding it to the mixture.
For the graham crackers, Honey Maid is what I grew up with and still use. You can also use gluten-free graham crackers if needed—just make sure they’re finely crushed. The melted butter binds everything together, so don’t skimp on it.
Equipment Needed
You don’t need a lot of fancy equipment for this recipe, which is part of its charm. Here’s what you’ll need:
- 9-inch pie dish (glass or ceramic works best—metal can sometimes affect the crust’s browning)
- Large mixing bowl (for the filling)
- Medium mixing bowl (for the crust)
- Electric hand mixer or stand mixer (you can do this by hand, but the mixer makes the cream cheese silky smooth)
- Measuring cups and spoons
- Spatula (for scraping down the bowl and folding in the whipped topping)
- Food processor or rolling pin (for crushing graham crackers—a zip-top bag and a rolling pin works perfectly if you don’t have a food processor)
- Plastic wrap (for covering the pie while it chills)
If you don’t have a pie dish, you can use a 9-inch springform pan or even individual ramekins for personal-sized pies. The springform pan makes for gorgeous presentation because you can remove the sides before serving. Just note that the crust might be slightly thicker in a springform pan, so you’ll want to press it a bit thinner.
Preparation Method
This easy no-bake pumpkin pie with graham cracker crust comes together in about 20 minutes of active work, then the fridge does the rest. Here’s how to make it perfect every time.
Step 1: Make the Graham Cracker Crust
In a medium bowl, combine the graham cracker crumbs, sugar, and cinnamon (if using). Pour in the melted butter and stir with a fork until all the crumbs are evenly moistened. The mixture should look like wet sand and hold together when you squeeze it in your fist. If it crumbles apart, add another tablespoon of melted butter.
Transfer the mixture to your pie dish. Press it firmly into the bottom and up the sides using the bottom of a measuring cup or a flat-bottomed glass. I like to use a measuring cup because it gives you even pressure. Make sure the crust goes all the way up to the rim of the pie dish—it will shrink slightly as it chills.
Place the crust in the refrigerator for at least 30 minutes to firm up while you make the filling. This step is important because a cold crust holds up better against the filling.
Step 2: Beat the Cream Cheese
In a large mixing bowl, beat the softened cream cheese with an electric hand mixer on medium speed until it’s completely smooth and fluffy—about 2 minutes. Scrape down the sides of the bowl halfway through. This is where having room temperature cream cheese really matters. Cold cream cheese will leave you with little white lumps that never quite disappear.
Step 3: Add the Sugars and Pumpkin
Add the granulated sugar and brown sugar to the cream cheese and beat until combined, about 1 minute. Then add the pumpkin puree, vanilla extract, pumpkin pie spice, cinnamon, and salt. Beat on medium speed until everything is smooth and well incorporated, about 2 more minutes. The mixture will be thick and smell incredible at this point.
Step 4: Fold in the Whipped Topping
Add the thawed whipped topping to the pumpkin mixture. Use a spatula to gently fold it in—don’t stir or beat it. Fold from the bottom up, turning the bowl as you go, until no white streaks remain. The goal here is to keep as much air in the whipped topping as possible, which gives the pie its light, silky texture.
If you’re using homemade whipped cream instead of Cool Whip, make sure it’s stabilized (you can add a teaspoon of powdered gelatin dissolved in water) or it might weep as the pie sets.
Step 5: Assemble the Pie
Remove the crust from the refrigerator. Spoon the filling into the crust and spread it evenly with the spatula. Give the pie dish a few gentle taps on the counter to release any air bubbles and help the filling settle.
Cover the pie loosely with plastic wrap and refrigerate for at least 6 hours, but overnight is better. The filling needs time to set up properly, and the flavors will deepen as it sits. I’ve made this up to 48 hours in advance and it was even better on day two.
Step 6: Make the Whipped Cream Topping
About 30 minutes before serving, make the whipped cream. Pour the heavy cream, powdered sugar, and vanilla into a chilled bowl. Beat with an electric mixer on medium-high speed until soft peaks form—about 3 minutes. Be careful not to overbeat, or you’ll end up with butter.
Spread or pipe the whipped cream over the set pie. Dust with cinnamon or pumpkin pie spice just before serving.
Cooking Tips & Techniques
I’ve made this pie about a dozen times now, and I’ve learned a few things the hard way so you don’t have to.
Room temperature ingredients are non-negotiable. The first time I made this, I was in a hurry and used cold cream cheese straight from the fridge. The filling came out lumpy and never smoothed out, no matter how long I beat it. Give your cream cheese at least an hour on the counter before starting. If you’re really pressed for time, cut it into small cubes and let it sit for 30 minutes.
Don’t overmix the filling. Once you add the whipped topping, use a gentle hand. Overmixing deflates the air bubbles and makes the pie denser than it should be. Fold just until combined—a few tiny white streaks are better than a deflated filling.
Chill time matters more than you think. Six hours is the absolute minimum, but 24 hours is ideal. The filling needs time to set up properly, and the flavors need time to meld. I once served this after only 4 hours and it was still a bit soft in the center. Not a disaster, but not as good as it could have been.
Press the crust firmly. A loose crust will crumble when you try to cut the pie. Use the bottom of a measuring cup to really press it down and up the sides. Take your time with this step—it makes a difference.
If your filling seems too soft after the recommended chill time, it might be because your pumpkin puree was watery. Pat it dry with paper towels next time. You can also add an extra ¼ cup of whipped topping to help stabilize it.
For cleaner slices, use a sharp knife dipped in hot water and wiped dry between cuts. This works for any creamy pie, but especially for no-bake versions.
Variations & Adaptations
One of the best things about this easy no-bake pumpkin pie with graham cracker crust is how adaptable it is. Here are some variations I’ve tried and loved.
Gluten-Free Version : Swap the regular graham crackers for gluten-free graham crackers (Kinnikinnick makes a good one) or use crushed gluten-free shortbread cookies instead. The rest of the recipe is naturally gluten-free.
Vegan Adaptation : Use vegan cream cheese (I like Miyoko’s or Kite Hill), vegan butter for the crust, and coconut whipped cream for the topping. The texture will be slightly different—a bit softer—but still delicious. Just make sure your pumpkin puree is plain and not sweetened.
Chocolate Pumpkin Pie : Add ¼ cup of cocoa powder to the graham cracker crust mixture for a chocolate base that pairs beautifully with the pumpkin filling. I did this accidentally once (grabbed the wrong container) and it was such a happy accident that I’ve repeated it on purpose.
Maple Pecan Twist : Substitute the brown sugar with maple syrup (reduce the granulated sugar to ¼ cup to balance the sweetness) and top the finished pie with toasted pecans. The maple and pumpkin combo is absolutely divine.
Individual Servings : Instead of one large pie, press the crust into a muffin tin lined with paper liners and divide the filling among them. These mini pies are perfect for parties or portion control. Chill for at least 4 hours before serving.
Spice Adjustments : If you’re not a fan of pumpkin pie spice, you can make your own blend with cinnamon, nutmeg, ginger, and a tiny pinch of cloves. I actually prefer this because I can adjust the ratios—more ginger for warmth, less cloves because they can be overpowering.
Serving & Storage Suggestions
This pie is best served cold, straight from the refrigerator. The texture is firm and sliceable at fridge temperature, and the flavors are most vibrant when it’s chilled.
Serving Ideas : Top each slice with a generous dollop of whipped cream and a dusting of cinnamon. For extra crunch, sprinkle some crushed graham crackers or toasted pecans on top. This pie also pairs beautifully with a warm beverage—try it alongside a pumpkin chai latte for the ultimate fall treat.
What to Serve With It : This pie is rich enough to stand on its own, but it’s lovely with a side of fresh berries or a drizzle of caramel sauce. If you’re serving it for a holiday meal, it pairs beautifully with brown butter pumpkin bundt cake for a dessert spread that covers all the bases.
Storage : Cover the pie tightly with plastic wrap or aluminum foil and store it in the refrigerator for up to 5 days. The crust will stay crisp for about 3 days, then start to soften slightly. Honestly, I’ve never had leftovers last longer than 3 days because it disappears too fast.
Freezing Instructions : You can freeze this pie for up to 2 months. Make it completely, let it set in the fridge for 6 hours, then wrap it tightly in plastic wrap and foil. Thaw in the refrigerator overnight before serving. The texture will be slightly softer after freezing, but still delicious. I don’t recommend freezing the whipped cream topping—add that fresh after thawing.
Reheating : Don’t. This pie is meant to be served cold. If you want a warm pumpkin dessert, try pumpkin chocolate chip cookies instead.
Nutritional Information & Benefits
Here’s the approximate nutritional breakdown for one slice of this pie (based on 10 servings, without the optional whipped cream topping):
- Calories: 320
- Fat: 18g
- Carbohydrates: 38g
- Protein: 4g
- Fiber: 2g
- Sugar: 28g
Pumpkin is the star ingredient here, and it brings some real nutritional benefits to the table. It’s loaded with vitamin A (great for eye health and immune function), fiber (which helps with digestion and keeps you feeling full), and antioxidants like beta-carotene. The cream cheese and whipped topping add richness, but they also contribute calcium and protein.
For a lighter version, you can use reduced-fat cream cheese and light whipped topping. The texture won’t be quite as luxurious, but it’ll still satisfy that pumpkin pie craving. This recipe is also vegetarian and can be made gluten-free and vegan with the substitutions I mentioned earlier.
Potential allergens include dairy (cream cheese, butter, whipped topping) and gluten (graham crackers). If you’re serving a crowd with dietary restrictions, the vegan and gluten-free variations work beautifully.
Conclusion
This easy no-bake pumpkin pie with graham cracker crust has become my go-to fall dessert for good reason. It’s simple enough for a weeknight treat but impressive enough for Thanksgiving dinner. The silky filling, the crisp crust, the warm pumpkin spices—it’s everything you want from pumpkin pie without any of the fuss.
What I love most about this recipe is how forgiving it is. You don’t need to worry about overbaking, cracking, or a soggy crust. It’s the kind of dessert that builds confidence in the kitchen, and honestly, we could all use more of that. Plus, it frees up your oven for all the other dishes you’re making.
I’d love to hear how this pie turns out for you. Did you try any of the variations? Did your family fight over the last slice? Drop a comment below and let me know. And if you’re looking for more no-bake desserts, check out my no-bake banana pudding icebox cake—it’s another crowd-pleaser that disappears fast.
Happy fall baking (or, you know, no-baking)!
Frequently Asked Questions
Can I use pumpkin pie filling instead of pumpkin puree?
No, I wouldn’t recommend it. Pumpkin pie filling is already sweetened and spiced, which will throw off the sugar and spice ratios in this recipe. Stick with 100% pure pumpkin puree for the best results.
How long does this pie need to set in the fridge?
At least 6 hours, but overnight (12-24 hours) is ideal. The filling needs time to firm up properly, and the flavors deepen as it sits. Don’t rush this step!
Can I make this pie dairy-free?
Yes! Use vegan cream cheese, dairy-free butter for the crust, and coconut whipped cream for the topping. The texture will be slightly softer, but it’s still delicious. Just make sure all your ingredients are at room temperature before mixing.
Why is my filling runny?
This usually happens for one of two reasons: your cream cheese wasn’t fully softened (leading to an uneven texture), or your pumpkin puree was too watery. Pat the pumpkin puree with a paper towel before adding it to the mixture to remove excess moisture.
Can I use a store-bought graham cracker crust instead?
Absolutely. If you’re short on time, a store-bought crust works perfectly. Just skip the crust-making steps and pour the filling directly into the pre-made crust. You’ll save about 10 minutes, and the pie will still be delicious.
Pin This Recipe!
Easy No-Bake Pumpkin Pie with Graham Cracker Crust
This easy no-bake pumpkin pie with graham cracker crust is a creamy, silky dessert that requires no oven. Perfect for Thanksgiving or any fall gathering, it sets up beautifully in the fridge and tastes even better the next day.
- Prep Time: 20 minutes
- Cook Time: 0 minutes
- Total Time: 6 hours 20 minutes (includes chilling)
- Yield: 10 servings 1x
- Category: Dessert
- Cuisine: American
Ingredients
- 1 ½ cups graham cracker crumbs (about 12 full sheets)
- ⅓ cup granulated sugar
- 6 tablespoons unsalted butter, melted
- ¼ teaspoon ground cinnamon (optional)
- 8 ounces cream cheese, softened to room temperature
- ½ cup granulated sugar
- ¼ cup packed light brown sugar
- 1 cup pumpkin puree (not pumpkin pie filling)
- 1 teaspoon vanilla extract
- 1 ½ teaspoons pumpkin pie spice
- ½ teaspoon ground cinnamon
- ¼ teaspoon salt
- 1 ½ cups frozen whipped topping, thawed
- 1 cup heavy whipping cream (for topping)
- 2 tablespoons powdered sugar (for topping)
- ½ teaspoon vanilla extract (for topping)
- Ground cinnamon or pumpkin pie spice for dusting (for topping)
Instructions
- In a medium bowl, combine graham cracker crumbs, sugar, and cinnamon (if using). Pour in melted butter and stir with a fork until all crumbs are evenly moistened. Press firmly into the bottom and up the sides of a 9-inch pie dish using the bottom of a measuring cup. Refrigerate for at least 30 minutes.
- In a large mixing bowl, beat softened cream cheese with an electric hand mixer on medium speed until smooth and fluffy, about 2 minutes. Scrape down the sides halfway through.
- Add granulated sugar and brown sugar to the cream cheese and beat until combined, about 1 minute. Then add pumpkin puree, vanilla extract, pumpkin pie spice, cinnamon, and salt. Beat on medium speed until smooth and well incorporated, about 2 minutes.
- Add thawed whipped topping to the pumpkin mixture. Gently fold with a spatula until no white streaks remain, being careful not to deflate the mixture.
- Remove crust from refrigerator. Spoon filling into crust and spread evenly. Tap the pie dish gently on the counter to release air bubbles. Cover loosely with plastic wrap and refrigerate for at least 6 hours, preferably overnight.
- About 30 minutes before serving, make the whipped cream topping: In a chilled bowl, beat heavy cream, powdered sugar, and vanilla with an electric mixer on medium-high speed until soft peaks form, about 3 minutes. Spread or pipe over the set pie and dust with cinnamon or pumpkin pie spice.
Notes
Room temperature cream cheese is crucial for a smooth filling. Chill the pie for at least 6 hours, but overnight is better for best texture and flavor. If pumpkin puree is watery, pat it dry with a paper towel before adding. For cleaner slices, use a sharp knife dipped in hot water and wiped dry between cuts.
Nutrition
- Serving Size: 1 slice (1/10 of pie
- Calories: 320
- Sugar: 28
- Sodium: 280
- Fat: 18
- Saturated Fat: 10
- Carbohydrates: 38
- Fiber: 2
- Protein: 4
Keywords: no-bake pumpkin pie, easy pumpkin pie, graham cracker crust, Thanksgiving dessert, fall dessert, no oven pumpkin pie


