“Wait—you mean I can just roll it up and eat it like that?” My eight-year-old nephew stared at me like I had just invented sliced bread. It was a Tuesday afternoon, the kind where lunch feels like a chore and you’re staring into the fridge hoping something magical appears. I had a few slices of ham, some cheddar, and a couple of flour tortillas that were about to hit their expiration date. I wasn’t trying to be creative. I was just trying to feed a hungry kid without turning on the stove.
So I laid out a tortilla, layered on the ham and cheese, rolled it tight, and sliced it into pinwheels. He ate six of them before I could even sit down. That was the moment I realized something simple could actually be genius. These Easy Ham and Cheese Sandwich Roll-Ups aren’t fancy. They’re not complicated. But honestly? They’re the kind of thing you make once and suddenly you’re making them every week. They’ve saved my sanity on busy afternoons, lazy weekends, and even those evenings when dinner plans fall apart at the last minute.
There’s something about a rolled-up sandwich that just feels more fun. Maybe it’s the pinwheel shape. Maybe it’s the way the cheese melts just slightly when you toast them. Or maybe it’s the fact that you can hold one in one hand while doing literally anything else with the other. Whatever it is, these roll-ups have become a staple in my kitchen, and I have a feeling they’re about to become one in yours too.
Why You’ll Love This Recipe
I’ve tested this recipe about a dozen times now, tweaking the cheese-to-ham ratio, trying different tortillas, and even experimenting with spreads. What I landed on is the version that works every single time. Here is why these Easy Ham and Cheese Sandwich Roll-Ups deserve a permanent spot in your meal rotation:
- Quick & Easy: From fridge to plate in under 10 minutes. No cooking required unless you want a warm, toasty version. Perfect for those days when you need lunch to happen immediately.
- Simple Ingredients: You probably already have everything you need. Ham, cheese, tortillas, and maybe a spread. That’s it. No fancy grocery trips, no obscure ingredients.
- Perfect for Lunchboxes: These roll-ups pack beautifully. They don’t get soggy, they hold their shape, and kids actually eat them without complaint. That’s a win in my book.
- Crowd-Pleaser: I’ve served these at playdates, potlucks, and even casual get-togethers. Adults love them just as much as kids. They disappear fast.
- Endlessly Customizable: Swap the ham for turkey. Use different cheeses. Add veggies or spreads. This recipe is a template, not a rulebook.
What makes these roll-ups different from just another sandwich? It’s the texture. The tortilla stays soft and pliable, the ham adds that savory bite, and the cheese gives you that creamy, satisfying finish. When you toast them lightly in a pan, the cheese melts into every layer and the outside gets just a little crispy. It’s next-level comfort food that takes almost no effort. The first time I made these for a friend’s kid who “doesn’t like sandwiches,” she ate four and asked for more. That’s when I knew this recipe was special.
What Ingredients You Will Need
This recipe uses simple, everyday ingredients to create something that feels way more exciting than it should. Most of these are pantry staples, and if you don’t have one thing, there’s almost always a good substitute. Here is what you will need:
- Flour tortillas (8-inch or 10-inch): The foundation of your roll-up. I prefer medium-sized flour tortillas because they roll easily without cracking. Burrito-sized works too, but you’ll get fewer slices per roll. For a healthier twist, try whole wheat or spinach tortillas. Just make sure they’re soft and pliable—stale tortillas will crack and fall apart.
- Ham slices (deli-style, about 6-8 slices): Go for good quality deli ham here. Honey ham, smoked ham, or black forest ham all work beautifully. I usually ask for thick-cut slices at the deli counter because they hold up better when rolling. Pre-packaged ham is fine too, just pat it dry with a paper towel if it looks wet. Excess moisture can make your roll-ups soggy.
- Cheese slices (cheddar, Swiss, provolone, or mozzarella): You want a cheese that melts well and has good flavor. Sharp cheddar gives you that bold, tangy punch. Swiss adds a nutty sweetness. Provolone is mild and creamy. I personally love using a mix of cheddar and mozzarella for the best of both worlds. Use 1-2 slices per tortilla depending on how cheesy you want it.
- Butter or mayonnaise (optional, for toasting): If you want warm, crispy roll-ups, a thin layer of softened butter or mayo on the outside of the tortilla before toasting makes all the difference. Butter gives you that rich, golden crust. Mayo spreads easier and adds a subtle tang. Both work great—it’s really a matter of preference.
- Spread or condiment (optional): This is where you can get creative. Yellow mustard, Dijon mustard, honey mustard, mayo, ranch dressing, or even cream cheese all add extra flavor. I like a thin layer of honey mustard for that sweet and tangy kick. Spread it evenly on the tortilla before adding the ham and cheese.
- Optional add-ins: Lettuce leaves (pat dry), thinly sliced tomatoes (remove seeds), pickles, roasted red peppers, or even a sprinkle of everything bagel seasoning. Just don’t overstuff or your roll-ups won’t hold together.
I recommend using Mission tortillas for their softness and flexibility. For cheese, Tillamook sharp cheddar is my go-to because it melts like a dream. And for ham, Boar’s Head honey ham has the perfect balance of sweet and savory. But honestly, whatever you have in the fridge will work. This recipe is forgiving that way.
Equipment Needed
You don’t need much to make these roll-ups, which is part of the beauty. Here is what you will need:
- Cutting board: A sturdy surface for assembling and slicing. I prefer a large wooden or plastic cutting board that gives you plenty of room to work.
- Sharp knife: A good chef’s knife or serrated knife makes clean slices without squishing the roll-ups. A dull knife will crush the tortilla and push the filling out. Trust me, I learned this the hard way.
- Non-stick skillet or griddle (optional): If you want to toast your roll-ups, a medium non-stick skillet works perfectly. A flat griddle gives you even more surface area if you’re making a big batch.
- Spatula: For flipping the roll-ups in the pan without burning your fingers.
- Toothpicks (optional): If you’re serving these at a party or packing them for lunch, toothpicks help keep the roll-ups from unraveling. Just poke one through the center of each slice.
- Parchment paper or wax paper: Helps with rolling and keeps things from sticking. I often roll the tortilla tightly in parchment paper and let it rest for a few minutes before slicing. This gives you cleaner cuts and tighter rolls.
If you don’t have a non-stick skillet, a cast iron pan works too—just add a little extra butter to prevent sticking. And if you’re making these for a crowd, consider using an electric griddle so you can toast multiple roll-ups at once. Budget-wise, you really only need a knife and a cutting board. Everything else is optional.
Preparation Method

Making these Easy Ham and Cheese Sandwich Roll-Ups is almost too simple. But there are a few tricks I’ve picked up along the way that make the difference between a good roll-up and a great one. Follow these steps and you’ll be rolling like a pro in no time.
- Prepare your workstation: Lay out all your ingredients on the counter. Warm your tortillas slightly if they seem stiff—about 10 seconds in the microwave makes them more pliable and less likely to crack. Place one tortilla flat on your cutting board.
- Add your spread (optional): If you’re using a spread like mustard, mayo, or cream cheese, spread a thin, even layer over the entire surface of the tortilla. Leave about a half-inch border around the edges so nothing squeezes out when you roll. A little goes a long way here—too much spread will make your roll-ups soggy.
- Layer the ham: Place 2-3 slices of ham evenly across the tortilla, slightly overlapping if needed. Make sure the ham covers most of the surface but doesn’t hang over the edges. If your ham slices are large, you might only need two. If they’re small, use three or four. The goal is even coverage without thick clumps.
- Add the cheese: Lay 1-2 slices of cheese on top of the ham. If you’re using two slices, place them side by side with a slight overlap in the middle. For extra cheesy roll-ups, tear the cheese into smaller pieces and distribute them evenly. Pro tip: if your cheese is cold from the fridge, let it sit at room temperature for 5 minutes so it’s easier to handle.
- Add any extras: This is where you can get creative. Add a few lettuce leaves (make sure they’re completely dry), a couple of thin tomato slices (seeds removed), or a pickle spear placed along one edge. Just remember—less is more. Overstuffing makes rolling difficult and your roll-ups will fall apart.
- Roll it up tight: Starting from one edge, fold the tortilla over the filling, tucking it tightly as you go. Use your fingers to hold the filling in place while you roll. Keep even pressure as you roll all the way to the other end. The roll should be firm but not so tight that the filling squeezes out the ends. Think of it like rolling a sleeping bag—snug but not suffocating.
- Secure and rest (optional but recommended): Wrap the rolled tortilla tightly in parchment paper or plastic wrap. Let it rest for 5-10 minutes at room temperature. This allows the tortilla to relax and hold its shape, which makes slicing much cleaner. If you’re in a hurry, you can skip this step, but the difference is noticeable.
- Slice into pinwheels: Using a sharp knife, slice the rolled tortilla into 1-inch thick rounds. A gentle sawing motion works better than pressing straight down—it keeps the shape intact. You should get about 5-6 slices per 8-inch tortilla. For a party presentation, cut them slightly thinner (about 3/4 inch) for more pieces.
- Toast them (optional): Heat a non-stick skillet over medium heat. Add a thin layer of butter or spread a little mayo on the outside of each pinwheel. Place the roll-ups cut-side down in the pan. Cook for 2-3 minutes per side until golden brown and the cheese is melted. The edges should be crispy and the center warm and gooey. Work in batches if needed—don’t overcrowd the pan.
- Serve immediately: Arrange the roll-ups on a plate, cut-side up so the pinwheel pattern is visible. If you used toothpicks, remove them before serving or leave them in for easy grabbing at parties. Serve warm or at room temperature.
A few things I’ve learned from making these dozens of times: If your tortilla cracks while rolling, it’s probably too cold or too dry. Warm it up for a few seconds next time. If your roll-ups are falling apart after slicing, you might have overstuffed them or used too much spread. And if the cheese isn’t melting enough when toasting, cover the pan with a lid for the last minute of cooking—the trapped steam will melt the cheese perfectly without burning the outside.
Cooking Tips & Techniques
After making these roll-ups more times than I can count, I’ve picked up a few tricks that make the process smoother and the results more consistent. Here are my best tips:
Warm your tortillas first. This is the number one tip I give everyone. Cold tortillas straight from the fridge are stiff and prone to cracking. A quick 10-second zap in the microwave makes them flexible and easy to roll without tearing. If you’re making a big batch, stack them between damp paper towels and microwave for 20-30 seconds.
Don’t overfill. I know it’s tempting to pile on the ham and cheese, but less really is more here. A thin, even layer of filling rolls more easily and stays together better. Think of it like a sushi roll—you want balance, not a bulge. If you can’t close your hand around the roll without the filling spilling out, you’ve gone too far.
Let the roll rest before slicing. This was a game-changer for me. After rolling, wrap the tortilla tightly in plastic wrap or parchment paper and let it sit for 5-10 minutes. The tortilla relaxes and holds its shape, so when you slice, you get clean, even pinwheels instead of squished, messy ones. I learned this after ruining a batch by slicing too quickly and ending up with a pile of unraveled filling.
Use a serrated knife for slicing. A sharp serrated knife cuts through the tortilla without crushing it. If you only have a straight-edge knife, make sure it’s very sharp and use a gentle sawing motion. Pressing straight down will squish the roll and push the filling out. I ruined my first few attempts with a dull knife—don’t make my mistake.
Toast on medium heat, not high. High heat will burn the outside before the cheese has a chance to melt. Medium heat gives you a golden, crispy exterior with a warm, melted interior. Patience pays off here. If you’re in a rush, you can microwave the roll-ups for 15 seconds before toasting to give the cheese a head start.
Multitask like a pro. While your first batch of roll-ups is resting, start assembling the next one. Or while they’re toasting, prep a dipping sauce or side dish. These roll-ups come together so quickly that you can easily make a double batch in under 20 minutes once you get the rhythm down.
Variations & Adaptations
One of the best things about this recipe is how easily it adapts to different tastes, diets, and occasions. Here are some of my favorite variations:
Turkey and Swiss Roll-Ups: Swap the ham for roasted turkey breast and use Swiss cheese instead of cheddar. Add a thin layer of cranberry sauce or Dijon mustard for a flavor combination that tastes like Thanksgiving in a bite. This is my go-to for fall lunches and holiday leftovers.
Italian-Inspired Roll-Ups: Use provolone cheese, salami or pepperoni instead of ham, and spread a thin layer of pesto or marinara sauce on the tortilla before rolling. Add a few fresh basil leaves if you have them. These are perfect for lunchboxes or party platters and pair beautifully with a side of cozy baked ziti with Italian sausage for a full Italian-inspired meal.
Vegetarian Roll-Ups: Skip the ham and load up on roasted vegetables like bell peppers, zucchini, and mushrooms. Use hummus or cream cheese as the spread, and add fresh spinach leaves. You can also use sliced avocado for creaminess. This version is just as satisfying and works great for meatless Mondays.
Low-Carb or Keto-Friendly: Use large lettuce leaves or low-carb tortillas instead of flour tortillas. Fill with ham, cheese, and your favorite low-carb spreads. Roll tightly and secure with toothpicks. These are light, fresh, and perfect for anyone watching their carb intake.
Breakfast Roll-Ups: Swap the ham for crispy bacon or breakfast sausage. Use scrambled eggs and cheddar cheese as the filling. Spread a little cream cheese or salsa on the tortilla before rolling. Toast until golden and serve with a side of fruit. These make mornings feel special without any extra effort.
Spicy Southwest Roll-Ups: Use pepper jack cheese instead of cheddar. Add a thin layer of ranch dressing or chipotle mayo. Include sliced jalapeños or a sprinkle of taco seasoning. These have a nice kick and pair wonderfully with a bowl of creamy crockpot white chicken chili for a cozy, spicy dinner combo.
I once tried a version with brie cheese, fig jam, and prosciutto for a fancy appetizer. It was incredible. Don’t be afraid to experiment—some of the best recipes come from happy accidents.
Serving & Storage Suggestions
These roll-ups are versatile enough to serve in almost any setting. Here is how to make the most of them:
Serving Temperature: These are delicious at room temperature, warm from the pan, or even cold straight from the fridge. For the best texture, I recommend serving them warm if you’ve toasted them, or at room temperature if you haven’t. The cheese has the best flavor and melt when it’s not ice-cold.
Presentation Ideas: Arrange the pinwheels on a platter with the cut sides facing up so the spiral pattern is visible. Garnish with fresh herbs like parsley or chives for a pop of color. Serve with small bowls of dipping sauces like honey mustard, ranch dressing, or marinara sauce. For parties, stick a toothpick through each roll-up for easy grabbing.
Complementary Dishes: These roll-ups pair beautifully with a simple side salad, fresh fruit, or vegetable sticks. For a heartier meal, serve them alongside a warm bowl of creamy one-pot Cajun chicken pasta or a cup of tomato soup. They also work great as a snack alongside crispy bacon wrapped jalapeno poppers for game day or party spreads.
Storage Instructions: Store leftover roll-ups in an airtight container in the refrigerator for up to 3 days. Place a paper towel at the bottom of the container to absorb any excess moisture and prevent sogginess. If you’ve already sliced them, keep them in a single layer or separate layers with parchment paper so they don’t stick together.
Reheating Methods: For best results, reheat roll-ups in a non-stick skillet over medium heat for 1-2 minutes per side. This restores the crispy exterior and melts the cheese. You can also microwave them for 15-20 seconds, but they’ll be softer. For a quick lunch, I often eat them cold straight from the fridge—they’re still delicious.
Freezing Instructions: You can freeze assembled but uncooked roll-ups. Wrap each roll tightly in plastic wrap, then place them in a freezer bag. They’ll keep for up to 2 months. To serve, thaw in the refrigerator overnight, then slice and toast as directed. I’ve done this for meal prep and it works beautifully.
One thing I love about these roll-ups is that the flavors actually meld together after a few hours in the fridge. They taste even better the next day, especially if you’ve used a spread like mustard or pesto. The tortilla softens slightly and the flavors marry together in a really satisfying way.
Nutritional Information & Benefits
Here is the estimated nutritional breakdown for one serving (about 4-5 pinwheels made with an 8-inch tortilla, 2 slices ham, 1 slice cheddar, and no spread or butter):
| Nutrient | Amount per Serving |
|---|---|
| Calories | 280-320 |
| Protein | 18-22g |
| Carbohydrates | 28-32g |
| Fat | 12-16g |
| Saturated Fat | 6-8g |
| Fiber | 1-2g |
| Sodium | 800-1000mg |
Health Benefits of Key Ingredients: Ham is a good source of high-quality protein, which helps keep you full and supports muscle health. Cheese provides calcium for strong bones and teeth. Tortillas offer carbohydrates for quick energy. If you use whole wheat tortillas, you’ll also get additional fiber for better digestion and sustained energy.
Dietary Considerations: This recipe can be made gluten-free by using gluten-free tortillas. For a lower-sodium option, choose low-sodium ham and cheese. To reduce fat, use reduced-fat cheese and skip the butter for toasting. The recipe is naturally nut-free and egg-free, making it suitable for many common allergies.
Potential Allergens: This recipe contains dairy (cheese, butter) and gluten (tortillas). If you’re serving these at a gathering, always check with guests about dietary restrictions. I’ve made dairy-free versions using vegan cheese and gluten-free tortillas, and they turned out great—just adjust the toasting time since vegan cheese melts differently.
From a personal wellness perspective, I love that these roll-ups offer a balanced mix of protein, carbs, and fat in one portable package. They’re satisfying without being heavy, and they give you steady energy without the crash you get from sugary snacks. For busy days, they’re a lunch that actually fuels you instead of just filling you up.
Conclusion
These Easy Ham and Cheese Sandwich Roll-Ups have become one of those recipes I genuinely rely on. They’re not complicated or fancy, but they solve real problems—what to feed a hungry kid in five minutes, what to pack for lunch that won’t get soggy, what to bring to a gathering that everyone will actually eat. They’ve saved me on countless busy afternoons and lazy weekends, and I have a feeling they’ll do the same for you.
What I love most about this recipe is how adaptable it is. You can make it your own by switching up the fillings, trying different spreads, or adding your favorite veggies. It’s a template for creativity, not a rigid set of rules. So go ahead—experiment, make mistakes, and discover your perfect combination. That’s half the fun of cooking anyway.
I’d love to hear how these turn out for you. Did you try a fun variation? Did your kids devour them? Drop a comment below and let me know. And if you’re looking for more easy, family-friendly recipes, check out the easy cheesy cheeseburger casserole or the creamy marry me chicken with sun dried tomatoes for more weeknight winners. Happy rolling, friends!
Frequently Asked Questions
Can I make these roll-ups ahead of time?
Absolutely. You can assemble the roll-ups a day in advance and keep them wrapped tightly in the refrigerator. Slice and serve them cold, or slice and toast them just before serving. They actually hold up really well overnight, and the flavors meld together nicely.
Why are my tortillas cracking when I roll them?
This usually happens when the tortillas are too cold or too dry. Warm them in the microwave for 10-15 seconds before rolling, and make sure they’re fresh and pliable. If your tortillas are on the older side, they may need a little extra warmth to become flexible again.
Can I use corn tortillas instead of flour?
You can, but corn tortillas are smaller and more prone to cracking. They work best if you warm them well and don’t overfill them. For the best results with corn tortillas, keep the filling minimal and roll them gently. Flour tortillas are definitely easier to work with for this recipe.
How do I keep the roll-ups from getting soggy in lunchboxes?
The key is to pat your ham dry with a paper towel before assembling, and avoid using too much spread. Also, let the assembled roll-ups rest for a few minutes before wrapping them for lunch. If you’re packing them for later, store any dipping sauces separately and add them just before eating.
Can I make these dairy-free?
Yes! Use dairy-free cheese slices and a dairy-free spread like vegan cream cheese or hummus. Just keep in mind that dairy-free cheese melts differently than regular cheese, so if you’re toasting them, watch them closely to avoid burning. I’ve had good results with plant-based cheddar shreds melted on top before rolling.
Pin This Recipe!
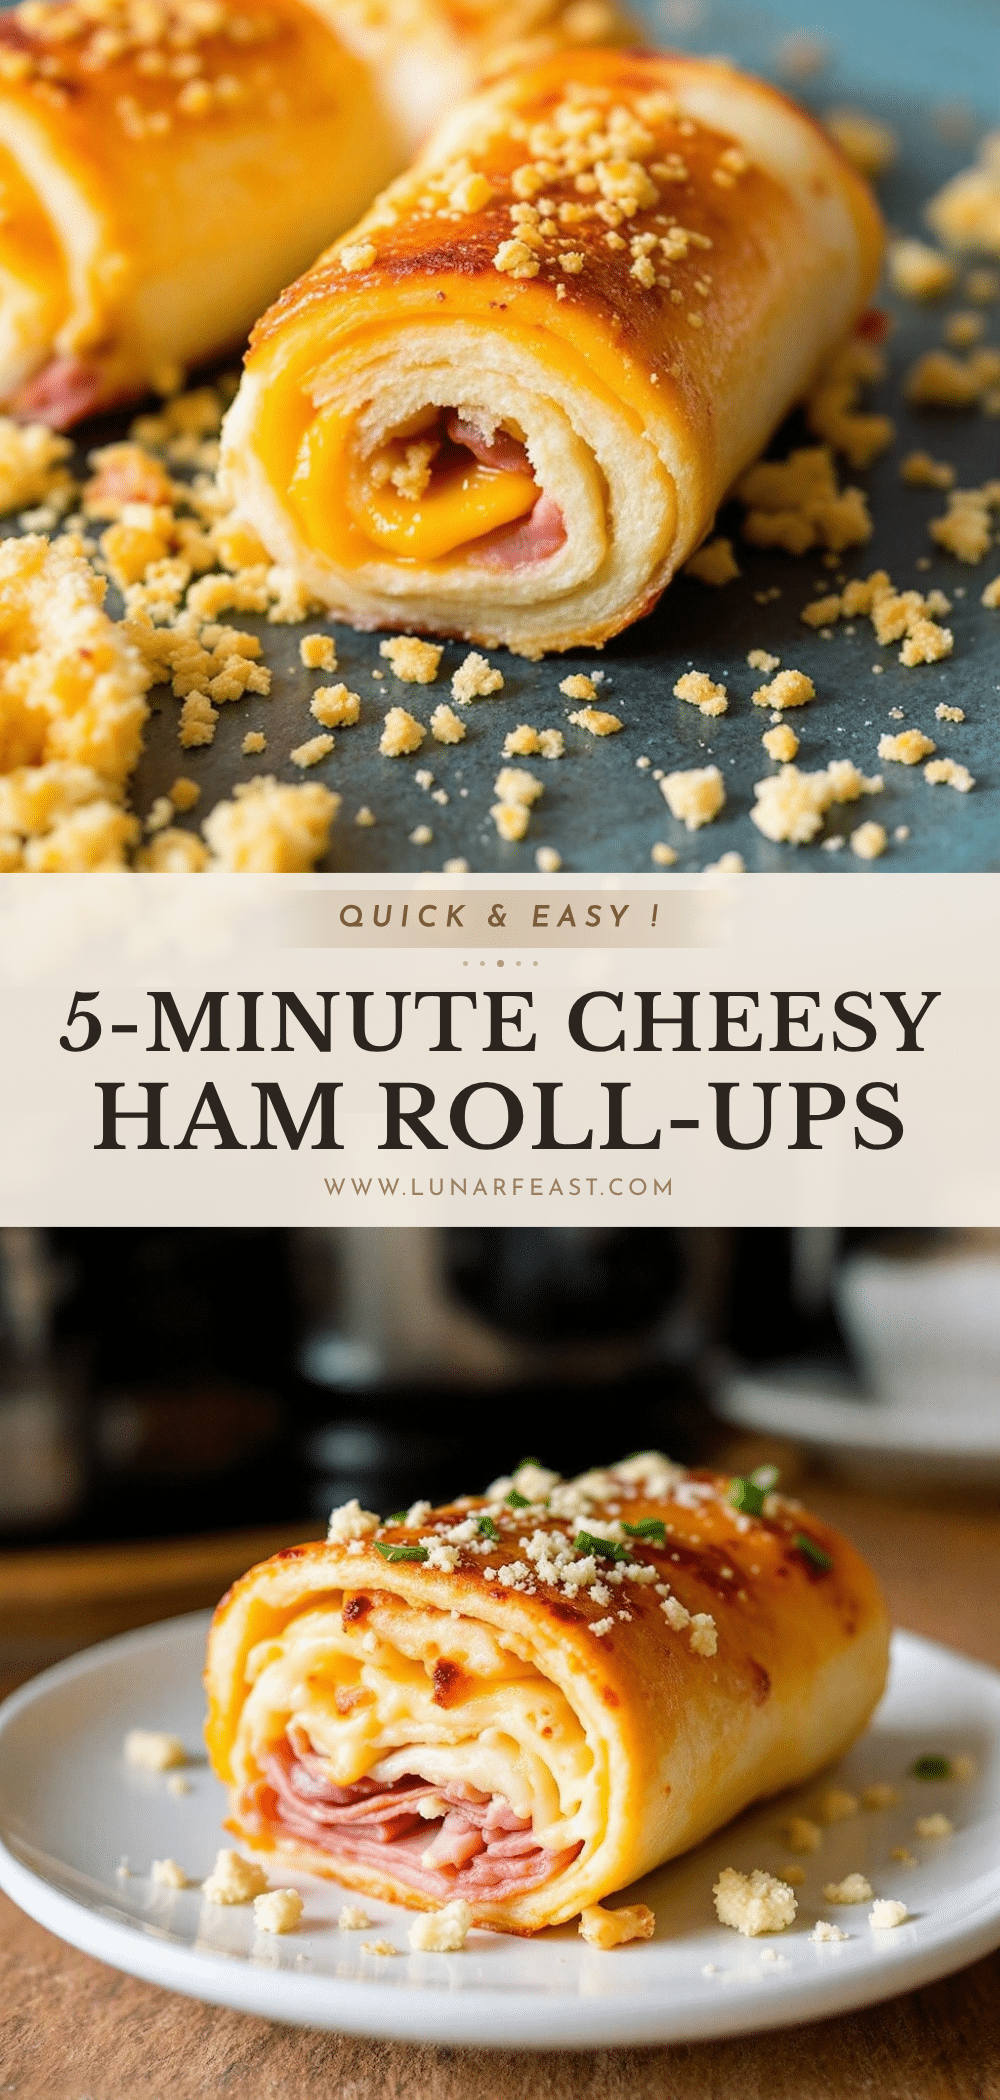
Easy Ham and Cheese Roll-Ups: Best Lunch Idea!

These Easy Ham and Cheese Sandwich Roll-Ups are a quick, no-cook lunch idea perfect for busy days. Made with simple ingredients like ham, cheese, and tortillas, they’re customizable, kid-friendly, and great for lunchboxes or parties.
- Prep Time: 10 minutes
- Cook Time: 6 minutes
- Total Time: 16 minutes
- Yield: 4 servings
- Category: Lunch
- Cuisine: American
Ingredients
- Flour tortillas (8-inch or 10-inch)
- Ham slices (deli-style, about 6-8 slices)
- Cheese slices (cheddar, Swiss, provolone, or mozzarella)
- Butter or mayonnaise (optional, for toasting)
- Spread or condiment (optional, e.g., mustard, mayo, honey mustard, ranch, cream cheese)
- Optional add-ins: lettuce leaves (pat dry), thinly sliced tomatoes (remove seeds), pickles, roasted red peppers, everything bagel seasoning
Instructions
- Prepare your workstation: Lay out all ingredients. Warm tortillas slightly if stiff (10 seconds in microwave). Place one tortilla flat on cutting board.
- Add your spread (optional): Spread a thin, even layer over the entire tortilla, leaving a half-inch border around edges.
- Layer the ham: Place 2-3 slices of ham evenly across the tortilla, slightly overlapping if needed, covering most of the surface without hanging over edges.
- Add the cheese: Lay 1-2 slices of cheese on top of the ham. For extra cheesiness, tear cheese into smaller pieces and distribute evenly.
- Add any extras: Add dry lettuce leaves, thin tomato slices (seeds removed), or a pickle spear along one edge. Less is more to avoid overstuffing.
- Roll it up tight: Starting from one edge, fold the tortilla over the filling, tucking tightly as you roll. Keep even pressure until the other end. The roll should be firm but not too tight.
- Secure and rest (optional but recommended): Wrap the rolled tortilla tightly in parchment paper or plastic wrap. Let rest for 5-10 minutes at room temperature for cleaner slicing.
- Slice into pinwheels: Using a sharp knife, slice the rolled tortilla into 1-inch thick rounds using a gentle sawing motion. You should get about 5-6 slices per 8-inch tortilla.
- Toast them (optional): Heat a non-stick skillet over medium heat. Add a thin layer of butter or spread mayo on the outside of each pinwheel. Place cut-side down in pan. Cook for 2-3 minutes per side until golden brown and cheese is melted.
- Serve immediately: Arrange roll-ups on a plate, cut-side up so pinwheel pattern is visible. Remove toothpicks if used. Serve warm or at room temperature.
Notes
Warm tortillas first to prevent cracking. Don’t overfill. Let roll rest before slicing for cleaner cuts. Use a serrated knife for slicing. Toast on medium heat, not high. For extra melty cheese, cover pan with lid for last minute of cooking. Store leftovers in airtight container in fridge for up to 3 days. Can be frozen for up to 2 months.
Nutrition
- Serving Size: 4-5 pinwheels
- Calories: 300
- Sugar: 2
- Sodium: 900
- Fat: 14
- Saturated Fat: 7
- Carbohydrates: 30
- Fiber: 1.5
- Protein: 20
Keywords: ham and cheese roll-ups, easy lunch, pinwheel sandwiches, no-cook lunch, kid-friendly, lunchbox ideas, party appetizer


