My six-year-old looked up at me with chocolate smeared across her cheek and said, “Mom, these are the best ghosts ever. Can we make them for my class party?” And honestly, that moment—sticky fingers, proud grin, and all—is exactly why I keep coming back to this recipe. She had helped me shape these little guys after school, and watching her carefully place each candy eye felt like a tiny Halloween miracle. I didn’t plan for them to become our go-to spooky snack. But here we are, three batches later, and she still hasn’t gotten tired of them.
These Easy Halloween Rice Krispie Ghost Treats are exactly what you need when you want something festive but don’t have the energy for complicated baking. Just three ingredients (okay, four if you count the candy eyes) and about fifteen minutes of your time. That’s it. No oven required, no fancy piping bags, no stressing over melted chocolate seizing up on you. I’ve made these for school parties, Halloween playdates, and even a last-minute neighborhood gathering where I realized I had nothing to bring. They saved me every single time.
The best part? Kids can actually help with these. Like, genuinely help—not just lick the spoon while you do all the work. My daughter shapes the ghosts herself now, and sure, some of them look more like lopsided snowmen than spooky spirits. But that’s the charm, you know? They’re supposed to look a little goofy. That’s what makes them fun.
Why You’ll Love This Recipe
Let me tell you why these little ghosts have earned a permanent spot in my Halloween rotation. I’ve tested this recipe through multiple school parties, a few rainy October afternoons, and one particularly chaotic evening where I needed something done in under twenty minutes. They passed every test.
- Only 3 ingredients (plus eyes): Rice Krispies cereal, marshmallows, butter, and candy eyes. That’s your entire shopping list. No hunting for specialty items at three different stores.
- Ready in 15 minutes: From start to finish, you’re looking at about a quarter of an hour. The hardest part is waiting for them to cool enough to eat.
- No baking required: Your oven stays off. Everything happens on the stovetop or in the microwave. Perfect for hot Halloween seasons when you don’t want to heat up the kitchen.
- Kid-approved and kid-friendly: I’ve made these with groups of six-year-olds, and nobody got hurt. The marshmallow mixture cools quickly enough that little hands can shape them safely.
- Perfect for Halloween parties: School events, trunk-or-treats, costume parties—these fit everywhere. They travel well and don’t need refrigeration.
- Customizable: You can dress them up with different colored icing, sprinkles, or even turn them into pumpkins instead. The basic recipe is a blank canvas.
What makes these different from every other Rice Krispie treat recipe out there? It’s the shaping technique. Most recipes tell you to press the mixture into a pan and cut shapes. But that wastes so much of the treat, and the edges never look right. I’ll show you how to shape them by hand so each ghost looks perfectly imperfect—just like a real homemade Halloween treat should.
What Ingredients You Will Need
This recipe uses the most basic pantry staples you probably already have sitting in your kitchen. No fancy extracts, no specialty flours, nothing that requires a trip to a gourmet grocery store. Here’s what you need:
- 3 tablespoons unsalted butter — Adds richness and helps prevent the marshmallows from sticking to everything. I use salted butter in a pinch, just reduce any added salt elsewhere. The butter also helps the treats stay soft longer.
- 10 ounces marshmallows (about 40 regular or 4 cups mini) — Mini marshmallows melt faster and more evenly, but regular work fine too. Jet-Puffed is my go-to brand because they melt consistently without becoming grainy. Store brands work, but you might need to stir a bit longer.
- 6 cups Rice Krispies cereal — The original is best for texture. Generic crispy rice cereal works too, but it tends to get soggy faster. Make sure your cereal is fresh—stale cereal won’t give you that signature crunch.
- Candy eyes (about 24-30 pairs) — These are the soul of your ghosts, literally. You can find them at craft stores, baking supply shops, or online. Wilton brand sticks well. If you can’t find them, use mini chocolate chips or M&Ms instead.
For the white chocolate version (optional):
- 1/2 cup white chocolate melting wafers — Gives the ghosts a brighter, whiter appearance and a slight vanilla flavor. Completely optional, but it makes them look more polished.
- 1 teaspoon coconut oil or shortening — Helps thin the white chocolate for easier dipping. Skip if your melting wafers already flow smoothly.
Ingredient selection tips: Look for marshmallows that feel soft when you squeeze the bag. Hard marshmallows won’t melt as smoothly and can leave lumps in your mixture. For the cereal, check the expiration date—fresh cereal makes a huge difference in texture. I learned this the hard way when I used a box that had been sitting in my pantry for months. The treats came out chewy instead of crisp.
Substitution guidance: You can use vegan marshmallows and plant-based butter to make these dairy-free. Dandies brand marshmallows work beautifully. For a gluten-free version, Rice Krispies are naturally gluten-free, but check the label because some generic brands add malt flavoring that contains gluten. The brand name version is safe.
Equipment Needed
You don’t need much for this recipe, which is part of the beauty. Here’s what I use:
- Large pot (4-quart or bigger) — You need room to stir the marshmallows and cereal together without spilling over the sides. A nonstick pot makes cleanup infinitely easier, but any large pot works.
- Silicone spatula — The best tool for stirring marshmallow mixture. Wooden spoons work too, but the marshmallow sticks to wood more. Silicone scrapes the sides clean and doesn’t scratch your pot.
- Large mixing bowl — For holding the cereal before you add the marshmallow mixture. Any big bowl works.
- Parchment paper or wax paper — Essential for shaping. The mixture is incredibly sticky, and parchment saves your sanity. I line my work surface with it.
- Small bowl of water — Dip your fingers in water before shaping, and the marshmallow mixture won’t stick to your hands. This is a game-changer.
- Baking sheet — To hold the finished ghosts while they set. Line it with parchment too.
Alternative options: If you don’t have a silicone spatula, use a wooden spoon sprayed with cooking spray. No parchment paper? Grease your hands generously with butter or cooking spray and shape directly on a clean counter. I’ve done this in a pinch, and it works—just expect a slightly messier cleanup.
Budget-friendly tip: Skip the candy eyes and use chocolate chips instead. They cost less and you probably already have them in your pantry. The ghosts won’t have that classic googly-eye look, but they’ll still be adorable.
Preparation Method
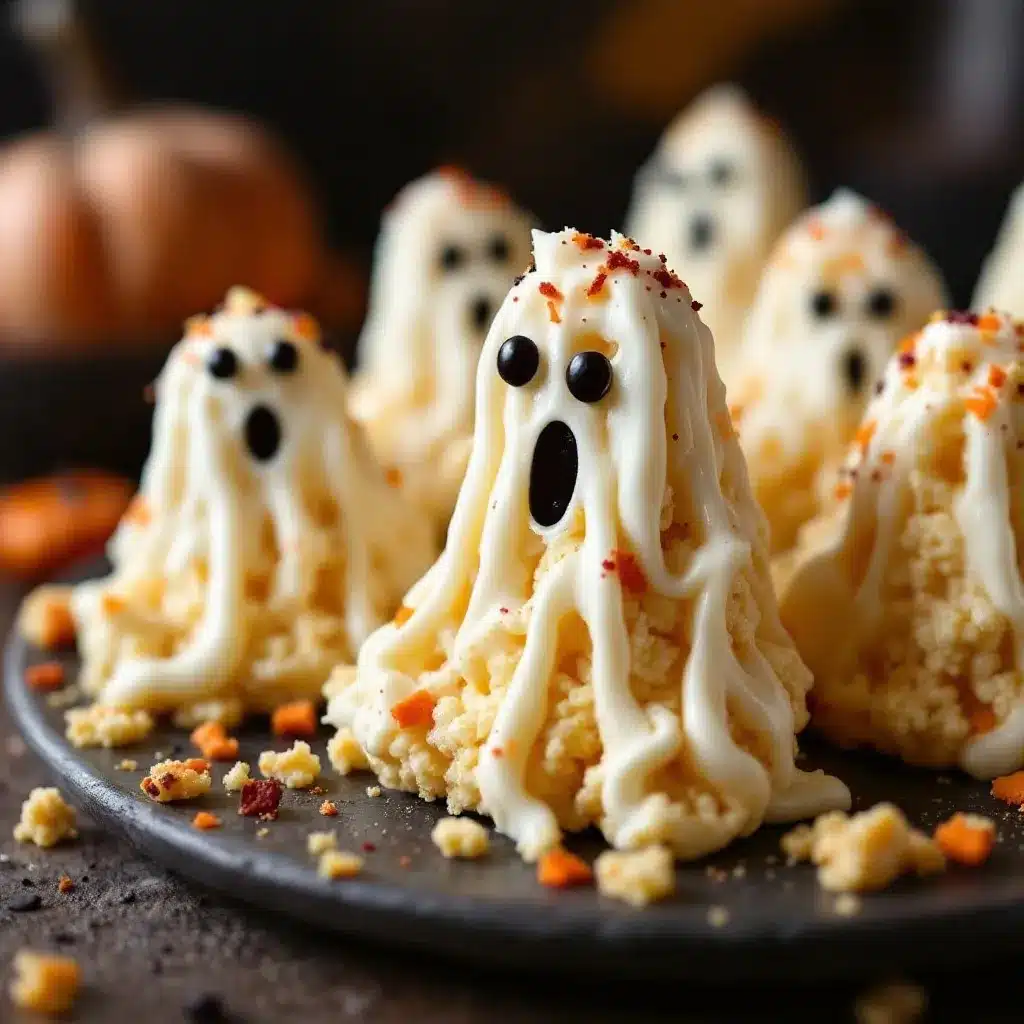
Follow these steps carefully, and you’ll have a batch of ghostly treats in no time. I’ve included all the little details that make the difference between okay treats and amazing ones.
- Prepare your workspace. Lay out a large sheet of parchment paper on your counter. Line a baking sheet with more parchment. Fill a small bowl with cool water and set it nearby. Spray your spatula with cooking spray or rub it with butter. This prep work takes two minutes and saves you from a sticky disaster later.
- Melt the butter. Place your large pot over low heat and add the 3 tablespoons of butter. Let it melt slowly—don’t rush this. Low heat prevents the butter from browning. You want it just melted, not sizzling. Swirl the pot occasionally to help it melt evenly.
- Add the marshmallows. Pour all 10 ounces of marshmallows into the melted butter. Stir constantly with your greased spatula. Keep the heat on low. The marshmallows will start to puff up and then collapse into a gooey mass. This takes about 3-4 minutes. Don’t walk away—marshmallows burn quickly if left unattended.
- Watch for the right consistency. You want the marshmallows completely melted and smooth, with no lumps remaining. The mixture should be thick and stretchy, like warm taffy. If you see any white lumps, keep stirring. Remove from heat immediately once smooth. Overheating makes the treats hard and brittle.
- Add the cereal. Pour the 6 cups of Rice Krispies into the pot all at once. Fold gently with your spatula, starting from the bottom and bringing the cereal up over the marshmallow. Don’t stir vigorously—you’ll crush the cereal and end up with dense, sad treats. Fold until every piece of cereal is coated. This takes about 1-2 minutes. You should see no dry spots.
- Let it cool slightly. Let the mixture sit in the pot for 2-3 minutes. It needs to cool enough that you can touch it without burning yourself, but not so long that it sets completely. Test by touching the edge of the mixture—if it feels hot, wait another minute.
- Shape the ghosts. Dip your hands in the bowl of water. Shake off excess water—you want damp hands, not dripping wet. Scoop up about 1/4 cup of the mixture. Roll it into a ball first, then gently shape it into an oval. Pinch one end to form a slightly pointed top (the ghost’s head). Flatten the bottom slightly so it stands upright. Place on your parchment-lined baking sheet. Repeat with remaining mixture. You should get 12-15 ghosts depending on size.
- Add the eyes immediately. While the treats are still warm and sticky, press two candy eyes onto each ghost. Push them in gently—they should sit flush with the surface. If you wait until the treats cool, the eyes won’t stick and will fall off. Work quickly through this step.
- Let them set completely. Leave the ghosts at room temperature for about 30 minutes. They’ll firm up as they cool. Don’t refrigerate them—condensation can make them sticky and ruin the texture. Once set, they’re ready to serve.
Sensory cues: When the marshmallow mixture is ready, it should stretch slowly when you lift the spatula. The cereal should look glossy and evenly coated, with no dry patches. The finished ghosts should feel firm but slightly springy when you touch them—not hard, not sticky.
Troubleshooting: If the mixture gets too stiff while you’re shaping, microwave it for 10 seconds to soften it. If your hands keep sticking, re-dip them in water. If the eyes won’t stick, dab a tiny bit of melted marshmallow on the back of each eye before pressing it on.
Cooking Tips & Techniques
I’ve made these treats more times than I can count, and I’ve learned a few things the hard way. Here are my best tips for perfect ghosts every time.
Low heat is your friend. I cannot stress this enough. High heat turns marshmallows into a rubbery mess. Keep your burner on low, and be patient. The first time I made these, I cranked the heat to speed things up, and the marshmallows turned brown and grainy. The treats came out hard and unpleasant. Low and slow gives you soft, tender ghosts.
Don’t overmix the cereal. Fold just until everything is coated. Overmixing crushes the cereal and compacts the treats. You want those little air pockets that make Rice Krispie treats light and crunchy. Think of it like folding egg whites—gentle, intentional movements.
Water is the secret weapon. Keep that bowl of water nearby and dip your hands between every few ghosts. The water creates a barrier between the sticky marshmallow and your skin. It also helps you shape smoother ghosts. If the mixture starts sticking to your hands, you need more water.
Work in batches if needed. If the mixture starts cooling and getting stiff before you’ve shaped all the ghosts, split it in half. Keep one half in the pot with the lid on to stay warm, and shape the other half. Or pop the pot back on low heat for 30 seconds to soften the mixture.
My biggest failure: I once tried to make these ghosts look perfect. I measured every ball of mixture, weighed them, and tried to make each ghost identical. They looked beautiful, but I spent an hour shaping and reshaping. My daughter’s lopsided ghosts from the next batch tasted exactly the same and took half the time. Perfection is overrated. Embrace the weird ones.
Variations & Adaptations
These ghosts are just the beginning. Here are some ways to switch things up based on what you have or who you’re serving.
Chocolate Ghosts: Replace 1/2 cup of the Rice Krispies with 1/2 cup of cocoa powder mixed into the marshmallow mixture. Or use Cocoa Krispies cereal for a double-chocolate version. The dark ghosts look spooky and taste amazing. My nephew refuses to eat the white ones but devours these.
Pumpkin Spice Ghosts: Add 1 teaspoon of pumpkin pie spice to the marshmallow mixture along with the butter. The warm spices complement the sweet marshmallow perfectly. These are great for Halloween parties where adults and kids mix. I made these for a fall potluck, and they disappeared before the dessert table opened.
Gluten-Free Option: Use certified gluten-free crispy rice cereal. Most regular Rice Krispies are gluten-free, but check the label. The recipe works exactly the same way. I’ve tested this with several gluten-free brands, and they all work fine—though some are slightly less crunchy than the original.
Vegan Version: Use vegan marshmallows (Dandies brand is my favorite) and plant-based butter. The texture is slightly different—vegan marshmallows don’t stretch as much—but the taste is still wonderful. My vegan friend couldn’t tell the difference when I served these at a party.
Monster Mash: Instead of ghosts, shape the mixture into balls and decorate with different colored candy eyes, sprinkles, and colored icing. Turn them into monsters, pumpkins, or bats. My kids love making a whole Halloween creature collection with one batch of mixture.
Serving & Storage Suggestions
These ghosts are best served at room temperature, right after they’ve set. The texture is perfect—crispy on the outside, soft and chewy inside. If you’re serving them at a party, arrange them on a platter with some fake spiderwebs or orange sprinkles scattered around for a festive look.
Complementary dishes: These pair beautifully with other Halloween treats. Try serving them alongside a warm mug of pumpkin cream cold foam coffee for adults, or with apple cider for the kids. For a full Halloween spread, they also go well with our Easy One-Pot Mummy Meatball Halloween Pasta for a savory-sweet combo that everyone loves.
Storage instructions: Keep these in an airtight container at room temperature for up to 3 days. Layer them between sheets of parchment paper so the eyes don’t stick to each other. Do NOT refrigerate—the cold makes them hard and the condensation makes them sticky. If you live in a humid climate, add a silica gel packet to the container to absorb excess moisture.
Freezer instructions: You can freeze these for up to 2 months. Place them in a single layer on a baking sheet and freeze until solid (about 1 hour). Then transfer to a freezer bag with parchment between layers. Thaw at room temperature for 30 minutes before serving. The texture won’t be quite as fresh, but they’re still delicious.
Flavor development: These treats taste best within 24 hours of making them. After that, the cereal starts to absorb moisture from the marshmallows and loses some crunch. They’re still good for a few days, just not as crispy. If you want them to stay fresh longer, add an extra tablespoon of butter to the recipe—it helps slow down moisture absorption.
Nutritional Information & Benefits
Per serving (1 ghost, based on 12 servings):
- Calories: 185
- Fat: 4g
- Carbohydrates: 36g
- Protein: 1g
- Sugar: 18g
- Sodium: 135mg
These are definitely a treat, not an everyday snack. But they’re made with simple ingredients you can recognize—no artificial preservatives or weird chemicals. The Rice Krispies provide iron and B vitamins, and the marshmallows are just sugar and gelatin. If you’re looking for a slightly healthier version, try using brown rice cereal and reducing the marshmallows by 1 cup. The treats will be less sweet and a bit more rustic, but still tasty.
Dietary considerations: These contain dairy (butter) and are not suitable for vegans unless you use substitutions. They are naturally gluten-free if you use certified gluten-free cereal. The candy eyes are typically made with sugar, cornstarch, and food coloring—check the package if you have specific allergen concerns.
Allergen note: Some candy eyes are manufactured in facilities that process nuts. If you’re serving these at a school party with allergy concerns, use mini chocolate chips instead, which are more likely to be nut-free. Always check labels.
Conclusion
These Easy Halloween Rice Krispie Ghost Treats have become a tradition in our house, and I hope they become one in yours too. They’re simple enough for a last-minute school party, fun enough for a Halloween playdate, and delicious enough that adults sneak them when the kids aren’t looking. The three-ingredient simplicity means you can whip them up without stress, and the hand-shaping technique means every ghost has its own personality.
I love making these with my daughter because they remind me that Halloween doesn’t have to be complicated to be special. Sometimes the best memories come from a pot of melted marshmallows, a box of cereal, and a kid with sticky fingers. So go ahead—make a batch. Let the kids shape them however they want. Embrace the lopsided ghosts and the ones with three eyes. They’ll taste just as good, and the memories will last way longer than the treats.
Have you made these ghosts? I’d love to hear how they turned out! Drop a comment below and tell me about your Halloween creations. Did your kids come up with their own decorations? Did you try a fun variation? Share your photos and stories—I read every single comment, and nothing makes me happier than seeing these little ghosts bring joy to other kitchens.
Frequently Asked Questions
Can I make these ghosts ahead of time?
Absolutely. Make them up to 2 days in advance and store them in an airtight container at room temperature. Don’t refrigerate them—they’ll get hard. If you’re making them for a party, I actually recommend making them the day before. The flavors meld together, and they’re still perfectly crispy.
Why are my Rice Krispie treats hard instead of soft?
This usually happens from overheating the marshmallows. Keep your heat on low and remove the pot from the burner as soon as the marshmallows are smooth. Also, make sure you’re using fresh marshmallows—old ones don’t melt as well. If your treats are already hard, try microwaving one for 10 seconds to soften it up.
Can I use a different cereal?
Yes, but the texture will change. Cocoa Krispies work great for chocolate ghosts. Fruity Pebbles make colorful monsters. Avoid flaky cereals like Corn Flakes—they crush too easily and don’t hold their shape. Puffed rice or puffed millet also work, but they’re less crunchy.
How do I keep the candy eyes from falling off?
Press the eyes into the treats while they’re still warm and sticky. If you wait until they cool, the eyes won’t stick. If you forget and the treats have already cooled, dab a tiny bit of melted marshmallow or icing on the back of each eye before pressing it on. This works like edible glue.
Can I double this recipe?
Yes, but use a bigger pot. A 6-quart pot works well for a double batch. Don’t try to double it in the same pot—the mixture won’t stir evenly, and you’ll end up with dry cereal patches. If you need a huge batch, make two separate batches instead of doubling. The results are much more consistent.
Pin This Recipe!
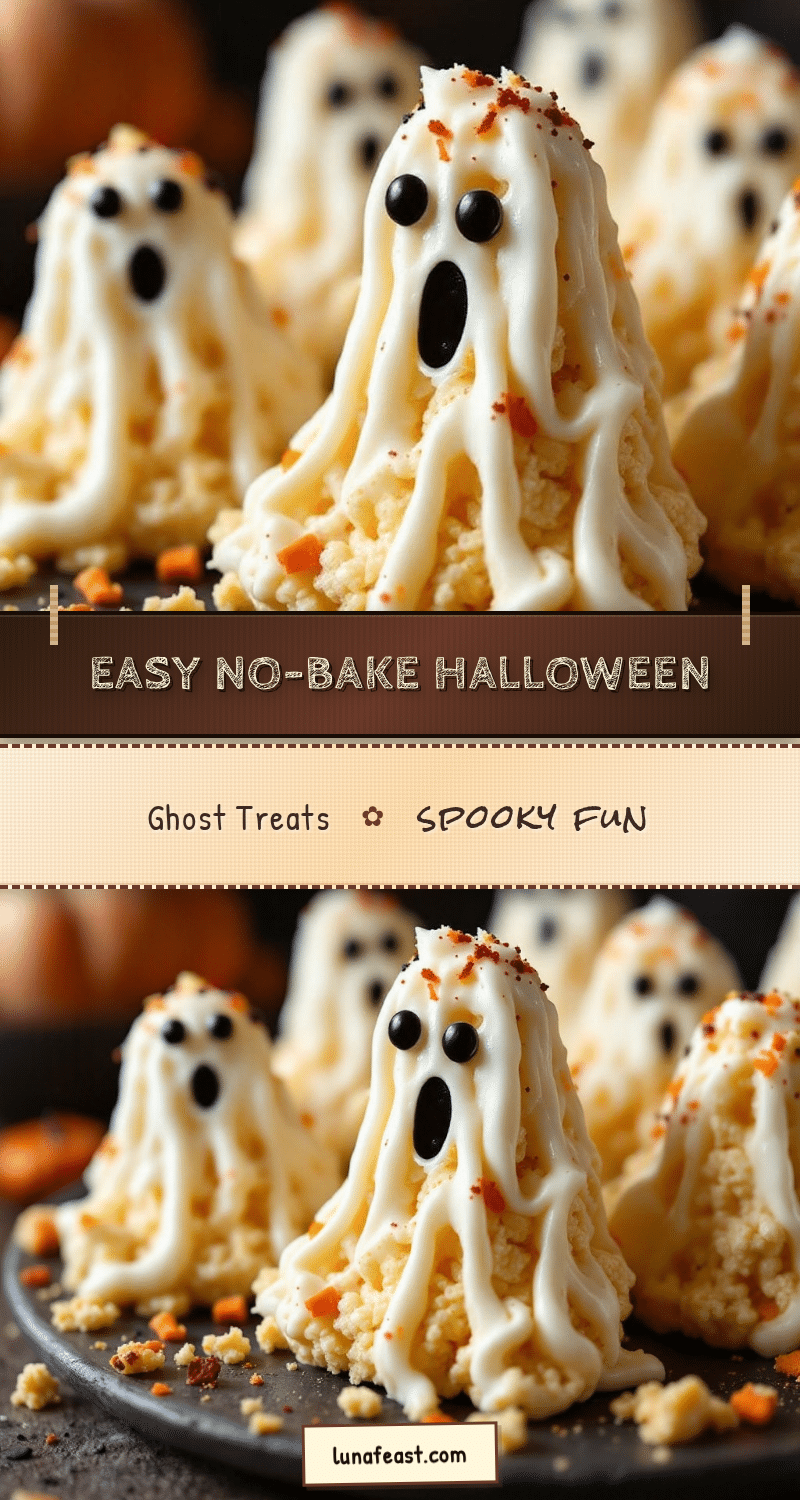
Easy Halloween Rice Krispie Ghost Treats: 3-Ingredient Fun
These Easy Halloween Rice Krispie Ghost Treats are exactly what you need when you want something festive but don’t have the energy for complicated baking. Just three ingredients (plus candy eyes) and about fifteen minutes of your time, no oven required.
- Prep Time: 10 minutes
- Cook Time: 5 minutes
- Total Time: 15 minutes
- Yield: 12-15 servings 1x
- Category: Dessert
- Cuisine: American
Ingredients
- 3 tablespoons unsalted butter
- 10 ounces marshmallows (about 40 regular or 4 cups mini)
- 6 cups Rice Krispies cereal
- Candy eyes (about 24-30 pairs)
- 1/2 cup white chocolate melting wafers (optional)
- 1 teaspoon coconut oil or shortening (optional)
Instructions
- Prepare your workspace. Lay out a large sheet of parchment paper on your counter. Line a baking sheet with more parchment. Fill a small bowl with cool water and set it nearby. Spray your spatula with cooking spray or rub it with butter.
- Melt the butter. Place your large pot over low heat and add the 3 tablespoons of butter. Let it melt slowly until just melted, not sizzling.
- Add the marshmallows. Pour all 10 ounces of marshmallows into the melted butter. Stir constantly with your greased spatula over low heat until completely melted and smooth, about 3-4 minutes. Remove from heat immediately once smooth.
- Add the cereal. Pour the 6 cups of Rice Krispies into the pot all at once. Fold gently with your spatula until every piece of cereal is coated, about 1-2 minutes.
- Let it cool slightly. Let the mixture sit in the pot for 2-3 minutes until cool enough to touch but not set completely.
- Shape the ghosts. Dip your hands in the bowl of water and shake off excess. Scoop up about 1/4 cup of the mixture. Roll into a ball, then shape into an oval. Pinch one end to form a slightly pointed top (the ghost’s head). Flatten the bottom slightly so it stands upright. Place on parchment-lined baking sheet. Repeat with remaining mixture to make 12-15 ghosts.
- Add the eyes immediately. While the treats are still warm and sticky, press two candy eyes onto each ghost. Push them in gently so they sit flush with the surface.
- Let them set completely. Leave the ghosts at room temperature for about 30 minutes until firm. Do not refrigerate.
Notes
Keep heat on low to prevent marshmallows from burning. Dip hands in water between shaping to prevent sticking. Add eyes while treats are still warm for best adhesion. Store in airtight container at room temperature for up to 3 days. Do not refrigerate. Can be frozen for up to 2 months.
Nutrition
- Serving Size: 1 ghost
- Calories: 185
- Sugar: 18
- Sodium: 135
- Fat: 4
- Saturated Fat: 2
- Carbohydrates: 36
- Protein: 1
Keywords: Halloween treats, Rice Krispie treats, ghost treats, no-bake desserts, kid-friendly Halloween, easy Halloween recipes, 3-ingredient desserts


