I ruined chicken pot pie four times before I finally got it right. Not a little underdone or slightly bland—I mean inedible, scrape-it-into-the-trash ruined. The first time, the filling was so watery it turned the puff pastry into a soggy, sad blanket. The second time, I skipped the step where you cook the flour long enough, and the whole thing tasted like raw paste. By attempt number three, I was so frustrated I just threw store-bought puff pastry on top of canned soup and called it dinner. It worked, kind of, but it wasn’t the one. You know the one—the recipe you actually want to make for people.
This easy chicken pot pie with buttery puff pastry is that recipe. It’s the one I finally figured out after all those failures, and honestly, it changed how I think about comfort food. The filling is creamy but not gluey, packed with tender chicken and vegetables in a sauce that actually coats the spoon. And the puff pastry—crispy, golden, flaky in all the right ways—sits on top like a buttery crown. I don’t say that to sound fancy. I say it because I’ve eaten this on a Tuesday night in sweatpants and felt like I was having a restaurant meal.
The secret? A few small technique shifts that make a massive difference. Things like letting the filling cool slightly before adding the pastry, and using heavy cream instead of all milk. Little tweaks I wish someone had told me years ago. So consider this your shortcut—I already made the mistakes so you don’t have to.
Why You’ll Love This Recipe
This isn’t just another chicken pot pie recipe. It’s the one that actually works on a busy weeknight without sacrificing flavor or texture. Here’s why it stands out:
- Quick & Easy: From start to table in about 45 minutes. The puff pastry does most of the heavy lifting, so you skip the homemade crust drama entirely.
- Simple Ingredients: No trips to a specialty store. Chicken, frozen veggies, cream, butter, and store-bought puff pastry—that’s the whole list.
- Perfect for Cozy Nights: This is the meal you want when the weather turns cold or you just need something that feels like a hug in a bowl.
- Crowd-Pleaser: Kids love the flaky topping. Adults love the rich, savory filling. Everyone goes back for seconds.
- Unbelievably Delicious: The contrast between the crisp, buttery pastry and the creamy, chunky filling is honestly next-level comfort food.
What makes this recipe different from the rest is the technique. Most recipes rush the roux or use too much liquid, leaving you with a soupy mess. Here, we cook the flour until it smells nutty, add the liquid gradually, and let the filling thicken properly before baking. It’s a small change, but it transforms the whole dish. The filling stays creamy and cohesive, not watery or pasty. Plus, using puff pastry instead of a double crust cuts the work in half while actually improving the texture.
This is the kind of recipe that makes you close your eyes after the first bite. It’s comfort food reimagined—faster, easier, but with the same soul-soothing satisfaction. Perfect for impressing guests without stress, or turning a simple Tuesday into something memorable.
What Ingredients You Will Need
This recipe uses simple, wholesome ingredients to deliver bold flavor and satisfying texture without the fuss. Most of these are pantry staples, which makes this dish perfect for last-minute dinners or using up leftover chicken.
For the Filling
- 2 tablespoons unsalted butter (adds richness and helps brown the vegetables)
- 1 medium yellow onion, diced (about 1 cup)
- 2 medium carrots, peeled and diced (about 1 cup)
- 2 celery stalks, diced (about 1/2 cup)
- 3 cloves garlic, minced
- 1/3 cup all-purpose flour (this thickens the sauce—don’t skip it)
- 1 1/2 cups chicken broth (low-sodium is best so you can control the salt)
- 1 cup heavy cream (or half-and-half for a lighter version)
- 1/2 cup whole milk
- 3 cups cooked chicken, shredded or diced (rotisserie chicken works great here)
- 1 cup frozen peas (no need to thaw them first)
- 1 cup frozen corn kernels
- 1 teaspoon dried thyme
- 1/2 teaspoon dried rosemary
- Salt and black pepper to taste
For the Topping

- 1 sheet frozen puff pastry, thawed (I prefer Pepperidge Farm or Dufour for the flakiest results)
- 1 large egg, beaten (for the egg wash—gives that golden, glossy finish)
- Flaky sea salt for sprinkling (optional but recommended)
Ingredient selection tip: Look for puff pastry that’s made with real butter, not shortening. The flavor difference is noticeable, and the texture is infinitely flakier. If you only have vegetable-based puff pastry, it will still work—just expect a slightly less rich result. For the chicken, rotisserie chicken is my go-to for convenience, but leftover roasted chicken or even poached chicken breast works beautifully. If you’re using raw chicken, season it well with salt and pepper before cooking.
Substitution guidance: For a dairy-free version, use olive oil instead of butter, and substitute the heavy cream and milk with full-fat coconut milk or a good-quality unsweetened oat milk. The texture will be slightly different but still delicious. For a gluten-free option, use a gluten-free all-purpose flour blend in the roux and skip the puff pastry—try a gluten-free biscuit topping instead.
Equipment Needed
You don’t need a fancy kitchen to make this easy chicken pot pie. Here’s what you’ll actually use:
- Large oven-safe skillet or Dutch oven (10 to 12 inches, preferably cast iron or stainless steel—this lets you cook the filling and bake the pie in one dish)
- Sharp chef’s knife and cutting board
- Wooden spoon or silicone spatula for stirring the roux
- Measuring cups and spoons
- Small bowl for the egg wash
- Pastry brush (a silicone one works best, but a folded paper towel will do in a pinch)
- Paring knife or pizza cutter for trimming the puff pastry
If you don’t have an oven-safe skillet, you can cook the filling on the stovetop, then transfer it to a 9×13-inch baking dish or individual ramekins before adding the pastry. I’ve done it both ways, and honestly, the individual ramekins look prettier for company. For budget-friendly options, a standard nonstick skillet works fine for the stovetop part—just make sure to use a baking dish for the oven step.
One tip: If you’re using a cast iron skillet, make sure it’s well-seasoned. I learned this the hard way when my first attempt left the filling tasting faintly metallic. A quick re-seasoning fixed it, and now I only use my trusty Lodge for this recipe.
Preparation Method
Let’s get cooking. This comes together faster than you think, especially if you prep your vegetables while the butter melts.
- Preheat your oven to 400°F (200°C). Position the rack in the center of the oven. If you’re using a baking dish instead of a skillet, place it on a baking sheet to catch any drips.
- Melt the butter in your large oven-safe skillet over medium heat. Once it’s foamy (about 1 minute), add the diced onion, carrots, and celery. Cook, stirring occasionally, until the vegetables are softened but not browned—about 6 to 8 minutes. The onions should look translucent, and the carrots should be just tender when poked with a fork.
- Add the minced garlic and cook for 30 seconds until fragrant. Stir constantly—garlic burns fast, and burnt garlic ruins the whole dish. Trust me, I’ve done it.
- Sprinkle the flour over the vegetables. Stir to coat everything evenly, then cook for 2 minutes, stirring constantly. This step is crucial: the flour needs to cook long enough to lose its raw taste. You’ll know it’s ready when the mixture smells slightly nutty and looks like a thick paste clinging to the vegetables.
- Slowly pour in the chicken broth while whisking constantly. Keep whisking until the mixture is smooth and starts to thicken, about 2 minutes. Then add the heavy cream and milk, whisking until fully incorporated. The sauce should be thick enough to coat the back of a spoon—not runny, but not stiff either.
- Stir in the cooked chicken, frozen peas, frozen corn, dried thyme, and dried rosemary. Season with salt and pepper—start with 1/2 teaspoon salt and 1/4 teaspoon pepper, then adjust to taste. Let the filling simmer gently for 3 to 4 minutes, stirring occasionally, until the chicken is heated through and the vegetables are tender. Remove the skillet from heat and let it cool for 5 minutes. This cooling step is important: if the filling is too hot when you add the pastry, the butter in the puff pastry will melt before it bakes, and you’ll end up with a soggy top.
- While the filling cools, prepare the puff pastry. On a lightly floured surface, unfold the thawed puff pastry sheet. If it’s cracked at the folds, gently press the cracks together with your fingers—it’s fine. Roll it out slightly to about 1/8-inch thickness, just enough to fit your skillet or baking dish. Cut the pastry to size, leaving about 1/2 inch of overhang all around. If you’re using individual ramekins, cut the pastry into rounds slightly larger than the rims.
- Drape the puff pastry over the cooled filling. Tuck the overhang under itself slightly, then crimp the edges with a fork or your fingers to seal. Cut 3 to 4 small slits in the top of the pastry to let steam escape—this prevents the pastry from getting soggy and helps it puff evenly.
- Brush the top of the pastry with the beaten egg wash. Be generous but avoid letting the egg pool around the edges, as it can make the pastry stick to the pan. Sprinkle with flaky sea salt if using.
- Bake for 25 to 30 minutes, until the puff pastry is deeply golden brown and puffed, and the filling is bubbling up through the slits. If the edges of the pastry are browning too quickly (after about 20 minutes), tent the dish loosely with foil for the remaining time.
- Let the pot pie rest for 10 minutes before serving. This is the hardest part, I know, but it’s essential. The filling needs time to set so it doesn’t run all over your plate. Plus, the pastry stays crispier if you let it cool slightly.
Sensory cue: When it’s done, the filling should be visibly bubbling and thick, not watery. The pastry should be a deep golden brown and feel light and crisp when you tap it. If it still looks pale, give it another 5 minutes—don’t rush this step.
Cooking Tips & Techniques
After all those failed attempts, I’ve learned a few things that make this recipe foolproof. Here are the tips I wish I’d known from the start:
Don’t rush the roux. This is the number one mistake people make. Cooking the flour for a full 2 minutes might seem like a small detail, but it’s the difference between a silky, flavorful sauce and one that tastes like raw flour. The nutty aroma is your cue—stop when you smell it.
Let the filling cool before adding the pastry. I cannot stress this enough. Hot filling melts the butter in the puff pastry before it even hits the oven, which means you lose all that beautiful flakiness. Five minutes of cooling is all it takes, and the difference is dramatic.
Use a sharp knife or pizza cutter for the pastry. A dull blade will drag and tear the delicate layers, which can prevent the pastry from puffing evenly. I use a pizza cutter for clean, straight edges every time.
Watch your oven temperature. Ovens run hot or cold more often than you’d think. If your puff pastry is browning too fast but the filling isn’t bubbling, your oven might be running hot. Keep an eye on it around the 20-minute mark, and don’t be afraid to adjust the temperature or tent with foil.
Make the filling ahead of time. This is my favorite hack for busy nights. You can prepare the filling up to two days in advance, store it in the fridge, and just add the pastry and bake when you’re ready. The flavors actually meld together better overnight. Just reheat the filling gently on the stovetop before adding the pastry, or let it sit at room temperature for 20 minutes so it’s not ice-cold going into the oven.
Don’t overwork the puff pastry. It’s already made—you don’t need to roll it excessively. Too much handling warms up the butter and makes the pastry less flaky. A few gentle passes with the rolling pin are plenty.
Variations & Adaptations
One of the best things about this recipe is how customizable it is. Here are some variations I’ve tried and loved:
Vegetarian Version
Swap the chicken for 2 cups of diced mushrooms (cremini or button work well) and add an extra cup of mixed vegetables like diced potatoes or green beans. Sauté the mushrooms with the onions until they release their liquid and start to brown—this adds a meaty, savory depth that mimics the chicken. I’ve made this for vegetarian friends, and they always ask for the recipe.
Herb & Mushroom Twist
Add 8 ounces of sliced cremini mushrooms to the vegetable sauté and cook until golden brown. Swap the dried herbs for 1 tablespoon fresh thyme leaves and 1 tablespoon fresh chopped parsley stirred in at the end. The earthiness of the mushrooms pairs beautifully with the creamy sauce and flaky pastry.
Spicy Southwest Version
Add 1 diced jalapeño (seeds removed for less heat) with the vegetables, and stir in 1 teaspoon cumin and 1/2 teaspoon smoked paprika with the flour. Swap the peas and corn for black beans and diced bell peppers. Top with shredded cheddar cheese before adding the puff pastry for a gooey, melty surprise.
Dairy-Free Adaptation
Use olive oil or vegan butter instead of regular butter. Substitute the heavy cream with full-fat coconut milk and the whole milk with unsweetened oat milk. The coconut flavor is subtle but adds a lovely richness. For the puff pastry, look for a vegan brand—many store-bought versions are accidentally vegan, but check the label.
Individual Pot Pies
Divide the filling among 4 to 6 oven-safe ramekins or small baking dishes. Cut the puff pastry into rounds slightly larger than the rims, place on top, and bake for 20 to 22 minutes. These are perfect for dinner parties—everyone gets their own golden, bubbly pie.
Serving & Storage Suggestions
This easy chicken pot pie is best served warm, straight from the oven, when the pastry is at its crispiest and the filling is still bubbling. Let it rest for those 10 minutes—I know it’s tempting to dig in, but the texture really benefits from the brief pause.
What to serve with it: A simple green salad with a bright vinaigrette cuts through the richness beautifully. I also love serving it with a side of roasted asparagus or steamed green beans. For a truly cozy meal, pair it with a bowl of cozy crockpot chicken and wild rice fall soup for a double dose of comfort. If you’re feeding a crowd, ultimate loaded baked potato salad makes an unexpected but delicious side dish.
Storage: Leftover pot pie keeps well in the refrigerator for up to 3 days. The puff pastry will soften slightly, but the flavor only gets better. To store, cover the dish tightly with foil or plastic wrap. If you’ve already baked it, let it cool completely before refrigerating.
Reheating: For best results, reheat in a 350°F (175°C) oven for 15 to 20 minutes, covered with foil to prevent the pastry from burning. The microwave works in a pinch (about 2 minutes on high), but the pastry will be soft rather than crisp. If you’re reheating individual portions, an air fryer at 350°F for 5 to 7 minutes works surprisingly well.
Freezing: You can freeze the unbaked pot pie for up to 3 months. Assemble the pie completely (including the pastry), but don’t brush with egg wash. Wrap tightly in plastic wrap, then foil. When ready to bake, thaw overnight in the refrigerator, brush with egg wash, and bake as directed, adding 10 to 15 minutes to the baking time. Baked pot pie also freezes well—just cool completely, wrap tightly, and reheat directly from frozen in a 350°F oven for about 30 minutes.
The flavors actually deepen overnight, so leftovers are often even better the next day. I’ve been known to make a double batch just for the lunch leftovers.
Nutritional Information & Benefits
While this is definitely comfort food, it does have some redeeming nutritional qualities. Here’s a rough estimate per serving (based on 6 servings):
| Nutrient | Amount Per Serving |
|---|---|
| Calories | 485 |
| Total Fat | 28g |
| Saturated Fat | 14g |
| Cholesterol | 115mg |
| Sodium | 620mg |
| Total Carbohydrates | 35g |
| Dietary Fiber | 4g |
| Sugars | 6g |
| Protein | 28g |
The chicken provides a solid amount of lean protein, which helps keep you full and supports muscle health. The carrots and peas contribute fiber, vitamin A, and antioxidants. The celery adds a small but welcome dose of vitamin K. And the puff pastry? Well, it’s not a health food, but it’s a wonderful occasional treat that feeds the soul as much as the body.
Dietary considerations: This recipe contains gluten (from the flour and puff pastry) and dairy (from the butter, cream, and milk). For a gluten-free version, use a gluten-free flour blend and a gluten-free biscuit topping. For a dairy-free version, see the variations section above. It’s not suitable for low-carb or keto diets due to the flour and pastry, but you could try a cauliflower-based topping for a lighter version.
I personally love that this recipe feels indulgent without being over-the-top. It’s the kind of meal that fills you up without weighing you down, especially if you pair it with a big green salad. And honestly, knowing there are vegetables in every bite makes me feel slightly better about going back for seconds.
Conclusion
This easy chicken pot pie with buttery puff pastry is the recipe I turn to when I need something that feels special but doesn’t require all day in the kitchen. It’s forgiving enough for a weeknight, impressive enough for company, and comforting enough to make even the worst day feel a little better. After all those failed attempts, I can finally say I’ve got it right—and I hope this version becomes your go-to too.
Don’t be afraid to make it your own. Swap in different vegetables, play with the herbs, or try one of the variations I mentioned. Cooking should feel creative, not stressful. And if your first attempt isn’t perfect? That’s okay. Mine wasn’t either. But this one—this one is worth making again and again.
I’d love to hear how it turns out for you. Drop a comment below and let me know if you tried any variations, or tag me in your photos if you share them online. There’s something special about knowing this recipe is bringing a little warmth to your table. Happy cooking, friend.
Frequently Asked Questions
Can I use homemade puff pastry instead of store-bought?
Absolutely, if you have the time and patience. Homemade puff pastry is undeniably more buttery and flaky, but it requires multiple folds and chilling steps. Store-bought works beautifully for this recipe and saves a ton of time. If you do go homemade, make sure it’s well-chilled before baking.
Can I make this in a slow cooker?
You can cook the filling in a slow cooker on low for 4 to 6 hours, but you’ll need to thicken it with a cornstarch slurry (2 tablespoons cornstarch mixed with 2 tablespoons cold water) stirred in during the last 30 minutes. Then transfer the filling to a baking dish, top with puff pastry, and bake in the oven. The pastry needs dry heat to puff properly, so the slow cooker alone won’t work.
Why is my puff pastry soggy?
Soggy pastry usually means one of two things: the filling was too hot when you added the pastry, or the filling was too thin. Make sure to let the filling cool for at least 5 minutes before topping with pastry, and cook the roux long enough so the sauce is thick and creamy. Cutting slits in the pastry also helps steam escape instead of getting trapped underneath.
Can I use leftover turkey instead of chicken?
Yes, this is a fantastic way to use up Thanksgiving leftovers. Turkey works perfectly in place of chicken—just shred or dice it the same way. The flavor is slightly richer, which pairs beautifully with the creamy sauce and buttery pastry. I actually prefer it with turkey sometimes.
How do I prevent the pastry from burning around the edges?
If the edges are browning too quickly, tent the dish loosely with aluminum foil for the last 10 to 15 minutes of baking. You can also trim the pastry so it doesn’t extend too far over the edge of the dish, which helps it cook more evenly. Keeping an eye on it around the 20-minute mark is your best bet.
Pin This Recipe!
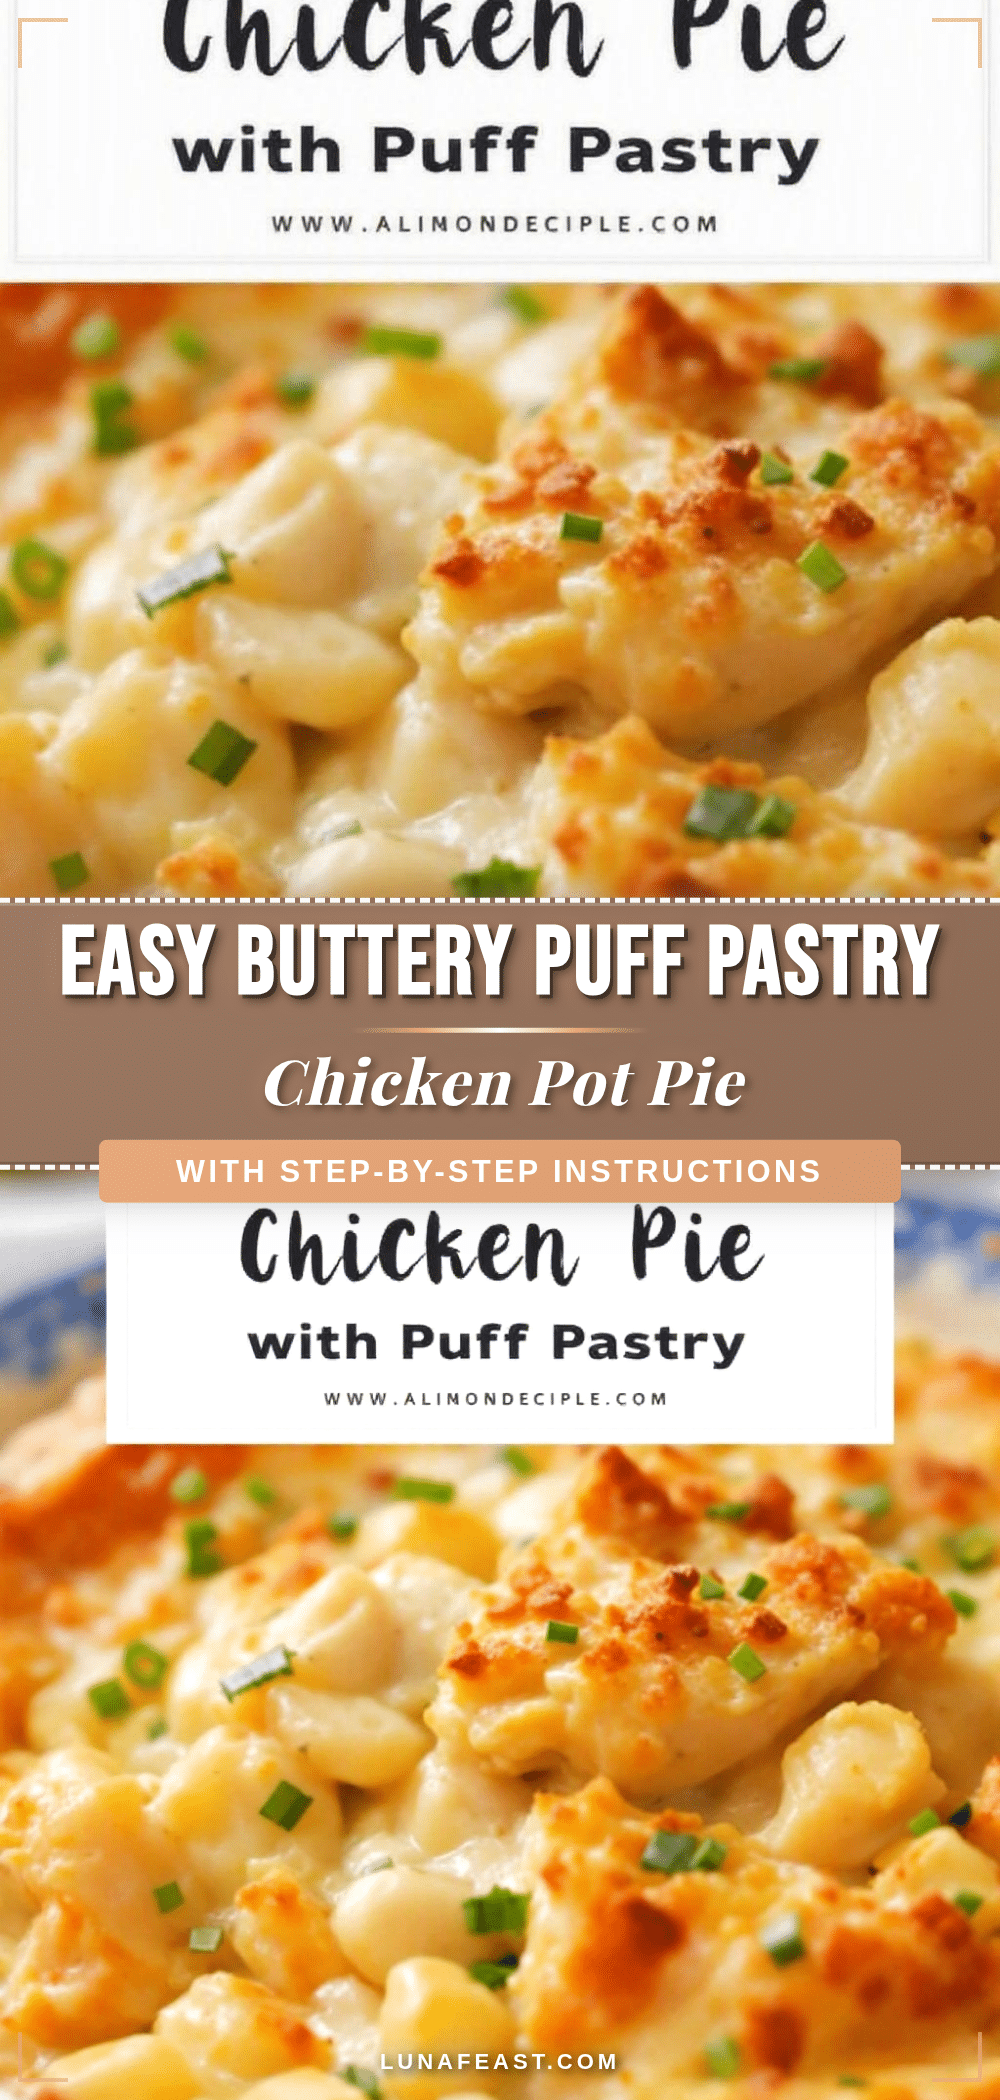
Easy Chicken Pot Pie With Buttery Puff Pastry

This easy chicken pot pie features a creamy, chunky filling with tender chicken and vegetables, topped with crispy, golden puff pastry. It’s a comforting weeknight dinner that comes together in about 45 minutes.
- Prep Time: 15 minutes
- Cook Time: 30 minutes
- Total Time: 45 minutes
- Yield: 6 servings 1x
- Category: Main Course
- Cuisine: American
Ingredients
- 2 tablespoons unsalted butter
- 1 medium yellow onion, diced (about 1 cup)
- 2 medium carrots, peeled and diced (about 1 cup)
- 2 celery stalks, diced (about 1/2 cup)
- 3 cloves garlic, minced
- 1/3 cup all-purpose flour
- 1 1/2 cups chicken broth (low-sodium)
- 1 cup heavy cream
- 1/2 cup whole milk
- 3 cups cooked chicken, shredded or diced
- 1 cup frozen peas
- 1 cup frozen corn kernels
- 1 teaspoon dried thyme
- 1/2 teaspoon dried rosemary
- Salt and black pepper to taste
- 1 sheet frozen puff pastry, thawed
- 1 large egg, beaten
- Flaky sea salt for sprinkling (optional)
Instructions
- Preheat your oven to 400°F (200°C). Position the rack in the center of the oven.
- Melt the butter in a large oven-safe skillet over medium heat. Add the diced onion, carrots, and celery. Cook, stirring occasionally, until softened, about 6 to 8 minutes.
- Add the minced garlic and cook for 30 seconds until fragrant.
- Sprinkle the flour over the vegetables. Stir to coat, then cook for 2 minutes, stirring constantly, until the mixture smells nutty.
- Slowly pour in the chicken broth while whisking constantly. Whisk until smooth and thickened, about 2 minutes. Add the heavy cream and milk, whisking until fully incorporated.
- Stir in the cooked chicken, frozen peas, frozen corn, dried thyme, and dried rosemary. Season with salt and pepper. Let the filling simmer gently for 3 to 4 minutes. Remove from heat and let cool for 5 minutes.
- On a lightly floured surface, unfold the thawed puff pastry sheet. Roll it out slightly to about 1/8-inch thickness. Cut the pastry to fit your skillet or baking dish, leaving about 1/2 inch of overhang.
- Drape the puff pastry over the cooled filling. Tuck the overhang under itself and crimp the edges with a fork. Cut 3 to 4 small slits in the top of the pastry.
- Brush the top of the pastry with the beaten egg wash. Sprinkle with flaky sea salt if using.
- Bake for 25 to 30 minutes, until the puff pastry is deeply golden brown and puffed, and the filling is bubbling. If the edges brown too quickly, tent with foil after 20 minutes.
- Let the pot pie rest for 10 minutes before serving.
Notes
Let the filling cool for 5 minutes before adding the pastry to prevent sogginess. For a dairy-free version, use olive oil instead of butter, and substitute heavy cream and milk with full-fat coconut milk or unsweetened oat milk. For a gluten-free version, use a gluten-free all-purpose flour blend and a gluten-free biscuit topping.
Nutrition
- Serving Size: 1 serving
- Calories: 485
- Sugar: 6
- Sodium: 620
- Fat: 28
- Saturated Fat: 14
- Carbohydrates: 35
- Fiber: 4
- Protein: 28
Keywords: chicken pot pie, easy chicken pot pie, puff pastry chicken pot pie, comfort food, weeknight dinner


