“Pass me the beer, will ya?” My buddy called out from across the yard as I wrestled with a plump chicken perched awkwardly on a can. Honestly, I was skeptical at first—how could a beer can possibly make chicken juicy and smoky? But that afternoon, with the sun setting low and a faint whiff of hickory smoke in the air, I found myself hooked on crispy beer can chicken on the grill.
It all started on an unplanned weekend cookout. I was juggling a few things in the kitchen, tired and a little short on time. Grabbing a cold can of beer and a whole chicken from the fridge, I slapped on a quick spice rub and plopped the bird on the can. The result? The crispiest skin I’d ever had, with a smoky, juicy inside that made everyone ask for seconds (and the recipe, of course). This recipe stuck with me—not because it was fancy, but because it was honest, simple, and downright satisfying.
That moment, with the grill humming and the smell of spices and beer blending in the warm air, reminded me why cooking outside feels a little like magic. This crispy beer can chicken recipe has since become a go-to for those laid-back gatherings where the food needs to be as chill as the company. If you’ve been hesitant about trying beer can chicken, this recipe might just change your mind like it did mine.
Why You’ll Love This Recipe
After countless tries and tweaking, this crispy beer can chicken recipe has proven itself in my kitchen and on my grill. Here’s why I keep coming back to it:
- Quick & Easy: From prep to plate in about 1 hour and 15 minutes, making it perfect for weekend cookouts or spontaneous dinners.
- Simple Ingredients: No need for exotic spices or hard-to-find items; most are pantry staples or easy to grab at any grocery store.
- Perfect for Outdoor Gatherings: Ideal for backyard barbecues, casual family dinners, or impressing friends without breaking a sweat.
- Crowd-Pleaser: Kids and adults alike go crazy for the flavorful, crispy skin and juicy meat inside.
- Unbelievably Delicious: The combination of beer steam and smoky grill heat locks in moisture and adds subtle layers of flavor you don’t get from plain roasting.
This isn’t just another grilled chicken recipe. The trick lies in balancing the spice rub with the beer’s natural sweetness and the grill’s smoky kiss. I’ve learned to use a dry rub that’s just the right mix of savory and a hint of heat, which works wonders with the beer’s aroma. Plus, the upright cooking on the can helps the skin crisp all around, which honestly, makes all the difference.
Whether you’re serving it alongside a crisp salad or pairing it with some comfort sides, this recipe turns simple grilled chicken into something special. It’s that kind of dish that has everyone leaning in for another bite and casually asking, “How’d you do this?”
What Ingredients You Will Need
This recipe uses simple, wholesome ingredients to deliver bold flavor and satisfying texture without the fuss. Most of these are pantry staples, and the beer can is usually something you have on hand (or can substitute easily).
- Whole chicken (about 4-5 pounds / 1.8-2.3 kg): Choose a fresh bird, preferably organic or free-range for the best flavor.
- Beer (12 oz / 355 ml can): Use a standard lager or pale ale; avoid overly bitter beers. I like using Sam Adams Boston Lager for a smooth, malty touch.
- Olive oil (2 tablespoons): Helps the skin crisp and the rub stick.
- Dry rub spices:
- Paprika (2 tablespoons) – adds smoky sweetness
- Garlic powder (1 tablespoon) – for depth of flavor
- Onion powder (1 tablespoon) – subtle savory notes
- Brown sugar (1 tablespoon) – balances the spices and caramelizes nicely
- Salt (1.5 teaspoons) – enhances all flavors
- Black pepper (1 teaspoon) – fresh ground for mild heat
- Cayenne pepper (optional, 1/4 teaspoon) – for a little kick
- Lemon (1, halved): Stuffed inside the chicken cavity for brightness.
- Fresh herbs (a few sprigs of thyme or rosemary): Optional, adds aromatic hints inside the bird.
If you want to switch things up, try swapping the brown sugar with coconut sugar for a different flavor note. Also, if you prefer a gluten-free beer or no alcohol, there are plenty of great non-alcoholic beers that work just as well. For a smoky twist, a splash of smoked paprika in the rub can add extra depth.
Equipment Needed
- Grill: Charcoal or gas grills both work fine; charcoal will add a deeper smoky flavor.
- Beer can chicken holder (optional): These handy stands keep the chicken upright and stable. I’ve made do without one, balancing the chicken carefully, but the holder makes life easier.
- Meat thermometer: Crucial for checking the internal temperature to avoid over- or undercooking.
- Basting brush: Useful if you want to add extra glaze or oil during grilling.
- Aluminum foil: Handy to tent the chicken if it starts browning too quickly.
For budget-friendly options, you can use a small roasting pan or a sturdy baking dish to catch drippings under the grill grate. If you don’t have a meat thermometer, the classic “juice runs clear” test can help, but I highly recommend investing in one for consistent results.
Preparation Method
- Prep the chicken: Rinse the whole chicken under cold water and pat dry thoroughly with paper towels. Removing moisture is key for crispy skin (10 minutes).
- Make the dry rub: In a small bowl, mix paprika, garlic powder, onion powder, brown sugar, salt, pepper, and cayenne (if using). I always give it a quick taste before applying to balance the flavors (5 minutes).
- Apply olive oil: Rub 2 tablespoons of olive oil all over the chicken, inside and out. This helps the dry rub stick and promotes browning (2 minutes).
- Rub the chicken: Generously coat the chicken with the spice mix, making sure to get under the skin where possible and inside the cavity for maximum flavor (5 minutes).
- Stuff the cavity: Place the halved lemon and fresh herbs inside the chicken’s cavity. This adds moisture and subtle aromatics as it cooks (2 minutes).
- Prepare the beer can: Open the beer and pour out about a quarter of it (or drink it—hey, no judgment!). Set the can on a stable surface (1 minute).
- Position the chicken: Carefully lower the chicken onto the beer can so it sits upright, with the can inside the cavity and the legs acting as a tripod. If using a holder, place the chicken in it now (3 minutes).
- Preheat the grill: Aim for medium heat, around 375°F (190°C). If using charcoal, bank the coals to one side for indirect grilling. Place a drip pan underneath the grill grate where the chicken will sit to catch drippings (10 minutes).
- Grill the chicken: Place the chicken upright on the grill, over indirect heat. Close the lid and cook for about 60-75 minutes. Use a meat thermometer to check for doneness; the internal temperature should read 165°F (74°C) in the thickest part of the thigh (don’t touch the bone) (60-75 minutes).
- Monitor and rotate: Every 20 minutes, rotate the chicken for even cooking and check the grill temperature. If the skin starts browning too fast, tent it with foil (optional) (5 minutes per turn).
- Rest the chicken: Remove from grill and let it rest upright for 10 minutes before carving. This helps juices redistribute and keeps the meat moist (10 minutes).
Pro tip: The beer inside the can steams the chicken from the inside, which means moist meat, while the dry rub crisps the outside. It’s this contrast that makes the dish stand out. If your grill tends to flare up, keep a spray bottle of water nearby to control flames without drying out the chicken.
Cooking Tips & Techniques
Getting the perfect crispy beer can chicken isn’t just about following steps; a few hard-earned tips can make a world of difference.
- Dry the skin thoroughly: Moisture is the enemy of crispiness. Pat your chicken dry and let it air-dry in the fridge uncovered for an hour if you can.
- Use indirect heat: Placing the chicken over indirect heat prevents burning while allowing slow cooking. This keeps the meat juicy without charring the skin.
- Don’t rush the temperature check: A meat thermometer is your best friend. Insert it into the thickest part of the thigh, not touching bone. Early removal leads to chewy meat; too late means dryness.
- Rotate the chicken: Turning the bird every 20 minutes helps avoid hot spots on your grill and promotes even cooking.
- Avoid opening the lid too often: Each peek lowers the grill temperature and extends cooking time. Trust the process and only check when necessary.
- Use a dry rub, not a wet marinade: Wet marinades can hinder skin crispiness. The dry rub locks in flavor and helps the skin brown beautifully.
I remember the first time I didn’t pat the chicken dry. The skin came out soggy, and I nearly gave up on beer can chicken altogether. Lesson learned! Also, the first few tries I cooked over direct flame and ended up with burnt spots. Now, indirect heat is key, and it turns out like clockwork every time.
Variations & Adaptations
One of the fun parts about this recipe is how easy it is to customize to your taste or dietary needs.
- Spice it up: Add chipotle powder or smoked paprika for a deeper smoky heat. For a sweeter touch, toss in some maple sugar or honey powder in the rub.
- Herb focus: Swap out lemon and thyme for orange slices and rosemary for a citrusy twist that pairs beautifully with the smoky flavor.
- Beer alternatives: Use non-alcoholic beer or even ginger ale for a different flavor profile. I once tried a spiced cider for fall grilling—it was surprisingly good!
- Cooking methods: If you don’t have a grill, this recipe works in the oven at 375°F (190°C) for about 90 minutes. Place the chicken on a beer can in a roasting pan to catch drippings.
- Dietary swaps: For a lower sodium option, reduce salt in the rub and use a low-sodium beer. If you need gluten-free, double-check your beer label or opt for gluten-free varieties.
Personally, I once swapped the dry rub for a Cajun seasoning blend for a weekend cookout, and it was a hit with friends who love a bit of heat. Don’t be afraid to experiment—this recipe is forgiving and flexible.
Serving & Storage Suggestions
Serve your crispy beer can chicken hot off the grill with some classic sides like grilled corn, coleslaw, or a fresh green salad. A squeeze of fresh lemon adds brightness at the table.
Leftovers? No worries. Store the chicken in an airtight container in the refrigerator for up to 3 days. Reheat gently in a 350°F (175°C) oven, covered with foil to prevent drying out, or slice cold for sandwiches.
If you want to freeze, carve the meat off the bones and wrap tightly in freezer-safe packaging. It keeps well for up to 3 months.
Fun fact: The smoky flavor tends to intensify a bit after resting overnight, so sometimes I make the chicken a day ahead and reheat—it’s a total crowd-pleaser. Pairing it with a side like the loaded baked potato bar makes for a comforting meal everyone loves.
Nutritional Information & Benefits
A serving of this crispy beer can chicken (about 6 oz / 170 g cooked meat) typically contains around 280 calories, 20 grams of protein, 18 grams of fat (mostly from skin), and minimal carbs. It’s a solid source of niacin, vitamin B6, and selenium.
The protein content makes it a filling meal, and the skin, while higher in fat, delivers that irresistible crisp that’s worth the occasional indulgence. Opting for leaner cuts or removing some skin can reduce fat if you’re watching intake.
The fresh lemon and herbs add antioxidants, and grilling over charcoal introduces subtle smoky compounds that enhance flavor without added calories. Just watch your portion sizes and balance with fresh veggies for a wholesome meal.
Conclusion
If you’re looking for a dish that’s simple to prepare yet delivers that juicy, smoky, crispy perfection, this crispy beer can chicken recipe is a winner. It’s one of those meals that feels like a treat but doesn’t demand hours in the kitchen or complicated ingredients.
Whether you stick to the classic rub or try your own variations, this recipe invites you to make it your own. Honestly, it’s become a staple in my summer grilling routine, and I love how it brings people together around the fire.
Give it a shot, tweak it to your liking, and let me know how your grill adventure goes. There’s something special about sharing a meal that’s both effortless and memorable—this chicken does just that.
FAQs About Crispy Beer Can Chicken
Is beer necessary for beer can chicken?
The beer helps steam the chicken from the inside, keeping it moist and adding subtle flavor. You can substitute with non-alcoholic beer, soda, or broth if preferred.
How do I know when the chicken is done?
Use a meat thermometer to check the thickest part of the thigh reaches 165°F (74°C). This ensures it’s cooked safely but still juicy.
Can I make beer can chicken in the oven?
Yes! Place the chicken on a beer can in a roasting pan and bake at 375°F (190°C) for about 90 minutes, or until done.
What type of beer works best?
Light to medium lagers or ales are best because they add mild malt sweetness without overpowering bitterness.
How do I get the skin extra crispy?
Pat the chicken dry before seasoning, use a dry rub, and cook over indirect heat. Avoid opening the grill too often to keep the temperature steady.
For a delicious game-day snack to pair with your grilled feast, you might enjoy the creamy buffalo chicken dip, which brings a different kind of comforting flavor to your spread.
Pin This Recipe!

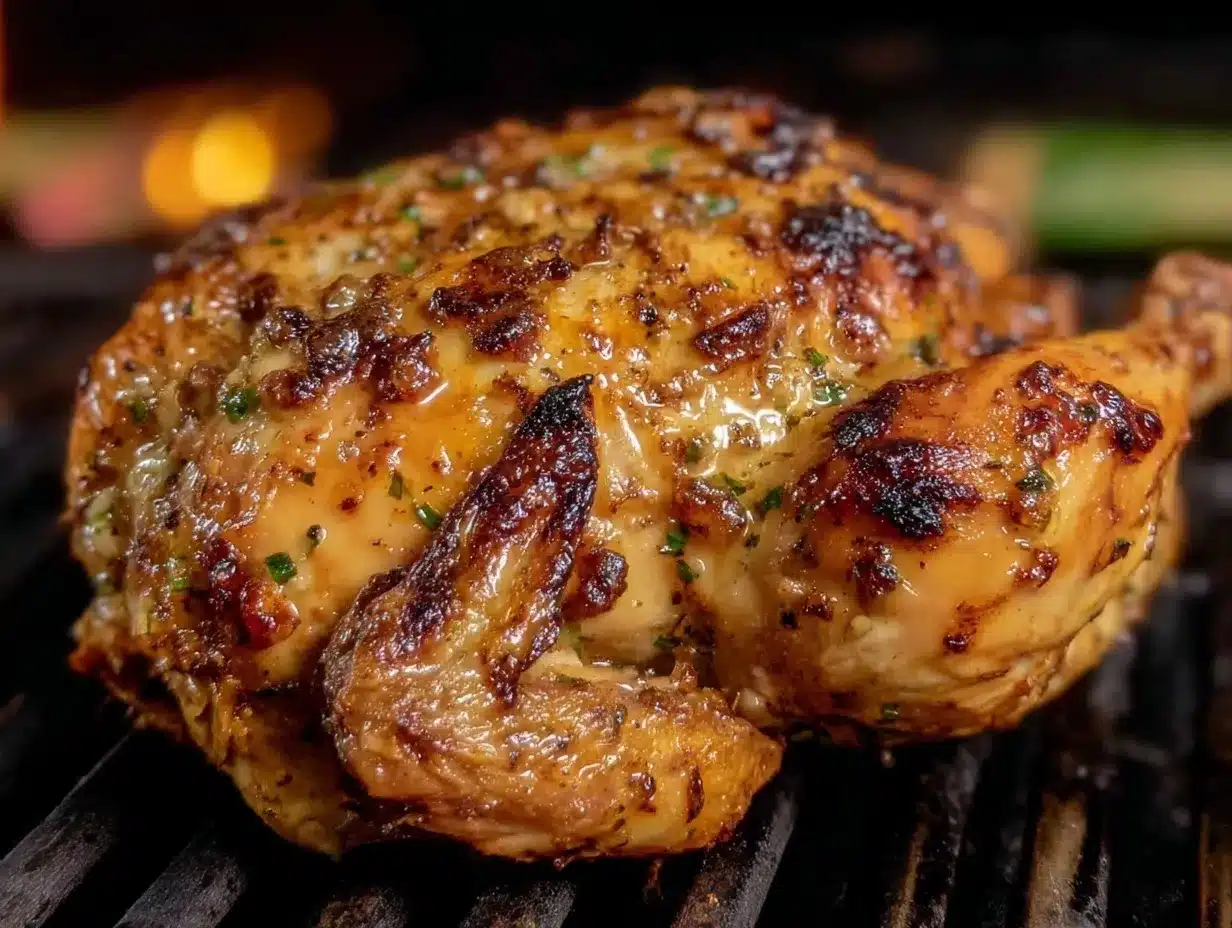
Crispy Beer Can Chicken

A simple and satisfying grilled chicken recipe that uses a beer can to steam the bird from the inside, resulting in juicy meat and crispy, smoky skin. Perfect for outdoor gatherings and easy weekend cookouts.
- Prep Time: 25 minutes
- Cook Time: 60-75 minutes
- Total Time: 1 hour 25 minutes to 1 hour 40 minutes
- Yield: 4-6 servings 1x
- Category: Main Course
- Cuisine: American
Ingredients
- Whole chicken (4-5 pounds)
- 1 (12 oz) can of beer (lager or pale ale)
- 2 tablespoons olive oil
- 2 tablespoons paprika
- 1 tablespoon garlic powder
- 1 tablespoon onion powder
- 1 tablespoon brown sugar
- 1.5 teaspoons salt
- 1 teaspoon black pepper
- 1/4 teaspoon cayenne pepper (optional)
- 1 lemon, halved
- A few sprigs of fresh thyme or rosemary (optional)
Instructions
- Rinse the whole chicken under cold water and pat dry thoroughly with paper towels (10 minutes).
- In a small bowl, mix paprika, garlic powder, onion powder, brown sugar, salt, black pepper, and cayenne pepper if using (5 minutes).
- Rub 2 tablespoons of olive oil all over the chicken, inside and out (2 minutes).
- Generously coat the chicken with the spice mix, getting under the skin and inside the cavity (5 minutes).
- Stuff the halved lemon and fresh herbs inside the chicken cavity (2 minutes).
- Open the beer can and pour out about a quarter of it. Set the can on a stable surface (1 minute).
- Carefully lower the chicken onto the beer can so it sits upright with the legs acting as a tripod. Use a beer can chicken holder if available (3 minutes).
- Preheat the grill to medium heat, about 375°F (190°C). For charcoal grills, bank coals to one side for indirect heat and place a drip pan under the grill grate (10 minutes).
- Place the chicken upright on the grill over indirect heat. Close the lid and cook for 60-75 minutes until the internal temperature reaches 165°F (74°C) in the thickest part of the thigh (60-75 minutes).
- Every 20 minutes, rotate the chicken for even cooking and check grill temperature. Tent with foil if skin browns too quickly (5 minutes per turn).
- Remove the chicken from the grill and let it rest upright for 10 minutes before carving (10 minutes).
Notes
Pat the chicken dry thoroughly before applying the rub for extra crispy skin. Use indirect heat on the grill to avoid burning. Rotate the chicken every 20 minutes for even cooking. Use a meat thermometer to ensure the chicken reaches 165°F internally. If skin browns too fast, tent with foil. Non-alcoholic beer or soda can substitute the beer. The recipe can also be cooked in the oven at 375°F for about 90 minutes.
Nutrition
- Serving Size: 6 oz (170 g) cooked
- Calories: 280
- Fat: 18
- Protein: 20
Keywords: beer can chicken, grilled chicken, crispy chicken, smoky chicken, outdoor cooking, barbecue, easy chicken recipe