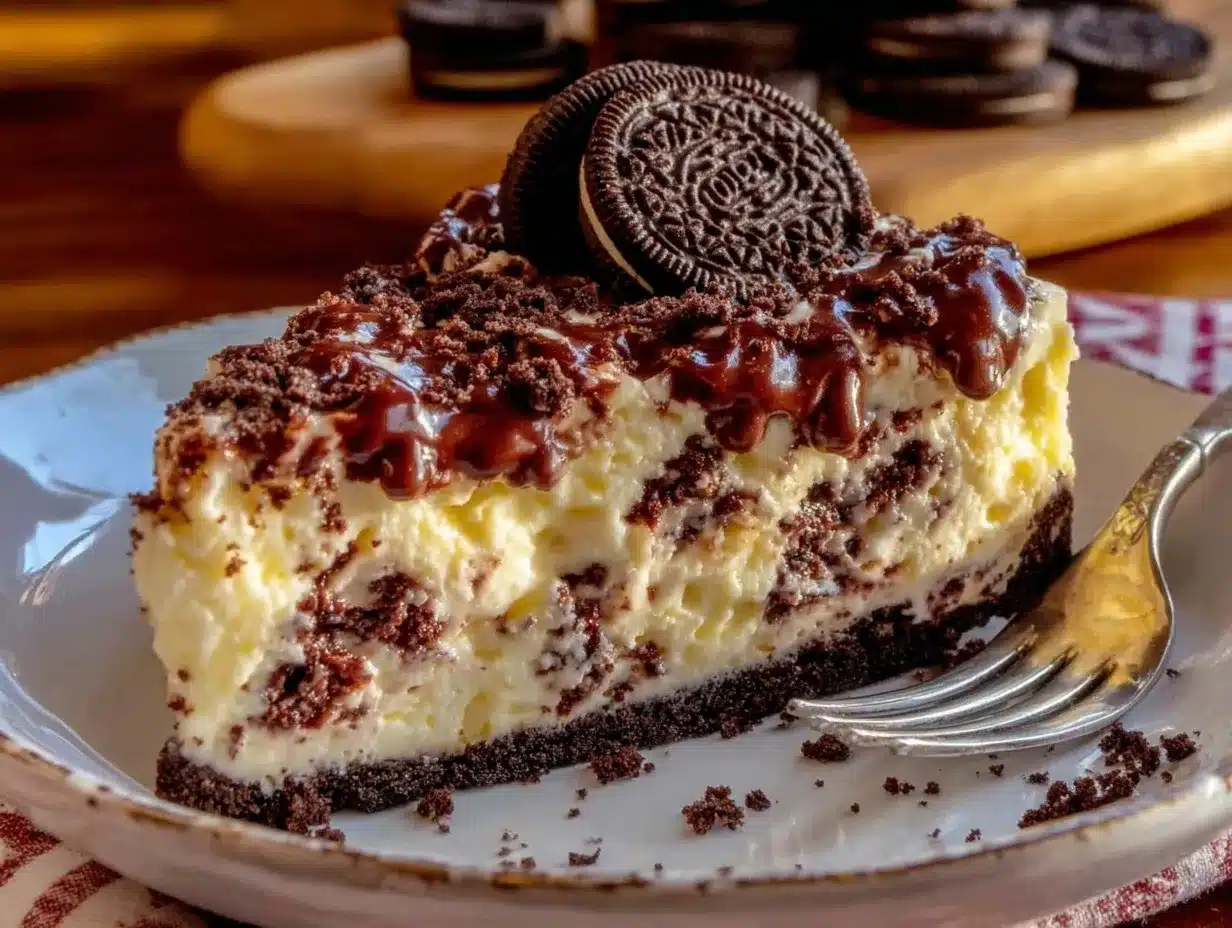
“You just need five minutes,” my friend said casually over the phone while I was juggling dinner plans and a mountain of laundry. Honestly, I was skeptical—no-bake cheesecakes always sounded like a compromise to me, something that couldn’t quite match the richness of the oven-baked versions I grew up loving. But curiosity got the better of me. That night, with Oreo crumbs scattered across the counter and cream cheese softening on the counter, I gave this recipe a shot.
The first bite was a revelation—the texture was indulgently creamy, the Oreos added just the right crunch and chocolate punch, and honestly, it felt like cheating on dessert without any guilt. It quickly became a recurring treat in my kitchen, especially on those evenings when I just wanted something quick but satisfying after a long day.
Now, several batches later, I can say this Creamy No-Bake Oreo Cheesecake Delight is my go-to for impressing friends without the fuss of the oven or the wait. It’s funny how the simplest recipes sometimes turn into the most beloved staples. This one stuck around because it’s pure comfort, with a bit of childhood nostalgia baked in—well, no baking actually required.
There’s something quietly joyful about pulling out a dessert that feels special yet barely takes any effort. If you’ve been on the fence about no-bake cheesecakes, this might just be the recipe that changes your mind.
Why You’ll Love This Recipe
After making this creamy no-bake Oreo cheesecake delight multiple times, I’ve picked up a few reasons why it stands out:
- Quick & Easy: Ready in just about 5 minutes of prep time—perfect for those last-minute dessert emergencies or a spontaneous sweet craving.
- Simple Ingredients: No need for fancy or hard-to-find items. If you’ve got cream cheese, Oreos, and a few pantry staples, you’re halfway there.
- Perfect for Any Occasion: Whether it’s a casual family dinner, a potluck, or an indulgent weekend treat, this cheesecake fits right in.
- Crowd-Pleaser: Kids, adults, even picky eaters adore it. The classic Oreo flavor combo is just that good.
- Unbelievably Delicious: The creamy texture paired with crunchy cookie bits hits that comforting dessert spot every time.
What sets this recipe apart is the easy blending technique that keeps the cheesecake ultra-smooth without any lumps, plus the crumbly Oreo crust that doesn’t get soggy (thanks to a little butter magic). I even swapped in a touch of vanilla extract to balance the flavors perfectly without overpowering that signature Oreo taste.
Honestly, this cheesecake isn’t just dessert—it’s a little moment of joy that feels homemade and special without the usual stress. If you loved the mini lemon blueberry cheesecakes I shared earlier, you’ll find this Oreo delight a wonderful, chocolatey counterpart to add to your recipe collection.
What Ingredients You Will Need
This recipe uses simple, wholesome ingredients to deliver bold flavor and satisfying texture without the fuss. Most are pantry staples or easy to find in any grocery store.
- Oreo Cookies – about 24 cookies, crushed finely (reserve a few for garnish). I prefer Nabisco Originals for that perfect balance of cookie and cream.
- Unsalted Butter – 5 tablespoons (70g), melted, to bind the crust and add richness.
- Cream Cheese – 16 ounces (450g), softened to room temperature for the creamiest texture.
- Powdered Sugar – ¾ cup (90g), sifted to avoid lumps and bring just the right sweetness.
- Heavy Whipping Cream – 1 cup (240ml), chilled, whipped to soft peaks to lighten the filling.
- Vanilla Extract – 1 teaspoon, to add warmth and depth to the flavor.
- Optional: A pinch of salt to balance the sweetness and enhance the Oreo flavor.
If you’re looking for a dairy-free or lower-carb twist, you can swap cream cheese with vegan cream cheese or blend Greek yogurt into the mix. For a gluten-free crust, almond flour mixed with cocoa powder can replace crushed Oreos (though it won’t have quite the same nostalgic crunch).
Equipment Needed
- Mixing Bowls: One large for the filling and one medium for the crust.
- Electric Mixer or Stand Mixer: Helps whip the cream and blend cream cheese smoothly; a handheld mixer works fine too.
- Food Processor or Rolling Pin: To crush the Oreos. I often use a rolling pin inside a sealed bag—works just as well if you don’t have a processor.
- Springform Pan or Pie Dish: A 9-inch (23cm) pan works best for shaping and easy removal.
- Spatula: For folding the whipped cream gently into the cream cheese mixture.
For those on a budget, alternatives like a regular pie dish and a manual whisk can work, though it might take a little extra elbow grease. Keeping your cream cheese and whipping cream properly chilled makes a big difference in texture and ease of mixing.
Preparation Method
- Crush the Oreos (5 minutes): Place 24 Oreo cookies in a food processor and pulse until fine crumbs form. If you don’t have a processor, seal the cookies in a plastic bag and crush with a rolling pin. Reserve about 1/4 cup (30g) of crumbs for garnish.
- Make the Crust (5 minutes): In a medium bowl, combine Oreo crumbs with 5 tablespoons (70g) melted unsalted butter. Mix until the crumbs are evenly coated and resemble wet sand.
- Press Crust into Pan (5 minutes): Transfer the crust mixture into a 9-inch (23cm) springform pan or pie dish. Use the back of a spoon or measuring cup to press down firmly and evenly. Place in the fridge to chill while preparing the filling.
- Prepare the Filling (15 minutes): In a large mixing bowl, beat 16 ounces (450g) softened cream cheese until smooth and creamy with an electric mixer. Gradually add ¾ cup (90g) powdered sugar, mixing well after each addition to avoid lumps.
- Whip the Cream (5 minutes): In a separate bowl, whip 1 cup (240ml) heavy cream to soft peaks. This means when you lift the whisk, the cream holds a bit of shape but still gently falls.
- Combine Filling and Cream (5 minutes): Gently fold the whipped cream and 1 teaspoon vanilla extract into the cream cheese mixture using a spatula. Fold carefully to keep the mixture light and airy.
- Mix in Remaining Oreo Crumbs (2 minutes): Fold in the remaining Oreo crumbs for texture and that signature chocolate burst in every bite.
- Assemble and Chill (4+ hours): Pour the filling over the chilled crust, smoothing the top with a spatula. Sprinkle reserved Oreo crumbs on top for garnish. Cover with plastic wrap and refrigerate for at least 4 hours or overnight for the best set.
Tips: Don’t rush the chilling stage—it’s key for a firm yet creamy slice. If the cream cheese feels too stiff, let it sit at room temperature a bit longer before mixing. The filling should be smooth and spread easily, not lumpy or grainy.
Cooking Tips & Techniques
One thing I learned the hard way is the importance of softening cream cheese properly. When it’s too cold, you end up with lumps that no amount of mixing can fully smooth out. So, patience here is rewarded.
Whipping the cream to just soft peaks is another subtle art—overwhip and it turns grainy; underwhip and the cheesecake won’t have that lovely light texture. I usually stop as soon as the cream holds shape but still looks fluffy.
When folding whipped cream into the cream cheese base, do it gently. You want to preserve the airiness, so use a spatula in a slow, sweeping motion rather than vigorous stirring.
Pressing the crust firmly is crucial. It creates a sturdy base that holds together when slicing, especially since this cheesecake doesn’t bake. I often use the bottom of a measuring cup—it’s just the right size and weight.
If you want to speed up chilling, placing the cheesecake in the freezer for the first hour helps it set faster without freezing the whole dessert.
Variations & Adaptations
Though this Oreo cheesecake delight is a classic, it’s fun to switch things up now and then. Here are a few variations I’ve tried and loved:
- Mint Oreo Twist: Swap regular Oreos with mint-flavored ones for a refreshing, holiday-inspired version.
- Peanut Butter Swirl: Add ½ cup (125g) creamy peanut butter to the filling for a rich, nutty flavor that pairs beautifully with Oreos.
- Gluten-Free Option: Use gluten-free chocolate sandwich cookies or replace crust with crushed gluten-free graham crackers mixed with butter.
- Chocolate Lover’s Dream: Fold in mini chocolate chips or drizzle melted chocolate on top before chilling.
For a lighter option, swapping heavy cream with whipped coconut cream works nicely, especially if you’re aiming for dairy-free. I recently tried a version with almond flour crust and coconut cream—less traditional but still super tasty.
Serving & Storage Suggestions
This cheesecake is best served chilled—take it out of the fridge about 10 minutes before slicing so it softens just enough to cut cleanly without crumbling. I like to garnish with extra Oreo crumbs or even a few whole cookies on the side for presentation.
It pairs wonderfully with a cup of strong coffee or a cold glass of milk, balancing the sweet richness perfectly. For a party, serving alongside fresh berries or a berry compote adds a lovely tart contrast.
Store leftovers covered tightly in the refrigerator for up to 3 days. It also freezes well—wrap in plastic wrap and place in an airtight container for up to 1 month. To thaw, move to the fridge overnight and let sit at room temperature briefly before serving.
Interestingly, the flavors meld and deepen after a day or two, making it taste even better—if you can resist the temptation to eat it all immediately!
Nutritional Information & Benefits
Each serving (about 1/10th of the cheesecake) offers roughly:
| Calories | 350 kcal |
|---|---|
| Fat | 28g |
| Carbohydrates | 22g |
| Protein | 5g |
The cream cheese provides a decent amount of protein and calcium, while the Oreos add sweetness and texture (and yes, a bit of indulgence!). Using unsalted butter keeps the sodium in check, and you can always reduce sugar or swap powdered sugar with a natural sweetener if preferred.
For those with lactose intolerance, switching to lactose-free cream cheese and coconut-based whipping cream can make this recipe more accessible. Also, it’s free from eggs and doesn’t require baking, which is great for those avoiding raw eggs.
Conclusion
This Creamy No-Bake Oreo Cheesecake Delight is proof that you don’t need to fuss or bake to make a dessert that feels special and tastes indulgent. It’s quick, approachable, and perfect for just about any occasion—whether you’re treating yourself or feeding a crowd.
I love how easy it is to customize and how reliably it delivers that classic Oreo flavor with a smooth, creamy texture. It’s become a little secret weapon in my dessert arsenal for when time is tight but dessert cravings are strong.
If you give this recipe a try, I’d love to hear how you make it your own or what twists you add. Sharing those stories is what makes cooking fun and keeps recipes alive.
So, from my kitchen to yours, happy mixing and even happier eating!
Frequently Asked Questions
Can I use low-fat cream cheese for this recipe?
Yes, you can, but the texture might be less creamy and slightly more dense. Full-fat cream cheese gives the best rich and smooth consistency.
How long should I chill the no-bake cheesecake before serving?
At least 4 hours, but overnight chilling is ideal for the best texture and flavor development.
Can I make this cheesecake ahead of time?
Absolutely! It stores well in the fridge for up to 3 days and can be frozen for up to a month.
Is it possible to use a different cookie for the crust?
Yes, graham crackers, chocolate wafers, or gluten-free cookies work well. Just adjust the amount of butter to get the right crust texture.
What if I don’t have a food processor to crush the Oreos?
No worries! Place the Oreos in a sealed plastic bag and crush them with a rolling pin or the bottom of a heavy pan until finely crushed.
Pin This Recipe!

Creamy No-Bake Oreo Cheesecake Delight
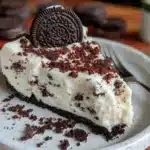
A quick and easy no-bake Oreo cheesecake that is creamy, indulgent, and perfect for any occasion. Ready in just about 5 minutes of prep time with simple ingredients.
- Prep Time: 30 minutes
- Cook Time: 0 minutes
- Total Time: 4 hours 30 minutes
- Yield: 10 servings 1x
- Category: Dessert
- Cuisine: American
Ingredients
- 24 Oreo Cookies, crushed finely (reserve a few for garnish)
- 5 tablespoons (70g) unsalted butter, melted
- 16 ounces (450g) cream cheese, softened to room temperature
- 3/4 cup (90g) powdered sugar, sifted
- 1 cup (240ml) heavy whipping cream, chilled, whipped to soft peaks
- 1 teaspoon vanilla extract
- Optional: pinch of salt
Instructions
- Crush the Oreos: Place 24 Oreo cookies in a food processor and pulse until fine crumbs form. If you don’t have a processor, seal the cookies in a plastic bag and crush with a rolling pin. Reserve about 1/4 cup (30g) of crumbs for garnish.
- Make the crust: In a medium bowl, combine Oreo crumbs with 5 tablespoons (70g) melted unsalted butter. Mix until the crumbs are evenly coated and resemble wet sand.
- Press crust into pan: Transfer the crust mixture into a 9-inch (23cm) springform pan or pie dish. Use the back of a spoon or measuring cup to press down firmly and evenly. Place in the fridge to chill while preparing the filling.
- Prepare the filling: In a large mixing bowl, beat 16 ounces (450g) softened cream cheese until smooth and creamy with an electric mixer. Gradually add 3/4 cup (90g) powdered sugar, mixing well after each addition to avoid lumps.
- Whip the cream: In a separate bowl, whip 1 cup (240ml) heavy cream to soft peaks.
- Combine filling and cream: Gently fold the whipped cream and 1 teaspoon vanilla extract into the cream cheese mixture using a spatula. Fold carefully to keep the mixture light and airy.
- Mix in remaining Oreo crumbs: Fold in the remaining Oreo crumbs for texture and chocolate bursts.
- Assemble and chill: Pour the filling over the chilled crust, smooth the top, sprinkle reserved Oreo crumbs on top for garnish. Cover with plastic wrap and refrigerate for at least 4 hours or overnight for best set.
Notes
Do not rush the chilling stage; it is key for a firm yet creamy slice. Soften cream cheese properly to avoid lumps. Whip cream to soft peaks to maintain light texture. Press crust firmly for a sturdy base. To speed chilling, place cheesecake in freezer for the first hour without freezing it completely.
Nutrition
- Serving Size: 1 slice (1/10th of c
- Calories: 350
- Fat: 28
- Carbohydrates: 22
- Protein: 5
Keywords: no-bake cheesecake, Oreo cheesecake, easy dessert, quick dessert, no bake, Oreo cookies, creamy cheesecake