Fourth batch in three days, and I finally stopped holding my breath when the toothpick came out clean. The first one was too dry—I’d overmixed, panicked, pulled it too early. The second? Soggy in the middle, that raw-dough sadness that makes you want to throw the whole pan out the window. Third time, I got close. But this one—this one had that crack down the center, the deep amber edges pulling away from the pan just slightly, and when I sliced into it warm, the walnuts caught the steam and softened just enough. I knew I had it.
Honestly, I wasn’t even trying to reinvent anything. I just wanted a best classic banana bread with walnuts that didn’t make me wish I’d made something else. You know the feeling—when you bite into a slice and think, “Yeah, this is fine,” but you’re not reaching for a second piece? That’s what I was running from. So I kept tweaking. Less sugar than my grandma’s recipe, more fat than the healthy blogs suggest, and a trick with the bananas that changed everything. (Let them go almost black. Not spotty. Almost fermenting. Trust me on this.)
By the fourth loaf, I wasn’t chasing perfection anymore. I was just hungry for something that tasted like Saturday mornings and didn’t need a pat of butter to be worth eating. This is that loaf. It’s not fancy, it’s not fussy, and it definitely doesn’t need a food blog backstory to sell itself. But here we are.
Why You’ll Love This Recipe
This isn’t just another banana bread recipe you’ll bookmark and forget. This is the one you’ll make twice in a week—and then text your sister about. Here’s why it works:
- One bowl, no mixer. You don’t need a stand mixer, a hand mixer, or even a whisk if you’re committed to a fork. Everything comes together in a single bowl with a spatula. Less cleanup, more banana bread.
- Perfect texture every time. The inside is moist and tender without being gummy. The crust is golden and slightly crisp. The walnuts add crunch without stealing the show. It’s the Goldilocks of banana breads.
- Real ingredients, no weird swaps. Butter, sugar, eggs, flour, bananas, walnuts. That’s it. No applesauce pretending to be oil, no coconut flour confusion. This is honest baking.
- Gets better on day two. If you can wait that long. The flavors meld overnight, the texture tightens up just enough, and a slice with coffee the next morning is basically a religious experience.
- Foolproof for beginners. I’ve tested this with overripe bananas, barely ripe bananas, frozen-and-thawed bananas—it works. Even if you forget the walnuts, even if you use a slightly different pan size, you’ll still get a great loaf.
I’ve been making banana bread for over a decade, and I’ve never stopped tweaking. This version came from years of trial and error—too dry, too wet, too sweet, not sweet enough. I wanted something that felt both nostalgic and precise. Something you could serve to guests without apologizing, but also eat over the sink at midnight without guilt. This is that bread.
What Ingredients You Will Need
This recipe uses simple, everyday ingredients. Nothing fancy, nothing hard to find. But the quality and ripeness of a few key items really do matter here.
- Very ripe bananas (about 3 medium, 1 ½ cups mashed): This is non-negotiable. Your bananas should be heavily spotted, almost entirely brown, and soft to the touch. If they’re still yellow, your bread will be less sweet and less moist. I’ve even used bananas that were completely black—they were perfect. Mash them well with a fork until mostly smooth, with just a few small lumps remaining.
- Unsalted butter (½ cup, 1 stick, melted and slightly cooled): I use unsalted so I can control the salt level. Melt the butter first and let it sit for a few minutes—you don’t want it hot enough to cook the eggs when you mix everything together. If you only have salted butter, reduce the added salt to ¼ teaspoon.
- Granulated sugar (¾ cup): This gives the bread structure and sweetness without making it cloying. I’ve tried reducing it to ½ cup, and the texture suffers—it’s drier and less tender. Stick with ¾ cup for the best result.
- Large eggs (2, at room temperature): Room temperature eggs incorporate more evenly into the batter. If you forgot to take them out of the fridge, place them in a bowl of warm water for 5 minutes. It works every time.
- Vanilla extract (1 teaspoon): Pure vanilla extract adds depth. Imitation vanilla works in a pinch, but the flavor won’t be as rich.
- All-purpose flour (1 ½ cups): Spoon and level your flour—don’t scoop directly from the bag. Scooping packs the flour down and you’ll end up with too much, leading to a dry bread. I’ve tested this with a kitchen scale: 1 ½ cups should weigh about 180 grams.
- Baking soda (1 teaspoon): This is your leavening agent. Make sure it’s fresh—if it’s been sitting in your cabinet for over a year, test it by dropping a little into vinegar. If it fizzes vigorously, it’s still good.
- Salt (½ teaspoon): Salt balances the sweetness and enhances the banana flavor. Don’t skip it.
- Ground cinnamon (1 teaspoon): Optional but highly recommended. Cinnamon and banana are a classic pairing. It adds warmth without overpowering the fruit.
- Chopped walnuts (¾ cup, plus extra for topping): Toast them first if you have time—spread them on a baking sheet at 350°F for 5-7 minutes until fragrant. Toasting brings out their oils and makes them crunchier. If you’re not a walnut fan, pecans work beautifully, or you can leave them out entirely.
That’s it. No buttermilk, no sour cream, no yogurt. Just honest ingredients that come together to make something greater than the sum of their parts.
Equipment Needed
You don’t need a fancy kitchen to make this bread. Here’s what you’ll actually use:
- 9×5-inch loaf pan: This is the standard size. If you use an 8×4-inch pan, your bread will take longer to bake and may have a domed top that cracks more dramatically. If you use a 10-inch pan, it’ll be shorter and bake faster. I prefer the 9×5 for the perfect height-to-crust ratio.
- Large mixing bowl: Any bowl will do. I use a glass or ceramic one because they’re easy to hold steady while mixing.
- Fork or potato masher: For mashing the bananas. A fork works perfectly—it leaves a few small lumps, which I actually prefer for texture.
- Spatula or wooden spoon: For folding everything together. A rubber spatula is ideal for scraping the sides of the bowl.
- Parchment paper or non-stick spray: Parchment paper makes cleanup effortless and ensures your loaf releases cleanly. If you use spray, make sure it’s a baking spray with flour.
- Cooling rack: Essential for letting the bread cool evenly. If you leave it in the pan, the bottom will get soggy.
I’ve made this bread with a cheap aluminum pan and a fancy ceramic one—both worked fine. Don’t overthink the equipment. A bowl, a pan, and a fork are all you really need.
Preparation Method
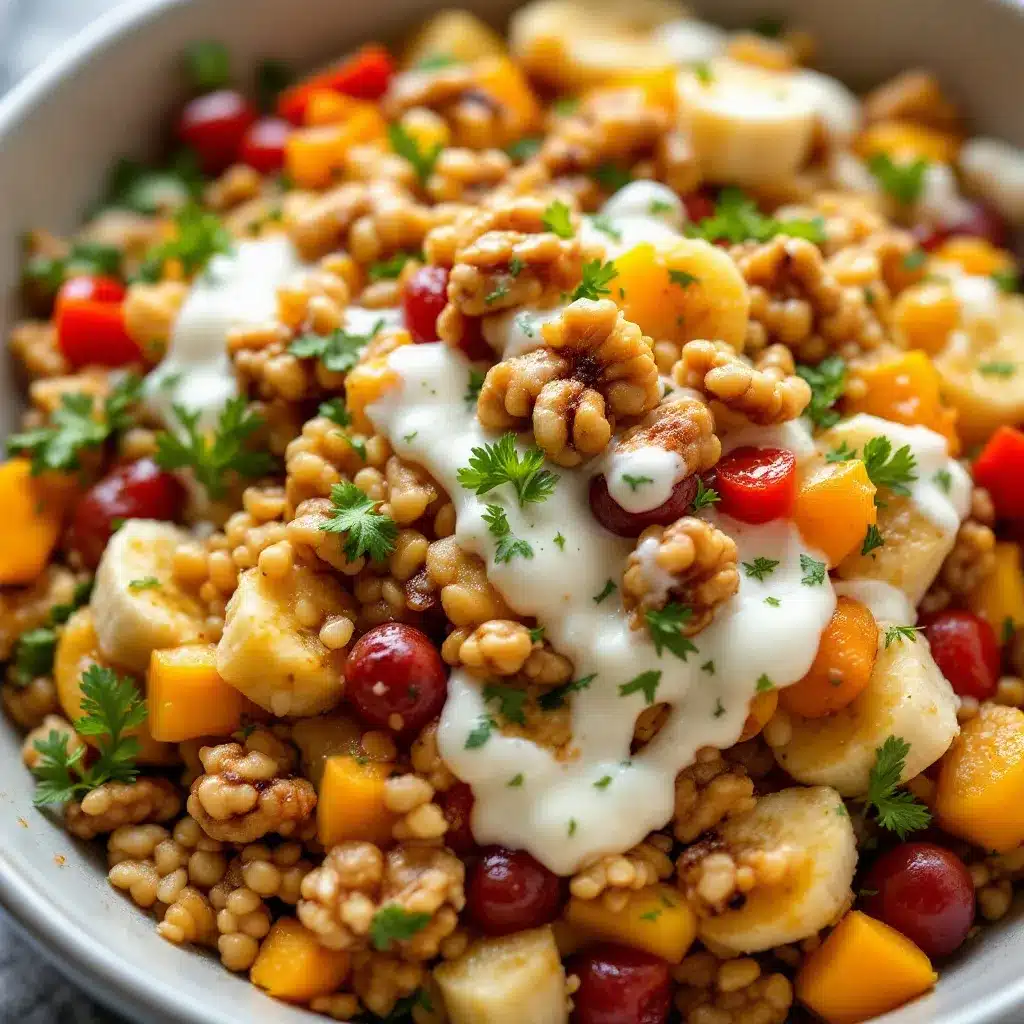
- Preheat your oven to 350°F (175°C). Position the rack in the center of the oven. While it’s heating, line your 9×5-inch loaf pan with parchment paper, leaving a little overhang on the long sides—this creates handles for lifting the bread out later. Or just spray it generously with non-stick baking spray.
- Mash the bananas. In your large mixing bowl, add the three very ripe bananas. Mash them with a fork until they’re mostly smooth with a few small lumps. You want about 1 ½ cups of mashed banana. Don’t puree them—you want some texture.
- Add the wet ingredients. Pour in the melted and slightly cooled butter, the granulated sugar, the two room-temperature eggs, and the vanilla extract. Stir everything together with your spatula until it’s well combined. The mixture will look a little lumpy from the bananas, and that’s fine. Don’t overmix here—just make sure the eggs are fully incorporated.
- Add the dry ingredients. Sprinkle the all-purpose flour, baking soda, salt, and cinnamon (if using) over the wet mixture. Use a spoon to lightly stir the dry ingredients together on top of the batter before folding—this helps distribute the baking soda evenly. Then fold everything together gently. Stop as soon as you no longer see streaks of flour. Overmixing at this stage develops gluten and will make your bread tough.
- Fold in the walnuts. Add the chopped walnuts (save a handful for topping) and fold them in with just a few strokes. They should be evenly distributed but not crushed.
- Pour the batter into the prepared pan. Use your spatula to scrape every last bit into the pan. Smooth the top gently. Sprinkle the reserved walnuts over the top, pressing them in very lightly so they stick.
- Bake for 55-65 minutes. Start checking at 55 minutes. Your bread is done when a toothpick inserted into the center comes out clean or with just a few moist crumbs attached—not wet batter. The top should be deep golden brown and cracked beautifully. If the top is browning too quickly (around 45 minutes), tent the pan loosely with aluminum foil.
- Cool in the pan for 10 minutes. Set the pan on a cooling rack. After 10 minutes, use the parchment paper handles to lift the bread out and transfer it directly to the cooling rack. Let it cool completely before slicing—about 1 hour. I know it’s hard to wait, but slicing warm banana bread can make it crumbly and gummy.
A few sensory cues as you go: When you fold in the flour, the batter should be thick and scoopable, not runny. When you lift the mixing bowl, you should smell bananas and cinnamon. When you tap the top of the baked loaf, it should feel firm and spring back slightly.
Cooking Tips & Techniques
I’ve made this recipe more times than I care to count, and I’ve learned a few things the hard way. Here’s what I wish someone had told me:
- Don’t overmix the batter. This is the number one mistake beginners make. Mix until the flour just disappears—a few small lumps are fine. Overmixing develops gluten, and gluten makes banana bread tough and rubbery. You want tender, not tough.
- Use a kitchen scale for flour if you have one. Cup measurements can vary wildly depending on how you scoop. One person’s cup of flour can weigh anywhere from 120 to 150 grams. For this recipe, 1 ½ cups should be 180 grams. If you don’t have a scale, spoon the flour into your measuring cup and level it off with a knife—don’t scoop directly from the bag.
- Let your bananas get ugly. I cannot stress this enough. Green-tipped bananas will give you bland, dry bread. You want bananas that are almost liquid inside. If your bananas aren’t ripe enough, you can speed things up by baking them at 300°F for 15-20 minutes until they turn black and soft. Let them cool before mashing.
- Check your baking soda’s freshness. Baking soda loses potency over time. If your bread doesn’t rise well and has a dense, flat top, your baking soda might be old. Test it by dropping ¼ teaspoon into a small bowl of vinegar—if it bubbles vigorously, it’s good.
- Rotate the pan halfway through. Ovens have hot spots. Rotating the pan at the 30-minute mark ensures even browning and baking.
I once made a batch where I forgot the sugar entirely. It was a sad, flat loaf that tasted like cardboard with banana flavor. Another time, I used frozen bananas without thawing them first—the batter was ice-cold, and the bread took forever to bake and ended up uneven. Learn from my mistakes. Room temperature ingredients matter.
Variations & Adaptations
This recipe is incredibly forgiving. Here are some ways to make it your own:
- Chocolate chip banana bread: Swap the walnuts for ¾ cup of semi-sweet or dark chocolate chips. The chocolate melts into little pockets of richness throughout the loaf. My kids prefer this version, and honestly, I don’t blame them.
- Gluten-free version: Use a 1:1 gluten-free baking flour blend (I like King Arthur’s or Bob’s Red Mill). The texture will be slightly more delicate, so let it cool completely before slicing. Don’t use almond flour or coconut flour—they won’t work here without major recipe adjustments.
- Vegan banana bread: Replace the butter with melted coconut oil or vegan butter, and use two flax eggs (2 tablespoons ground flaxseed mixed with 5 tablespoons water, let sit for 5 minutes). The texture will be a bit denser but still delicious.
- Spiced banana bread: Add ½ teaspoon of nutmeg, ¼ teaspoon of ground ginger, and a pinch of cloves along with the cinnamon. It gives the bread a warm, almost chai-like flavor that’s perfect for fall.
- Streusel topping: Mix ¼ cup flour, ¼ cup brown sugar, 2 tablespoons cold butter, and ¼ cup chopped walnuts until crumbly. Sprinkle over the batter before baking. It adds a buttery, crunchy crust that’s absolutely irresistible.
I once made a version with dried cranberries and white chocolate chips—it was surprisingly good, like a banana bread version of a trail mix bar. Don’t be afraid to experiment.
Serving & Storage Suggestions
This banana bread is wonderful on its own, but here’s how to make it even better:
- Serving temperature: Room temperature is ideal. The flavors are most pronounced and the texture is at its peak. If you’re impatient, a warm slice with a pat of butter melting into it is hard to beat.
- Pairings: A slice with a cup of strong coffee or a tall glass of cold milk is a classic combination. For a more indulgent treat, toast a slice lightly and spread it with salted butter or cream cheese.
- Storage: Wrap the cooled loaf tightly in plastic wrap or aluminum foil and store at room temperature for up to 4 days. Do not refrigerate—the cold will dry it out and make the texture mealy.
- Freezing: This bread freezes beautifully. Wrap the whole loaf or individual slices in plastic wrap, then place in a freezer-safe bag or container. It will keep for up to 3 months. To thaw, leave it at room temperature for a few hours or pop a slice in the microwave for 15-20 seconds.
- Flavor development: Honestly, this bread tastes even better on day two. The banana flavor deepens, the texture tightens up, and the walnuts soften just slightly. If you can resist eating it all on day one, you’re in for a treat.
I’ve packed slices of this in lunchboxes, taken them on road trips, and even crumbled them over vanilla ice cream for a quick dessert. It’s endlessly versatile.
Nutritional Information & Benefits
Let’s be real—this is banana bread, not a health food. But it does have some redeeming qualities:
- Estimated per slice (1/10 of loaf): Approximately 280 calories, 12g fat, 40g carbohydrates, 4g fiber, 18g sugar, 5g protein.
- Bananas: Packed with potassium, vitamin B6, and vitamin C. They also contain resistant starch, which is good for gut health.
- Walnuts: Rich in omega-3 fatty acids, antioxidants, and healthy fats that support brain health.
- Dietary considerations: This recipe can be made gluten-free and vegan with the substitutions listed above. It’s naturally nut-free if you omit the walnuts.
I’m not a nutritionist, and I don’t pretend to be. But I do believe that food made with real ingredients—butter, eggs, flour, fruit—is inherently better than anything processed. This bread is a treat, and it’s okay to enjoy treats. Balance, not perfection.
Conclusion
This best classic banana bread with walnuts is the kind of recipe that becomes a staple. It’s simple enough for a Tuesday afternoon, special enough for a Sunday brunch. It uses ingredients you probably already have, comes together in one bowl, and fills your kitchen with a smell that makes everyone wander in asking, “What’s baking?”
I’ve made this loaf for friends who said they didn’t like banana bread—and watched them go back for seconds. I’ve mailed slices to my mom across the country. It’s become my go-to for using up overripe bananas, for bringing to potlucks, for quiet mornings when all I want is something warm and familiar.
Now I want to hear from you. Did you make this? Did you add chocolate chips or leave out the walnuts? Did your loaf turn out perfect on the first try, or did you learn something along the way? Drop a comment below and let me know. And if you loved it, share it with someone who needs a little comfort in loaf form. Happy baking!
Frequently Asked Questions
Can I use frozen bananas for this recipe?
Yes, absolutely. In fact, frozen and thawed bananas are even sweeter and more liquid than fresh ripe ones. Just thaw them completely, drain off any excess liquid, and mash them as usual. The texture of the bread will be slightly more moist, which is a good thing.
Why did my banana bread sink in the middle?
This usually happens for one of three reasons: your oven temperature was too low, you opened the oven door too often during baking, or the bread was underbaked. Make sure your oven is fully preheated to 350°F, and resist the urge to peek until the 55-minute mark. A properly baked loaf should be set in the center and pulling away from the edges slightly.
Can I make this recipe into muffins instead?
Definitely. Divide the batter among a 12-cup muffin tin lined with paper liners. Bake at 350°F for 18-22 minutes, or until a toothpick inserted into the center of a muffin comes out clean. The baking time will be much shorter, so start checking around 18 minutes. You’ll get about 12 standard muffins.
How do I know when the banana bread is fully baked?
The most reliable test is the toothpick test. Insert a wooden toothpick or skewer into the center of the loaf—it should come out clean or with just a few moist crumbs attached. If it comes out with wet batter, it needs more time. You can also check the internal temperature with an instant-read thermometer; it should read about 200-205°F in the center.
Can I reduce the sugar in this recipe?
You can reduce it to ½ cup, but I don’t recommend going lower than that. Sugar does more than sweeten—it also contributes to the bread’s moisture, tenderness, and browning. If you reduce it too much, your bread will be drier and paler. If you’re looking for a lower-sugar option, try using very ripe bananas (which are naturally sweeter) and cutting the sugar to ⅔ cup.
If you enjoyed this recipe, you might also love my easy one bowl banana bread recipe for an even simpler version, or these quick peanut butter banana energy bites for a no-bake snack. For another comforting baked good, check out this best salted caramel apple crisp—it’s the perfect fall dessert.
Pin This Recipe!
Best Classic Banana Bread with Walnuts – Easy Homemade Recipe
This classic banana bread with walnuts is moist, tender, and perfectly sweetened. Made with simple ingredients in one bowl, it’s a foolproof recipe that gets even better on day two.
- Prep Time: 15 minutes
- Cook Time: 55-65 minutes
- Total Time: 1 hour 10 minutes to 1 hour 20 minutes
- Yield: 10 servings 1x
- Category: Dessert
- Cuisine: American
Ingredients
- 3 very ripe bananas (about 1 ½ cups mashed)
- ½ cup (1 stick) unsalted butter, melted and slightly cooled
- ¾ cup granulated sugar
- 2 large eggs, at room temperature
- 1 teaspoon vanilla extract
- 1 ½ cups all-purpose flour (spooned and leveled, about 180g)
- 1 teaspoon baking soda
- ½ teaspoon salt
- 1 teaspoon ground cinnamon (optional)
- ¾ cup chopped walnuts, plus extra for topping
Instructions
- Preheat your oven to 350°F (175°C). Position the rack in the center of the oven. Line a 9×5-inch loaf pan with parchment paper, leaving overhang on the long sides, or spray generously with non-stick baking spray.
- In a large mixing bowl, mash the bananas with a fork until mostly smooth with a few small lumps (about 1 ½ cups).
- Add the melted butter, granulated sugar, eggs, and vanilla extract to the mashed bananas. Stir with a spatula until well combined. Do not overmix.
- Sprinkle the flour, baking soda, salt, and cinnamon (if using) over the wet mixture. Lightly stir the dry ingredients together on top, then fold gently until just combined—no streaks of flour remain. Do not overmix.
- Fold in the chopped walnuts (reserve a handful for topping) with a few strokes until evenly distributed.
- Pour the batter into the prepared pan. Smooth the top gently and sprinkle the reserved walnuts on top, pressing them in lightly.
- Bake for 55-65 minutes, until a toothpick inserted into the center comes out clean or with a few moist crumbs. If the top browns too quickly (around 45 minutes), tent loosely with aluminum foil.
- Cool in the pan for 10 minutes, then lift out using the parchment handles and transfer to a cooling rack. Cool completely before slicing (about 1 hour).
Notes
Use very ripe, almost black bananas for best flavor and moisture. Do not overmix the batter to avoid tough bread. For a gluten-free version, use a 1:1 gluten-free baking flour blend. For a vegan version, replace butter with melted coconut oil and use two flax eggs. The bread tastes even better on day two.
Nutrition
- Serving Size: 1 slice (1/10 of loa
- Calories: 280
- Sugar: 18
- Sodium: 200
- Fat: 12
- Saturated Fat: 5
- Carbohydrates: 40
- Fiber: 4
- Protein: 5
Keywords: banana bread, classic banana bread, banana bread with walnuts, easy banana bread, one bowl banana bread, moist banana bread


