The last square was gone before the coffee even finished brewing. That’s the moment I knew I had to write this down. Not because I wanted to, but because my husband was already reaching for a second plate, eyes half-closed, holding out an empty hand like a begging puppy. “One more,” he mumbled, crumbs on his chin. “Just one more.”
It’s funny how these things happen. I wasn’t trying to make a masterpiece. I was just tired. It was late October, the leaves were turning that bruised purple color, and the grocery store run felt like too much effort. I had a can of pumpkin, some gingersnap cookies, and a block of cream cheese sitting in the fridge. I figured, why not throw it together? I mean, how hard can pumpkin bars be, right?
Wrong. It turned out to be the kind of dessert that silences a room. I brought them to my book club last Tuesday, and let’s face it, I’ve been judged before for bringing store-bought brownies. But this? This was different. The crust crumbled slightly when you picked it up, and the filling was so smooth it felt like eating a cloud. Three people asked for the recipe before they even finished their second cup of tea. One woman literally took a photo of the empty pan.
I didn’t plan for this. I just wanted something sweet to pair with my evening read. But now, every time I smell cinnamon and nutmeg, I think about that look on my husband’s face. It’s not just about the taste, honestly. It’s about that quiet pride of making something simple that feels fancy. These Creamy Pumpkin Pie Bars with Gingersnap Crust are it. They’re easy, they’re forgiving, and they’re going to disappear. Just like they did today.
Why You’ll Love This Recipe
Look, I’ve made my fair share of pumpkin desserts. Some are dry, some are too spicy, and some require a degree in chemistry to get right. This recipe is different. It’s the kind of bake that feels like a warm hug on a cold day. Here’s why you’re going to keep coming back to it:
- Quick & Easy: You don’t need a stand mixer or hours of prep time. This comes together in under 30 minutes of active work, making it perfect for those busy weeknights when you want dessert but don’t want to spend your evening in the kitchen.
- Simple Ingredients: No fancy grocery trips needed. You likely already have everything in your pantry. Pumpkin puree, gingersnap cookies, cream cheese, and spices. That’s it. It’s pantry-friendly comfort food.
- Perfect for Fall Gatherings: Whether it’s a Thanksgiving potluck, a casual Halloween party, or just a cozy Tuesday night, these bars fit the bill. They look elegant on a platter but are sturdy enough to handle a casual picnic.
- Crowd-Pleaser: Kids love the sweetness, and adults love the spice. It’s a balance that works for everyone. I’ve served these to picky eaters and foodies alike, and the result is always the same: empty plates.
- Unbelievably Delicious: The texture is the star here. The gingersnap crust provides a crunchy, buttery base that contrasts perfectly with the silky, dense pumpkin filling. It’s next-level comfort food without the effort of a whole pie.
What makes this recipe stand out from the rest is the simplicity of the crust. Usually, pie crusts are a pain to make. Here, we just crush up store-bought gingersnaps. It saves time and adds that distinct ginger kick that pairs so well with pumpkin. It’s not just another version of pumpkin bars; it’s the best version because it respects your time while delivering maximum flavor. It’s the kind of recipe that makes you close your eyes after the first bite. It’s comfort food reimagined—healthier-ish, faster, but with the same soul-soothing satisfaction.
What Ingredients You Will Need
This recipe uses simple, wholesome ingredients to deliver bold flavor and satisfying texture without the fuss. You don’t need to hunt down exotic spices or specialty flours. Everything here is designed to be accessible and easy to find. Here is what you’ll need to get started:
- Gingersnap Cookies: About 2 cups of crumbs. I recommend using a sturdy, spicy gingersnap brand like Pepperidge Farm or any store brand that holds up well. They provide the structure and the flavor base for the crust.
- Unsalted Butter: 1/2 cup (1 stick), melted. This binds the cookie crumbs together. Use real butter for the best flavor; margarine can leave a waxy aftertaste.
- Full-Fat Cream Cheese: 8 ounces, softened. Do not use the light version. You need the fat content for that creamy, dense texture. Kraft or Philadelphia work perfectly fine.
- Granulated Sugar: 1/2 cup. This sweetens the filling without being overly cloying. You can reduce this slightly if you prefer less sweetness, but don’t cut it too much or the texture will suffer.
- Pumpkin Puree: 1 cup (about half a standard can). Make sure you use 100% pure pumpkin puree, not pumpkin pie filling. The filling has extra sugar and spices that will throw off the balance.
- Eggs: 2 large eggs. These act as the binder. Room temperature eggs are best for a smooth batter, but cold eggs work if you’re in a hurry.
- Pumpkin Pie Spice: 1 teaspoon. This is a blend of cinnamon, ginger, nutmeg, and cloves. If you don’t have it, you can make your own by mixing 1/2 tsp cinnamon, 1/4 tsp ginger, 1/8 tsp nutmeg, and 1/8 tsp cloves.
- Vanilla Extract: 1 teaspoon. Pure vanilla adds depth. Avoid imitation vanilla if you can help it.
- Salt: A pinch. This is crucial. It balances the sweetness and makes the spices pop.
If you’re feeling adventurous, you can swap half the granulated sugar for brown sugar for a deeper molasses flavor. For a gluten-free option, use certified gluten-free gingersnap cookies. And if you’re dairy-free, you can use a plant-based cream cheese alternative, though the texture might be slightly less dense.
Equipment Needed
You don’t need a fancy kitchen to make these bars. Here is what you’ll need:
- 9×9 Inch Baking Pan: This is the standard size for these bars. You can use an 8×8 pan if you prefer thicker bars, but the baking time will need to increase slightly.
- Rolling Pin or Food Processor: To crush the gingersnap cookies. A rolling pin works fine if you put the cookies in a zip-top bag and crush them by hand. A food processor makes it faster.
- Mixing Bowls: Two medium-sized bowls. One for the crust, one for the filling.
- Electric Mixer: A hand mixer or stand mixer is helpful for beating the cream cheese and sugar until smooth. You can do it by hand with a whisk, but it takes more arm strength.
- Parchment Paper: Highly recommended. Line your pan with parchment paper, leaving an overhang on the sides. This makes lifting the bars out of the pan so much easier. No more stuck bottoms!
- Cooling Rack: To let the bars cool completely before slicing. This step is important for clean cuts.
If you don’t have a food processor, don’t worry. The rolling pin method is just as effective. Just be prepared to get a little sweaty. And if you don’t have a 9×9 pan, a square cake pan works too. The key is having that parchment paper liner. It’s a game-changer for cleanup and presentation.
Preparation Method
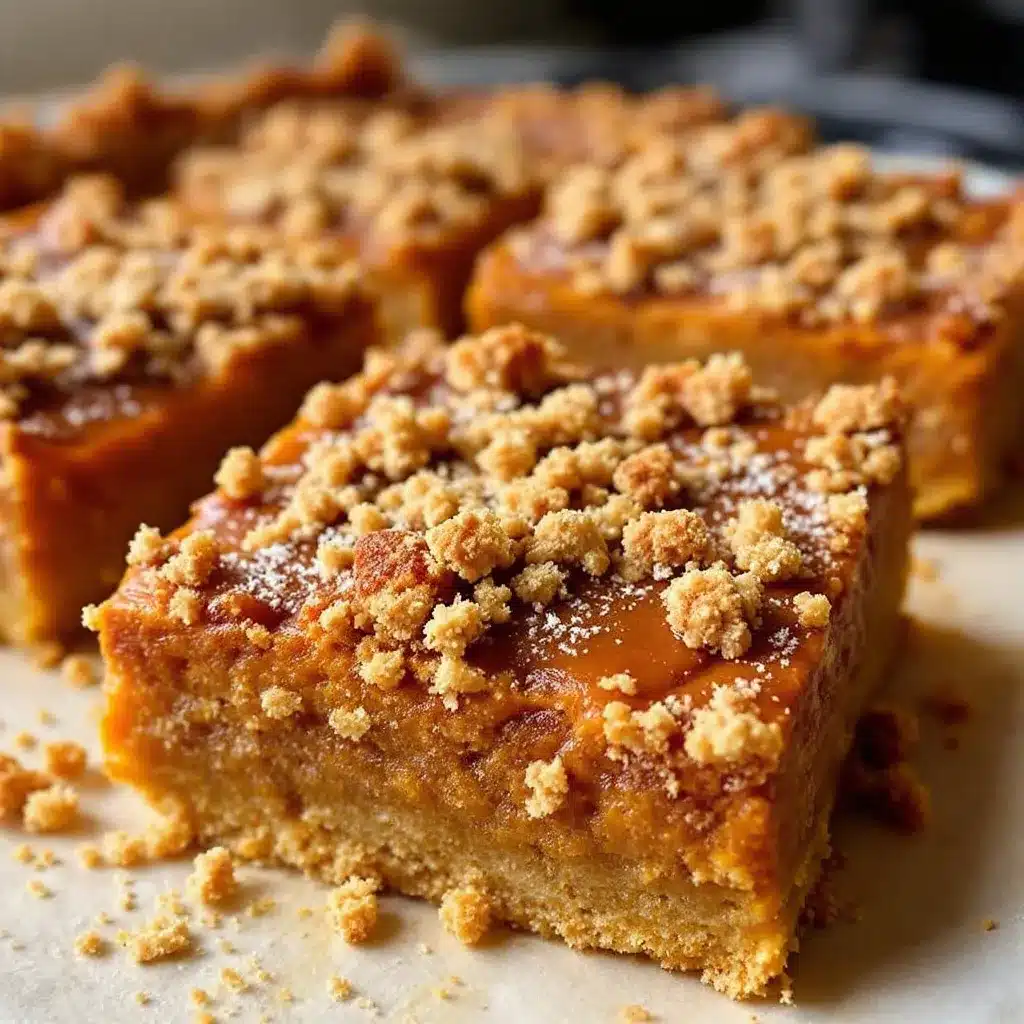
Let’s get cooking. This part is straightforward, but pay attention to the details for the best results.
- Preheat and Prep: Preheat your oven to 350°F (175°C). Line your 9×9 inch baking pan with parchment paper. Leave a little overhang on the sides so you can lift the bars out later. Grease the parchment lightly with butter or cooking spray.
- Make the Crust: Crush the gingersnap cookies into fine crumbs. You can use a food processor for about 10 seconds, or put them in a bag and crush them with a rolling pin. In a medium bowl, mix the cookie crumbs with the melted butter until it looks like wet sand. Press this mixture firmly into the bottom of your prepared pan. Use the bottom of a measuring cup to pack it down tight. This step is crucial for a sturdy crust. Bake the crust for 8-10 minutes until it’s set and fragrant. Remove from the oven and let it cool while you make the filling.
- Prepare the Filling: In a large bowl, beat the softened cream cheese and granulated sugar together until smooth and creamy. This should take about 2-3 minutes. If you’re using a hand mixer, make sure you scrape down the sides of the bowl. Add the pumpkin puree, eggs, pumpkin pie spice, vanilla extract, and a pinch of salt. Mix on low speed until just combined. Be careful not to overmix once the eggs are added, as this can incorporate too much air and cause the bars to crack.
- Assemble: Pour the pumpkin filling over the pre-baked crust. Spread it out evenly with a spatula. Tap the pan gently on the counter a few times to release any air bubbles.
- Bake: Bake at 350°F (175°C) for 25-30 minutes. The bars are done when the edges are set and the center is just slightly jiggly. It should look like a dense custard. Do not overbake, or the texture will become rubbery.
- Cool: Let the bars cool in the pan on a wire rack for at least 30 minutes. Then, transfer the whole pan to the refrigerator. Chill for at least 2 hours, or overnight. This step is non-negotiable if you want clean slices. Warm pumpkin bars are delicious, but they’re messy. Cold pumpkin bars are perfect.
- Slice and Serve: Use the parchment paper overhang to lift the bars out of the pan. Slice into squares. Enjoy!
Pro tip: If you’re in a rush, you can freeze the bars for 30 minutes instead of chilling them in the fridge. It speeds up the setting process.
Cooking Tips & Techniques
Here are some tips I’ve learned from trial and error to help you avoid common mistakes.
- Softened Cream Cheese: Make sure your cream cheese is truly softened. If it’s cold, you’ll get lumps in your filling. Microwave it for 10-15 seconds if needed. Smooth cream cheese equals smooth bars.
- Don’t Overmix: Once you add the eggs, mix just until combined. Overmixing creates air bubbles, which can lead to cracks on the surface. We want dense and creamy, not fluffy and airy.
- The Jiggle Test: When checking for doneness, look for a slight jiggle in the center. It should not be liquid, but it shouldn’t be rock hard either. It will continue to set as it cools.
- Patient Cooling: I know it’s hard to wait. But slicing warm bars is a recipe for disaster. They will crumble. Trust me on this one. Let them chill.
- Spice Adjustment: Pumpkin pie spice varies by brand. If you’re using homemade spice, taste the filling before baking. Adjust the cinnamon or ginger to your liking. Some people like it spicy, others prefer it mild.
Also, if your crust starts to brown too quickly, cover it loosely with foil after the first 10 minutes. And if you want a crunchier crust, add a tablespoon of flour to the cookie crumb mixture. It helps absorb excess moisture.
Variations & Adaptations
While the classic version is fantastic, here are some ways to tweak it:
- Caramel Swirl: Drizzle 1/4 cup of caramel sauce over the filling before baking. Use a knife to swirl it in for a pretty marbled effect.
- White Chocolate Chips: Sprinkle 1/2 cup of white chocolate chips over the filling before baking. They melt into gooey pockets of sweetness.
- Maple Glaze: Mix 1/2 cup powdered sugar with 1 tablespoon maple syrup and 1 teaspoon milk. Drizzle over the chilled bars for an extra sweet finish.
- Gluten-Free: Use gluten-free gingersnap cookies and ensure your pumpkin puree is certified gluten-free. Most brands are, but always check the label.
- Dairy-Free: Use plant-based cream cheese and butter. The texture might be slightly less dense, but the flavor will still be great.
I once tried adding chopped pecans to the crust, and it was delicious. The nuttiness paired well with the ginger. If you’re a nut lover, give that a try. Also, if you’re not a fan of ginger, you can use vanilla wafers for the crust, though you’ll lose that signature spice kick.
Serving & Storage Suggestions
These bars are best served chilled. They hold their shape well and have a firm, satisfying texture. Pair them with a cup of hot coffee or tea to balance the sweetness. They also go well with a glass of cold milk or a slice of sharp cheddar cheese if you’re feeling adventurous.
For storage, keep the bars in an airtight container in the refrigerator for up to 5 days. They can also be frozen for up to 3 months. Wrap them tightly in plastic wrap and then in aluminum foil. Thaw them in the refrigerator overnight before serving.
Reheating is not recommended for these bars, as the texture changes. But if you must, you can warm them in the microwave for 10-15 seconds. Just be prepared for a softer crust.
The flavors actually develop over time. If you can wait, let them sit in the fridge for a day or two before eating. The spices meld together, and the taste becomes more complex and rich.
Nutritional Information & Benefits
Here is an estimate of the nutritional content per bar (assuming 16 bars):
- Calories: Approx. 250 kcal
- Fat: 15g
- Carbohydrates: 28g
- Protein: 4g
- Fiber: 1g
Pumpkin is a good source of vitamin A and fiber. Gingersnap cookies add a bit of iron. While these are definitely a treat, the pumpkin adds some nutritional value. If you’re watching your sugar intake, consider reducing the sugar in the filling or using a sugar substitute. For a lower-calorie option, use light cream cheese, though the texture will be less rich.
From a wellness perspective, I love that this recipe uses real pumpkin. It’s a whole food ingredient, not just a flavoring. It adds moisture and nutrition without needing excessive butter or oil. It’s a way to enjoy dessert that feels a bit more grounded.
Conclusion
These Creamy Pumpkin Pie Bars with Gingersnap Crust are a winner. They’re easy, delicious, and perfect for any fall occasion. I hope you try them and enjoy them as much as I do. Don’t be afraid to customize them with your favorite add-ins or glazes. Make them your own.
If you make this recipe, please let me know how it turned out. Leave a comment below or tag me on social media. I love seeing your creations. And if you have any questions, feel free to ask. I’m here to help.
Happy baking, and enjoy every bite. These bars are worth the wait.
FAQs
Can I use pumpkin pie filling instead of pure pumpkin puree?
No, you should not use pumpkin pie filling. It contains added sugar and spices that will throw off the balance of the recipe. Stick to 100% pure pumpkin puree for the best results.
Can I freeze these bars?
Yes, these bars freeze very well. Wrap them tightly in plastic wrap and then in aluminum foil. They can be frozen for up to 3 months. Thaw them in the refrigerator before serving.
Why did my bars crack?
Cracking is usually caused by overmixing the batter or overbaking. Make sure to mix gently after adding the eggs and check for doneness early. The bars should still have a slight jiggle in the center.
Can I use a different type of cookie for the crust?
You can use vanilla wafers, shortbread cookies, or even graham crackers. However, gingersnap cookies provide a unique spice flavor that pairs perfectly with pumpkin. If you use a different cookie, adjust the spices in the filling accordingly.
How do I store these bars?
Store the bars in an airtight container in the refrigerator for up to 5 days. They are best served chilled. You can also leave them at room temperature for a few hours if you prefer a softer texture, but refrigeration is recommended for food safety.
Pin This Recipe!
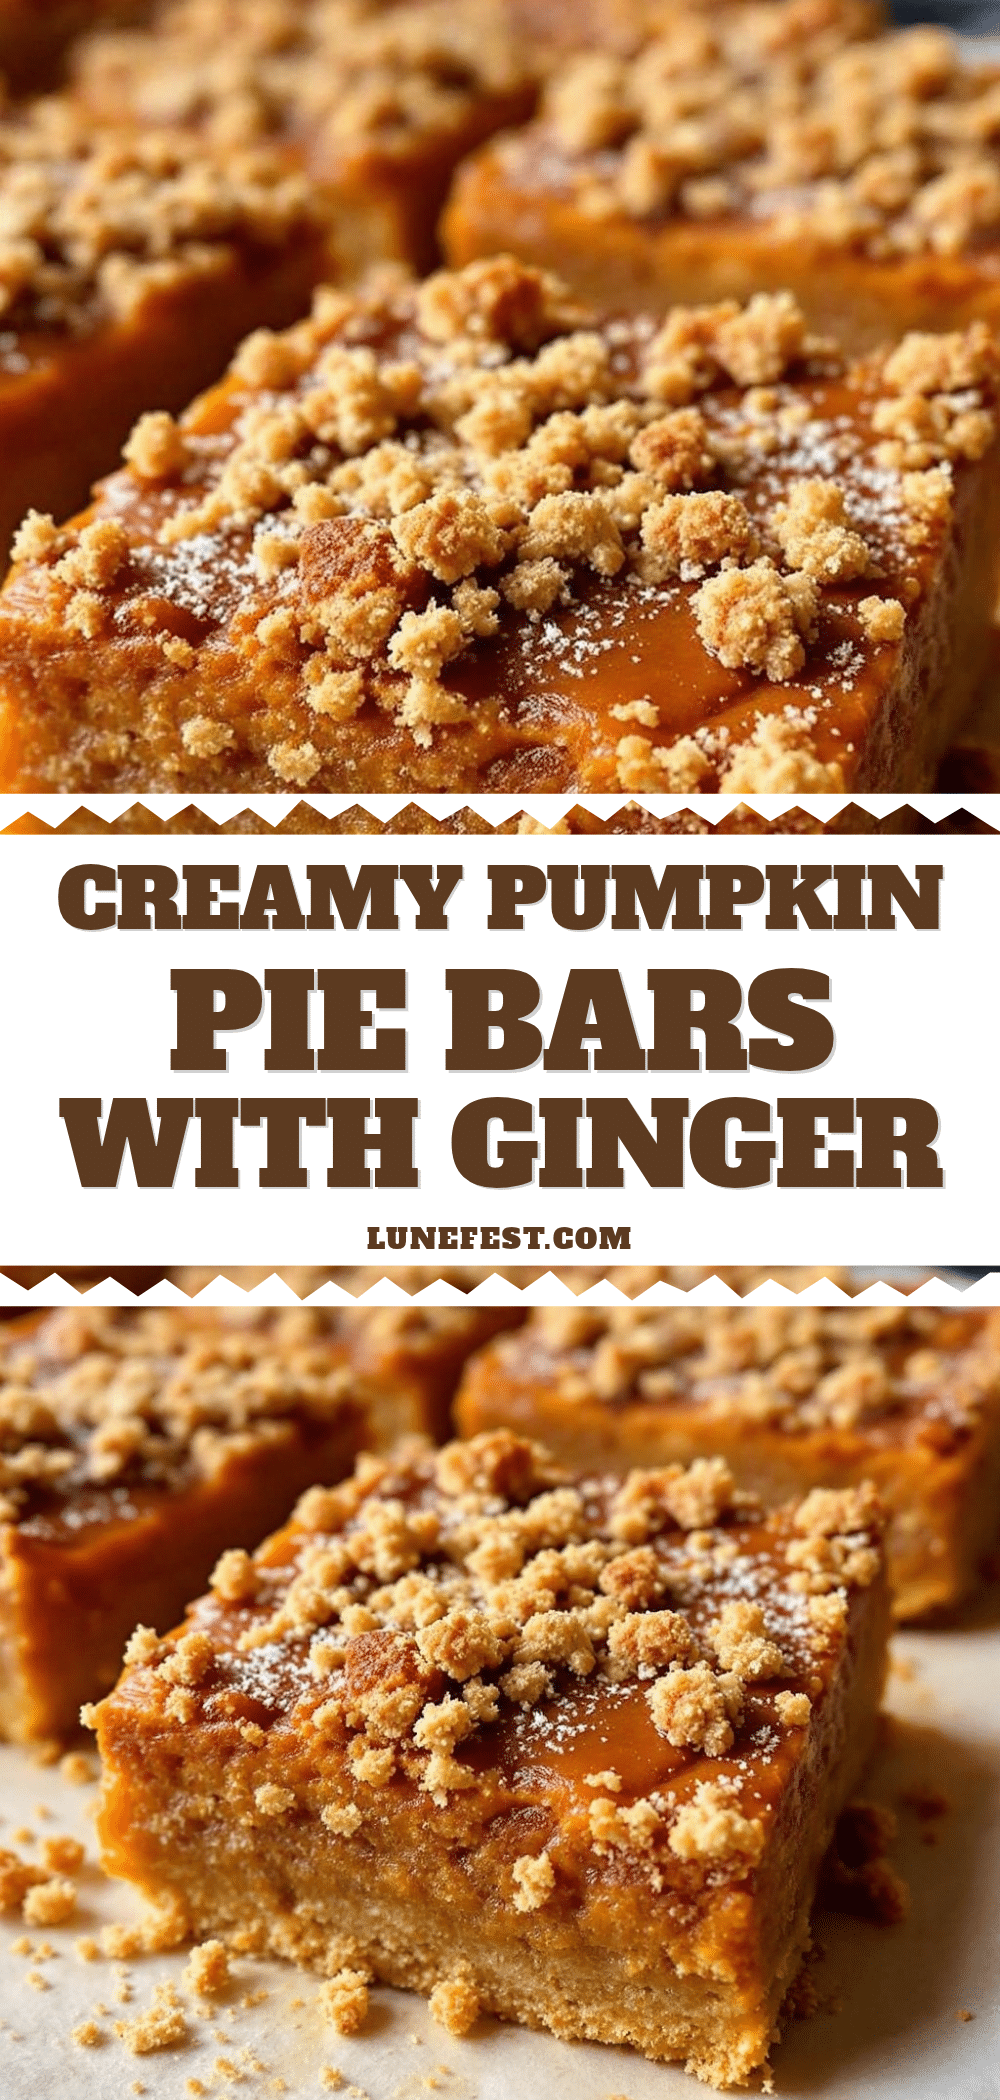
Creamy Pumpkin Pie Bars with Gingersnap Crust
These easy, 4-ingredient pumpkin bars feature a crunchy gingersnap crust and a silky, dense cream cheese filling. They are perfect for fall gatherings and require minimal prep time.
- Prep Time: 15 minutes
- Cook Time: 35 minutes
- Total Time: 50 minutes
- Yield: 16 servings 1x
- Category: Dessert
- Cuisine: American
Ingredients
- 2 cups gingersnap cookie crumbs
- 1/2 cup (1 stick) unsalted butter, melted
- 8 ounces full-fat cream cheese, softened
- 1/2 cup granulated sugar
- 1 cup 100% pure pumpkin puree
- 2 large eggs, room temperature
- 1 teaspoon pumpkin pie spice
- 1 teaspoon vanilla extract
- 1 pinch salt
Instructions
- Preheat oven to 350°F (175°C). Line a 9×9 inch baking pan with parchment paper, leaving an overhang on the sides, and grease lightly.
- Crush gingersnap cookies into fine crumbs. Mix crumbs with melted butter until resembling wet sand. Press firmly into the bottom of the prepared pan.
- Bake the crust for 8-10 minutes until set and fragrant. Remove from oven and let cool.
- In a large bowl, beat cream cheese and sugar until smooth and creamy (2-3 minutes).
- Add pumpkin puree, eggs, pumpkin pie spice, vanilla extract, and salt. Mix on low speed until just combined. Do not overmix.
- Pour filling over the pre-baked crust and spread evenly. Tap pan gently to release air bubbles.
- Bake at 350°F (175°C) for 25-30 minutes, until edges are set and the center is slightly jiggly.
- Cool in the pan on a wire rack for at least 30 minutes.
- Transfer to the refrigerator and chill for at least 2 hours (or overnight) before slicing.
- Lift bars out using parchment overhang, slice into squares, and serve chilled.
Notes
Ensure cream cheese is fully softened to avoid lumps. Do not overmix after adding eggs to prevent cracking. Bars must be chilled completely for clean slices. Can be frozen for up to 3 months.
Nutrition
- Serving Size: 1 bar
- Calories: 250
- Sugar: 18
- Sodium: 180
- Fat: 15
- Saturated Fat: 8
- Carbohydrates: 28
- Fiber: 1
- Protein: 4
Keywords: pumpkin bars, gingersnap crust, cream cheese filling, fall dessert, easy pumpkin recipe, no-bake crust, holiday baking


