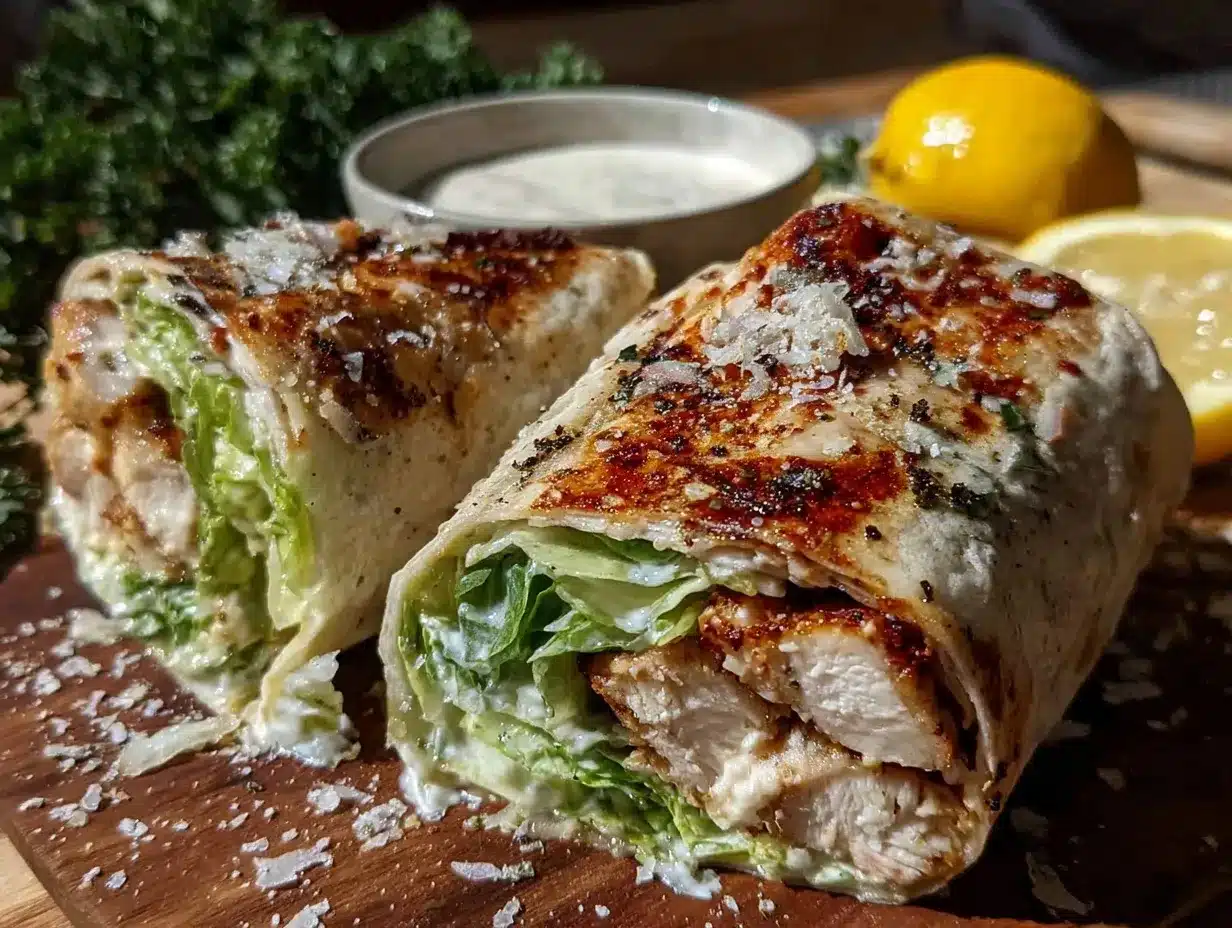
Let me tell you, the smell of warm, crispy chicken mingling with the tangy kick of Caesar dressing is enough to make anyone’s mouth water. The first time I made these Crispy Caesar Chicken Wraps, I was instantly hooked—the kind of moment where you pause, take a deep breath, and just smile because you know you’re onto something truly special. It was a rainy weekend afternoon years ago, trying to recreate a favorite takeout treat at home, and honestly, I wish I’d stumbled upon this recipe when I was knee-high to a grasshopper.
My family couldn’t stop sneaking these wraps off the plate while they were cooling (and I can’t really blame them). Whether it’s a quick lunch, a potluck favorite, or a sweet treat for your kids after school, these wraps hit that perfect balance of crispy, creamy, and fresh. You know what I love most? They’re dangerously easy to whip up yet pack pure, nostalgic comfort. Perfect for brightening up your Pinterest recipe board or impressing guests without breaking a sweat.
I’ve tested this Crispy Caesar Chicken Wraps recipe more times than I can count—in the name of research, of course—and it’s become a staple for family gatherings and gifting. If you’re looking for a meal that feels like a warm hug wrapped in a tortilla, you’re going to want to bookmark this one.
Why You’ll Love This Recipe
Having spent countless afternoons tweaking and perfecting these Crispy Caesar Chicken Wraps, I can confidently say this recipe ticks all the boxes. Here’s why it stands out:
- Quick & Easy: Ready in under 30 minutes, ideal for busy weeknights or last-minute cravings.
- Simple Ingredients: No exotic trips to specialty stores—your pantry probably already has everything.
- Perfect for Any Occasion: Whether it’s brunch, a casual dinner, or a game-day snack, these wraps fit right in.
- Crowd-Pleaser: Kids and adults alike rave about the crispy chicken combined with that signature Caesar tang.
- Unbelievably Delicious: The crunchy chicken, creamy dressing, and fresh greens come together like a flavor party.
This isn’t just another wrap recipe. What makes it different? The chicken is double-coated to achieve that perfect crunch without frying in a ton of oil. Plus, blending the Caesar dressing with a touch of Greek yogurt gives it a creamy, tangy boost that feels lighter but no less satisfying. Honestly, it’s comfort food reimagined—faster, healthier, but still soul-soothing.
This recipe will have you closing your eyes after the very first bite—it’s that kind of magic. It’s perfect for impressing guests without stress or turning a simple meal into something memorable.
What Ingredients You Will Need
This recipe uses simple, wholesome ingredients to deliver bold flavor and satisfying texture without the fuss. Most are pantry staples, making your prep quick and painless.
- For the Chicken:
- 2 large boneless, skinless chicken breasts (about 1 pound / 450g), sliced into thin strips
- 1 cup (120g) all-purpose flour (or almond flour for gluten-free)
- 2 large eggs, beaten, room temperature
- 1 cup (100g) panko breadcrumbs (I prefer Japanese brand for extra crispiness)
- 1 teaspoon garlic powder
- 1 teaspoon paprika (adds smoky flavor)
- Salt and freshly ground black pepper, to taste
- Cooking oil (vegetable or light olive oil) for frying
- For the Caesar Dressing:
- ½ cup (120g) mayonnaise
- ¼ cup (60g) Greek yogurt (adds creaminess and tang)
- 2 cloves garlic, minced
- 2 tablespoons grated Parmesan cheese (plus extra for garnish)
- 1 tablespoon fresh lemon juice
- 1 teaspoon Dijon mustard
- 1 teaspoon Worcestershire sauce
- Salt and pepper, to taste
- For the Wrap Assembly:
- 4 large flour tortillas (or whole wheat for added fiber)
- 2 cups (about 85g) romaine lettuce, chopped
- ½ cup (50g) cherry tomatoes, halved (optional, for freshness)
- Additional grated Parmesan for topping
Feel free to swap Greek yogurt with dairy-free coconut yogurt if you need a dairy-free option. In summer, fresh cherry tomatoes really brighten up the wrap, but you can skip them in cooler months. For gluten-free, almond flour and gluten-free panko breadcrumbs work well, just make sure to check the labels.
Equipment Needed
- Large skillet or frying pan – a non-stick pan works great for frying the chicken evenly without sticking.
- Mixing bowls – one for flour, one for egg wash, and another for breadcrumbs.
- Whisk or fork – to beat eggs and mix dressing.
- Measuring cups and spoons – for accurate ingredient measurements.
- Paper towels – to drain excess oil from the fried chicken strips.
- Spatula or tongs – to flip and handle chicken safely.
- Sharp knife and cutting board – for slicing chicken and chopping lettuce and tomatoes.
- Optional: blender or food processor – if you prefer smoother Caesar dressing, but a whisk works just fine.
If you don’t have panko breadcrumbs, crushing cornflakes makes a fun and budget-friendly alternative that still gives a nice crunch. I’ve used cast iron pans for frying, but honestly, any heavy-bottomed skillet will do the trick. Just keep it well-seasoned and avoid overcrowding the pan to get that perfect crisp.
Preparation Method
- Prep the Chicken: Slice the chicken breasts into thin strips, roughly 3 inches (7.5 cm) long and about ½ inch (1.2 cm) thick. Pat them dry with paper towels to help the coating stick better. (Prep time: 5 minutes)
- Set Up the Breading Station: In three separate shallow bowls, place the flour seasoned with a pinch of salt and pepper, the beaten eggs, and the seasoned panko breadcrumbs mixed with garlic powder and paprika. This triple setup makes breading quick and less messy. (Prep time: 3 minutes)
- Coat the Chicken: One strip at a time, dredge the chicken in flour, shaking off excess, dip in the egg wash, then coat thoroughly in the breadcrumb mixture. For extra crunch, you can repeat the egg and breadcrumb step once more. (Tip: Don’t rush this step—make sure each piece is well coated.) (Prep time: 10 minutes)
- Fry the Chicken: Heat about ¼ inch (6 mm) of oil in your skillet over medium heat until shimmering but not smoking (about 350°F / 175°C if you have a thermometer). Fry the chicken strips in batches for 3-4 minutes on each side until golden brown and crispy. Avoid overcrowding to keep the oil temperature steady. Drain on paper towels. (Cooking time: 10-12 minutes)
- Make the Caesar Dressing: While chicken fries, whisk together mayonnaise, Greek yogurt, minced garlic, Parmesan, lemon juice, Dijon mustard, Worcestershire sauce, salt, and pepper until smooth and creamy. Taste and adjust seasoning to your liking. (Prep time: 5 minutes)
- Assemble the Wraps: Lay out the tortillas and spread a generous spoonful of Caesar dressing over each. Layer with chopped romaine lettuce, cherry tomatoes if using, and top with crispy chicken strips. Sprinkle extra Parmesan over the top. Roll up tightly to enclose all the goodness. (Assembly time: 5 minutes)
- Serve Immediately: Cut wraps diagonally for that classic look and serve with extra dressing on the side for dipping. The contrast of hot, crunchy chicken with cool, creamy dressing is a total winner. (Serving tip: Warm the tortilla slightly in a dry pan or microwave for easier rolling.)
If your chicken isn’t as crispy as you hoped, don’t worry—next time, just make sure the oil’s hot enough and your pieces aren’t too thick. Also, remember to pat chicken dry before breading; moisture is the enemy of crunch!
Cooking Tips & Techniques
Here are some nuggets of wisdom I’ve picked up making Crispy Caesar Chicken Wraps over the years:
- Double Dip for Crunch: Coating chicken twice in egg and breadcrumbs makes a thicker crust that stays crispy longer, especially handy if you’re packing these wraps for lunch.
- Oil Temperature Matters: Too cool, and your chicken soaks up oil, turning soggy. Too hot, and the exterior burns before the inside cooks. Medium heat is your friend.
- Don’t Overcrowd the Pan: Fry chicken in batches. Crowding drops the oil temperature and leads to greasy, limp coating.
- Use Panko Breadcrumbs: Their flaky texture is key for that light, crispy bite—regular breadcrumbs tend to be denser and less crunchy.
- Prep Ingredients Ahead: Chop lettuce and make dressing while chicken fries to save time and keep everything fresh.
- Rest Fried Chicken: Let strips drain on paper towels briefly to shed excess oil; it also helps crispness hold.
- Wrap Warm Tortillas: Slightly warming tortillas makes rolling easier and prevents cracking.
Honestly, the first time I tried skipping the flour step, the coating just slipped off in the pan. Lesson learned! Also, I found that mixing a bit of paprika into the breadcrumbs adds a subtle smoky depth that lifts the whole wrap.
Variations & Adaptations
- Low-Carb Option: Swap flour and tortillas for almond flour dredging and large lettuce leaves or low-carb wraps for a gluten-free, keto-friendly meal.
- Spicy Kick: Add a dash of cayenne pepper to the breadcrumb mix or a drizzle of hot sauce in the dressing for those who like a little heat.
- Vegetarian Version: Replace chicken with crispy fried cauliflower florets breaded the same way for a satisfying meat-free alternative.
- Grilled Chicken: For a lighter take, grill the chicken strips with a sprinkle of garlic powder and paprika instead of frying. The wraps will be less crispy but still tasty.
- Dairy-Free Dressing: Use vegan mayo and coconut yogurt in the Caesar sauce, and skip Parmesan or use a dairy-free alternative.
One variation I tried recently was adding avocado slices inside the wrap for creaminess—it was a game-changer! The rich avocado paired beautifully with the tangy Caesar flavor and crunchy chicken.
Serving & Storage Suggestions
Serve these Crispy Caesar Chicken Wraps warm or at room temperature for best flavor. They pair wonderfully with a crisp side salad, crunchy veggie sticks, or even a light soup for a fuller meal. A cold lemonade or iced tea complements the tangy dressing and crispy chicken perfectly.
If you have leftovers (though they rarely stick around!), wrap them tightly in foil or plastic wrap and refrigerate for up to 2 days. To reheat, unwrap and warm in a skillet over medium heat to bring back some crispness—microwaving tends to make the coating soggy.
These wraps are fantastic fresh but also hold up well when packed for lunches. Flavors meld beautifully after a few hours, making the chicken even juicier and the dressing more pronounced. Just remember to keep the lettuce separate if you want to avoid sogginess.
Nutritional Information & Benefits
Each serving of Crispy Caesar Chicken Wraps provides approximately:
| Nutrient | Amount |
|---|---|
| Calories | 450-500 kcal |
| Protein | 35g |
| Carbohydrates | 35g |
| Fat | 20g |
| Fiber | 3-5g |
The chicken is a great lean protein source, while the romaine lettuce adds fiber and essential vitamins. Using Greek yogurt in the dressing boosts calcium and probiotics, which are good for digestion. For those watching carbs, swapping to almond flour and low-carb wraps cuts down the carbohydrate load significantly.
Note: Contains dairy and gluten unless substitutions are made. Always check for allergens if cooking for sensitive eaters.
Conclusion
If you’re looking for a meal that’s easy to make, packed with flavor, and loved by everyone around the table, these Crispy Caesar Chicken Wraps are a winner. You can customize them to fit your taste buds and dietary needs, making them a versatile addition to your recipe collection.
I love this recipe because it brings together textures and flavors in a way that feels both indulgent and wholesome. It’s the kind of food that makes you feel good—not just from the taste but from knowing it’s made with simple, quality ingredients.
Give this recipe a try, and don’t be shy about making it your own. Leave a comment sharing your twists or questions—I’m always excited to hear how you savor these wraps! Happy cooking!
FAQs About Crispy Caesar Chicken Wraps
Can I bake the chicken instead of frying it?
Yes! Coat the chicken as directed and bake on a greased baking sheet at 425°F (220°C) for 15-20 minutes, flipping halfway, until crispy and cooked through. The texture will be a bit different but still delicious.
How long can I store the wraps in the fridge?
Wraps keep well for up to 2 days when tightly wrapped and refrigerated. For best texture, reheat chicken separately and assemble fresh.
What’s the best way to prevent soggy wraps?
Spread dressing sparingly and add lettuce and tomatoes just before serving. Keeping wet ingredients separate until right before eating helps maintain crispness.
Can I use pre-cooked chicken?
Absolutely! Just crisp it up in the pan with some oil and seasoning before assembling to get that satisfying crunch.
Is there a vegetarian version of this recipe?
Yes! Try breaded and fried cauliflower or crispy tofu strips as a tasty meat-free alternative.
Pin This Recipe!
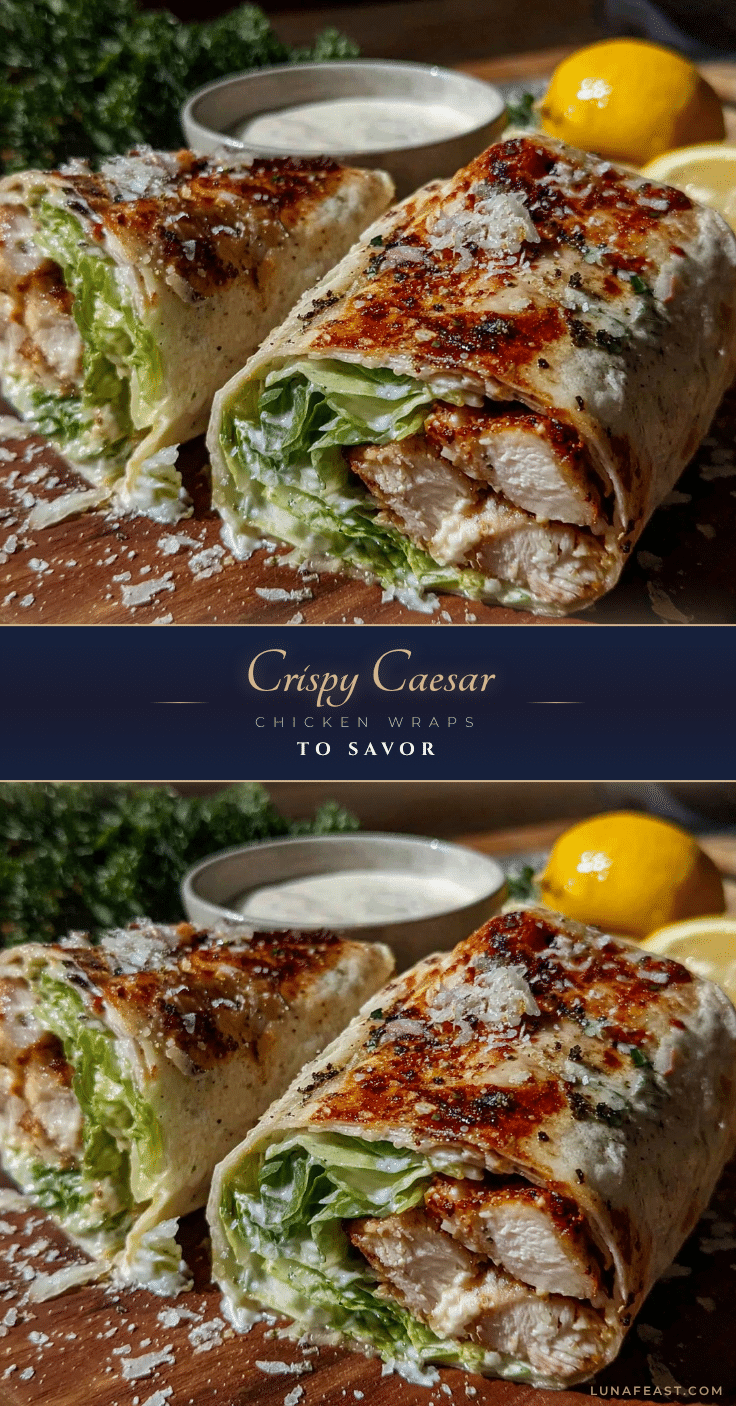
Crispy Caesar Chicken Wraps

These Crispy Caesar Chicken Wraps combine warm, crispy double-coated chicken strips with a creamy, tangy Caesar dressing and fresh greens, perfect for a quick, easy, and crowd-pleasing meal.
- Prep Time: 23 minutes
- Cook Time: 12 minutes
- Total Time: 35 minutes
- Yield: 4 servings 1x
- Category: Main Course
- Cuisine: American
Ingredients
- 2 large boneless, skinless chicken breasts (about 1 pound / 450g), sliced into thin strips
- 1 cup (120g) all-purpose flour (or almond flour for gluten-free)
- 2 large eggs, beaten, room temperature
- 1 cup (100g) panko breadcrumbs (Japanese brand preferred)
- 1 teaspoon garlic powder
- 1 teaspoon paprika
- Salt and freshly ground black pepper, to taste
- Cooking oil (vegetable or light olive oil) for frying
- ½ cup (120g) mayonnaise
- ¼ cup (60g) Greek yogurt
- 2 cloves garlic, minced
- 2 tablespoons grated Parmesan cheese (plus extra for garnish)
- 1 tablespoon fresh lemon juice
- 1 teaspoon Dijon mustard
- 1 teaspoon Worcestershire sauce
- Salt and pepper, to taste
- 4 large flour tortillas (or whole wheat for added fiber)
- 2 cups (about 85g) romaine lettuce, chopped
- ½ cup (50g) cherry tomatoes, halved (optional)
- Additional grated Parmesan for topping
Instructions
- Slice the chicken breasts into thin strips, about 3 inches long and ½ inch thick. Pat dry with paper towels.
- Set up three shallow bowls: one with flour seasoned with salt and pepper, one with beaten eggs, and one with panko breadcrumbs mixed with garlic powder and paprika.
- Dredge each chicken strip in flour, shake off excess, dip in egg wash, then coat thoroughly in breadcrumb mixture. Repeat egg and breadcrumb step once more for extra crunch.
- Heat about ¼ inch of oil in a skillet over medium heat (about 350°F). Fry chicken strips in batches for 3-4 minutes per side until golden and crispy. Drain on paper towels.
- While chicken fries, whisk together mayonnaise, Greek yogurt, minced garlic, Parmesan, lemon juice, Dijon mustard, Worcestershire sauce, salt, and pepper until smooth.
- Lay out tortillas and spread a generous spoonful of Caesar dressing on each. Layer with chopped romaine, cherry tomatoes if using, and crispy chicken strips. Sprinkle extra Parmesan on top.
- Roll up the wraps tightly, cut diagonally, and serve immediately with extra dressing on the side.
Notes
Double coating the chicken with egg and breadcrumbs creates a thicker, longer-lasting crispy crust. Maintain medium oil temperature to avoid soggy or burnt chicken. Warm tortillas slightly before rolling to prevent cracking. For gluten-free, use almond flour and gluten-free panko. For dairy-free, substitute Greek yogurt and mayonnaise with dairy-free alternatives and omit Parmesan or use vegan cheese.
Nutrition
- Serving Size: 1 wrap
- Calories: 475
- Sugar: 3
- Sodium: 600
- Fat: 20
- Saturated Fat: 4
- Carbohydrates: 35
- Fiber: 4
- Protein: 35
Keywords: crispy chicken wraps, Caesar chicken wraps, easy chicken wraps, homemade chicken wraps, quick chicken meal, family-friendly wraps