I ruined three pounds of strawberries before I realized I was holding the chocolate wrong.
It wasn’t even that long ago, maybe two winters back, when I decided that making homemade chocolate covered strawberries was a manageable project. I bought the biggest box of organic berries I could find. I felt very sophisticated about it. I thought I was going to create the perfect Valentine’s Day centerpiece for my partner.
I melted the chocolate in a microwave, dipping berry after berry with zero chill. I didn’t wait for the wax paper to set. I just stacked them in a bowl, eager to eat them. By the time I got to the bottom of the pile, the chocolate was a sad, smeary mess. The berries were sliding around like wet soap. The texture was clumpy. It looked like a toddler’s art project.
Honestly, I almost threw the whole batch out. It tasted fine, but it looked terrible. I didn’t want to serve that to anyone. I wanted something that looked as good as it tasted. I wanted that glossy, professional finish you see on food blogs that makes you want to scream.
I spent the next week reading forums and watching videos. I learned that the secret isn’t just the chocolate. It is the temperature. It is the patience. It is knowing when to stop stirring.
I tried again. This time, I used a double boiler. I dried the berries like my life depended on it. I waited. I let them sit in the fridge until they were firm. The result was a clean snap. A bright red pop of fruit against dark, smooth cocoa.
That was the moment I stopped making a mess and started making the treat I actually wanted to eat. These are the ones I make now. They are simple, but they require respect.
The best part is that once you get the technique down, you can make them for any occasion. They are better than store-bought. They taste like real fruit and real chocolate. No waxy coatings or artificial flavors. Just pure, simple indulgence.
I still get nervous when I dip them. But the fear is gone. Now, I just enjoy the process. It is calming. It is quiet. And the result is always worth the wait.
Why You’ll Love This Recipe
There is a specific kind of magic that happens when you take something as simple as a strawberry and coat it in rich chocolate. It transforms a basic snack into a moment of luxury. You do not need to be a professional pastry chef to pull this off. You just need a few good ingredients and a little bit of patience.
Here is why this recipe has become a staple in my kitchen:
- Quick & Easy: You can have these ready in under thirty minutes. This is perfect for last-minute guests or when you need a sweet fix that feels fancy but doesn’t take all day.
- Simple Ingredients: You likely have everything you need right now. Fresh strawberries, good chocolate, and maybe a little oil. No complicated pantry items or hard-to-find spices.
- Perfect for Gifting: These look incredibly high-end. You can arrange them in a nice box and give them to neighbors or friends. They feel personal and thoughtful.
- Crowd-Pleaser: Everyone loves chocolate and fruit. Even people who are usually picky about desserts will dig into these. They are a safe bet for parties.
- Unbelievably Delicious: The contrast between the tart, juicy berry and the rich, smooth chocolate is next-level comfort food. It is a texture combo that keeps you coming back.
What makes this version different from the rest is the focus on technique. Many recipes tell you to just melt and dip. But I have found that adding a small amount of coconut oil or shortening to the chocolate makes a huge difference. It thins the chocolate just enough so it coats evenly without being too thick. It also helps it set with a nice snap instead of staying soft and gooey.
I also dry the berries thoroughly. This is the step most people skip. If there is any water on the berry, the chocolate will seize up. It will look grainy and ugly. Drying them ensures a smooth finish.
This recipe isn’t just good. It is the kind that makes you close your eyes after the first bite. It is comfort food reimagined—simpler, faster, but with the same soul-soothing satisfaction. Perfect for impressing guests without stress, or turning a simple Tuesday evening into something memorable.
What Ingredients You Will Need
This recipe uses simple, wholesome ingredients to deliver bold flavor and satisfying texture without the fuss. The beauty of this treat is that it relies on the quality of just three main components. You do not need a dozen different items. You just need good ones.
Here is what you will need to gather:
- Fresh Strawberries: Look for large, firm berries that are deep red and free of bruises. Avoid berries that are soft or mushy. The fresher they are, the better they will taste. I recommend buying them the same day you plan to make the treat. (Choose organic if you can, since you are eating the skin.)
- Semi-Sweet Chocolate Chips: I prefer high-quality semi-sweet chips for the best balance of sweetness. Brands like Ghirardelli or Guittard work wonderfully. Avoid the cheapest baking chips, as they often contain more wax and less cocoa butter. (Use dark chocolate for a less sweet option.)
- Coconut Oil: This is the secret weapon. It helps thin the chocolate so it flows smoothly over the berry. It also helps the coating set firmly. Use refined coconut oil if you do not want a coconut flavor. (Adds richness and improves texture.)
- Vanilla Extract: Just a teaspoon or two. It rounds out the flavor of the chocolate and adds a subtle warmth. (Optional, but recommended for depth.)
- Salt: A tiny pinch of flaky sea salt on top can make the chocolate pop. It balances the sweetness perfectly. (Optional, for flavor contrast.)
- Optional Toppings: Crushed nuts, sprinkles, or white chocolate drizzle. (Use almond slices for crunch or rainbow sprinkles for fun.)
You can substitute the semi-sweet chocolate with milk chocolate if you prefer it sweeter. Or use dark chocolate if you want a more intense cocoa flavor. The coconut oil can be swapped for vegetable shortening if you prefer, but coconut oil gives a nicer shine.
Keep in mind that the strawberries will shrink slightly as they sit. So pick ones that are big enough to satisfy your craving. If you buy a large box, you will have plenty to share. Or you can just keep some for yourself. No judgment here.
Equipment Needed
You do not need a lot of fancy gear to make this. In fact, keeping it simple is part of the appeal. Here is what you need to have on hand.
- Double Boiler: A heatproof bowl set over a pot of simmering water is the best way to melt chocolate. It prevents burning. If you do not have one, you can use a microwave-safe bowl. Just heat in short bursts.
- Fork or Dipping Tool: You need something to hold the berry while you dip it. A regular dinner fork works fine. Some people use a dipping fork with tines. A toothpick works too, but it can be tricky to get a good coat.
- Baking Sheet: Line a large baking sheet with parchment paper or a silicone mat. This is where you will place the dipped berries to set. Parchment paper is easier to clean up.
- Paper Towels: Essential for drying the berries. Moisture is the enemy of smooth chocolate.
- Spatula: A silicone spatula is good for stirring the chocolate. It scrapes the sides of the bowl so nothing burns.
- Small Bowls: You might want a small bowl for toppings if you are adding sprinkles or nuts.
If you are on a budget, you probably already have all of this in your kitchen. No need to buy anything special. Just make sure your double boiler is clean and dry. Any water in the bowl will ruin the chocolate.
I personally like using a silicone mat because the berries release easily once they are set. Parchment paper works too, but sometimes the chocolate sticks if it gets too cold. Either way, it is a minor detail. The main thing is to have enough space on your sheet. Do not crowd the berries. They need room to breathe and set.
Preparation Method

Making these treats is straightforward, but you need to follow the steps carefully. Here is how to do it right.
- Wash and Dry the Strawberries: Gently rinse the strawberries under cold water. Do not soak them. Pat them completely dry with paper towels. This step is critical. If there is any water left, the chocolate will not stick. Let them air dry for a few minutes to be sure. (Time: 5 minutes)
- Prepare Your Station: Line your baking sheet with parchment paper. Have your dipping tool ready. Place a small bowl of toppings nearby if you are using any. Set up your double boiler with an inch of water simmering in the bottom pot. (Time: 2 minutes)
- Melt the Chocolate: Add the chocolate chips to the heatproof bowl. Add the coconut oil. Stir gently over the simmering water. Do not let the bowl touch the water. Melt slowly, stirring frequently. Remove from heat when almost melted and stir until smooth. (Time: 3-5 minutes)
- Add Flavorings: Stir in the vanilla extract and salt. The mixture should be glossy and fluid. If it looks too thick, add a tiny bit more coconut oil. If it is too thin, let it cool for a minute. (Time: 1 minute)
- Dip the Berries: Hold a strawberry by the stem or use a fork to hold the bottom. Dip it into the chocolate, coating it completely. Lift it out and let the excess chocolate drip off. Tap the fork gently on the side of the bowl to remove drips. (Time: varies per berry)
- Place on Sheet: Carefully place the dipped berry onto the parchment paper. If you want toppings, sprinkle them on immediately before the chocolate sets. Do not wait. (Time: varies per berry)
- Repeat: Continue dipping all the berries. Work in batches if you have a lot. Do not let the chocolate get too hot. If it starts to thicken, remove the bowl from the heat for a moment. (Time: 10-15 minutes)
- Set the Chocolate: Place the baking sheet in the refrigerator. Let them sit for at least 30 minutes. This allows the chocolate to harden completely. (Time: 30 minutes)
- Store and Serve: Once set, transfer them to an airtight container. Enjoy immediately or store for later. (Time: 1 minute)
Watch the chocolate closely. If it starts to smoke, it is too hot. Take it off the heat immediately. You want it smooth, not burnt.
Cooking Tips & Techniques
There are a few tricks that separate the pros from the amateurs. I learned these the hard way.
First, never rush the melting. Low and slow is the golden rule. High heat burns chocolate quickly. Burnt chocolate tastes bitter and cannot be fixed. If you use a microwave, heat in 30-second intervals. Stir between each. It takes longer, but it is safer.
Second, keep your workspace cool. If your kitchen is very warm, the chocolate might not set properly. A cool room helps the coating harden faster. This is especially important in the summer.
Third, do not touch the berries with wet hands. Even a little moisture can cause the chocolate to crack or peel. Dry your hands before you start.
I once tried to dip berries that were still slightly damp. The chocolate clumped up on the fork. I had to scrap the whole batch. It was a waste of good chocolate. Lesson learned. Always dry them thoroughly.
Another tip is to temper your chocolate if you want it to have a professional shine. This involves melting, cooling, and reheating slightly. It is a bit more advanced. For this simple recipe, just melting and dipping works fine. The addition of coconut oil helps with the shine anyway.
If your chocolate gets too thick while you are working, add a tiny bit more oil. Do not add water. Water is the enemy.
Finally, be patient. Do not try to eat them immediately. The chocolate needs time to set. Rushing this step leads to smudges and messy fingers. Let the fridge do its job.
Variations & Adaptations
You can easily change this recipe to suit your taste or dietary needs. Here are a few ideas.
- White Chocolate: Use white chocolate chips instead of semi-sweet. It creates a beautiful contrast with the red berries. Add red sprinkles for a festive look.
- Dark Chocolate: Use 70% dark chocolate for a richer, less sweet treat. This is great for those who prefer less sugar.
- Gluten-Free: This recipe is naturally gluten-free. Just make sure your chocolate chips are certified gluten-free. Some brands add wheat starch.
- Vegan: Use vegan chocolate chips and coconut oil. Most dark chocolates are vegan, but check the label for milk solids.
- Flavored Infusions: Add a drop of peppermint extract for a holiday twist. Or add orange zest for a sophisticated flavor.
- Crunchy Toppings: Roll the dipped berries in crushed pistachios, hazelnuts, or crushed pretzels. The saltiness pairs well with the chocolate.
I once made these with orange zest in the chocolate. It was amazing. The citrus brightened up the rich cocoa. It felt very fancy.
You can also drizzle melted white chocolate over the set berries for a decorative touch. Use a fork to drizzle it back and forth. It looks professional and adds another layer of flavor.
Try different combinations. See what you like best. The possibilities are endless.
Serving & Storage Suggestions
These treats are best served chilled. The cold temperature enhances the tartness of the berry. It creates a nice contrast with the room-temperature chocolate.
Present them on a nice platter. Arrange them in a single layer. Do not stack them. You can add some mint leaves for a pop of green color. It makes the red berries look even brighter.
For storage, keep them in an airtight container in the refrigerator. They will last for up to five days. Place a sheet of parchment paper between layers if you need to stack them. This prevents the chocolate from sticking.
Do not leave them out at room temperature for too long. The chocolate will soften and melt. If it gets too warm, they will lose their shape.
You can also freeze them. Place them on a baking sheet in the freezer until hard. Then transfer to a freezer bag. They will last for up to a month. Thaw them in the fridge before serving.
The flavors develop over time. The chocolate absorbs some of the berry flavor. This makes them taste even better after a day or two.
I usually make these the day before a party. This gives them time to set and firm up. They are always a hit.
Nutritional Information & Benefits
While these are a treat, they do have some benefits. Strawberries are high in vitamin C and antioxidants. They are low in calories compared to other desserts.
Chocolate, especially dark chocolate, contains flavonoids. These are good for heart health. It can improve blood flow and lower blood pressure.
However, this recipe is high in sugar due to the chocolate. Enjoy in moderation. It is a dessert, not a health food.
The coconut oil adds healthy fats. It helps with satiety. You will feel full faster.
Overall, this is a better option than processed candies. You know exactly what is in it. No artificial colors or preservatives.
I like to think of it as a mindful indulgence. Savor each bite. Enjoy the quality of the ingredients.
Conclusion
Making homemade chocolate covered strawberries is easier than you think. It requires a few simple ingredients and a little bit of care. The result is a treat that looks professional and tastes incredible.
You can customize it to your liking. Try different chocolates and toppings. Find your favorite combination.
I love making these because they are simple yet special. They feel like a gift. Whether you make them for yourself or for others, they bring joy.
Try this recipe. I think you will love it. Share your creations with me. Let me know how they turned out.
Happy dipping!
FAQs
Why did my chocolate seize up?
Water is the main culprit. Even a small drop of water can cause chocolate to clump. Make sure your bowl and utensils are completely dry. Also, ensure the strawberries are fully dried before dipping.
Can I use a microwave to melt the chocolate?
Yes, but be careful. Heat in 30-second intervals. Stir well between each interval. Do not let it get too hot. A double boiler is safer and more even.
How long do they last?
They last up to five days in the refrigerator. Keep them in an airtight container to prevent them from absorbing odors. They can also be frozen for up to a month.
Can I use frozen strawberries?
No. Frozen strawberries release too much water as they thaw. This will ruin the chocolate. Always use fresh, firm strawberries.
Why is my chocolate not setting?
The chocolate might be too warm. Or there might not be enough coconut oil. Make sure you chill them in the fridge for at least 30 minutes. If the kitchen is very hot, it might take longer.
Pin This Recipe!
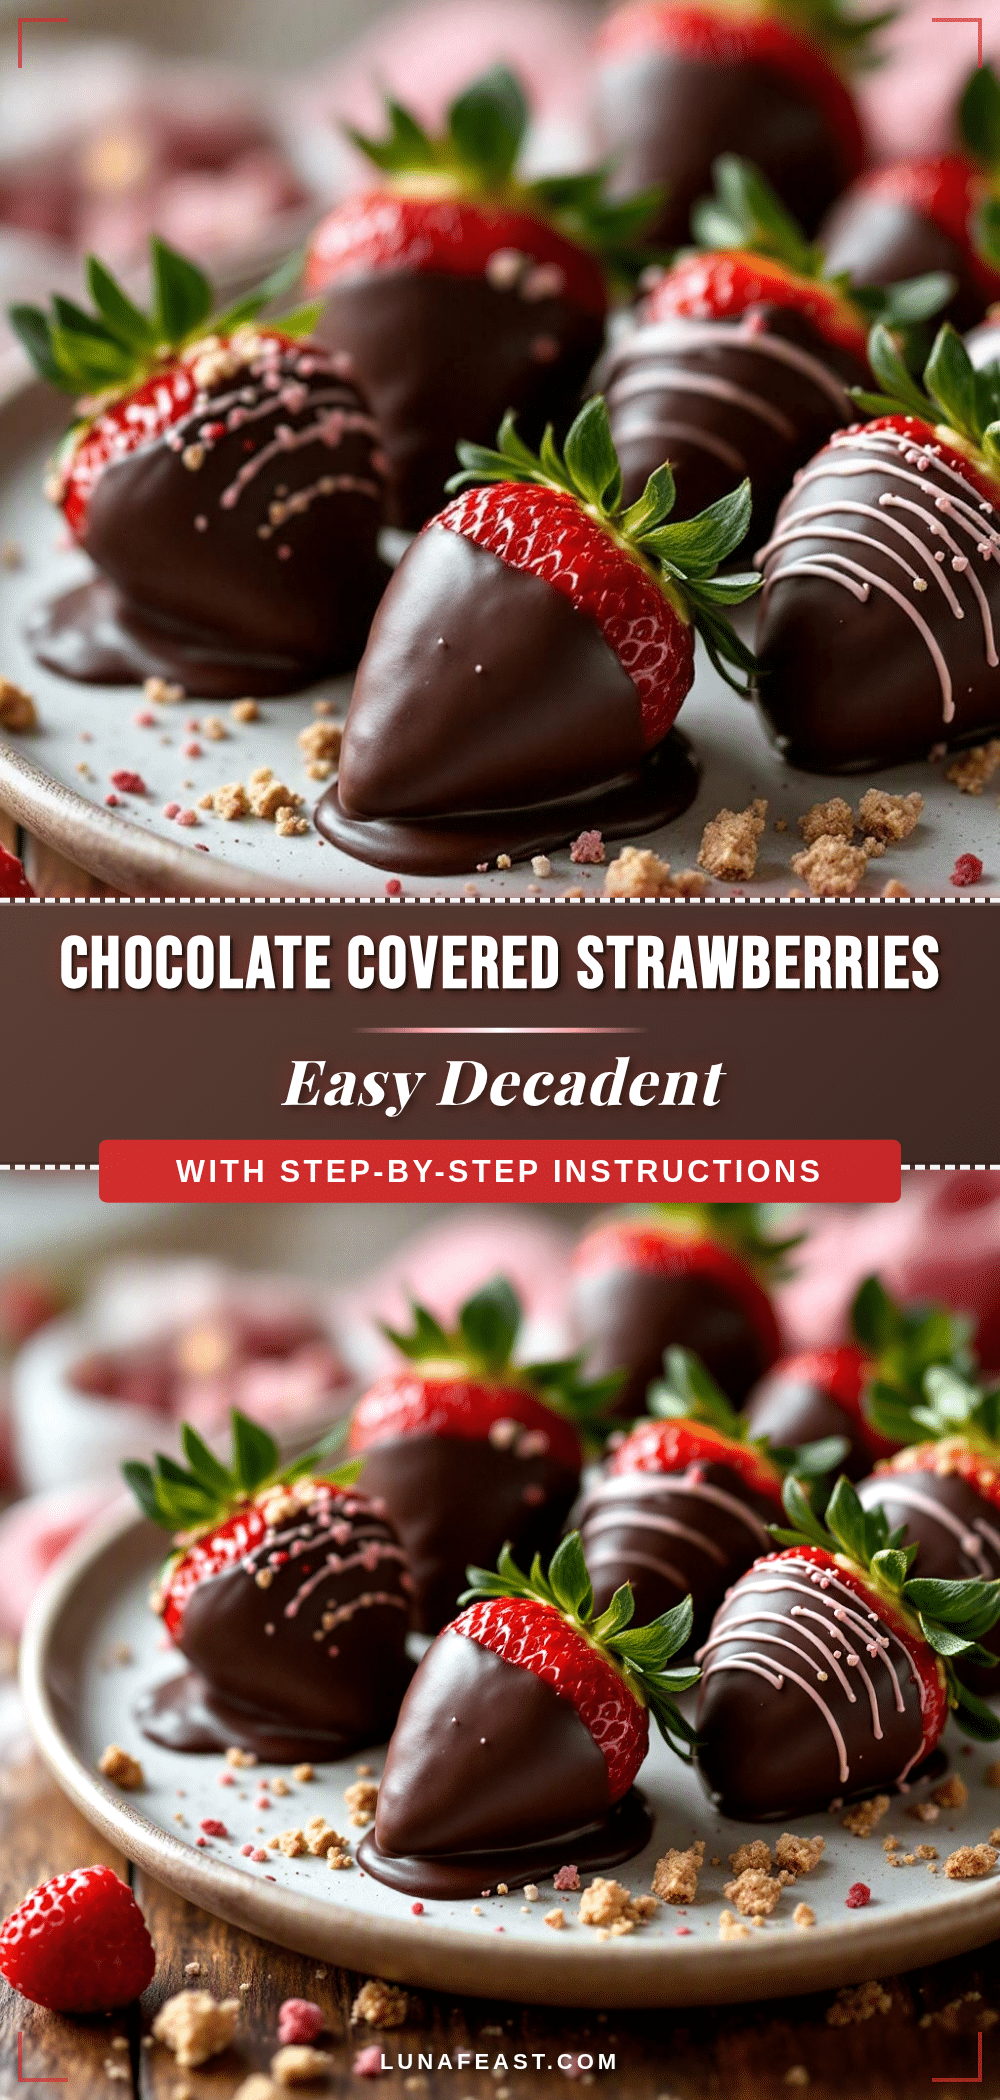
Easy Decadent Chocolate Covered Strawberries: 3-Ingredient Homemade Treat

A simple yet elegant homemade treat featuring fresh strawberries dipped in smooth, glossy chocolate. This recipe focuses on technique to ensure a professional finish with a clean snap.
- Prep Time: 15 minutes
- Cook Time: 5 minutes
- Total Time: 50 minutes
- Yield: 12 servings
- Category: Dessert
- Cuisine: American
Ingredients
- Fresh strawberries (large, firm, and dry)
- Semi-sweet chocolate chips (high quality)
- Coconut oil (refined or unrefined)
- Vanilla extract (optional)
- Salt (pinch of flaky sea salt, optional)
- Optional toppings: crushed nuts, sprinkles, or white chocolate drizzle
Instructions
- Wash strawberries gently under cold water and pat them completely dry with paper towels. Let them air dry for a few minutes to ensure no moisture remains.
- Line a large baking sheet with parchment paper or a silicone mat. Set up a double boiler with an inch of simmering water in the bottom pot.
- Add chocolate chips and coconut oil to the heatproof bowl of the double boiler. Stir gently over simmering water until almost melted, then remove from heat and stir until smooth.
- Stir in vanilla extract and a pinch of salt. The mixture should be glossy and fluid; add a tiny bit more coconut oil if too thick.
- Hold a strawberry by the stem or use a fork to hold the bottom. Dip it into the chocolate, coating it completely.
- Lift the berry out and let excess chocolate drip off. Tap the fork gently on the side of the bowl to remove drips.
- Place the dipped berry onto the prepared baking sheet. If using toppings, sprinkle them on immediately before the chocolate sets.
- Repeat for all berries, working in batches if necessary. Do not let the chocolate get too hot.
- Place the baking sheet in the refrigerator and let sit for at least 30 minutes until the chocolate is firm.
- Transfer to an airtight container. Enjoy immediately or store in the refrigerator for up to 5 days.
Notes
Ensure strawberries are completely dry before dipping, as any moisture will cause the chocolate to seize. Use a double boiler for even melting; if using a microwave, heat in 30-second intervals and stir frequently. Keep the workspace cool to help the chocolate set properly. Do not use frozen strawberries as they release too much water.
Nutrition
- Serving Size: 1 chocolate covered
- Calories: 85
- Sugar: 8
- Sodium: 5
- Fat: 5
- Saturated Fat: 3
- Carbohydrates: 10
- Fiber: 1
- Protein: 1
Keywords: chocolate covered strawberries, homemade dessert, easy treats, Valentine's Day, gluten-free dessert, vegan dessert option, chocolate dipping


