Fourth time in a month and the freezer is basically a shrine to my bad decision-making. I had the chocolate bar in one hand and a half-eaten peppermint patty in the other, staring at the empty space on the baking sheet where the rest of it used to be. It wasn’t supposed to be a project. It was supposed to be a five-minute distraction while the house smelled like gingerbread and everyone else was arguing about where to put the Christmas tree. But then I melted another batch of dark chocolate, and the mint oil from the crushed candy canes started seeping into the edges, and suddenly I was back at square one.
There is a specific kind of madness that comes from making this easy festive peppermint chocolate bark when you already have a pantry full of other holiday treats. You tell yourself you’re done. You put the spoon down. You wipe the counter. But the urge to see if you can get the candy cane pieces finer, or if you can sprinkle a little more sea salt on top, just won’t quit. I made it on Tuesday for the office party. I made it again on Thursday because I ran out of the good dark chocolate. And now it’s Sunday night, and I’m scraping the last shards off the parchment paper, wondering if I can eat it for breakfast.
The texture is the thing that gets you. It’s that sharp snap of the chocolate against the gritty, icy crunch of the peppermint. It’s not subtle. It’s loud. It’s the kind of treat that demands attention in a room full of fancy cookies. I’ve tried the white chocolate version. I’ve tried the milk chocolate version. But the dark chocolate with the crushed red-and-white stripes is the one that keeps pulling me back. It’s simple, sure. But simple is hard to get right when you’re doing it four times in thirty days.
I don’t know why I keep making it. Maybe it’s because the kitchen gets quiet for a minute while the chocolate sets. Maybe it’s because the smell of mint is so strong it masks the stress of the holidays for five minutes. Or maybe it’s just that I like breaking things into little, edible pieces. Either way, here it is again. The easy festive peppermint chocolate bark that I can’t stop making.
Why You’ll Love This Recipe
Quick & Easy
This easy festive peppermint chocolate bark comes together in under ten minutes of active time. You really just melt, spread, and sprinkle. It is perfect for busy weeknights or last-minute cravings when you need a sweet fix but don’t have hours to bake.
Simple Ingredients
No fancy grocery trips needed. You likely already have chocolate and peppermint candy in your kitchen. If not, they are staples at any store during the holidays. It relies on quality basics rather than complex techniques.
Perfect for Holiday Gifting

This is great for potlucks, office parties, or cozy dinners. It breaks apart easily and looks festive in a mason jar or a small box. It’s the kind of gift that feels homemade but requires zero baking skill.
Crowd-Pleaser
It always gets rave reviews from kids and adults alike. The combination of sweet chocolate and cool mint is a classic flavor profile that most people enjoy. Even picky eaters usually give it a thumbs up.
Unbelievably Delicious
The texture and flavor combo is next-level comfort food. The contrast between the smooth chocolate and the crunchy candy pieces creates a sensory experience that is hard to resist. It’s rich, cool, and satisfying all at once.
What Makes This Recipe Different
Whether it is the specific technique of tempering the chocolate slightly for a better snap, or the creative twist of using crushed candy canes instead of just mint extract, this isn’t just another version. It’s your best version. The key is using real candy canes for that authentic icy crunch, which you can’t get from extract alone. This isn’t just good—it is the kind that makes you close your eyes after the first bite. It’s comfort food reimagined—healthier, faster, but with the same soul-soothing satisfaction. Perfect for impressing guests without stress, or turning a simple meal into something memorable.
What Ingredients You Will Need
This recipe uses simple, wholesome ingredients to deliver bold flavor and satisfying texture without the fuss. The beauty of this easy festive peppermint chocolate bark lies in its minimalism. You don’t need a dozen spices or exotic flours. You just need good chocolate and good peppermint.
For the Chocolate Base
- Dark Chocolate Chips or Chunks (2 cups): I recommend using high-quality semi-sweet chocolate chips for the best melt. Brands like Ghirardelli or Lindt work well because they have a higher cocoa butter content, which gives you that professional snap. You can also use chopped chocolate bars for an even smoother finish.
- White Chocolate Chips (1 cup): Optional, but highly recommended for the classic red-and-white look. Use a good quality white chocolate, as cheaper versions can taste waxy. Ghirardelli white chocolate chips are my go-to for their creamy texture.
- Coconut Oil (1 tablespoon): This is a secret weapon. Adding a tablespoon of melted coconut oil to the chocolate helps thin it out slightly, making it easier to spread. It also helps prevent the chocolate from seizing up if a tiny bit of moisture gets in.
For the Topping
- Candy Canes (10-12 sticks): Look for traditional red and white striped candy canes. You want them to be hard and brittle so they crush into nice chunks. Avoid the soft, gummy peppermint candies; they won’t provide the necessary crunch.
- Crushed Peppermint Candy (1/4 cup): You can buy pre-crushed peppermint bits, but crushing your own candy canes is cheaper and gives you more control over the size of the pieces. It also ensures the mint flavor is fresh and potent.
- Flaky Sea Salt (Pinch): This is non-negotiable. The salt cuts through the sweetness of the chocolate and enhances the mint flavor. Maldon sea salt is great, but any flaky salt will work.
Substitutions
- Dairy-Free Option: Use dairy-free dark and white chocolate chips. Many brands offer excellent options that melt just as smoothly.
- Gluten-Free Option: Ensure your chocolate chips are certified gluten-free, as some brands process them in facilities with wheat. Most pure chocolate is naturally gluten-free, but always check the label.
- Vegan Option: Swap the white chocolate for a vegan white chocolate alternative, which is often made with coconut milk instead of dairy.
Equipment Needed
You don’t need much to make this easy festive peppermint chocolate bark, but having the right tools makes the process much smoother. A microwave-safe bowl is essential. Glass bowls are great because they don’t retain heat as much as plastic, but sturdy microwave-safe plastic works too. If you prefer the stovetop method, a double boiler setup is ideal. You can make one by placing a heatproof bowl over a pot of simmering water.
A silicone baking mat or parchment paper is crucial for lining your baking sheet. Silicone mats are reusable and provide a non-stick surface that makes removing the bark incredibly easy. Parchment paper is a good budget-friendly alternative, but you might need to use a little more effort to lift the bark off if the chocolate sticks. A sharp knife or a pizza cutter is helpful for breaking the bark into pieces. A sharp knife gives you cleaner edges, while a pizza cutter is faster for breaking large sheets.
If you are crushing candy canes, a heavy-bottomed skillet or a meat mallet works well. You can also put them in a zip-top bag and crush them with a rolling pin. Just be careful not to crush them into dust; you want chunks. Finally, a spoon or an offset spatula is useful for spreading the chocolate evenly. An offset spatula gives you better control over the thickness, ensuring the bark sets uniformly.
Preparation Method
- Prepare Your Workspace (2 minutes): Line a large baking sheet with parchment paper or a silicone baking mat. This step is critical because chocolate sticks to everything. Make sure your baking sheet is clean and dry. Any moisture can cause the chocolate to seize.
- Melt the Dark Chocolate (3-4 minutes): Place the dark chocolate chips and coconut oil in a microwave-safe bowl. Microwave on high for 30 seconds. Remove and stir. The residual heat will continue to melt the chocolate. If there are still large chunks, microwave in 15-second intervals, stirring after each, until smooth. Do not overheat, or the chocolate will burn. The chocolate should be glossy and fluid.
- Spread the Dark Chocolate (2 minutes): Pour the melted dark chocolate onto the prepared baking sheet. Use a spoon or offset spatula to spread it into an even layer. Try to keep the thickness consistent, about 1/4 inch thick. If the chocolate starts to thicken, you can microwave it for another 10 seconds to loosen it up.
- Add the First Layer of Toppings (1 minute): While the dark chocolate is still wet, sprinkle half of the crushed candy cane pieces over the surface. Press them gently into the chocolate so they stick. You don’t want them to roll off later. Reserve the rest of the candy cane pieces for the white chocolate layer.
- Melt the White Chocolate (3-4 minutes): In a clean bowl, melt the white chocolate chips with another tablespoon of coconut oil if needed. Use the same microwave method as before. Stir until smooth and creamy. White chocolate burns more easily than dark chocolate, so be extra careful not to overheat it.
- Spread the White Chocolate (2 minutes): Pour the melted white chocolate over the dark chocolate layer. You don’t need to cover it completely; a marbled effect is nice. Use your spatula to spread it out, letting some of the dark chocolate and candy canes show through. This creates a beautiful visual contrast.
- Add the Second Layer of Toppings (1 minute): Sprinkle the remaining crushed candy cane pieces over the white chocolate. Add a few extra whole candy cane pieces for decoration if you like. Finally, sprinkle a pinch of flaky sea salt over the entire surface. The salt will adhere to the wet chocolate and add a nice finish.
- Chill the Bark (20-30 minutes): Place the baking sheet in the refrigerator. Let the bark set for at least 20 minutes, or until the chocolate is completely firm. If you are in a hurry, you can put it in the freezer for 10-15 minutes, but the refrigerator is safer to prevent condensation.
- Break and Serve: Once the bark is fully set, remove it from the baking sheet. Break it into irregular pieces using your hands or a knife. The pieces should snap cleanly. Store in an airtight container in the refrigerator or freezer.
Cooking Tips & Techniques
The biggest mistake people make with chocolate bark is overheating the chocolate. Chocolate is sensitive to heat and moisture. If you microwave it for too long, it can seize up and become grainy. Always melt in short intervals and stir frequently. If the chocolate looks dry or clumpy, add a tiny bit more coconut oil to smooth it out.
Another common issue is the candy canes sliding off. To prevent this, make sure the chocolate layer is still wet when you add the toppings. If the chocolate starts to set, it won’t hold the candy pieces. You can also press the candy canes gently into the chocolate to help them adhere.
For a professional finish, use high-quality chocolate. Cheap chocolate chips often contain stabilizers that prevent them from melting smoothly. Chopped chocolate bars usually have a higher cocoa butter content, which results in a better texture and flavor. If you can’t find chopped bars, buy good quality chips and chop them yourself for a more artisanal look.
When crushing candy canes, use a heavy-bottomed skillet or a meat mallet. Place the candy canes in a zip-top bag and crush them with a rolling pin. This gives you control over the size of the pieces. You want a mix of small bits and larger chunks for visual interest and texture. Avoid crushing them into fine powder, as it won’t provide the same crunch.
If you are making this ahead of time, store it in the refrigerator in an airtight container. Layer the pieces between sheets of parchment paper to prevent them from sticking together. This bark can last up to two weeks in the refrigerator or up to three months in the freezer. Just make sure to keep it away from strong-smelling foods, as chocolate can absorb odors.
Variations & Adaptations
While the classic peppermint version is my favorite, there are many ways to customize this easy festive peppermint chocolate bark. You can swap the dark chocolate for milk chocolate for a sweeter treat. This is great for kids or those who prefer a milder chocolate flavor. You can also use white chocolate for the entire base and add red sprinkles or crushed peppermint candies on top for a more uniform look.
For a nutty twist, add chopped toasted pecans or almonds to the chocolate before it sets. The nuts add a nice crunch and complement the mint flavor. You can also add a drizzle of caramel or toffee bits for a richer, more complex taste. This version is especially good if you are serving it at a holiday party.
If you want to try a different flavor profile, swap the peppermint for orange zest or crushed peppermint patties. Orange and chocolate is a classic combination that works well with the holiday theme. You can also add a pinch of chili powder to the chocolate for a spicy kick. This is a fun variation for those who like a little heat with their sweet.
For a dairy-free option, use dairy-free chocolate chips and coconut oil. There are many high-quality dairy-free chocolate options available that melt just as smoothly as regular chocolate. You can also use vegan candy canes, although they can be harder to find. If you can’t find vegan candy canes, use crushed peppermint candies that are labeled vegan.
Serving & Storage Suggestions
This easy festive peppermint chocolate bark is best served at room temperature. If it’s too cold, the chocolate can be hard and the mint flavor might be overwhelming. Let it sit out for 5-10 minutes before serving. It pairs well with hot coffee, tea, or milk. The mint flavor complements the bitterness of coffee, making it a perfect after-dinner treat.
For presentation, break the bark into irregular pieces and arrange them on a platter. You can garnish with extra candy cane pieces or a sprig of fresh mint for a festive touch. It’s also great packaged in small cellophane bags tied with ribbon for holiday gifts. Add a handwritten tag with the recipe name for a personal touch.
Store the bark in an airtight container in the refrigerator. It can last up to two weeks. If you are storing it for longer, freeze it in an airtight container for up to three months. Thaw it in the refrigerator before serving. Avoid storing it in the freezer for too long, as the chocolate can develop a white film called bloom, which is harmless but affects the appearance.
The flavors develop over time, so the bark tastes even better the next day. The mint flavor mellows slightly, and the chocolate becomes more intense. If you have leftovers, they are usually gone within a day or two, so you might not need to worry about storage too much. Just keep it away from kids if you want to save some for later.
Nutritional Information & Benefits
This easy festive peppermint chocolate bark is rich in calories due to the chocolate and sugar content, so it should be enjoyed in moderation. Each serving contains approximately 150-200 calories, depending on the size of the piece. The dark chocolate provides antioxidants, which are beneficial for heart health. Peppermint can aid digestion and help soothe an upset stomach. The sea salt adds essential electrolytes, although in small amounts.
For those with dietary restrictions, this recipe can be adapted to be gluten-free and dairy-free. Just ensure all ingredients are certified gluten-free and dairy-free. It is not suitable for those with nut allergies if you add nuts. Always check the labels of your chocolate chips and candy canes for potential allergens.
From a wellness perspective, this treat is a fun way to satisfy a sweet tooth without going overboard. It’s a small, manageable portion that provides a quick energy boost. The mint flavor can also help freshen breath, making it a practical choice after a meal. Just remember that it’s a treat, not a health food, so enjoy it responsibly.
Conclusion
This easy festive peppermint chocolate bark is the perfect holiday treat for anyone who loves simple, delicious snacks. It’s quick to make, requires minimal ingredients, and tastes amazing. Whether you’re making it for yourself, for gifts, or for a party, it’s sure to be a hit. I hope you enjoy making it as much as I do. Feel free to customize it with your favorite toppings and flavors. Share your creations with me in the comments below, and let me know how you like to enjoy your holiday bark. Happy baking!
FAQs
How long does the chocolate bark last?
It can last up to two weeks in the refrigerator or up to three months in the freezer when stored in an airtight container.
Can I use milk chocolate instead of dark chocolate?
Yes, you can use milk chocolate for a sweeter taste. Just keep in mind that it will be less rich than dark chocolate.
How do I crush candy canes without making a mess?
Place the candy canes in a zip-top bag and crush them with a rolling pin or a heavy skillet. This contains the pieces and makes cleanup easier.
Can I make this recipe dairy-free?
Yes, use dairy-free chocolate chips and coconut oil. Ensure your candy canes are also dairy-free, as some may contain milk derivatives.
Why did my chocolate seize up?
Chocolate seizes when it comes into contact with moisture. Make sure your bowl and utensils are completely dry, and avoid microwaving for too long.
Pin This Recipe!
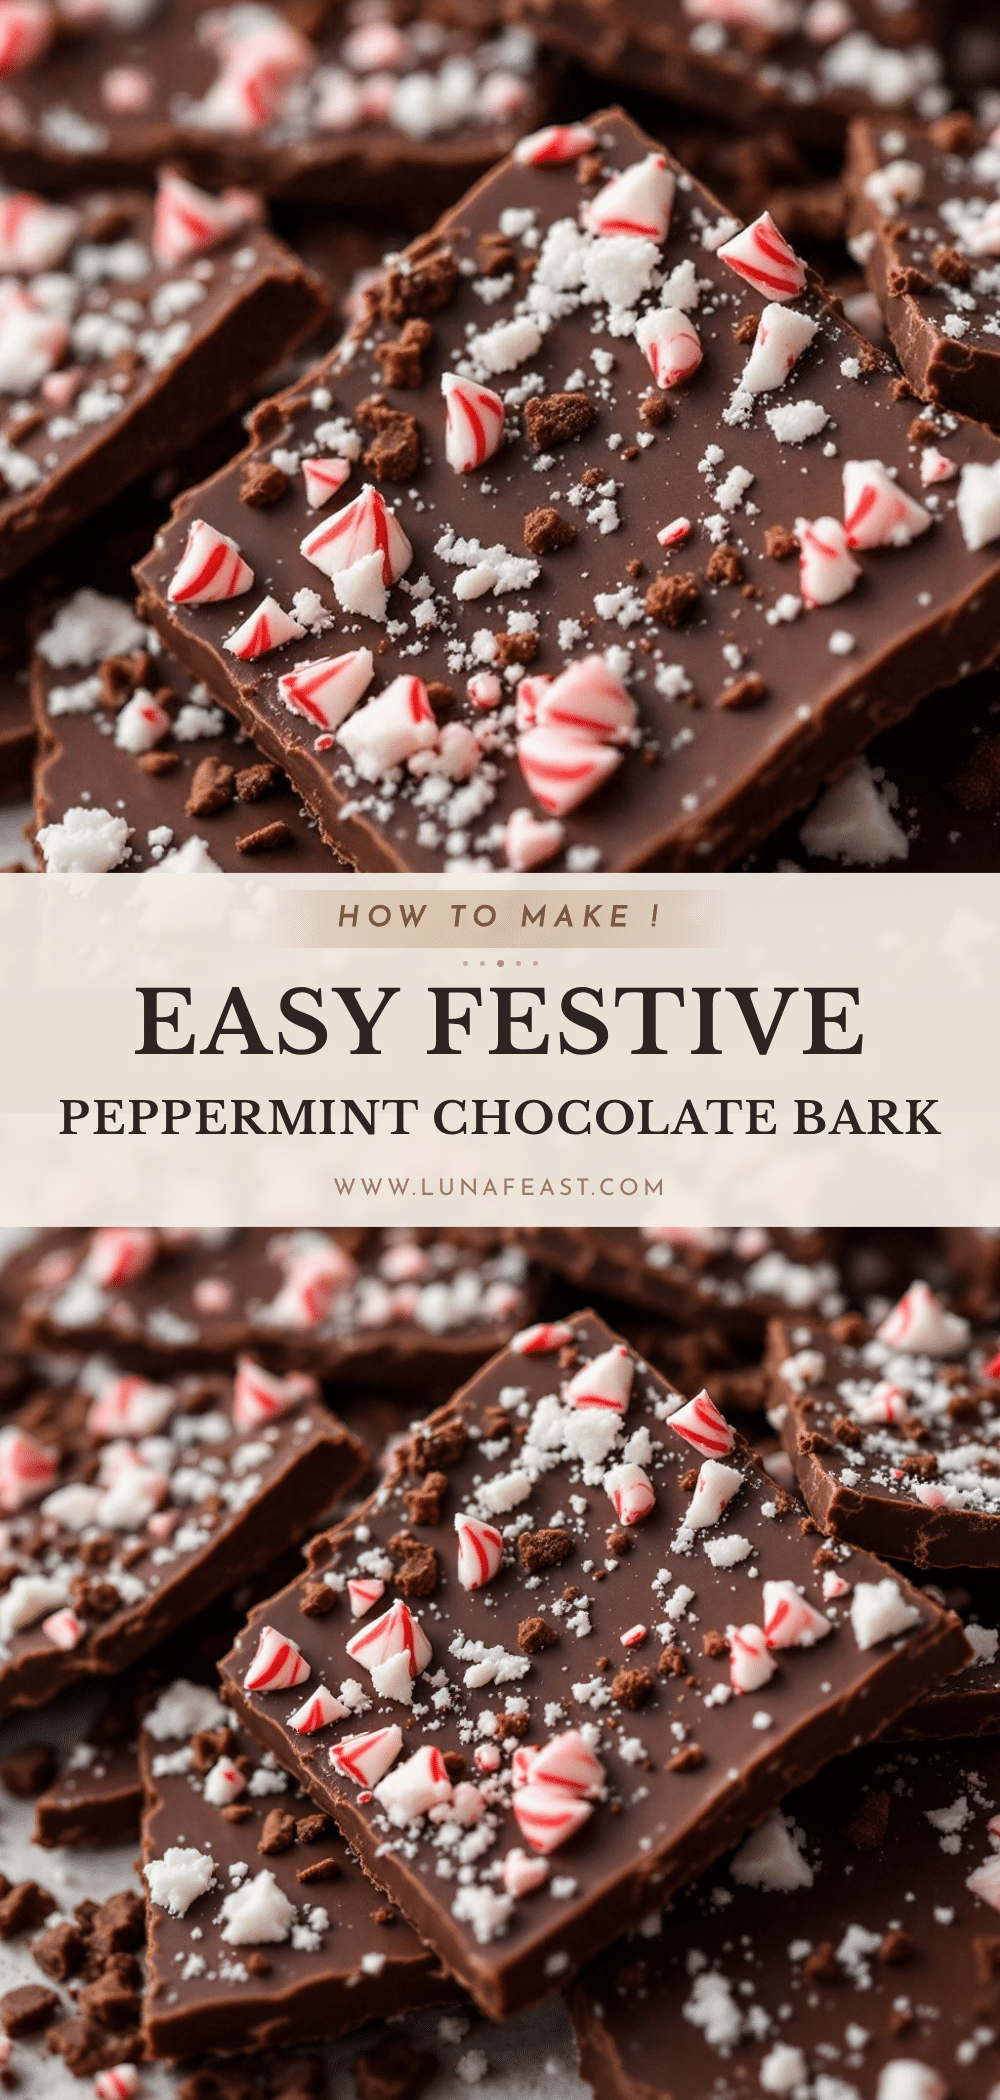
Easy Festive Peppermint Chocolate Bark: 5-Minute Holiday Treat

A quick and easy holiday treat featuring a marbled layer of dark and white chocolate topped with crushed candy canes and flaky sea salt. This no-bake bark comes together in under ten minutes and is perfect for gifting or snacking.
- Prep Time: 5 minutes
- Cook Time: 0 minutes
- Total Time: 30 minutes
- Yield: Approximately 20-24 pieces 1x
- Category: Dessert
- Cuisine: American
Ingredients
- 2 cups dark chocolate chips or chunks (semi-sweet)
- 1 cup white chocolate chips
- 1 tablespoon coconut oil (for dark chocolate)
- 1 tablespoon coconut oil (for white chocolate, optional)
- 10–12 candy canes (traditional red and white striped)
- 1/4 cup crushed peppermint candy
- Pinch of flaky sea salt
Instructions
- Line a large baking sheet with parchment paper or a silicone baking mat.
- Place dark chocolate chips and 1 tablespoon coconut oil in a microwave-safe bowl. Microwave on high for 30 seconds, stir, then continue in 15-second intervals until smooth and glossy.
- Pour melted dark chocolate onto the prepared baking sheet and spread into an even layer about 1/4 inch thick.
- Sprinkle half of the crushed candy cane pieces over the wet dark chocolate, pressing gently to adhere.
- In a clean bowl, melt white chocolate chips with optional coconut oil using the same microwave method until smooth.
- Pour melted white chocolate over the dark chocolate layer, spreading to create a marbled effect while allowing some dark chocolate to show through.
- Sprinkle remaining crushed candy cane pieces and a pinch of flaky sea salt over the white chocolate layer.
- Refrigerate for 20-30 minutes until completely firm, or freeze for 10-15 minutes.
- Break the set bark into irregular pieces and store in an airtight container.
Notes
Ensure all equipment is completely dry to prevent chocolate from seizing. Use high-quality chocolate for the best snap and flavor. Candy canes should be hard and brittle for proper crunch. Store in an airtight container in the refrigerator for up to two weeks or freezer for up to three months.
Nutrition
- Serving Size: 1 piece (approx. 1 o
- Calories: 175
- Sugar: 18
- Sodium: 15
- Fat: 11
- Saturated Fat: 7
- Carbohydrates: 22
- Fiber: 1
- Protein: 2
Keywords: peppermint chocolate bark, holiday treats, easy dessert, no bake cookies, christmas snacks, candy cane recipe, dark chocolate bark, white chocolate bark, holiday gifts


