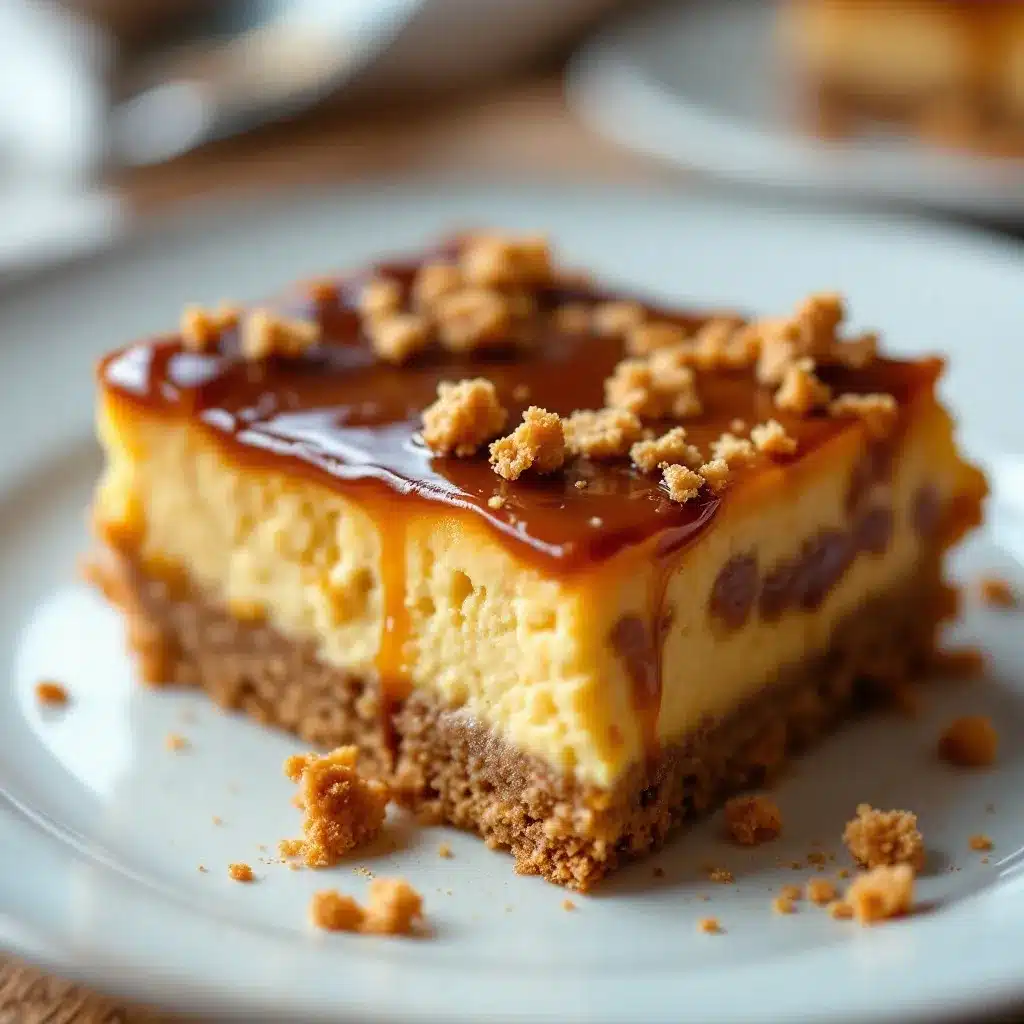
That pale, ivory sheen on the top layer is what I made this for — everything else is secondary. You know that moment when you lift the foil and the light catches the surface just right? It looks like polished marble, cool and unbroken, before you even bring a fork down. Honestly, I stood in my kitchen for a full minute just staring at it, terrified to break the seal. The graham cracker crust underneath is rough and sandy by comparison, a dark, crunchy foundation for that smooth, dense topping. It’s not about the flavor first, not really. It’s about the resistance. Or rather, the lack of it. When you cut a square, the knife slides through without a single crumb of resistance from the cheese layer itself. It yields completely. That’s the texture I was hunting for after years of dense, cracked cheesecakes that tasted like concrete. This one is different. It’s airy yet heavy, creamy but not cloying. I remember the first time I made these, it was late October and the air outside was already turning crisp. I needed something that felt like a hug but looked like it belonged on a fancy dessert table. These bars fit the bill. They don’t scream for attention with bright colors or complex garnishes. They just sit there, quiet and confident. The fall spices are tucked inside, warming the palate only after the initial creaminess hits. It’s a slow reveal. I’ve tested this recipe more times than I care to admit, tweaking the butter ratio and the chilling time, until I finally got that specific mouthfeel. It’s the kind of dessert that feels sophisticated but is actually incredibly forgiving. You don’t need a water bath to make it work, which is a relief because let’s face it, nobody wants to deal with a leaky foil tent. The secret is in the blending speed and the temperature of your ingredients. Once you get it right, you’ll find yourself making these every single autumn. It becomes a ritual. The smell of cinnamon and toasted nuts fills the house, and suddenly, the season feels a little more manageable. I keep a batch in the fridge at all times during November. It’s not just a treat; it’s a comfort anchor. And if you’ve ever struggled with a cheesecake that’s too heavy or too dry, trust me, this approach changes everything. The contrast between the crisp edge and the soft center is pure magic. It’s simple, but it’s the kind of simple that takes practice to perfect. I’m glad you’re here to try it.
Why You’ll Love This Recipe
There is a specific kind of satisfaction that comes from making a dessert that looks like it came from a high-end patisserie but is actually assembled in thirty minutes. This creamy fall cheesecake bars with graham cracker crust recipe has been tested, tweaked, and loved by my family for years. It’s not just another pumpkin variation; it’s a masterclass in balance. Here is why this recipe stands out in a sea of autumn desserts:
- Quick & Easy: Unlike traditional cheesecakes that require hours of prep and a water bath, these bars come together in under 30 minutes of active time. They bake quickly and cool down faster too, perfect for those last-minute dinner parties or sudden cravings on a Tuesday night.
- Simple Ingredients: You likely have 90% of these items in your pantry right now. Flour, sugar, butter, cream cheese, pumpkin puree, and spices. No exotic ingredients or fancy grocery trips needed. It’s wholesome, accessible cooking.
- Perfect for Fall Gatherings: Whether it’s a Thanksgiving side dish, a Halloween party treat, or a cozy Sunday brunch, these bars fit any occasion. They hold their shape well when cut and travel nicely to potlucks without falling apart.
- Crowd-Pleaser: Kids love the creamy sweetness, while adults appreciate the subtle spice notes. They are universally liked, which is rare for dessert. I’ve served these to picky eaters and foodies alike, and the verdict is always the same.
- Unbelievably Delicious: The texture is next-level. It’s not dense like a New York slice, nor is it fluffy like a mousse. It sits perfectly in the middle, rich and smooth. The graham cracker crust adds a necessary crunch that prevents it from being too soft.
What makes this recipe different from the rest is the technique used to incorporate the air. By beating the cream cheese properly and folding in the puree gently, we avoid overworking the batter. This prevents cracking and ensures that silken texture I mentioned earlier. It’s a small detail that makes a huge difference. Also, the spice blend is balanced so it doesn’t overpower the cheese. It’s warm, not spicy. It’s comforting, not heavy. This isn’t just a dessert; it’s a mood. It captures the essence of October in a single square. I’ve tried swapping in different crusts, but the classic graham cracker remains the best partner for this filling. It’s reliable. It’s tasty. And it’s the kind of recipe that makes you look like a pro chef, even if you’re just a beginner in the kitchen.
What Ingredients You Will Need
This recipe relies on a few key components that work together to create that signature creamy texture and rich flavor profile. The quality of your ingredients matters more here than in other baked goods, so I’ve included some tips on what to look for. We aren’t using anything obscure, but we do need things at the right temperature and consistency.
For the Graham Cracker Crust
- Graham Cracker Crumbs: About 1 ½ cups. You can buy pre-made crumbs or crush whole sheets yourself. I prefer whole sheets because the flavor is fresher. Look for crumbs that are fine, not chunky.
- Unsalted Butter: 6 tablespoons, melted. Using unsalted allows you to control the salt level. If you only have salted, reduce any added salt in the recipe slightly. Room temperature butter melts more evenly, but melted works fine here.
- Granulated Sugar: 2 tablespoons. This adds a little sweetness to the crust, balancing the savory butter. It also helps the crust brown slightly in the oven.
- Ground Cinnamon: ½ teaspoon. A hint of spice in the crust ties it to the filling. It’s subtle but effective.
- Salt: A pinch. Just enough to wake up the flavors.
For the Creamy Filling
- Full-Fat Cream Cheese: 24 ounces (3 packages). This is non-negotiable. Low-fat versions have higher water content and will result in a watery, runny bar. Brands like Philadelphia or Horizon are reliable. Make sure it is softened to room temperature.
- Granulated Sugar: 1 cup. Don’t reduce this too much, or the texture will be off. The sugar helps tenderize the cheese.
- Heavy Cream: ½ cup. This adds richness and helps lighten the batter slightly. Full fat is best for stability.
- Pumpkin Puree: 1 cup. Use 100% pure pumpkin, not pumpkin pie filling. The filling has sugar and spices already, which will throw off the balance. Look for brands like Libby’s or make your own roasted pumpkin.
- Eggs: 3 large eggs, room temperature. Cold eggs can cause the cream cheese to curdle when mixed. Bring them out an hour before you start.
- Vanilla Extract: 1 teaspoon. Pure vanilla adds depth. I recommend McCormick or Nielsen-Massey for consistent flavor.
- Pumpkin Pie Spice: 1 ½ teaspoons. This blend usually contains cinnamon, ginger, nutmeg, and cloves. If you don’t have it, you can make your own blend, but pre-made saves time.
- Ground Ginger: ½ teaspoon. Adds a little zing that cuts through the fat.
- Nutmeg: ¼ teaspoon. Freshly grated is best, but ground works fine.
Note: If you are gluten-sensitive, you can substitute the graham crackers with a gluten-free graham cracker brand or even almond flour for the crust. The rest of the recipe is naturally gluten-free, just double-check your spice blends.
Equipment Needed
You don’t need a lot of fancy gear to make these bars, but having the right tools makes the process smoother. Here is what you’ll need:
- 9×13 Inch Baking Pan: A standard metal pan works best. Glass pans can cause the edges to overcook, so metal is my preference. Make sure it’s deep enough to hold the batter without spilling.
- Parchment Paper: This is crucial. Line the pan with parchment, leaving an overhang on the sides. This acts as a sling, allowing you to lift the entire block of bars out once they are chilled. It makes cutting so much easier.
- Hand Mixer or Stand Mixer: A hand mixer is perfectly fine and often easier for small batches. A stand mixer with a paddle attachment works well too. Just be careful not to overmix.
- Spatula: A silicone spatula is great for scraping the bowl and folding in the pumpkin puree gently.
- Measuring Cups and Spoons: Accuracy is key in baking. Use standard measuring cups for dry ingredients and liquid measuring cups for the cream and puree.
- Wire Cooling Rack: Allows air to circulate under the pan as it cools, preventing condensation from making the crust soggy.
If you don’t have a 9×13 pan, you can use a 9×9 pan, but the bars will be thicker. You may need to increase the baking time by 10-15 minutes. Keep an eye on them. Also, having a sharp chef’s knife is helpful for clean cuts. Wipe the blade between cuts for the neatest squares.
Preparation Method
Let’s get into the nitty-gritty. Making these bars is straightforward, but timing is everything. Follow these steps closely for the best results.
- Prep the Pan (5 minutes): Preheat your oven to 350°F (175°C). Line your 9×13 inch baking pan with parchment paper. Leave a generous overhang on the long sides. This is your lifting mechanism later. Spray the parchment lightly with non-stick spray.
- Make the Crust (5 minutes): In a medium bowl, combine the graham cracker crumbs, melted butter, sugar, cinnamon, and salt. Mix until the crumbs look like wet sand. Press this mixture firmly into the bottom of the prepared pan. Use the bottom of a measuring cup to pack it down tightly. You want it even and compact. Bake the crust for 8-10 minutes until it smells toasty. Remove from the oven and let it cool while you make the filling. Do not skip this step; a warm crust helps set the base.
- Beat the Cream Cheese (3 minutes): In a large mixing bowl, add the softened cream cheese and granulated sugar. Beat on medium-low speed until smooth and creamy. Scrape down the sides of the bowl. This step is vital. If there are lumps of cream cheese, they will show up in the final bars. Take your time here. You want a smooth, white paste.
- Add Wet Ingredients (2 minutes): With the mixer on low, pour in the heavy cream and vanilla extract. Mix until combined. Then, add the pumpkin puree. Mix just until the orange color disappears into the white. Do not overmix at this stage. Overmixing incorporates too much air, which can lead to cracking during baking.
- Incorporate Eggs (2 minutes): Add the eggs one at a time, mixing on low speed after each addition. Stop as soon as the eggs are incorporated. The batter should look smooth and slightly thick. If you mix too much now, the bars might rise and fall, causing cracks.
- Season the Filling (1 minute): Sprinkle in the pumpkin pie spice, ground ginger, and nutmeg. Fold these into the batter using your spatula. This gives you more control over the mixing speed. Fold gently until the spices are evenly distributed.
- Assemble and Bake (30-35 minutes): Pour the filling over the cooled crust. Smooth the top with your spatula. Place the pan in the preheated oven. Bake for 30-35 minutes. The edges should be set and slightly puffed, but the center should still have a slight jiggle when you shake the pan gently. It will firm up as it cools. Do not overbake, or the texture will become dense and dry.
- Cool Completely (2 hours): Remove the pan from the oven and place it on a wire rack. Let it cool at room temperature for about 1 hour. Then, transfer the entire pan to the refrigerator. Chill for at least 4 hours, preferably overnight. This chilling time is what sets the texture. Rushing this step will result in messy, soft bars.
- Cut and Serve: Once chilled, lift the bars out of the pan using the parchment sling. Place them on a cutting board. Use a sharp knife to cut into squares. Wipe the knife clean between cuts. Serve cold.
Cooking Tips & Techniques
Even simple recipes can go wrong if you miss a few key details. Here are some tips from my experience to ensure your bars turn out perfect every time.
Temperature is Key: The biggest mistake people make is using cold cream cheese or eggs. Cold ingredients don’t blend smoothly. They create lumps and can cause the batter to separate. Make sure your cream cheese is soft enough that you can press a finger into it easily. Let your eggs sit on the counter for an hour before you start.
Don’t Overmix: I know it’s tempting to beat the batter until it’s perfectly smooth, but overmixing adds air. Air expands in the oven and then contracts as it cools. This expansion and contraction is what causes cracks on the surface. Mix on low speed and stop as soon as ingredients are combined. The batter doesn’t need to be frothy.
The Jiggle Test: Knowing when to take the bars out of the oven is an art. They should look set around the edges but the center two inches should still wobble slightly. If the center is firm, they are overbaked. They will continue to cook from residual heat as they cool. It’s better to underbake slightly than overbake.
Patience with Cooling: I know it’s hard to wait, but cutting into warm bars is a disaster. The structure hasn’t set yet. You’ll end up with a mushy mess. Let them cool completely on the rack, then chill them thoroughly. The cold helps firm up the fats in the cream cheese and butter, creating that clean slice.
Knife Maintenance: For clean cuts, dip your knife in hot water and wipe it dry before each cut. This prevents the cream cheese from sticking to the blade. It sounds like a small thing, but it makes a huge difference in presentation.
Variations & Adaptations
While the classic version is my favorite, these bars are versatile. Here are a few ways to tweak them:
- Gluten-Free Option: Swap the graham cracker crumbs for a gluten-free graham cracker brand or use almond flour mixed with a little gluten-free oats. Ensure your pumpkin pie spice is certified gluten-free.
- Dairy-Free: Use vegan cream cheese blocks (not the tub variety, as they have different water content) and coconut cream instead of heavy cream. The texture might be slightly different, but it’s still delicious. Use vegan butter for the crust.
- Maple Twist: Replace half of the granulated sugar with pure maple syrup. This adds a deeper, woodsy flavor that pairs beautifully with the fall spices. Reduce the heavy cream by a tablespoon to account for the extra liquid.
- White Chocolate Swirl: Melt some white chocolate and drizzle it over the batter before baking. Use a knife to swirl it in for a marbled effect. This adds a sweet, creamy contrast to the pumpkin spice.
- Butterscotch Crust: Swap the graham crackers for crushed shortbread cookies or gingersnap cookies. Gingersnaps add a nice zing that complements the pumpkin well.
I’ve tried adding a layer of caramel on top, but it can make the bars too sweet. The natural sweetness of the cream cheese and sugar is usually enough. However, a light drizzle of salted caramel right before serving adds a nice touch.
Serving & Storage Suggestions
These bars are best served chilled. The cold temperature enhances the creamy texture and keeps the spices distinct. They are perfect for a dessert platter alongside other fall treats. I often serve them with a dollop of whipped cream and a sprinkle of extra pumpkin pie spice on top. It adds height and visual appeal.
Storage: Store the bars in an airtight container in the refrigerator for up to 5 days. They actually taste better on the second or third day as the flavors meld together. If you need to freeze them, wrap individual squares in plastic wrap and place them in a freezer-safe bag. They will last for up to 3 months. Thaw them in the refrigerator overnight before serving.
Reheating: You don’t need to reheat these. In fact, reheating can make the texture oily and soft. Eat them cold straight from the fridge. If you prefer a slightly softer texture, let them sit at room temperature for 10 minutes before eating.
Pairings: These bars pair wonderfully with a hot cup of coffee or tea. The bitterness of the coffee cuts through the richness of the cheese. I also like them with a glass of cold milk or a spiced cider. For a more adult twist, serve with a small glass of bourbon or a pumpkin-spiced latte.
Nutritional Information & Benefits
While these are definitely a treat, they are made with relatively wholesome ingredients. Here is a general overview of the nutritional profile per bar (assuming 16 servings):
- Calories: Approximately 320-350 calories.
- Fat: 22g (mostly from the cream cheese and butter).
- Carbohydrates: 28g (from the sugar, pumpkin, and crust).
- Protein: 6g (from the cream cheese and eggs).
The pumpkin puree adds a boost of Vitamin A and fiber, which is a nice plus. The graham cracker crust provides some carbohydrates for energy. If you are watching your sugar intake, you can reduce the sugar in the filling by 25% without significantly affecting the texture, though the bars will be less sweet. For those with dairy sensitivities, the vegan adaptations mentioned earlier are a good option. Remember, moderation is key. These are rich bars, so a small square is often enough to satisfy a sweet tooth.
Conclusion
These creamy fall cheesecake bars are a testament to the power of simplicity. They don’t need fancy decorations or complex techniques to be amazing. Just good ingredients, proper temperature control, and a little patience. I hope you try this recipe and find it to be your new autumn staple. It’s a dessert that brings people together, whether it’s a quiet evening at home or a busy holiday gathering. Feel free to adjust the spices to your liking. Maybe you like more ginger, or perhaps you prefer less cinnamon. Make it your own. And if you do make these, I’d love to hear how they turned out. Leave a comment below with your thoughts or share a photo. I read every single one. Happy baking, and enjoy every bite.
Frequently Asked Questions
Can I use pumpkin pie filling instead of pure pumpkin puree?
No, it is important to use 100% pure pumpkin puree. Pumpkin pie filling already contains sugar, spices, and thickeners, which will alter the sweetness and texture of your cheesecake bars, likely making them too sweet and dense.
Why did my cheesecake bars crack?
Cracking is usually caused by overmixing the batter, which incorporates too much air, or overbaking. Make sure to mix on low speed and stop as soon as ingredients are combined. Also, check the bars at 30 minutes; they should still have a slight jiggle in the center.
Can I make these bars ahead of time?
Yes, these bars actually taste better the next day. You can make them up to 2 days in advance. Store them in the refrigerator in an airtight container. They will keep well for up to 5 days.
How do I get clean cuts?
Use a sharp knife and wipe it with a damp cloth or dip it in hot water between each cut. This prevents the creamy filling from sticking to the blade and tearing the bars. Also, ensure the bars are fully chilled before cutting.
Can I freeze these bars?
Yes, you can freeze them. Wrap individual squares tightly in plastic wrap and place them in a freezer-safe bag or container. They will last for up to 3 months. Thaw them in the refrigerator overnight before serving.
Pin This Recipe!
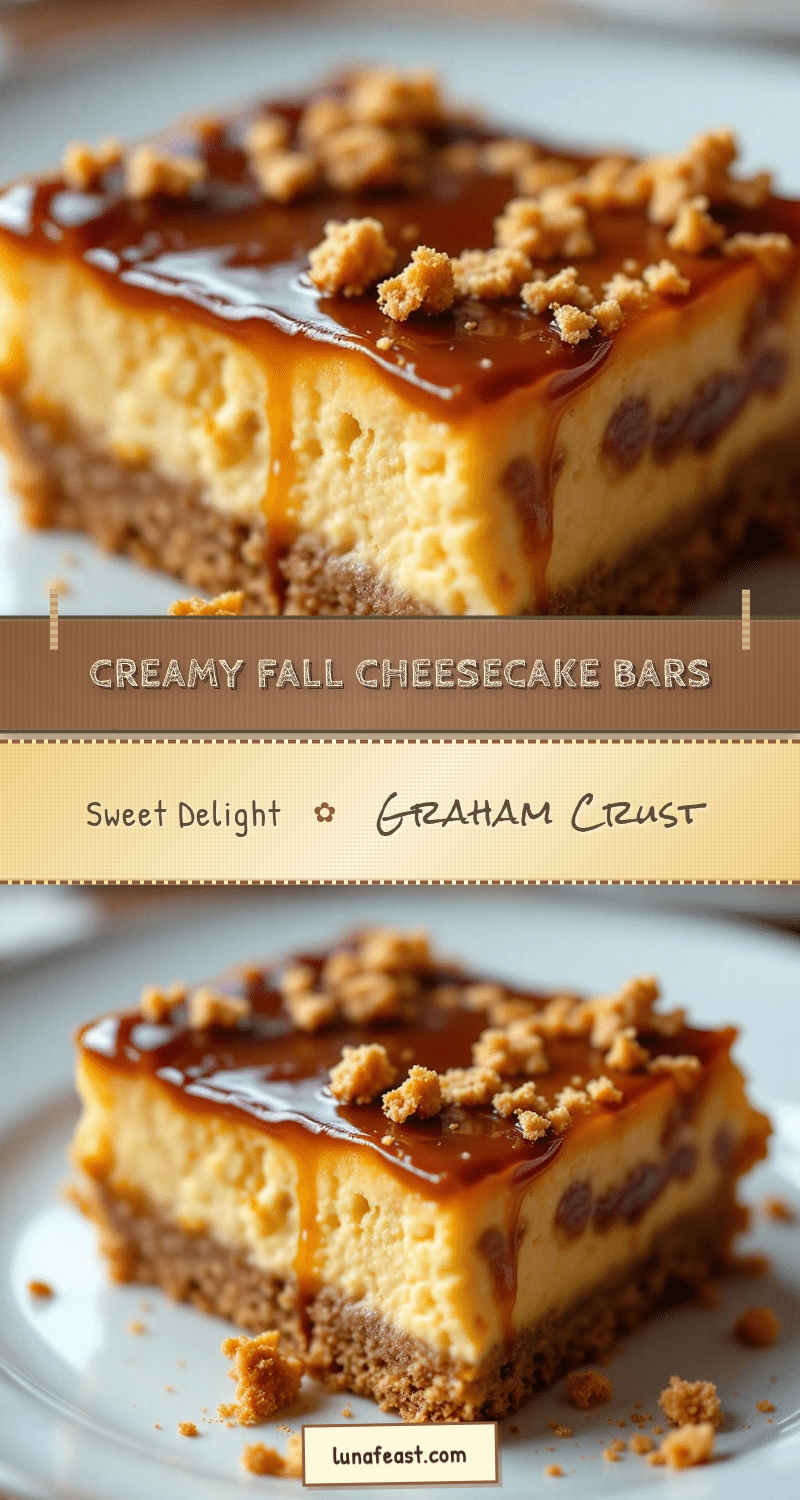
Creamy Fall Cheesecake Bars: Best Easy Autumn Dessert
These creamy fall cheesecake bars feature a rich, silken pumpkin-spiced filling on a crunchy graham cracker crust. They are easy to make, require no water bath, and offer a sophisticated texture that is perfect for autumn gatherings.
- Prep Time: 30 minutes
- Cook Time: 30-35 minutes
- Total Time: 4 hours 30 minutes
- Yield: 16 servings 1x
- Category: Dessert
- Cuisine: American
Ingredients
- 1 ½ cups graham cracker crumbs
- 6 tablespoons unsalted butter, melted
- 2 tablespoons granulated sugar
- ½ teaspoon ground cinnamon
- A pinch of salt
- 24 ounces full-fat cream cheese, softened to room temperature
- 1 cup granulated sugar
- ½ cup heavy cream
- 1 cup 100% pure pumpkin puree
- 3 large eggs, room temperature
- 1 teaspoon vanilla extract
- 1 ½ teaspoons pumpkin pie spice
- ½ teaspoon ground ginger
- ¼ teaspoon nutmeg
Instructions
- Preheat oven to 350°F (175°C). Line a 9×13 inch baking pan with parchment paper, leaving an overhang on the long sides, and spray lightly with non-stick spray.
- In a medium bowl, combine graham cracker crumbs, melted butter, 2 tablespoons sugar, cinnamon, and salt. Mix until resembling wet sand, then press firmly into the bottom of the prepared pan.
- Bake the crust for 8-10 minutes until toasty. Remove from oven and let cool while making the filling.
- In a large mixing bowl, beat the softened cream cheese and 1 cup sugar on medium-low speed until smooth and creamy. Scrape down the sides of the bowl.
- With the mixer on low, add heavy cream and vanilla extract. Mix until combined.
- Add the pumpkin puree and mix just until the color disappears. Do not overmix.
- Add eggs one at a time, mixing on low speed after each addition until just incorporated.
- Sprinkle in pumpkin pie spice, ground ginger, and nutmeg. Fold into the batter gently with a spatula until evenly distributed.
- Pour the filling over the cooled crust and smooth the top.
- Bake for 30-35 minutes. The edges should be set and slightly puffed, but the center should still have a slight jiggle.
- Remove from oven and place on a wire rack to cool at room temperature for 1 hour.
- Transfer the pan to the refrigerator and chill for at least 4 hours, preferably overnight.
- Lift the bars out using the parchment sling, place on a cutting board, and cut into squares with a sharp knife. Wipe the blade between cuts. Serve cold.
Notes
Ensure all dairy ingredients are at room temperature to prevent lumps. Do not overmix the batter to avoid cracking. The bars must be fully chilled before cutting for clean slices. They can be stored in the refrigerator for up to 5 days or frozen for up to 3 months.
Nutrition
- Serving Size: 1 bar
- Calories: 335
- Sugar: 20
- Sodium: 180
- Fat: 22
- Saturated Fat: 13
- Carbohydrates: 28
- Fiber: 1
- Protein: 6
Keywords: fall dessert, pumpkin cheesecake bars, autumn baking, easy cheesecake, graham cracker crust, holiday dessert, pumpkin spice


