I assumed that making a “dirt cup” dessert would require a trip to the garden for actual topsoil. It took about five minutes for me to realize that chocolate cookie crumbs and whipped cream are the primary components, not actual earth. Honestly, I was standing in my kitchen holding a bag of Oreos, wondering if I had lost my mind. The concept of serving “dirt” to guests seemed a bit rustic, even for a Halloween party. But then I tasted it. The contrast between the cool, airy pudding and the gritty, sweet cookie texture was instant magic.
It was supposed to be a simple snack for the kids, but you know how these things go. The adults got involved, and suddenly there was a line for the second cup. This no-bake Halloween dirt cup pudding turned out to be less about the spooky aesthetic and more about that specific comfort of childhood treats. It’s messy, it’s fun, and it requires zero oven time.
I remember watching my nephew try to eat the gummy worms before the pudding was even set. He was determined to get to the “bugs” first. That chaos is exactly why this recipe stuck with me. It’s not just a dessert; it’s an experience. And let’s face it, who doesn’t love a treat that looks like it crawled out of a garden bed?
The real surprise was how easy it was to pull together. I spent more time arranging the plastic spiders than I did mixing the ingredients. That’s the kind of stress-free cooking I can get behind. You get the visual impact of a complex pastry without the hours of prep work. It’s just layers of flavor and fun, served in little clear cups so everyone can see the layers they are about to devour.
Why You’ll Love This Recipe
- Quick & Easy: This no-bake Halloween dirt cup pudding comes together in under 20 minutes. It is perfect for last-minute Halloween parties or busy weeknights when you need a sweet treat fast.
- Simple Ingredients: You likely already have everything in your kitchen. Chocolate pudding mix, whipped cream, cookies, and gummy worms are pantry staples for most households.
- Perfect for Halloween: The spooky presentation makes it an ideal centerpiece for trick-or-treaters or a fun addition to your holiday table.
- Crowd-Pleaser: Kids love the idea of eating “dirt” with bugs in it, and adults love the rich chocolate flavor. It always gets rave reviews from all ages.
- Unbelievably Delicious: The texture combo of creamy pudding and crunchy crumbs is next-level comfort food. It feels like a treat but is simple enough for everyday enjoyment.
What makes this recipe different from other pudding cups is the layering technique. I’ve tried just dumping everything in, but the distinct layers look so much better and provide better texture contrast. Whether you use homemade whipped cream or the canned kind, the key is getting that fluffy top layer right. It’s not just another version—it’s my best version because it balances sweetness with that slight crunch of the cookie crumbs.
This recipe isn’t just good—it is the kind that makes you close your eyes after the first bite. It’s comfort food reimagined for the spooky season. It’s perfect for impressing guests without stress, or turning a simple dinner into something memorable. Plus, it pairs wonderfully with other fall treats like easy pumpkin cookies if you want a full autumn dessert spread.
What Ingredients You Will Need
This recipe uses simple, wholesome ingredients to deliver bold flavor and satisfying texture without the fuss. The beauty of this no-bake Halloween dirt cup pudding is that it relies on high-quality basics to shine. You don’t need fancy gadgets or obscure spices. Just good chocolate, creamy dairy, and crunchy cookies.
- Chocolate Pudding Mix: I recommend using a high-quality instant chocolate pudding mix for the best flavor. Brands like Jell-O or homemade instant pudding work well. You will need two boxes (about 5.1 oz each) to ensure there is enough filling.
- Milk: Use cold whole milk for the creamiest texture. If you prefer dairy-free, almond milk works, but the consistency might be slightly thinner.
- Whipped Topping: Thawed frozen whipped topping (like Cool Whip) is the standard for this recipe. It provides that light, airy texture that contrasts with the dense pudding. You can also make homemade whipped cream if you have the time.
- Chocolate Sandwich Cookies: Oreos are the classic choice. You need them crushed into fine crumbs. Save a few whole cookies for garnish if you want a fun presentation.
- Gummy Worms: These are essential for the “dirt” theme. Use your favorite brand, but make sure they are pliable so they can be tucked into the pudding without breaking.
- Optional Add-ins: I sometimes add a tablespoon of cocoa powder to the pudding mix for a deeper chocolate flavor. You can also sprinkle crushed peppermint candies for a festive touch.
For the best texture, look for cookie crumbs that are fine but not dust-like. You want some small chunks to provide crunch. If you crush the cookies yourself, put them in a zip-top bag and roll a rolling pin over them. It’s satisfying and gives you control over the crumb size. For a gluten-free option, use gluten-free chocolate sandwich cookies. The substitution is straightforward and doesn’t compromise the taste at all.
Equipment Needed
You don’t need much to make this no-bake Halloween dirt cup pudding, which is part of its appeal. A large mixing bowl is essential for whipping up the pudding and folding in the whipped topping. I prefer a bowl with a wide base so it’s easier to get a good whisk or electric mixer.
A hand mixer works well if you are making pudding from scratch, but for instant mix, a whisk is fine. You will also need measuring cups and spoons for the milk. For the cookie crumbs, a food processor or a simple zip-top bag and rolling pin will do the job. If you use a food processor, be careful not to over-process the cookies into a paste. You want crumbs.
Small serving cups are crucial for the presentation. Clear plastic or glass cups allow everyone to see the layers. I like using 6-ounce dessert cups. They are the perfect size for a single serving and look elegant on a party table. If you don’t have clear cups, opaque ramekins work too, but you lose the visual appeal of the layers.
For maintenance, just wash your bowls and utensils immediately after use. Pudding dries quickly and can be hard to scrub off later. Keep your whipped topping cold until you are ready to use it. This ensures it holds its shape when folded into the pudding. Budget-friendly options include using store-brand pudding mix and whipped topping. The taste difference is negligible for this type of recipe.
Preparation Method
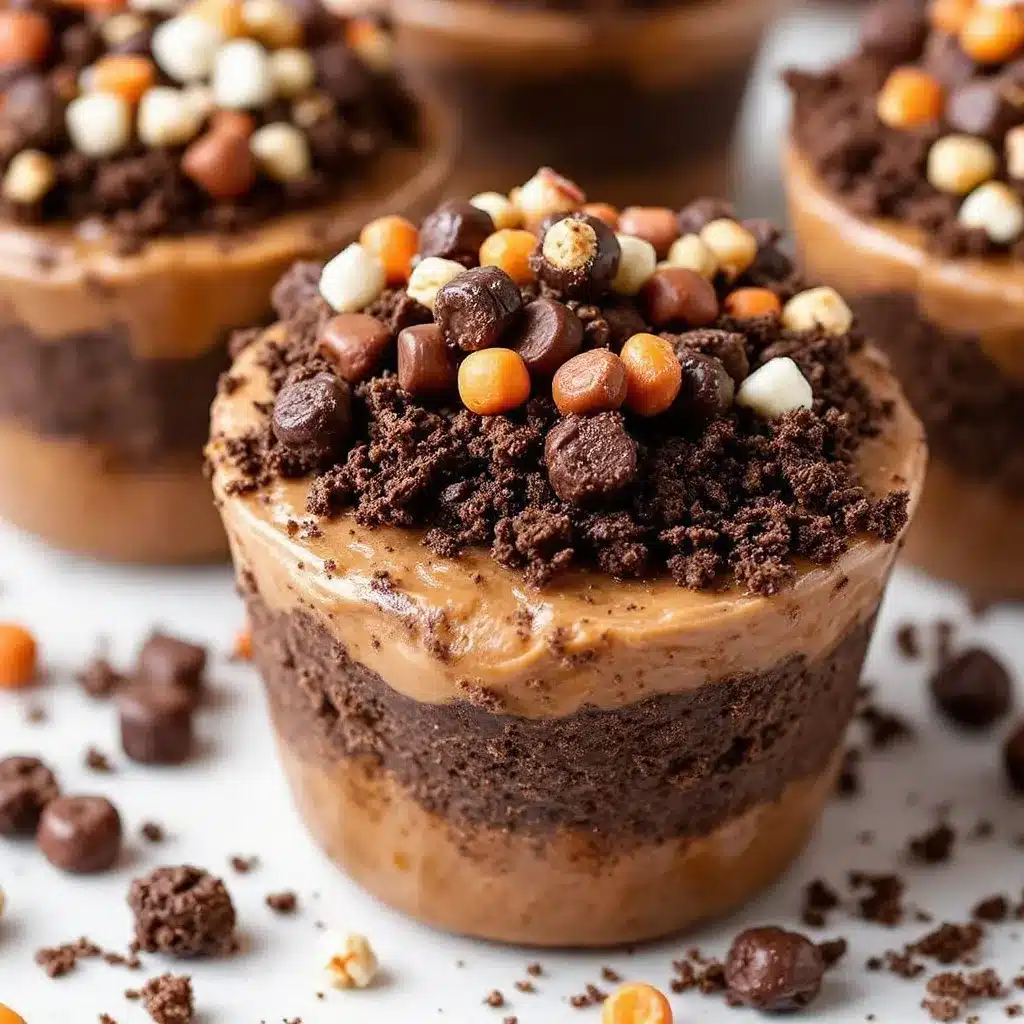
- Prepare the Pudding: Start by pouring the instant chocolate pudding mix into a large mixing bowl. Add the cold milk as directed on the package. Whisk vigorously for about 2 minutes until the mixture thickens and becomes smooth. This step usually takes about 5 minutes. Make sure there are no lumps. The pudding should be thick enough to hold its shape when spooned. If it’s too runny, your pudding cups will be messy.
- Fold in the Whipped Topping: Once the pudding is set, gently fold in the thawed whipped topping. Use a spatula to combine them without deflating the whipped topping too much. You want to keep it light and airy. Fold until the color is uniform and there are no streaks of white. This should take about 1-2 minutes. The mixture should look fluffy and creamy.
- Crush the Cookies: While the pudding is mixing, crush the chocolate sandwich cookies into fine crumbs. If using a food processor, pulse until they are like sand. If using a bag, roll the pin over them until they are broken down. Reserve about 1/4 cup of crumbs for garnish. The rest will be used for layering. This takes about 3 minutes.
- Layer the Cups: Begin assembling the dirt cups. Start with a layer of cookie crumbs at the bottom of each cup. You want about 1-2 tablespoons per cup. This forms the “dirt” base. Then, add a layer of the chocolate-whipped topping mixture. Use about 1/3 cup per cup. Press it down gently with the back of a spoon to create an even layer. Repeat the layers: crumbs, then pudding mixture. End with a final layer of pudding mixture on top.
- Add the Worms: Gently push the gummy worms into the top layer of pudding. They should look like they are crawling out of the dirt. Add more cookie crumbs on top if you want extra “dirt” coverage. This is the fun part, so let the kids help if they are around. It takes about 5 minutes to assemble all the cups.
- Chill and Serve: Place the cups in the refrigerator for at least 30 minutes to set. This helps the layers firm up and the flavors meld together. When ready to serve, garnish with extra cookie crumbs or a plastic spider for a spooky touch. Enjoy immediately or store in the fridge for up to 2 days.
Watch out for over-mixing the whipped topping. If you beat it too much, it can become grainy. Fold gently. Also, ensure your milk is very cold. Warm milk will slow down the thickening process of the instant pudding. If you are in a hurry, you can skip the chilling step, but the layers might not be as distinct.
How do I prevent the pudding from being too runny?
Make sure you use the exact amount of milk specified on the package. Do not add extra milk thinking it will make it creamier. Instant pudding is designed to thicken with a specific liquid ratio. If it is still runny, add a bit more pudding mix or chill it longer.
Can I use homemade whipped cream?
Yes, but it is less stable than frozen whipped topping. If you use homemade cream, whip it to stiff peaks and fold it in gently. The dessert might not hold its shape as well over time, so serve it immediately.
Cooking Tips & Techniques
Getting the texture right is the most important part of this no-bake Halloween dirt cup pudding. The key is to keep the whipped topping light. When you fold it into the pudding, use a gentle hand. Think of it like a dance, not a wrestling match. You want to preserve the air bubbles that make the dessert fluffy. If you mix too hard, you’ll end up with a dense, heavy pudding cup.
Another tip is to chill your bowls before starting. If you are making whipped cream from scratch, putting the bowl and beaters in the freezer for 10 minutes helps the cream whip faster and hold its shape. This is a pro tip that many home cooks overlook. It makes a huge difference in the final texture.
Timing is also crucial. Don’t assemble the cups too far in advance. The cookie crumbs will absorb moisture from the pudding and become soggy if they sit for more than a day. If you are prepping for a party, assemble them the morning of the event. This way, they are fresh and crunchy when served.
I once made these cups the night before a party, and the kids complained that the “dirt” was too mushy. Lesson learned. Now I always wait until the last hour to assemble them. It’s a small step that makes a big difference in quality. Also, use a variety of cookie crumbs. Mixing chocolate cookies with vanilla wafers adds visual interest and a slight flavor contrast. It’s a simple variation that elevates the presentation.
Multitasking is your friend here. While the pudding is thickening, crush the cookies. While the cookies are crushed, prepare the gummy worms. This keeps the process moving smoothly and prevents bottlenecks in the kitchen. Keep your workspace organized. Have all your bowls and cups lined up before you start layering. It makes the assembly process feel like an assembly line, which is efficient and fun.
Variations & Adaptations
There are many ways to customize this no-bake Halloween dirt cup pudding to suit different tastes and dietary needs. One popular variation is to use strawberry pudding mix instead of chocolate. It creates a pink “blood” effect that is perfect for Halloween. Just pair it with vanilla wafers or lemon cookies for a different flavor profile. It’s surprisingly delicious and looks great in clear cups.
For a healthier twist, you can use low-fat pudding mix and light whipped topping. It reduces the calorie count without sacrificing too much flavor. Another option is to use almond milk and dairy-free whipped topping for a vegan version. There are many high-quality plant-based pudding mixes available now that taste almost identical to the dairy versions.
If you want to add a kick, mix a little bit of espresso powder into the chocolate pudding. It enhances the chocolate flavor without making it taste like coffee. It’s a subtle change that adds depth. For a nutty version, sprinkle crushed pecans or walnuts into the cookie crumb layer. It adds a nice crunch and pairs well with the chocolate.
I once tried adding a layer of peanut butter cups into the mix. It was rich and decadent, but maybe too heavy for some guests. It’s a good option for peanut butter lovers. For a seasonal fall variation, use pumpkin spice pudding mix and gingersnap cookies. It captures the essence of autumn in a cup. It’s a great alternative if you want to move away from the classic chocolate flavor.
Addressing allergens is easy with this recipe. Use gluten-free cookies and ensure your pudding mix is certified gluten-free. For nut allergies, simply avoid adding nuts and check your cookie labels. Most chocolate sandwich cookies are nut-free, but it’s always good to double-check. The beauty of this recipe is its flexibility. You can adapt it to any dietary requirement while keeping the fun, spooky theme intact.
Serving & Storage Suggestions
Serve these no-bake Halloween dirt cup pudding cups cold for the best texture. They look best in clear plastic or glass cups so the layers are visible. Add a plastic spider or a gummy bat on top for a festive touch. They pair well with a glass of cold milk or a cup of hot cocoa. For a party setting, place them on a tiered stand with other Halloween treats.
For storage, keep the cups in an airtight container in the refrigerator. They will stay fresh for up to 2 days. Do not freeze them, as the whipped topping can become grainy and separate upon thawing. If you need to transport them, keep them in a cooler with ice packs to maintain the cold temperature.
The flavors develop over time, with the cookie crumbs softening and melding with the pudding. Some people prefer them after sitting for a few hours, while others like them fresh. It’s a matter of personal preference. If you notice the crumbs getting too soft, add a fresh sprinkle of crumbs on top before serving.
When reheating is necessary, avoid the microwave. It will melt the whipped topping and make the dessert messy. If you must reheat, let them sit at room temperature for 15 minutes to soften slightly. But honestly, they are best served straight from the fridge. The cold temperature enhances the creamy texture and keeps the gummy worms firm.
Nutritional Information & Benefits
This no-bake Halloween dirt cup pudding is a rich, indulgent dessert. A single serving (one cup) contains approximately 350-400 calories, depending on the brands used. It is high in sugar and carbohydrates due to the pudding mix, cookies, and whipped topping. However, it provides a quick energy boost, which is perfect for Halloween night trick-or-treating.
The chocolate pudding offers some calcium and protein from the milk. The whipped topping adds fat and sugar, contributing to the creamy texture. While it is not a health food, it can be enjoyed in moderation as part of a balanced diet. For those watching their sugar intake, consider using sugar-free pudding mix and whipped topping. It reduces the calorie count significantly.
Gluten-free options are available by using gluten-free cookies and pudding mix. Dairy-free versions can be made with plant-based milk and whipped topping. Be mindful of allergens, especially if serving to guests with nut or gluten sensitivities. Always check labels to ensure safety.
Personally, I view this as a special occasion treat. It’s fun, festive, and brings back childhood memories. It’s not something I make every week, but it’s perfect for Halloween parties. The joy it brings to children outweighs the nutritional concerns. Enjoy it as a fun, spooky dessert that everyone can share.
Conclusion
This no-bake Halloween dirt cup pudding is a winner for any party. It’s easy to make, delicious to eat, and fun to look at. I love how it brings people together, especially kids, with its spooky theme. It’s a recipe that requires minimal effort but delivers maximum fun.
I encourage you to customize it with your favorite cookies or pudding flavors. Make it your own by adding unique garnishes or variations. Whether you stick to the classic chocolate or try a strawberry twist, the result will be a hit. Share your creations with friends and family, and see how they enjoy the “dirt.”
Please leave a comment below if you try this recipe. I’d love to hear how it turned out and see your spooky creations. Share it on social media and tag me so I can see your fun presentations. Don’t forget to pin this recipe to your Halloween board for later!
Happy Halloween, and enjoy your creepy-crawly dessert!
FAQs
Can I make this recipe ahead of time?
Yes, you can assemble the cups up to 24 hours in advance. Store them in the refrigerator in an airtight container. The layers will set nicely, but the cookie crumbs may soften slightly over time.
What kind of cookies work best?
Chocolate sandwich cookies like Oreos are the classic choice. You can also use chocolate wafer cookies or even chocolate chip cookies for a different texture. Avoid cookies with large chunks of candy or nuts if you want a smooth crumb.
Can I use homemade whipped cream?
Yes, but it is less stable than frozen whipped topping. Whip it to stiff peaks and fold it gently into the pudding. Serve immediately if you use homemade cream, as it may deflate over time.
How do I keep the gummy worms from sinking?
Push them into the pudding just before serving. If you add them too early, they will absorb moisture and sink. You can also use shorter gummy worms for easier handling.
Is there a gluten-free option?
Absolutely. Use gluten-free chocolate pudding mix and gluten-free chocolate sandwich cookies. Most major brands offer gluten-free versions that work perfectly in this recipe.
Pin This Recipe!
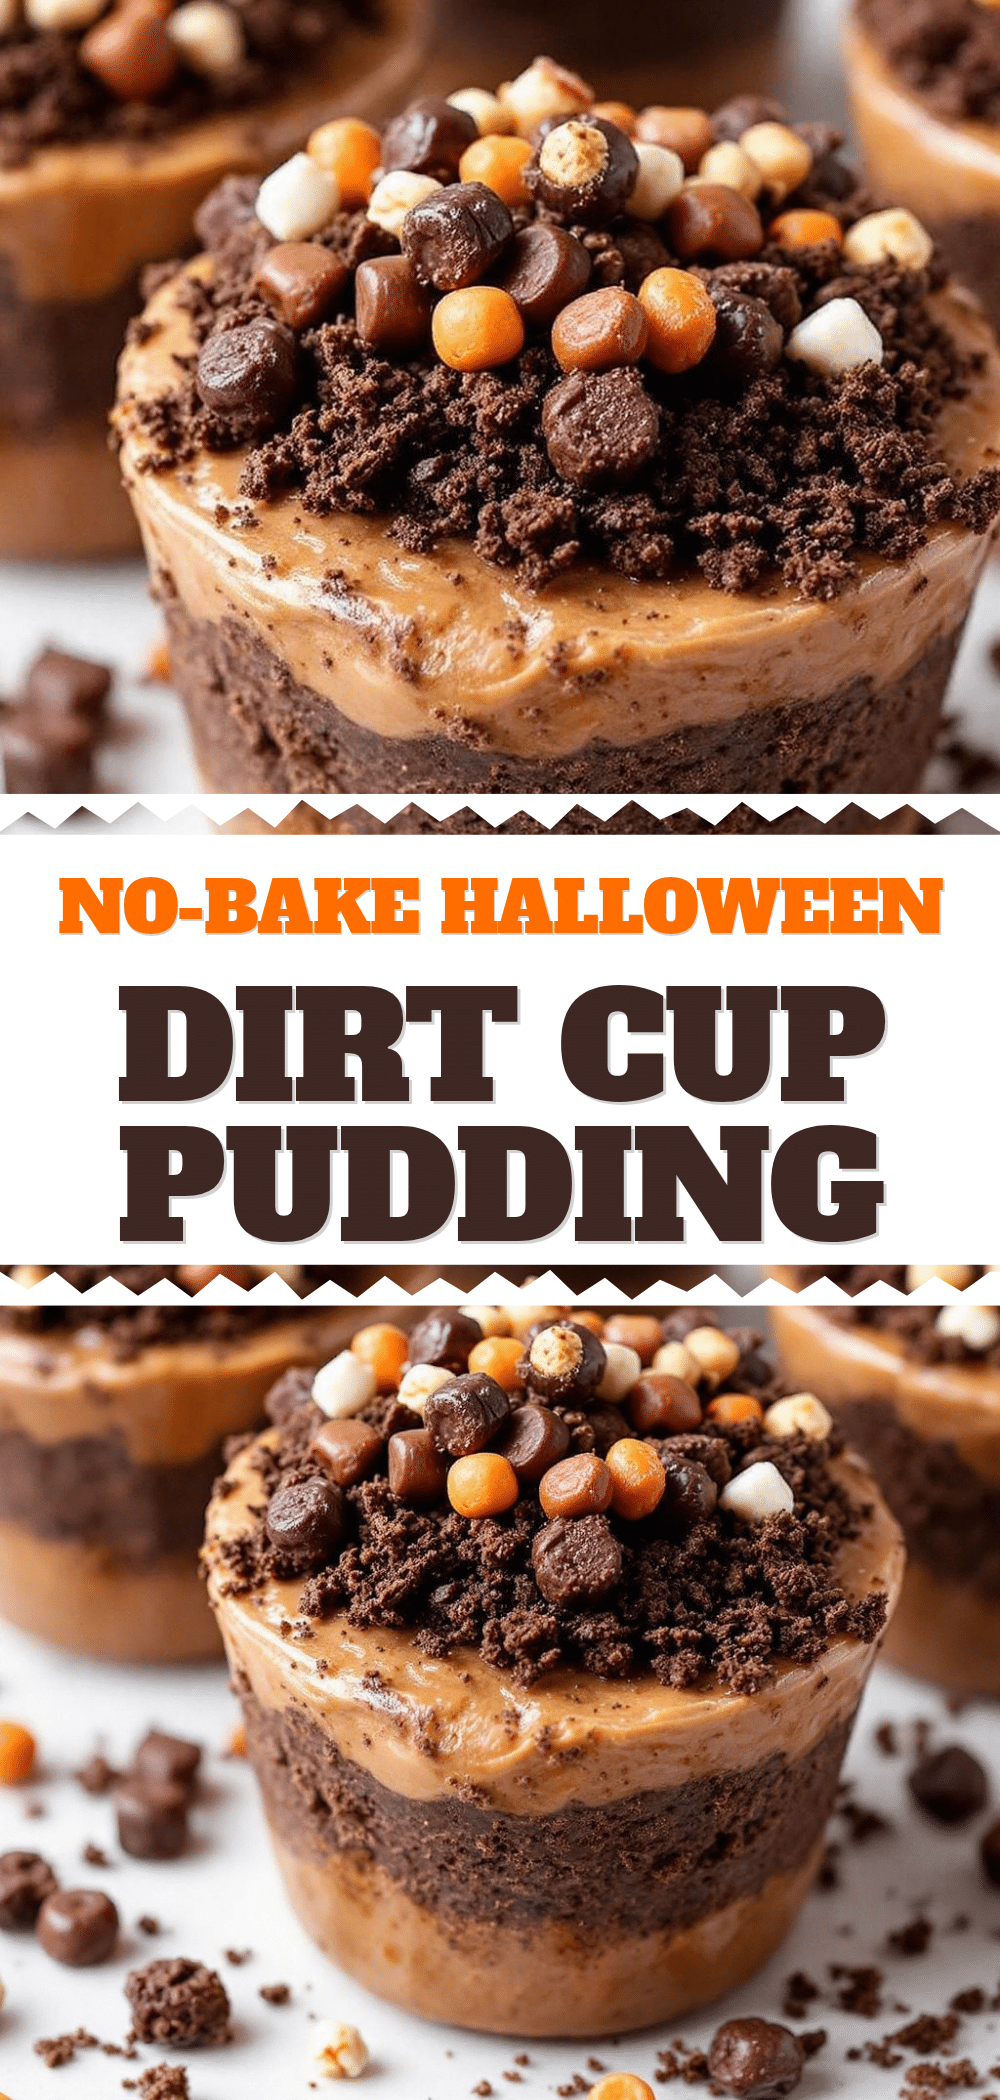
No-Bake Halloween Dirt Cup Pudding

A fun, spooky, and easy no-bake dessert featuring layers of chocolate pudding, whipped topping, and cookie crumbs, topped with gummy worms for a perfect Halloween treat.
- Prep Time: 15 minutes
- Cook Time: 0 minutes
- Total Time: 45 minutes
- Yield: 6 servings 1x
- Category: Dessert
- Cuisine: American
Ingredients
- 2 boxes (5.1 oz each) instant chocolate pudding mix
- Cold whole milk (amount as directed on package, typically 2 cups)
- 1 container (8 oz) frozen whipped topping, thawed
- Chocolate sandwich cookies (Oreos), crushed into fine crumbs
- Gummy worms
- Optional: 1 tbsp cocoa powder for deeper flavor
- Optional: Crushed peppermint candies for garnish
Instructions
- Pour instant chocolate pudding mix into a large mixing bowl. Add cold milk and whisk vigorously for about 2 minutes until thick and smooth.
- Gently fold in the thawed whipped topping using a spatula until the mixture is uniform in color and fluffy.
- Crush chocolate sandwich cookies into fine crumbs using a food processor or a zip-top bag and rolling pin. Reserve 1/4 cup for garnish.
- Layer the cups: Start with 1-2 tablespoons of cookie crumbs at the bottom. Add about 1/3 cup of the chocolate-whipped topping mixture. Press down gently.
- Repeat layers: Add another layer of cookie crumbs, then top with the remaining pudding mixture.
- Gently push gummy worms into the top layer of pudding to look like they are crawling out of the dirt. Sprinkle with reserved crumbs if desired.
- Refrigerate for at least 30 minutes to set before serving.
Notes
Ensure milk is very cold to help the pudding thicken quickly. Do not over-mix the whipped topping to maintain a light, airy texture. For best results, assemble cups no more than 24 hours in advance to prevent cookie crumbs from becoming too soggy. Serve immediately if using homemade whipped cream as it is less stable than frozen topping.
Nutrition
- Serving Size: 1 cup
- Calories: 375
- Sugar: 38
- Sodium: 350
- Fat: 18
- Saturated Fat: 7
- Carbohydrates: 52
- Fiber: 2
- Protein: 5
Keywords: Halloween dessert, no-bake pudding, dirt cups, easy treats, kids party food, chocolate pudding, gummy worms


