Let’s be honest for a second. Baking a full-sized cake is a lot of commitment. You need the right pan, you need to measure out enough sugar to feed a small army, and then you’re left with leftovers that dry out by Tuesday. That’s why I stopped making full batches years ago. This moist small-batch apple dapple cake changes the game because it’s designed for real life. It’s about half the size of a standard loaf, which means it bakes faster and finishes before you lose interest.
What makes this recipe stand out isn’t just the size, though. It’s the texture. Most small cakes turn out dense or dry, but not this one. I’ve tested this recipe dozens of times to get the ratio of apples to batter just right. The key is using a mix of finely diced apples in the batter and larger chunks on top. This creates that classic “dapple” effect where you get a tender crumb with bursts of soft fruit in every bite.
Here is why this specific version works so well:
- Quick & Easy: You can have this from bowl to oven in about 20 minutes. The smaller size means it bakes in roughly 35-40 minutes, which is perfect for a quick afternoon snack or an impromptu dessert.
- Simple Ingredients: You probably have everything you need right now. Flour, sugar, butter, eggs, and apples. No obscure spices or hard-to-find items. It’s pantry-friendly comfort food.
- Perfect for Solo Dining or Small Families: If you live alone or just have a small household, this is the answer to your dessert prayers. No more wondering what to do with the rest of the cake.
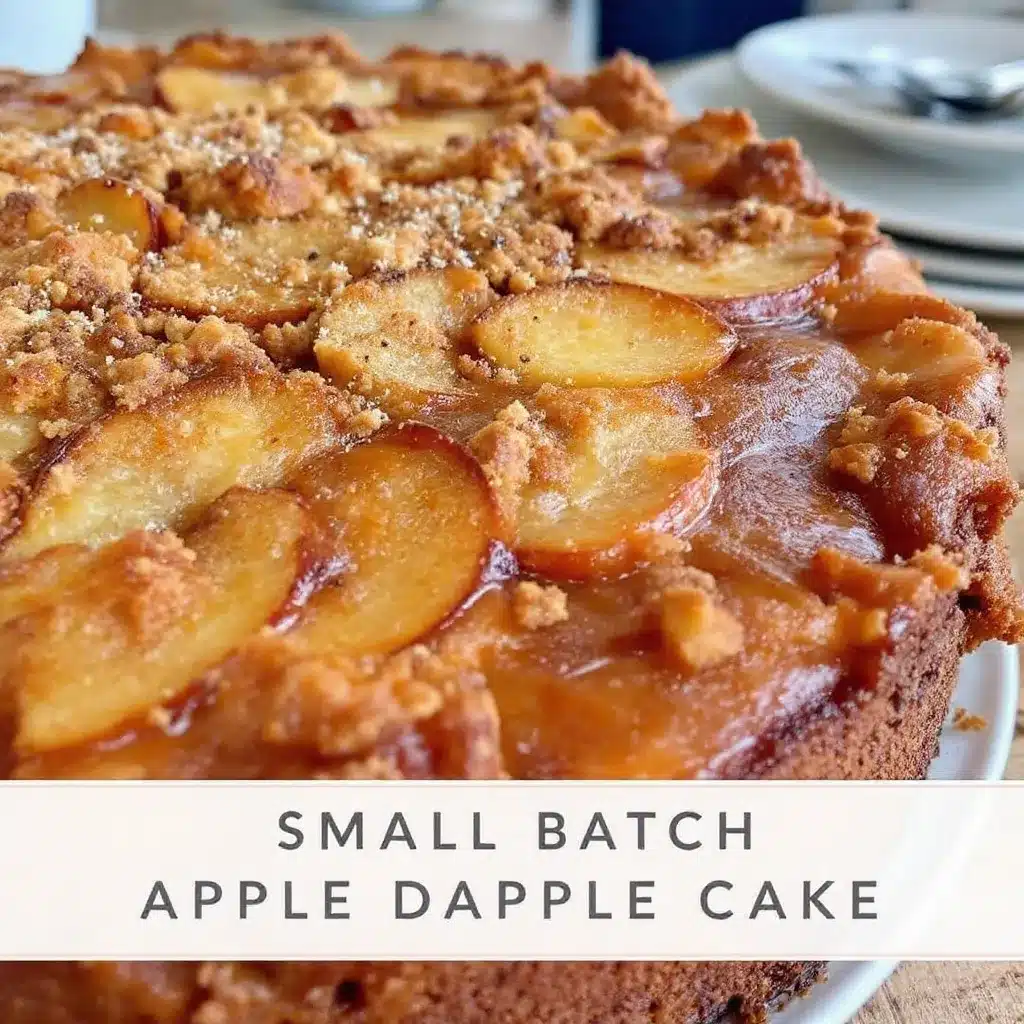
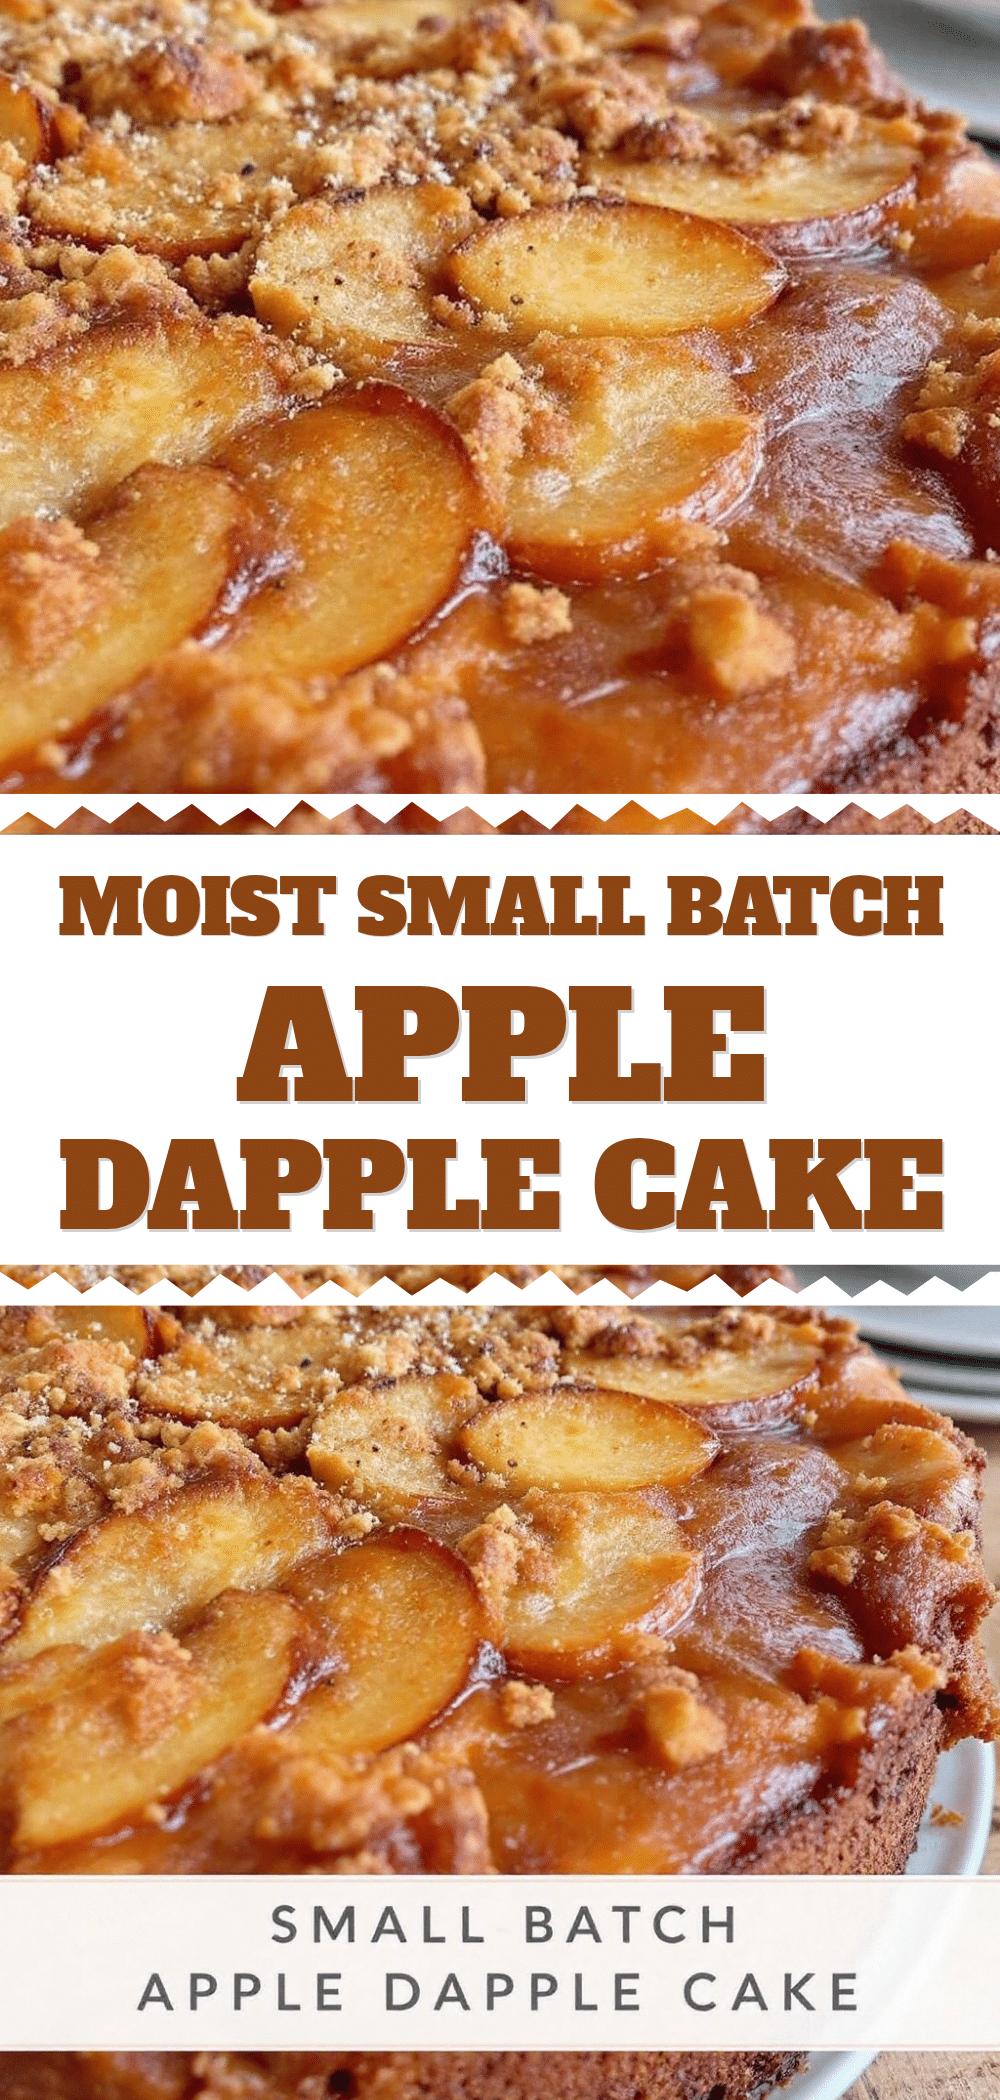
- Crowd-Pleaser: Even though it’s small, it’s impressive. The caramelized top and the visible apple chunks make it look like something from a fancy bakery, but it’s humble and approachable.
- Unbelievably Delicious: The combination of warm cinnamon, nutmeg, and fresh apples creates a flavor profile that feels like a hug. It’s rich without being heavy.
What makes this different from other small-batch recipes? It’s the technique. I use a method that ensures the apples stay moist without making the cake soggy. By tossing the diced apples in a little flour before folding them in, they suspend evenly in the batter rather than sinking to the bottom. It’s a small trick that makes a huge difference in the final result.
This recipe isn’t just about feeding a hunger. It’s about that moment when you take the first bite and close your eyes because it tastes exactly like autumn. It’s the kind of bake that turns a regular Wednesday into something special. You don’t need a reason to make it, but if you do, let it be the smell of cinnamon filling your kitchen.
What Ingredients You Will Need
This recipe relies on a few simple, wholesome ingredients to deliver bold flavor and satisfying texture without the fuss. The beauty of a small-batch cake is that you don’t need to buy giant packages of things you’ll only use once. Everything is measured precisely for this single 4×4 or 5×5 inch pan. Most of these items are pantry staples, and the apples are the star of the show, so pick ones that hold their shape well when baked.
Here is exactly what you’ll need to gather:
- For the Batter:
- 1 cup all-purpose flour (sifted for a lighter texture)
- 1 teaspoon baking powder (make sure it’s fresh for the best rise)
- 1/2 teaspoon baking soda
- 1/2 teaspoon salt
- 1 teaspoon ground cinnamon
- 1/4 teaspoon ground nutmeg (adds that warm, cozy depth)
- 1/2 cup unsalted butter, softened to room temperature (I prefer Kerrygold for flavor, but any good butter works)
- 3/4 cup granulated sugar (you can use half brown sugar for more moisture)
- 1 large egg, room temperature
- 1 teaspoon vanilla extract (real vanilla makes a difference)
- 1/4 cup sour cream or full-fat Greek yogurt (this is the secret to the moist crumb)
- For the Apples:
- 1 medium apple, peeled and finely diced (about 1 cup) – I recommend using a crisp variety like Honeycrisp or Gala. These hold up well in the batter.
- 1 medium apple, peeled and diced into larger chunks (about 3/4 cup) – These go on top for that visual appeal.
- For the Topping:
- 1 tablespoon brown sugar
- 1/2 teaspoon cinnamon
- 1 teaspoon cold butter, cut into small pieces
If you don’t have sour cream, plain yogurt is a fine substitute. For the apples, avoid varieties like Red Delicious as they tend to turn mushy and lose their flavor when baked. I’ve also made this with Fuji apples, which are sweeter, but Honeycrisp gives the best balance of tartness and texture. If you’re looking for a gluten-free option, you can swap the all-purpose flour for a 1-to-1 gluten-free baking blend, though the texture might be slightly denser.
Equipment Needed
You don’t need a fancy kitchen to make this cake. In fact, the beauty of a small-batch bake is how little gear it requires. The most critical piece of equipment is your baking pan. I use a 4×4 inch square pan, but a 5×5 inch pan works too if you want a slightly thinner cake. If you only have a standard 9×9 inch pan, you can double the recipe, but keep an eye on the baking time as it will take longer.
Other than the pan, you’ll need:
- A medium mixing bowl for the dry ingredients.
- A larger bowl for creaming the butter and sugar.
- A hand mixer or a sturdy whisk (a whisk gives you more control over the texture).
- A small spoon or spatula for folding in the apples.
- A sharp paring knife for dicing the apples.
I’ve found that non-stick pans are great for this because the cake is small and you want to get it out easily. If you’re using a metal pan, I recommend lining the bottom with parchment paper for easy removal. There’s nothing worse than scraping bits of cake out of a pan. Also, make sure your butter is truly softened. If it’s too cold, it won’t cream properly with the sugar, and your cake won’t rise as nicely.
Preparation Method
Let’s get into the actual baking process. This is where the magic happens. I like to break it down into clear steps so you don’t feel overwhelmed. Remember, since this is a small cake, it moves quickly. Don’t walk away while it’s in the oven.
- Prep your pan and oven (2 minutes): Preheat your oven to 350°F (175°C). Grease your 4×4 or 5×5 inch square pan with butter or non-stick spray. If you’re worried about sticking, line the bottom with a square of parchment paper. This ensures a clean release later.
- Mix the dry ingredients (2 minutes): In a medium bowl, whisk together the flour, baking powder, baking soda, salt, cinnamon, and nutmeg. Set this aside. It’s important to whisk these well to distribute the leavening agents evenly.
- Cream the butter and sugar (3 minutes): In a large bowl, beat the softened butter and granulated sugar together until light and fluffy. This usually takes about 2-3 minutes with a hand mixer. You want the mixture to look pale and airy. This step incorporates air into the batter, which helps the cake rise.
- Add wet ingredients (2 minutes): Beat in the egg and vanilla extract until combined. Then, mix in the sour cream or yogurt. The mixture might look slightly curdled at this point, which is normal. Don’t worry about it.
- Combine wet and dry (1 minute): Gradually add the dry ingredients to the wet mixture. Mix on low speed or use a spatula until just combined. Do not overmix! Overmixing develops gluten and leads to a tough cake. Stop as soon as you see no streaks of flour.
- Fold in the apples (2 minutes): Toss the finely diced apples with a teaspoon of flour from your dry measure (this prevents sinking). Gently fold these into the batter. Then, pour the batter into your prepared pan.
- Add the topping apples and crumble (2 minutes): Arrange the larger apple chunks on top of the batter in a neat pattern. In a small bowl, mix the brown sugar and cinnamon, then sprinkle it over the apples. Dot the top with the small pieces of cold butter. This creates a delicious, crumbly, caramelized crust.
- Bake (35-40 minutes): Place the pan in the center of the oven. Bake for 35-40 minutes. The cake is done when the top is golden brown and a toothpick inserted into the center comes out clean or with just a few moist crumbs. Avoid opening the oven door too early, as this can cause the cake to collapse.
- Cool (10 minutes): Let the cake cool in the pan for about 10 minutes. Then, run a knife around the edges and invert it onto a wire rack to cool completely or serve warm.
If you notice the top browning too quickly, you can loosely tent a piece of aluminum foil over the cake for the last 10 minutes of baking. This is a common trick for cakes with sugary toppings.
Cooking Tips & Techniques
I’ve made my fair share of baking mistakes over the years, and some of them involved apple cakes. Here are a few tips to help you avoid common pitfalls and ensure your moist small-batch apple dapple cake turns out perfectly every time.
First, temperature matters. Make sure your butter, egg, and sour cream are at room temperature. If they’re cold, they won’t emulsify properly with the sugar, leading to a dense batter. I usually take my butter out of the fridge about an hour before I start baking. If you forget, you can soften it in the microwave for 10-second intervals, but be careful not to melt it.
Second, don’t skip the flour toss on the apples. I know it seems like an extra step, but it really does keep the apples suspended in the batter. If you skip this, you’ll likely end up with a layer of mushy apples at the bottom of the pan. It’s a simple fix that saves you from disappointment.
Third, watch your bake time closely. Every oven is different. My oven runs a little hot, so I often check the cake at 32 minutes. If the toothpick comes out clean, pull it out. If it’s wet, give it another 2-3 minutes. It’s better to underbake slightly than to overbake, as overbaking dries out the cake.
Also, multitask wisely. While the cake is baking, you can start prepping your coffee or tea. The smell will fill your house, and you’ll be tempted to eat it straight out of the pan. Resist the urge! Let it cool for at least 10 minutes. This allows the structure to set, making it easier to slice and serve.
Variations & Adaptations
One of the best things about this recipe is how flexible it is. You can tweak it based on what you have on hand or what flavors you prefer. Here are a few variations I’ve tried and loved.
Walnut or Pecan Add-In: If you like a bit of crunch, fold 1/2 cup of chopped walnuts or pecans into the batter along with the apples. Toasting the nuts in a dry pan for a few minutes before adding them enhances their flavor significantly.
Cardamom Twist: Swap the nutmeg for ground cardamom. Cardamom pairs beautifully with apples and adds a floral, slightly spicy note that feels sophisticated. Use 1/2 teaspoon of cardamom instead of nutmeg.
Gluten-Free Option: As mentioned earlier, you can use a 1-to-1 gluten-free flour blend. I’ve used brands like Bob’s Red Mill or King Arthur, and they work well. Just note that gluten-free bakes can sometimes be more fragile, so handle them gently when cooling.
Dairy-Free: You can substitute the butter with a high-quality vegan butter stick and use coconut yogurt or soy yogurt instead of sour cream. The texture might be slightly different, but the flavor will still be delicious.
Personally, I love adding a pinch of ground ginger to the batter. It adds a little zing that complements the sweetness of the apples. It’s a small change that makes the flavor profile more complex and interesting.
Serving & Storage Suggestions
This cake is versatile when it comes to serving. It’s perfect for a cozy afternoon snack with a cup of coffee or tea. It also pairs wonderfully with a scoop of vanilla ice cream or a dollop of whipped cream for a more indulgent dessert experience. I often serve it warm, straight from the oven, because the warmth makes the cinnamon scent even more inviting.
For storage, this cake keeps well at room temperature for up to two days if covered tightly with plastic wrap or stored in an airtight container. Because it’s small, it’s unlikely to last longer than that in a household with more than one person! If you need to keep it longer, refrigerate it for up to five days. Just let it come to room temperature before serving for the best texture.
You can also freeze this cake. Wrap individual slices tightly in plastic wrap and then in aluminum foil. They will last in the freezer for up to three months. To reheat, simply thaw them at room temperature or microwave them for 15-20 seconds to warm them up.
The flavors actually develop and meld together over time, so some people prefer eating this cake the day after it’s baked. The apples soften further, and the spices become more pronounced. It’s a nice little secret that makes leftovers even better.
Nutritional Information & Benefits
While this is definitely a treat, it’s not without its benefits. Apples are a great source of fiber and vitamin C, especially if you leave the skin on (though peeling them gives a softer texture). The cinnamon has anti-inflammatory properties and helps regulate blood sugar levels. Using a small-batch size also helps with portion control, so you can enjoy the dessert without overindulging.
Here is an estimated nutritional breakdown per slice (assuming 4 slices):
- Calories: 220
- Carbohydrates: 35g
- Fat: 9g
- Protein: 3g
- Fiber: 2g
Keep in mind that these values are approximate and will vary based on the specific brands and ingredients you use. If you’re watching your sugar intake, you can reduce the granulated sugar by 2-3 tablespoons without significantly affecting the texture. The natural sweetness from the apples helps balance it out.
Conclusion
This moist small-batch apple dapple cake is more than just a recipe; it’s a solution to the problem of too much baking. It’s quick, easy, and incredibly delicious. I hope you give it a try and enjoy the process as much as I do. Don’t be afraid to experiment with the variations and make it your own. Whether you add nuts, swap spices, or just enjoy it plain, it’s a reliable crowd-pleaser.
If you make this cake, I’d love to hear how it turns out. Leave a comment below with your thoughts or share a photo if you post it on social media. Tag me so I can see your creations! And if you’re looking for more easy baking ideas, check out my easy cinnamon sugar apple fritter bread for another apple-forward treat.
Happy baking! Remember, the best part of cooking is sharing it with the people you love. Enjoy every bite.
Frequently Asked Questions
Can I use a different type of pan?
Yes, you can use a 5×5 inch pan, but the cake will be slightly thinner and may bake a few minutes faster. You can also use a mini muffin tin, filling each cup about 2/3 full. Bake time will be reduced to about 15-18 minutes.
Do I have to peel the apples?
It’s recommended to peel the apples for a smoother texture, especially for the diced apples in the batter. If you prefer more fiber and a rustic look, you can leave the skin on, but make sure to wash them thoroughly.
Can I make this recipe ahead of time?
Yes, you can bake the cake a day in advance. Store it in an airtight container at room temperature. It actually tastes better the next day as the flavors meld together. Just reheat slightly before serving if you prefer it warm.
What is the best apple for this cake?
Honeycrisp, Gala, and Fuji apples are excellent choices because they hold their shape well and offer a good balance of sweet and tart flavors. Avoid Red Delicious as they tend to become mushy when baked.
Why did my cake sink in the middle?
This usually happens if the oven door was opened too early or if the leavening agents (baking powder/soda) were old. Make sure to check your oven temperature with an thermometer and use fresh baking powder for the best rise.
Pin This Recipe!
Moist Small-Batch Apple Dapple Cake: 5 Easy Steps
A quick, moist small-batch apple cake designed for real life, featuring a tender crumb with bursts of soft fruit and a caramelized cinnamon topping.
- Prep Time: 20 minutes
- Cook Time: 35-40 minutes
- Total Time: 55-60 minutes
- Yield: 4 servings 1x
- Category: Dessert
- Cuisine: American
Ingredients
- 1 cup all-purpose flour (sifted)
- 1 teaspoon baking powder
- 1/2 teaspoon baking soda
- 1/2 teaspoon salt
- 1 teaspoon ground cinnamon
- 1/4 teaspoon ground nutmeg
- 1/2 cup unsalted butter, softened to room temperature
- 3/4 cup granulated sugar
- 1 large egg, room temperature
- 1 teaspoon vanilla extract
- 1/4 cup sour cream or full-fat Greek yogurt
- 1 medium apple, peeled and finely diced (about 1 cup)
- 1 medium apple, peeled and diced into larger chunks (about 3/4 cup)
- 1 tablespoon brown sugar (for topping)
- 1/2 teaspoon cinnamon (for topping)
- 1 teaspoon cold butter, cut into small pieces (for topping)
Instructions
- Preheat oven to 350°F (175°C). Grease a 4×4 or 5×5 inch square pan and line the bottom with parchment paper if desired.
- In a medium bowl, whisk together the flour, baking powder, baking soda, salt, cinnamon, and nutmeg. Set aside.
- In a large bowl, beat the softened butter and granulated sugar together until light and fluffy, about 2-3 minutes.
- Beat in the egg and vanilla extract until combined, then mix in the sour cream or yogurt.
- Gradually add the dry ingredients to the wet mixture, mixing on low speed or with a spatula until just combined. Do not overmix.
- Toss the finely diced apples with a teaspoon of flour from your dry measure and gently fold them into the batter.
- Pour the batter into the prepared pan. Arrange the larger apple chunks on top.
- Mix the brown sugar and cinnamon, sprinkle over the apples, and dot the top with small pieces of cold butter.
- Bake for 35-40 minutes, or until the top is golden brown and a toothpick inserted into the center comes out clean.
- Let the cake cool in the pan for 10 minutes, then invert onto a wire rack to cool completely or serve warm.
Notes
Ensure butter, egg, and sour cream are at room temperature for proper emulsification. Tossing diced apples in flour prevents them from sinking to the bottom. If the top browns too quickly, tent with aluminum foil for the last 10 minutes. The cake keeps well at room temperature for 2 days or in the fridge for 5 days.
Nutrition
- Serving Size: 1 slice
- Calories: 220
- Sugar: 22
- Sodium: 150
- Fat: 9
- Saturated Fat: 5
- Carbohydrates: 35
- Fiber: 2
- Protein: 3
Keywords: small batch cake, apple cake, dapple cake, easy baking, autumn dessert, moist cake, single serve dessert


