I want banana pudding right now, and I don’t want to turn on my oven to get it. That’s the honest thought that started this whole thing—a craving so specific it felt like a physical weight, the kind where you can almost taste the vanilla wafers and the cool, creamy layers even as you’re standing in the kitchen staring into the fridge. I had everything except the patience to make a traditional pudding from scratch, and honestly, the humidity was already making my hair curl in ways that felt personally offensive. So I stood there, mid-thought, and the idea just clicked: what if I made it an icebox cake instead?
This Creamy No-Bake Banana Pudding Icebox Cake is exactly what happens when laziness meets a really good idea. It’s got all the classic flavors—ripe bananas, silky vanilla pudding, and those soft, almost-cookie-like vanilla wafers—but it stacks them into a layered dessert that sets up in the fridge instead of the oven. No baking, no fuss, no standing over a hot stove stirring custard. Just layers of creamy goodness that get better the longer they sit, which is perfect because you can make it a day ahead and forget about it until dessert time rolls around.
The first time I made this, I used a glass dish that was slightly too small and ended up with pudding oozing over the sides like a delicious, accidental disaster. But you know what? It still tasted incredible, and that’s when I knew this recipe was a keeper. It’s forgiving, it’s flexible, and it’s the kind of dessert that makes people close their eyes after the first bite. It stuck because it solved a real problem—how to get that banana pudding fix without any of the work.
Why You’ll Love This Recipe
Let’s be real—there are a million banana pudding recipes out there, but this one is different. I’ve tested it, tweaked it, and served it to crowds who couldn’t stop raving about it. Here’s why this Creamy No-Bake Banana Pudding Icebox Cake stands out from the rest.
- No Oven Required: This recipe comes together in about 20 minutes of active time, and then the fridge does all the work. Perfect for hot summer days or when you just don’t want to deal with preheating anything.
- Simple Ingredients: You probably already have most of these in your pantry. No fancy extracts, no obscure flours—just real, recognizable ingredients that come together into something magical.
- Perfect for Entertaining: This dessert actually gets better overnight, which means you can make it a full day ahead of your party. No last-minute stress, no running around—just pull it out of the fridge and watch everyone dig in.
- Crowd-Pleaser: Kids love it, adults love it, and even people who claim they don’t like banana desserts have been converted. I’ve seen it disappear at potlucks, birthday parties, and casual family dinners.
- Unbelievably Creamy: The texture is next-level comfort food. The wafers soften into cake-like layers, the pudding stays silky, and the bananas add just the right amount of natural sweetness and freshness.
What makes this recipe different is the technique—instead of a traditional pudding that requires constant stirring, we’re using a no-cook approach that still delivers that rich, homemade taste. I’ve found that letting the pudding mixture sit for a few minutes before layering gives it a thicker consistency that holds up better between the wafers. It’s a small trick, but it makes all the difference. This isn’t just another version of banana pudding—it’s the best version, the one that makes you wonder why you ever bothered with the oven in the first place.
What Ingredients You Will Need
This Creamy No-Bake Banana Pudding Icebox Cake uses simple, wholesome ingredients to deliver bold flavor and satisfying texture without the fuss. Most of these are pantry staples, but I’ve included a few notes on what to look for to get the best results every time.
- 3 boxes (3.4 oz each) instant vanilla pudding mix — I prefer Jell-O brand for consistent results. Don’t use cook-and-serve pudding; it won’t set properly in this recipe.
- 4 cups cold whole milk — Whole milk gives the richest, creamiest texture. You can use 2% in a pinch, but it won’t be quite as luscious. (adds richness and body)
- 1 can (14 oz) sweetened condensed milk — This is the secret to that ultra-creamy, decadent texture. Don’t skip it or substitute with regular milk.
- 1 teaspoon vanilla extract — Pure vanilla extract makes a difference here. Imitation will work, but the flavor won’t be as warm and complex.
- 1 package (12 oz) vanilla wafers — Nilla Wafers are my go-to brand. You’ll need about one and a half boxes for a standard 9×13 dish. (look for fresh, crisp wafers for best layering)
- 4-5 ripe but firm bananas — Look for bananas that are yellow with a few brown spots but still hold their shape. Overripe bananas will turn mushy and brown too quickly. (use firm bananas for clean slices)
- 1 container (8 oz) frozen whipped topping, thawed — Cool Whip works perfectly here. You can also use homemade whipped cream if you prefer, but the stabilized version holds up better over time.
- Optional: 1/2 cup sour cream — This is my secret ingredient. It adds a subtle tang that balances the sweetness and makes the pudding taste even more homemade. (adds complexity and richness)
- Optional toppings: crushed vanilla wafers, sliced bananas, whipped cream — For garnish right before serving.
For the best texture, I’ve found that using cold milk straight from the fridge helps the pudding set up faster and thicker. If you want a dairy-free version, you can substitute oat milk or full-fat coconut milk, though the texture will be slightly different. And if you’re looking for a lighter option, try using sugar-free pudding mix and light whipped topping—it still tastes great with a fraction of the calories.
Equipment Needed
You don’t need a fancy kitchen to pull off this Creamy No-Bake Banana Pudding Icebox Cake. Here’s what you’ll need, along with some budget-friendly alternatives if you’re just starting out.
- 9×13-inch baking dish — A glass or ceramic dish works best because it shows off the beautiful layers. I use a Pyrex dish and it’s never let me down.
- Large mixing bowl — You’ll need a big bowl for whisking the pudding. A standard stainless steel or glass bowl is perfect.
- Whisk — A balloon whisk works great for getting the pudding smooth without lumps. An electric hand mixer also works if you want to speed things up.
- Sharp knife and cutting board — For slicing the bananas. A serrated knife works best to avoid bruising the fruit.
- Spatula — A rubber spatula helps you scrape every last bit of pudding into the dish. Don’t waste a single drop!
- Measuring cups and spoons — For accuracy, though this recipe is pretty forgiving.
- Plastic wrap or lid — To cover the dish while it chills. Make sure it’s airtight so the pudding doesn’t absorb fridge smells.
If you don’t have a 9×13 dish, you can use a deep 8×8 pan and make fewer layers, or even individual serving cups for a fun, personal presentation. I’ve made this in a trifle bowl before and it looked stunning—just adjust the layering to fit the shape of your dish.
Preparation Method
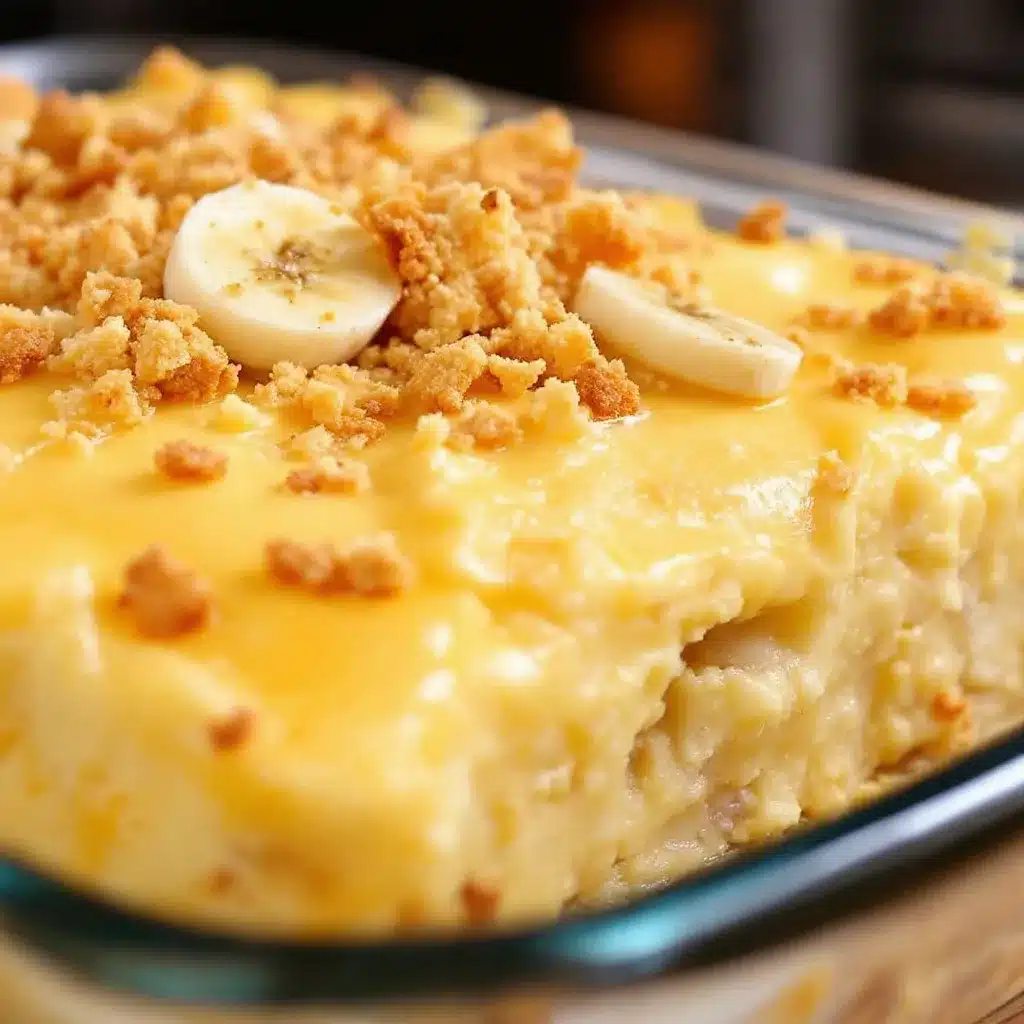
Let’s walk through this step by step. I’ve included time estimates and sensory cues so you know exactly what to look for at each stage. Trust me, this is easier than it sounds.
- Make the pudding mixture (5 minutes): In your large mixing bowl, whisk together the instant vanilla pudding mix and cold whole milk. Whisk vigorously for about 2 minutes until the mixture starts to thicken. You’ll feel it get heavier in the bowl—that’s the pudding setting up. Let it sit for 5 minutes to fully thicken. (pro tip: if you’re using the optional sour cream, whisk it in now for extra creaminess)
- Add the sweetened condensed milk and vanilla (2 minutes): Pour in the sweetened condensed milk and vanilla extract. Whisk until everything is smooth and fully combined. The mixture should be thick, glossy, and smell like vanilla heaven. Taste it—yes, you have to taste it. It should be sweet but not cloying, with a rich, creamy mouthfeel.
- Fold in the whipped topping (2 minutes): Gently fold the thawed whipped topping into the pudding mixture using your spatula. Don’t stir too aggressively—you want to keep the air in the whipped topping to maintain that light, fluffy texture. The final mixture should be smooth, pale, and mousse-like. It should hold soft peaks when you lift the spatula.
- Slice the bananas (3 minutes): Peel the bananas and slice them into 1/4-inch thick rounds. Aim for even slices so they layer nicely. If you’re not layering immediately, toss the slices with a little lemon juice to prevent browning. (trust me on this—it keeps them bright and pretty)
- Start layering (5 minutes): Spread a thin layer of the pudding mixture on the bottom of your 9×13 dish—just enough to coat the surface. This helps the first layer of wafers stick and stay in place. Arrange a single layer of vanilla wafers on top, covering the bottom completely. Don’t overlap them too much, but don’t leave big gaps either.
- Add banana layer (3 minutes): Arrange half of your banana slices evenly over the wafers. Try to cover as much surface area as possible. The bananas add moisture and flavor to every bite.
- Spread half the remaining pudding (3 minutes): Spoon half of the remaining pudding mixture over the bananas and spread it evenly with your spatula. Make sure it reaches all the edges. This layer should be about 1/2-inch thick.
- Repeat the layers (5 minutes): Add another layer of vanilla wafers, followed by the remaining banana slices, and then the rest of the pudding mixture. Spread it smoothly to the edges. The top should be even and creamy.
- Crush some wafers for the top (2 minutes): Take about 10-12 vanilla wafers and crush them in your hand or a ziplock bag. Sprinkle the crumbs evenly over the top layer. This adds a lovely crunch and makes it look finished.
- Cover and chill (minimum 4 hours, overnight is best): Cover the dish tightly with plastic wrap and refrigerate for at least 4 hours, but overnight is ideal. The wafers will soften into cake-like layers, and the flavors will meld together beautifully. You’ll know it’s ready when the top feels firm to the touch and the wafers have completely softened.
One thing I learned the hard way—don’t rush the chilling time. If you cut into it too early, the layers will slide around and you’ll lose that perfect cross-section. Be patient. Your future self will thank you when you pull out a perfectly set, sliceable dessert.
Cooking Tips & Techniques
I’ve made this Creamy No-Bake Banana Pudding Icebox Cake more times than I can count, and I’ve definitely made my share of mistakes along the way. Here are the tips I wish someone had told me from the start.
Use cold milk straight from the fridge. This is non-negotiable. Cold milk helps the instant pudding set up faster and thicker, which means your layers will hold together better. Room temperature milk will give you a runny, soupy mess that won’t set properly. Trust me, I learned this the hard way on a hot summer afternoon when I was too impatient to wait for the milk to chill.
Don’t overmix the pudding. Once you whisk the pudding mix into the milk, stop as soon as it’s smooth and starting to thicken. Overmixing can break down the starches and prevent the pudding from setting properly. You’ll know it’s done when it feels heavy in the bowl and leaves a trail when you lift the whisk.
Let the bananas ripen just right. You want bananas that are yellow with a few brown spots—ripe enough to be sweet and creamy, but firm enough to hold their shape when sliced. Overripe bananas will turn into mushy brown spots in your dessert, and underripe bananas will be starchy and lack flavor. It’s a fine line, but once you know what to look for, you’ll nail it every time.
Layer strategically. Start with a thin layer of pudding on the bottom of the dish to anchor the first layer of wafers. This prevents them from sliding around when you add the next layers. Also, make sure your banana slices are evenly distributed so every bite gets a little bit of fruit.
Plan ahead for the best texture. This dessert needs at least 4 hours to set, but overnight is really where the magic happens. The wafers soften into a cake-like texture, the bananas release their natural sweetness into the pudding, and everything melds together into one cohesive, creamy masterpiece. I always make this the day before I plan to serve it—it takes the pressure off and tastes better for it.
Use a serrated knife for clean slices. When you’re ready to serve, use a sharp serrated knife to cut through the layers cleanly. A dull knife will squish the bananas and drag the pudding around, making a mess of your beautiful dessert. Wipe the knife clean between cuts for the prettiest presentation.
Variations & Adaptations
One of the best things about this Creamy No-Bake Banana Pudding Icebox Cake is how adaptable it is. Here are some of my favorite variations that I’ve tested and loved.
Chocolate Banana Pudding Icebox Cake: Swap the vanilla pudding mix for chocolate instant pudding. The chocolate and banana combination is absolutely divine—it’s like a banana split in cake form. I’ve also added a layer of chocolate sauce between the wafers for extra decadence. This version disappears even faster than the original, if you can believe it.
Peanut Butter Banana Pudding Icebox Cake: Add 1/2 cup of creamy peanut butter to the pudding mixture when you’re whisking in the sweetened condensed milk. The peanut butter adds a savory richness that pairs beautifully with the sweet bananas and vanilla wafers. For extra crunch, sprinkle crushed peanuts between the layers. This one is dangerously good—I’ve been known to eat it for breakfast (no judgment, please).
Berry Banana Pudding Icebox Cake: Layer fresh strawberries, blueberries, or raspberries along with the bananas. The tartness of the berries cuts through the sweetness of the pudding and adds a beautiful pop of color. I love making this version in the summer when berries are at their peak. It’s bright, fresh, and feels a little lighter than the original.
Gluten-Free Version: Use gluten-free vanilla wafers or substitute with gluten-free shortbread cookies. The texture will be slightly different, but it still works beautifully. I’ve tested this with Schar brand vanilla wafers and they soften into a lovely cake-like layer.
Vegan Version: Use full-fat coconut milk or oat milk instead of dairy milk, and a vegan whipped topping like CocoWhip. Swap the sweetened condensed milk for a vegan version—there are several good ones on the market now. The texture will be a bit different, but the flavor is still amazing. I’ve served this to vegan friends who couldn’t stop eating it.
Individual Serving Cups: Instead of a large dish, layer everything into individual mason jars or dessert cups. This is perfect for parties or meal prep—just grab one and go. Plus, they look adorable on a dessert table.
Serving & Storage Suggestions
This Creamy No-Bake Banana Pudding Icebox Cake is best served cold, straight from the fridge. The texture is at its peak when the wafers have softened but still have a little bit of structure—usually after about 6-8 hours of chilling. Here’s how to serve and store it like a pro.
Serving Temperature: Serve chilled, but let it sit at room temperature for about 10 minutes before cutting. This takes the edge off the cold and allows the flavors to open up. If it’s too cold, the pudding can feel a bit dense.
Presentation Ideas: For the prettiest presentation, garnish the top with fresh banana slices (tossed in lemon juice to prevent browning), a few whole vanilla wafers, and a dollop of whipped cream. A drizzle of caramel sauce or chocolate syrup also works beautifully. I like to dust the top with a little cinnamon or nutmeg for a warm, aromatic finish.
Complementary Dishes: This dessert pairs wonderfully with a cup of hot coffee or a cold glass of milk. If you’re serving it after a meal, it’s the perfect follow-up to something savory and hearty—like a cozy baked ziti with Italian sausage or a creamy one-pot Cajun chicken pasta. The cool, creamy sweetness balances out the richness of a savory main course beautifully.
Storage Instructions: Cover the dish tightly with plastic wrap or a lid and store in the refrigerator for up to 3 days. The bananas will start to brown after about 24 hours, but the flavor will still be excellent. If you’re making this for a party, I recommend assembling it no more than 24 hours in advance for the best appearance.
Freezing Instructions: You can freeze this dessert for up to 1 month, but the texture will change slightly. The bananas will become softer and the wafers will be completely cake-like when thawed. To freeze, wrap the dish tightly in plastic wrap and then foil. Thaw in the refrigerator overnight before serving. I’ve done this for holiday prep, and while it’s not as perfect as fresh, it’s still delicious and a huge time-saver.
Reheating: You don’t need to reheat this dessert—it’s meant to be served cold. But if you want to soften it slightly, let it sit at room temperature for 20 minutes before serving.
How Flavors Develop: The flavors actually get better over time as the bananas infuse the pudding with their sweetness and the wafers soften into a cake-like texture. Day two is often even better than day one, which is why I always recommend making this a day ahead.
Nutritional Information & Benefits
Let’s be honest—this Creamy No-Bake Banana Pudding Icebox Cake is a treat, not a health food. But that doesn’t mean it can’t fit into a balanced lifestyle. Here’s what you need to know.
Estimated Nutritional Values (per serving, based on 12 servings):
| Nutrient | Amount |
|---|---|
| Calories | 385 |
| Total Fat | 14g |
| Saturated Fat | 8g |
| Cholesterol | 25mg |
| Sodium | 420mg |
| Total Carbohydrates | 60g |
| Dietary Fiber | 2g |
| Sugars | 42g |
| Protein | 6g |
Health Benefits of Key Ingredients: Bananas are packed with potassium, which supports heart health and muscle function. They also contain vitamin B6 and vitamin C. Whole milk provides calcium and vitamin D for bone health. The vanilla wafers? Well, they bring joy—and that counts for something, right?
Dietary Considerations: This recipe contains dairy and gluten. For a gluten-free version, use gluten-free vanilla wafers. For a dairy-free version, use plant-based milk and whipped topping. It’s not suitable for a low-carb or keto diet due to the sugar content, but you can experiment with sugar-free pudding mix and a sugar-free sweetened condensed milk alternative.
Potential Allergens: This recipe contains milk, wheat (in the wafers), and may contain traces of soy and nuts depending on the brands you use. Always check labels if you’re serving someone with allergies.
My Personal Take: I believe in enjoying dessert without guilt. This is a special occasion dessert—something you make for birthdays, holidays, or when you just need a little comfort. It’s not an everyday thing, and that’s okay. The key is balance. Pair it with a healthy meal, savor every bite, and don’t beat yourself up for enjoying something delicious.
Conclusion
This Creamy No-Bake Banana Pudding Icebox Cake is the kind of dessert that feels like a hug in a dish. It’s simple enough to throw together on a busy weekday, but impressive enough to serve at a dinner party. The combination of silky vanilla pudding, sweet bananas, and soft vanilla wafers is pure comfort—the kind of dessert that makes you close your eyes after the first bite and just savor the moment.
I love this recipe because it’s forgiving. If your layers aren’t perfect, it still tastes amazing. If you use slightly different proportions, it still works. It’s a dessert that doesn’t demand perfection—it just asks you to enjoy the process and the result. And honestly, that’s my favorite kind of cooking.
I’d love to hear how yours turns out! Did you try a variation? Add your own twist? Drop a comment below and let me know—I read every single one and I love seeing your creations. And if you’re looking for more no-bake desserts, check out this creamy no-bake cheesecake with graham crust—it’s another one of my favorites that comes together without turning on the oven. Happy cooking, and remember: the best desserts are the ones made with love (and a little bit of patience).
Frequently Asked Questions
Can I use homemade whipped cream instead of Cool Whip?
Absolutely! Just make sure your whipped cream is stabilized so it holds up over time. Whip 1 1/2 cups of heavy cream with 2 tablespoons of powdered sugar until stiff peaks form. It won’t hold up quite as long as Cool Whip, but it tastes amazing and has a more natural flavor.
Why is my pudding runny?
This usually happens if the milk isn’t cold enough, or if you didn’t let the pudding set before layering. Make sure your milk is straight from the fridge, and let the pudding mixture sit for a full 5 minutes before using it. Also, check that you’re using instant pudding mix, not cook-and-serve—they’re different and the cook-and-serve won’t set properly.
Can I make this dessert sugar-free?
Yes! Use sugar-free instant vanilla pudding mix, sugar-free sweetened condensed milk (or a homemade version), and light whipped topping. The texture will be slightly different, but the flavor is still great. I’ve made this for diabetic friends and they loved it.
How do I keep the bananas from turning brown?
Toss the sliced bananas in a little lemon juice or pineapple juice before layering. The acid prevents oxidation and keeps them looking fresh. Don’t use too much—just a light toss is enough. Also, make sure the bananas are fully covered by the pudding mixture, which acts as a barrier against air.
Can I use a different type of cookie instead of vanilla wafers?
Definitely! Shortbread cookies, graham crackers, or even ladyfingers work beautifully. Each one will give a slightly different texture and flavor. I’ve used Biscoff cookies for a spiced twist, and it was incredible. Just keep in mind that different cookies soften at different rates, so adjust your chilling time accordingly.
Pin This Recipe!
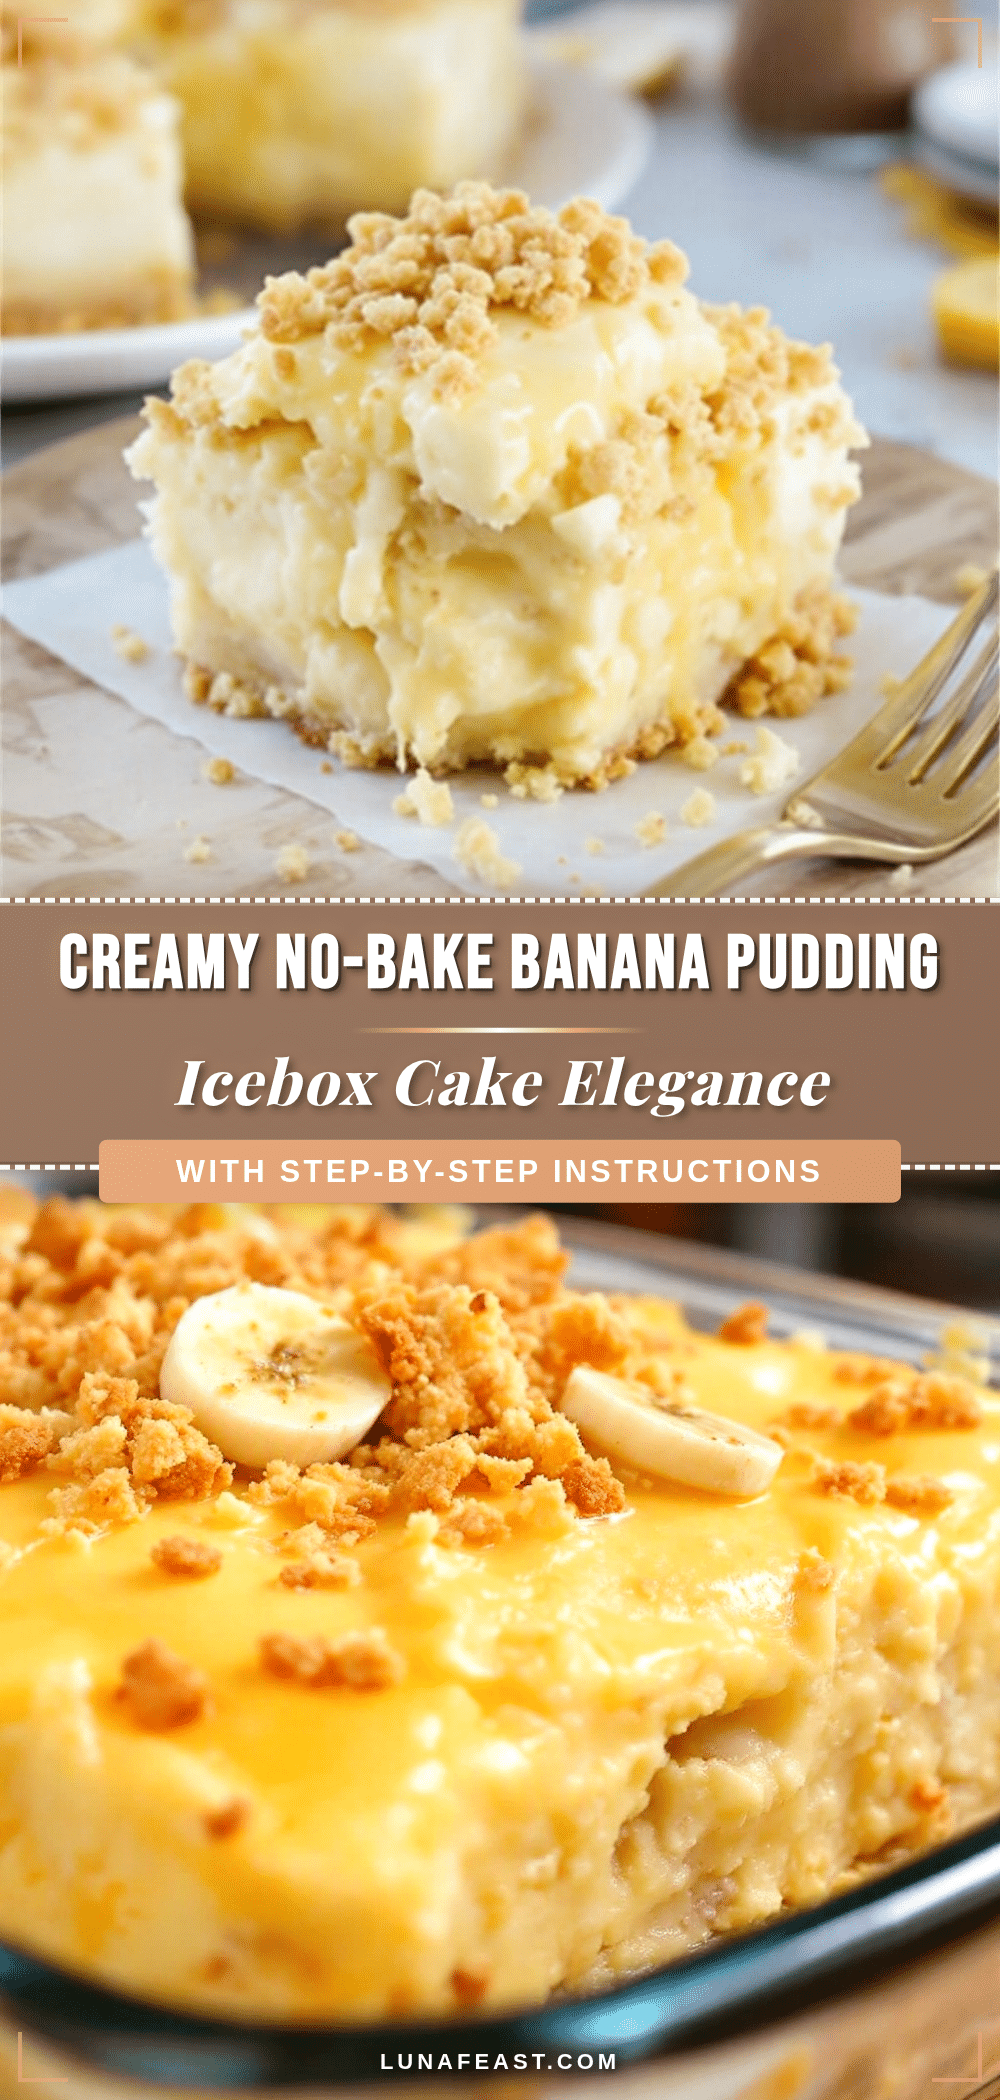
Creamy No-Bake Banana Pudding Icebox Cake (Best Easy Dessert)
This Creamy No-Bake Banana Pudding Icebox Cake is exactly what happens when laziness meets a really good idea. It’s got all the classic flavors—ripe bananas, silky vanilla pudding, and those soft, almost-cookie-like vanilla wafers—but it stacks them into a layered dessert that sets up in the fridge instead of the oven.
- Prep Time: 20 minutes
- Cook Time: 0 minutes
- Total Time: 4 hours 20 minutes (includes chilling time)
- Yield: 12 servings 1x
- Category: Dessert
- Cuisine: American
Ingredients
- 3 boxes (3.4 oz each) instant vanilla pudding mix
- 4 cups cold whole milk
- 1 can (14 oz) sweetened condensed milk
- 1 teaspoon vanilla extract
- 1 package (12 oz) vanilla wafers
- 4–5 ripe but firm bananas
- 1 container (8 oz) frozen whipped topping, thawed
- Optional: 1/2 cup sour cream
- Optional toppings: crushed vanilla wafers, sliced bananas, whipped cream
Instructions
- Make the pudding mixture (5 minutes): In your large mixing bowl, whisk together the instant vanilla pudding mix and cold whole milk. Whisk vigorously for about 2 minutes until the mixture starts to thicken. Let it sit for 5 minutes to fully thicken. (If using optional sour cream, whisk it in now.)
- Add the sweetened condensed milk and vanilla (2 minutes): Pour in the sweetened condensed milk and vanilla extract. Whisk until everything is smooth and fully combined.
- Fold in the whipped topping (2 minutes): Gently fold the thawed whipped topping into the pudding mixture using your spatula. Don’t stir too aggressively.
- Slice the bananas (3 minutes): Peel the bananas and slice them into 1/4-inch thick rounds.
- Start layering (5 minutes): Spread a thin layer of the pudding mixture on the bottom of your 9×13 dish. Arrange a single layer of vanilla wafers on top, covering the bottom completely.
- Add banana layer (3 minutes): Arrange half of your banana slices evenly over the wafers.
- Spread half the remaining pudding (3 minutes): Spoon half of the remaining pudding mixture over the bananas and spread it evenly with your spatula.
- Repeat the layers (5 minutes): Add another layer of vanilla wafers, followed by the remaining banana slices, and then the rest of the pudding mixture. Spread it smoothly to the edges.
- Crush some wafers for the top (2 minutes): Take about 10-12 vanilla wafers and crush them. Sprinkle the crumbs evenly over the top layer.
- Cover and chill (minimum 4 hours, overnight is best): Cover the dish tightly with plastic wrap and refrigerate for at least 4 hours, but overnight is ideal.
Notes
Use cold milk straight from the fridge for best results. Don’t overmix the pudding. Let the bananas ripen just right (yellow with a few brown spots). Layer strategically starting with a thin layer of pudding on the bottom. Plan ahead for the best texture—overnight chilling is ideal. Use a serrated knife for clean slices.
Nutrition
- Serving Size: 1 slice (1/12 of cak
- Calories: 385
- Sugar: 42
- Sodium: 420
- Fat: 14
- Saturated Fat: 8
- Carbohydrates: 60
- Fiber: 2
- Protein: 6
Keywords: no-bake banana pudding, icebox cake, banana dessert, no-bake dessert, easy dessert, vanilla pudding, banana pudding cake


