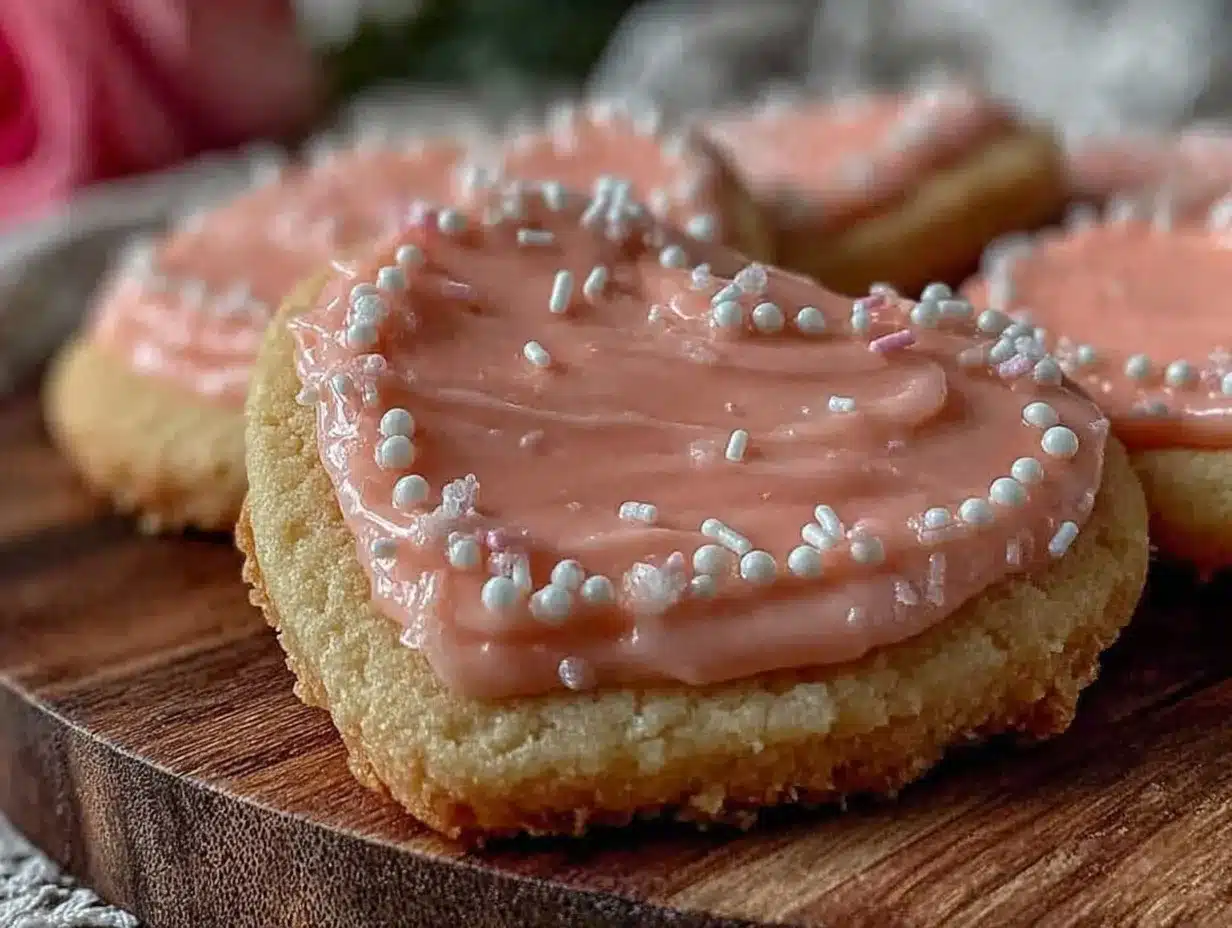
“Do we have any cookies for the party tomorrow?” my daughter asked, barely glancing up from her homework. Honestly, my mind was already racing through the week’s chaos—meetings, errands, and somehow, no cookies in the house. I wasn’t exactly prepared for baking, but the idea of whipping up something quick and special hit me like a little spark. So, there I was, digging through the pantry late at night, thinking, “Maybe heart-shaped sugar cookies with royal icing? Could I pull that off with what I have?”
Turns out, yes. And not just pull off, but nail it in a way that surprised me. The dough came together faster than I expected, and the royal icing—well, it gave me a chance to get creative (and patient, because piping that delicate icing is an art!). What made it stick with me wasn’t just the sweetness or the perfect crunch but the quiet moment of calm amid the bustle, decorating those little hearts one by one.
That night, I realized these cookies weren’t just for parties or celebrations; they became a go-to treat when you want to say something with a little extra care—without fuss. Maybe it’s the nostalgic sugar cookie base or the soft, glossy icing that feels like a tiny canvas for your mood. Whatever it is, these Perfect Heart-Shaped Sugar Cookies with Royal Icing have a way of making simple moments feel a bit more special.
And honestly? Once you master the dough and get comfortable with the icing, you’ll find yourself making these more often than planned. That’s why I’m sharing all my tips and tricks here—so you can enjoy the same sweet surprise whenever the cookie craving (or last-minute request) hits.
Why You’ll Love This Perfect Heart-Shaped Sugar Cookies Recipe
After testing and tweaking this recipe multiple times, I can confidently say it’s a keeper. Here’s why this heart-shaped sugar cookie recipe has become a favorite in my kitchen—and why it might soon be in yours:
- Quick & Easy: The dough comes together in about 15 minutes, and the cookies bake in just 10-12 minutes—perfect for busy days or last-minute celebrations.
- Simple Ingredients: No need for fancy or hard-to-find items. The recipe uses pantry staples like flour, sugar, butter, and eggs. I usually keep King Arthur flour on hand for the best texture.
- Perfect for Special Occasions: Whether it’s Valentine’s Day, anniversaries, or just because, the heart shape adds that sweet touch without extra effort.
- Crowd-Pleaser: Kids adore the sweet, buttery flavor, and adults appreciate the balance of soft centers with slightly crisp edges.
- Unbelievably Delicious Royal Icing: The royal icing dries smooth and hard, making these cookies ideal for stacking or gifting. Plus, it’s a perfect canvas for creative decorating.
- Not Your Average Sugar Cookie: The dough is rolled just right to keep the cookies from spreading too much, so those heart shapes stay crisp and defined.
This isn’t just another sugar cookie recipe—it’s the one that’s saved me more than once when I needed a sweet pick-me-up or a thoughtful treat to share. If you’ve ever found yourself scrambling for a last-minute dessert, this recipe will be your new secret weapon. And if you like combining quick preparation with a little artistic flair, you’ll especially appreciate the royal icing tips I share below.
What Ingredients You Will Need for Perfect Heart-Shaped Sugar Cookies with Royal Icing
This recipe keeps it straightforward. Each ingredient plays a role in creating that tender, buttery cookie and the smooth royal icing glaze. Most are pantry staples, so you probably have everything on hand already.
For the Sugar Cookie Dough:
- All-purpose flour – 2 ¾ cups (345 grams); I prefer King Arthur for consistent texture
- Baking powder – 1 teaspoon (4 grams); helps the cookies rise just enough
- Salt – ½ teaspoon (3 grams); balances the sweetness
- Unsalted butter, softened – 1 cup (226 grams); room temperature for easy creaming
- Granulated sugar – 1 ¼ cups (250 grams); the right amount for sweetness without overpowering
- Large egg – 1; room temperature to help bind the dough
- Pure vanilla extract – 1 teaspoon (5 ml); adds warmth and depth
- Almond extract (optional) – ½ teaspoon (2.5 ml); for a subtle nutty note that pairs perfectly with royal icing
For the Royal Icing:
- Powdered sugar – 4 cups (480 grams); sifted to avoid lumps
- Pasteurized egg whites or meringue powder – 3 tablespoons (30 grams); meringue powder is easier and safer
- Fresh lemon juice – 2 tablespoons (30 ml); brightens the icing flavor and helps it set
- Water – 3-5 tablespoons (45-75 ml); adjust for consistency
- Food coloring (gel or paste) – optional; gel colors won’t thin the icing
For best results, I recommend using Wilton meringue powder and gel food colors. They give you control over consistency and vibrant colors without watering down your icing. If you’re baking in warmer seasons, keep your dough chilled longer to avoid spreading. And in summer, swapping vanilla for fresh lemon zest in the dough adds a refreshing twist.
Equipment Needed
- Mixing bowls: One large for the dough and another for the icing.
- Electric mixer: A stand mixer makes creaming butter and whipping icing easier, but a hand mixer works fine too.
- Rolling pin: Essential for rolling out the dough evenly; using adjustable rings can help keep thickness consistent.
- Heart-shaped cookie cutters: Size depends on your preference—mine are about 3 inches wide.
- Baking sheets: Non-stick or lined with parchment paper to prevent sticking.
- Wire cooling racks: Allows cookies to cool completely before icing.
- Piping bags and tips: For decorating with royal icing; fine round tips (#1 or #2) work best for outlining and detail.
- Spatula or scraper: To help transfer and smooth dough.
If you don’t have piping bags, zip-top bags with a tiny corner snipped off make a handy substitute. I’ve also used silicone baking mats on my sheets, which help cookies bake evenly and are easy to clean. Keeping your dough chilled while prepping equipment can save you some frustration with sticky dough.
Preparation Method
- Mix dry ingredients: In a bowl, whisk together 2 ¾ cups (345 g) of flour, 1 teaspoon (4 g) baking powder, and ½ teaspoon (3 g) salt. Set aside. This step ensures even distribution of leavening and salt, which helps the cookies bake uniformly.
- Cream butter and sugar: Using a stand or hand mixer, beat 1 cup (226 g) softened unsalted butter with 1 ¼ cups (250 g) granulated sugar on medium speed for about 3-4 minutes. The mixture should look pale and fluffy—that’s your cue the air is incorporated, making cookies light.
- Add egg and extracts: Beat in 1 large room-temperature egg, 1 teaspoon (5 ml) vanilla extract, and if using, ½ teaspoon (2.5 ml) almond extract. Mix until combined, scraping down sides if needed. The dough might look slightly curdled, but that’s fine.
- Combine wet and dry: Gradually add the flour mixture to the butter mixture on low speed. Mix until just combined—avoid overmixing or the cookies can turn tough. The dough will be soft but not sticky. If too sticky, add a tablespoon of flour at a time.
- Chill the dough: Divide the dough in half, flatten into disks, wrap in plastic wrap, and chill for at least 1 hour. This step helps the dough firm up, making it easier to roll and preventing spreading during baking.
- Preheat oven: Set to 350°F (175°C). Line baking sheets with parchment paper or silicone mats.
- Roll and cut: On a lightly floured surface, roll one disk of dough to about ¼ inch (6 mm) thickness. Use your heart-shaped cookie cutter to cut cookies, transferring them carefully to the baking sheet, spaced about 1 inch apart.
- Bake: Place baking sheets in the oven and bake for 10-12 minutes, or until the edges just start to turn golden. The centers should still look slightly soft. Overbaking leads to dry cookies.
- Cool: Let cookies cool on the baking sheet for 5 minutes before transferring to wire racks to cool completely. Only ice completely cooled cookies to prevent royal icing from melting.
- Prepare royal icing: In a clean bowl, combine 4 cups (480 g) powdered sugar, 3 tablespoons (30 g) meringue powder, 2 tablespoons (30 ml) lemon juice, and 3 tablespoons (45 ml) water. Beat on high speed until stiff peaks form, about 5-7 minutes. Adjust water to reach piping consistency (should hold shape but flow off spoon).
- Decorate: Divide icing if using colors. Outline cookies first with thicker icing, then flood the center with thinner consistency. Use toothpicks or a scribe tool to smooth icing or create patterns. Let icing dry at least 4 hours or overnight for best results.
Pro tip: Keep a damp cloth over your piping bags when not in use to prevent icing from drying out. I’ve found that chilling the decorated cookies for 15 minutes in the fridge before the icing fully sets helps avoid smudges if you’re stacking them for gifting.
Cooking Tips & Techniques for Flawless Sugar Cookies and Royal Icing
Getting perfect sugar cookies and royal icing takes some practice, but a few tricks make a world of difference.
- Don’t skip chilling: Chilling the dough is key to controlling spread and preserving the sharp heart shape. I’ve learned this the hard way after a batch that looked more like blobs than hearts!
- Use room-temperature ingredients: Butter and eggs blend more smoothly, giving you a better dough texture.
- Roll evenly: Use rolling pin guides or bands to keep dough thickness consistent. Thin spots can burn; thick ones take longer to bake through.
- Test bake: Bake a single cookie first to check oven temperature and baking time. Ovens vary, and this helps avoid burnt or underdone batches.
- Royal icing consistency: For outlining, thicker icing holds edges better; for flooding, thin with water until it flows smoothly but isn’t runny. Gel colors are your friend to keep icing thick without watering down.
- Patience with drying: Rushing icing to set causes smudges. I usually let cookies sit overnight in an open box or on a rack to harden fully.
- Practice makes perfect: Don’t worry if your first few cookies aren’t Instagram-ready. I’ve been there, and honestly, the taste is what wins hearts, not always the decoration.
These tips helped me transform from a hesitant cookie decorator to someone who actually enjoys the process—and the results. If you want more tips on easy breakfast treats to pair with your baking mornings, you might find inspiration in my fluffy sheet pan pancakes recipe—perfect for a cozy weekend.
Variations & Adaptations for Your Heart-Shaped Sugar Cookies
One of the best things about this recipe is how easy it is to adapt to your taste or dietary needs. Here are a few ideas to make these cookies your own:
- Gluten-Free: Substitute the all-purpose flour with a 1:1 gluten-free baking flour blend. I’ve tried Bob’s Red Mill with great results, though the texture is slightly softer.
- Flavor Twists: Swap vanilla and almond extracts for citrus zest, like lemon or orange, for a fresh, bright flavor. Adding a pinch of cinnamon or cardamom to the dough adds warmth perfect for winter treats.
- Royal Icing Variations: Try adding a few drops of peppermint extract to the icing for a festive touch or substitute lemon juice with orange juice for a subtle difference.
- Decorating Styles: Instead of classic royal icing, try a simple glaze with powdered sugar and milk for a softer finish. Or, dip half the cookie in melted chocolate for extra indulgence.
- Holiday Themes: Use different cookie cutters and color the royal icing accordingly. Hearts aren’t just for Valentine’s Day—they can be festive for Christmas or weddings too.
Once I made a batch where I swapped out half the sugar for coconut sugar—it added a nice caramel note but kept the texture intact. It’s fun to experiment and find your signature spin on this classic.
Serving & Storage Suggestions for Your Heart-Shaped Sugar Cookies
These cookies shine when served at room temperature, allowing the buttery flavor and smooth royal icing to be enjoyed fully. They’re perfect on their own or paired with a warm cup of tea or coffee.
For gatherings or gifting, arrange them on a pretty platter or stack them in a tin lined with parchment paper. If you want to add a breakfast twist, pairing them with cheesy ham and cheese breakfast sliders makes for a sweet-and-savory spread that delights every crowd.
Storage is straightforward—keep the cookies in an airtight container at room temperature for up to 5 days. If your kitchen is humid, storing them in the fridge helps, but bring them back to room temperature before serving for the best texture.
For longer storage, freeze undecorated cookies in a single layer on a baking sheet, then transfer to a freezer-safe bag for up to 3 months. Icing is best done after thawing if you want that fresh look and texture.
When reheating, avoid the microwave as it can soften the icing too much. Instead, let cookies warm in a 200°F (95°C) oven for 3-5 minutes if you want a fresh-baked feel.
Nutritional Information & Benefits
Each heart-shaped sugar cookie, depending on size, contains approximately 150-180 calories, with about 7 grams of fat and 20 grams of carbohydrates. The royal icing adds some extra sugar but is used sparingly for decoration.
Key ingredients like butter provide richness and a source of fat-soluble vitamins, while eggs add protein and moisture. Using real vanilla extract over artificial flavoring contributes to a more natural taste.
This recipe can be modified to suit gluten-free diets by swapping flours and can easily be adapted for egg-free or dairy-free needs by using suitable substitutes, making it accessible for many dietary preferences.
From a wellness perspective, these cookies are a treat best enjoyed in moderation, but the homemade aspect means you control the ingredients—no preservatives or artificial additives—just simple, honest baking.
Conclusion
This Perfect Heart-Shaped Sugar Cookies with Royal Icing recipe is truly a gem for anyone who loves a sweet treat with a personal touch. Whether you’re baking for a holiday, a party, or just because, these cookies bring a little joy through their buttery flavor and delicate decoration.
Don’t hesitate to customize the flavors, colors, and decorations to suit your style or occasion. I love how these cookies give me a chance to slow down and get creative, even during a hectic week. They remind me that sometimes the simplest recipes make the biggest memories.
If you’ve tried these cookies, I’d love to hear how you decorated yours or any twists you added! Share your thoughts or favorite cookie moments below—baking is always better when we share.
And now, with this recipe in hand, you’re ready to bring a little sweetness to any day.
Frequently Asked Questions about Perfect Heart-Shaped Sugar Cookies with Royal Icing
Can I make the dough ahead of time?
Yes! You can prepare the dough up to 3 days in advance and keep it wrapped tightly in the fridge. Let it sit at room temperature for 10-15 minutes before rolling.
How do I fix royal icing that’s too runny?
Add more powdered sugar a tablespoon at a time until it thickens to your desired consistency. If too thick, add a few drops of water slowly.
Can I use egg substitutes in the dough?
Absolutely. For egg-free options, use flax eggs (1 tablespoon ground flaxseed + 3 tablespoons water) or commercial egg replacers, but texture may vary slightly.
How long does royal icing take to dry completely?
Typically 4-6 hours at room temperature, but overnight drying is best for a hard, smooth finish.
What’s the best way to store decorated cookies?
Keep them in an airtight container at room temperature for up to 5 days. Separate layers with parchment paper to prevent sticking.
Pin This Recipe!
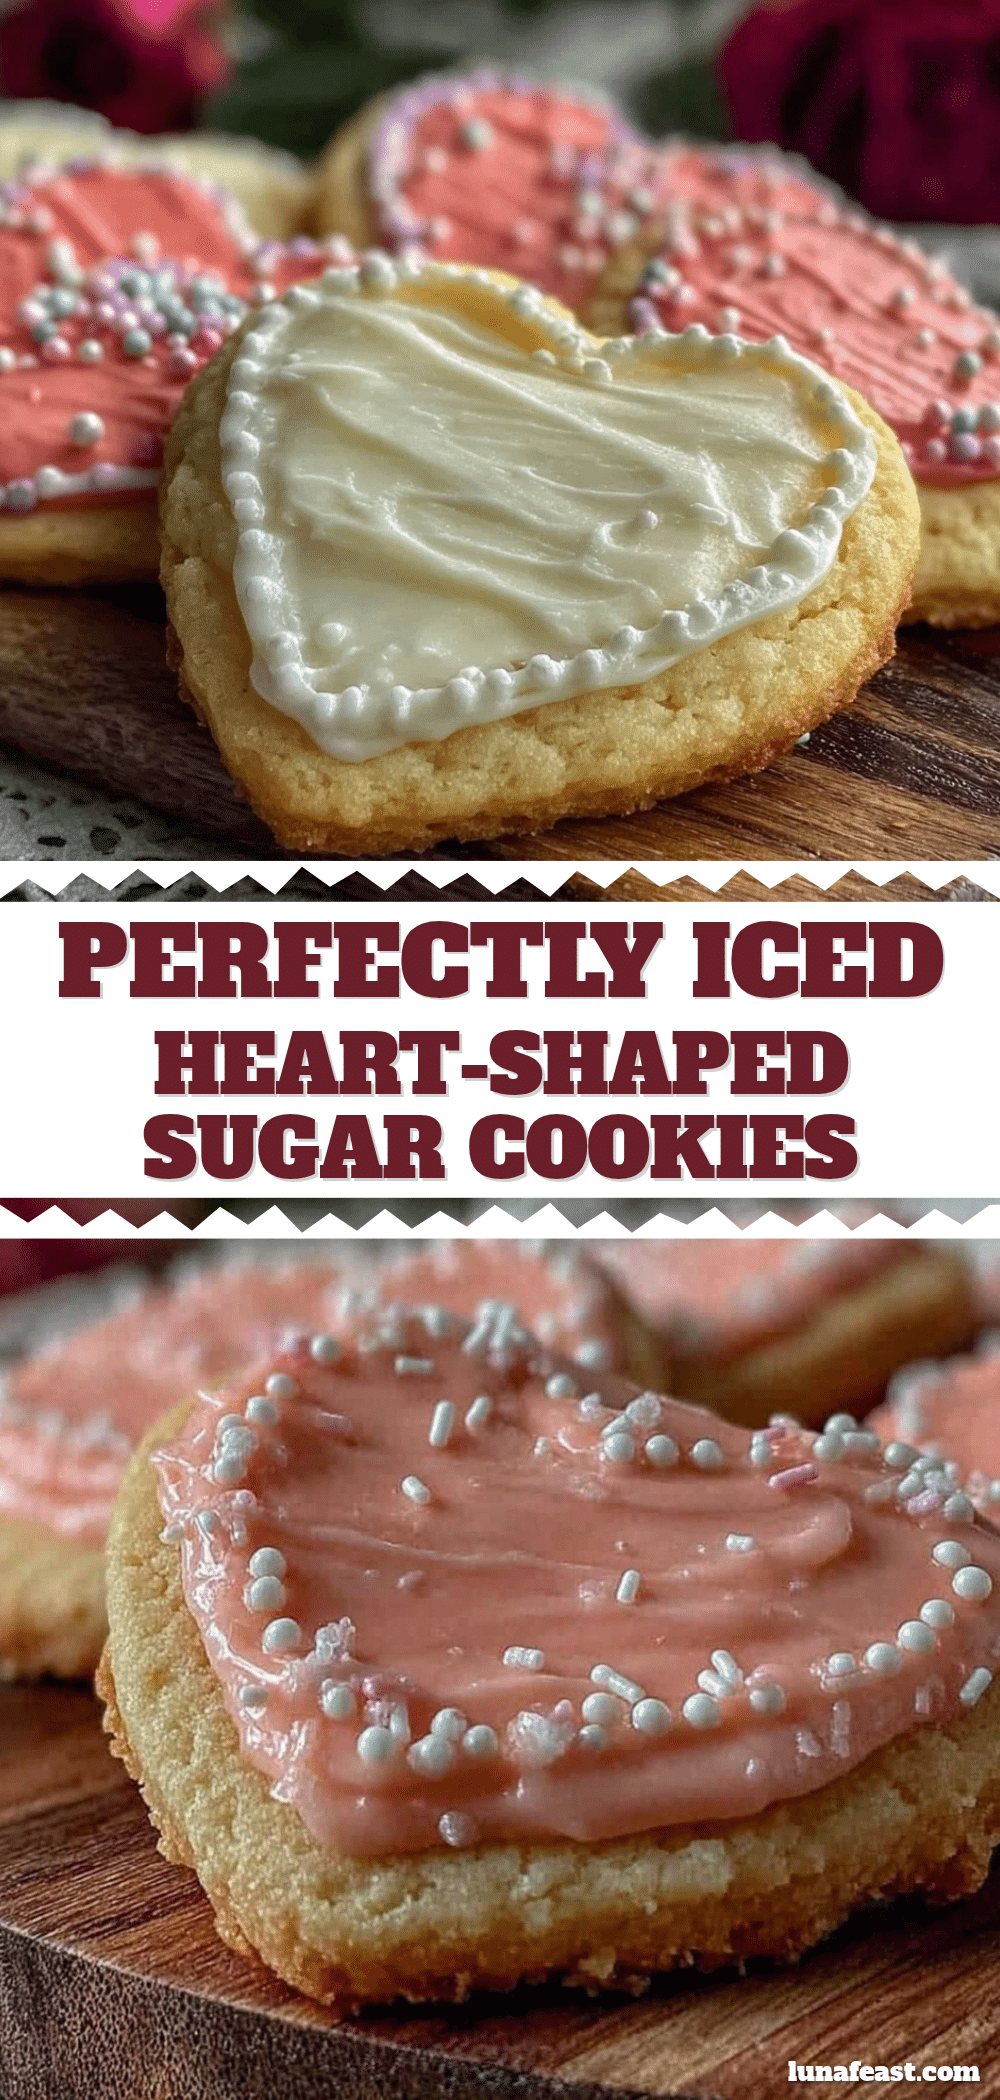
Perfect Heart-Shaped Sugar Cookies with Royal Icing

A quick and easy recipe for tender, buttery heart-shaped sugar cookies decorated with smooth, hard royal icing—perfect for special occasions or everyday treats.
- Prep Time: 20 minutes
- Cook Time: 12 minutes
- Total Time: 1 hour 32 minutes
- Yield: 24 cookies 1x
- Category: Dessert
- Cuisine: American
Ingredients
- 2 ¾ cups (345 grams) all-purpose flour
- 1 teaspoon (4 grams) baking powder
- ½ teaspoon (3 grams) salt
- 1 cup (226 grams) unsalted butter, softened
- 1 ¼ cups (250 grams) granulated sugar
- 1 large egg, room temperature
- 1 teaspoon (5 ml) pure vanilla extract
- ½ teaspoon (2.5 ml) almond extract (optional)
- 4 cups (480 grams) powdered sugar, sifted
- 3 tablespoons (30 grams) pasteurized egg whites or meringue powder
- 2 tablespoons (30 ml) fresh lemon juice
- 3–5 tablespoons (45–75 ml) water
- Food coloring (gel or paste, optional)
Instructions
- Mix dry ingredients: In a bowl, whisk together flour, baking powder, and salt. Set aside.
- Cream butter and sugar: Beat softened butter with granulated sugar on medium speed for 3-4 minutes until pale and fluffy.
- Add egg and extracts: Beat in egg, vanilla extract, and almond extract if using until combined.
- Combine wet and dry: Gradually add flour mixture to butter mixture on low speed until just combined. If dough is too sticky, add flour tablespoon by tablespoon.
- Chill the dough: Divide dough in half, flatten into disks, wrap in plastic wrap, and chill for at least 1 hour.
- Preheat oven to 350°F (175°C). Line baking sheets with parchment paper or silicone mats.
- Roll and cut: Roll one disk of dough on a lightly floured surface to ¼ inch (6 mm) thickness. Cut with heart-shaped cookie cutter and place cookies 1 inch apart on baking sheet.
- Bake: Bake for 10-12 minutes until edges start to turn golden but centers remain slightly soft.
- Cool: Let cookies cool on baking sheet for 5 minutes, then transfer to wire racks to cool completely before icing.
- Prepare royal icing: Beat powdered sugar, meringue powder, lemon juice, and water on high speed until stiff peaks form (5-7 minutes). Adjust water for piping consistency.
- Decorate: Outline cookies with thicker icing, flood centers with thinner icing. Use toothpicks or scribe tool to smooth or create patterns. Let icing dry at least 4 hours or overnight.
Notes
Chill dough for at least 1 hour to prevent spreading and keep heart shapes crisp. Use gel food coloring to avoid thinning royal icing. Let decorated cookies dry overnight for best results. Keep piping bags covered with a damp cloth to prevent icing from drying out. Chilling decorated cookies for 15 minutes before icing sets helps avoid smudges when stacking.
Nutrition
- Serving Size: 1 cookie
- Calories: 165
- Sugar: 12
- Sodium: 90
- Fat: 7
- Saturated Fat: 4
- Carbohydrates: 20
- Fiber: 0.5
- Protein: 2
Keywords: heart-shaped sugar cookies, royal icing, sugar cookies recipe, easy sugar cookies, homemade cookies, cookie decorating, Valentine's Day cookies