Introduction
“Do you have any of those recipes that just seem to magically turn a regular night into something special?” my friend Sarah asked me one chilly November evening. I was mid-batch, brushing melted honey butter over a tray of golden dinner rolls, the warm scent filling my kitchen and creeping into the living room where the soft hum of a fire added background comfort. Honestly, I wasn’t expecting much when I first tried this recipe — I was just looking for something quick to serve alongside a simple stew. But the moment I pulled these fluffy honey butter dinner rolls from the oven, I knew I had stumbled onto a keeper.
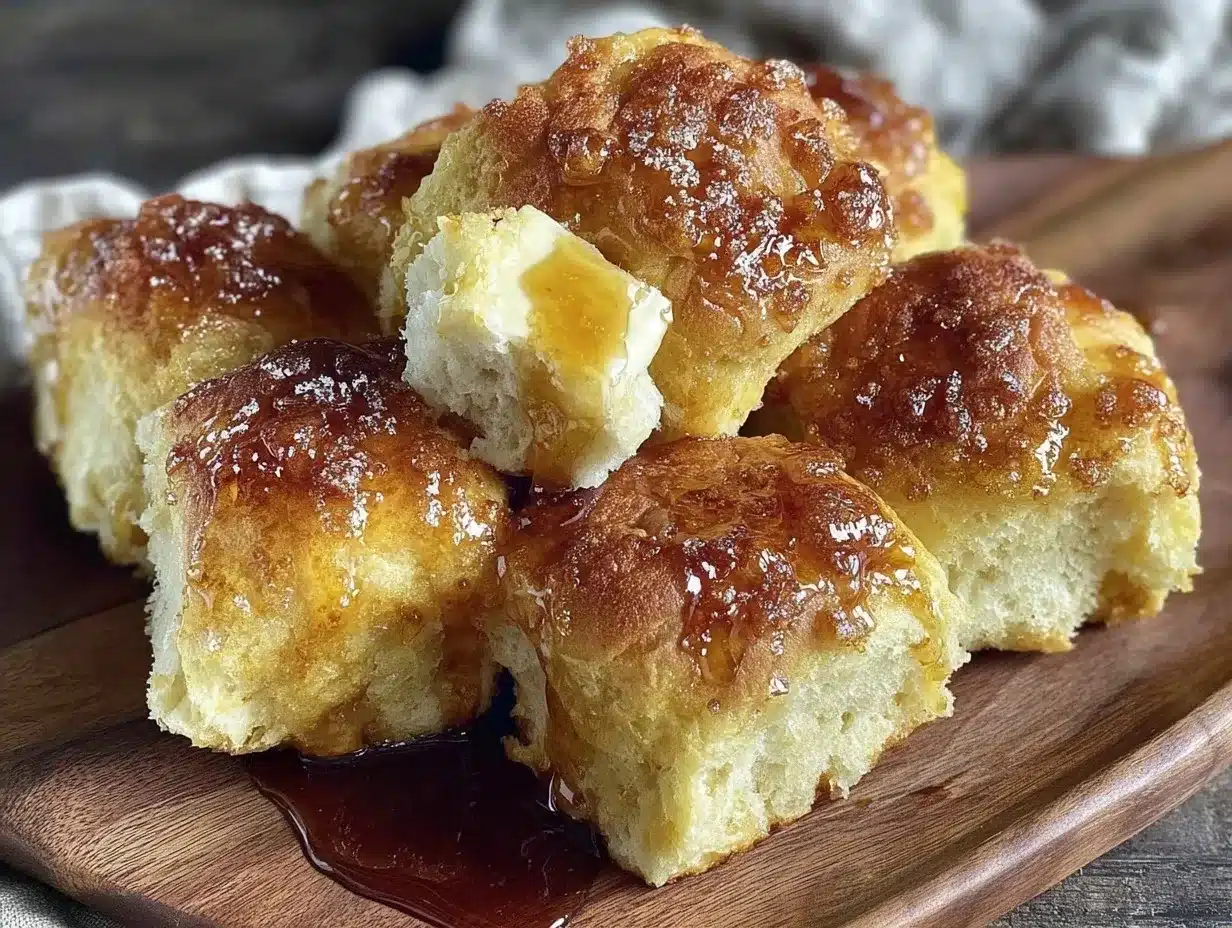
There’s something quietly satisfying about the way the honey’s sweetness plays against the buttery softness. The texture is so pillowy that, well, you almost want to eat them plain, out of hand. But the butter glaze? That’s the secret handshake. Over a few cozy gatherings since, I watched these rolls become a bit of a legend among my friends and family. They’re the kind of recipe that invites you to linger a little longer at the table, to savor the small moments — you know, that warm, filling feeling that makes a house a home.
What surprised me most, though, is how simple they are. No tricky yeast rituals or endless kneading—just straightforward steps that anyone can follow, even if you’re not really a baker. And that’s why these honey butter dinner rolls stuck around in my recipe box. They’re reliable, comforting, and perfectly suited for those times you want to gather people close without fuss. If you’ve ever found yourself scrambling for a last-minute side or craving something a bit more soulful than plain bread, these rolls might just be your new best friend.
Why You’ll Love This Recipe
I’ve made these fluffy honey butter dinner rolls more times than I can count, and here’s why they’ve earned a permanent spot on my table:
- Quick & Easy: From start to finish, they come together in about 90 minutes — perfect for busy weeknights or those unexpected dinner guests.
- Simple Ingredients: You probably already have everything in your pantry and fridge—flour, yeast, honey, butter, and a few basics. No fancy trips needed.
- Perfect for Cozy Gatherings: Whether it’s a chilly family dinner, an intimate holiday brunch, or just a casual weekend meal, these rolls fit right in.
- Crowd-Pleaser: Kids and adults alike can’t seem to get enough. I’ve had friends ask me to bring these to potlucks more than once.
- Unbelievably Delicious: The honey butter glaze adds a subtle sweetness that balances the soft, fluffy crumb — it’s comfort food with a gentle twist.
What sets this recipe apart is the way the dough is gently enriched with honey and a touch of butter, creating a tender crumb without feeling heavy. Plus, the honey butter glaze after baking imbues the rolls with a shiny finish and a hint of sticky sweetness that feels just right—not overpowering, but enough to make you close your eyes after the first bite. This recipe isn’t just bread; it’s a little moment of warmth you can count on for those cozy times with the people you care about.
What Ingredients You Will Need
This recipe uses simple, wholesome ingredients to deliver bold flavor and satisfying texture without the fuss. Most are pantry staples, but I’ve added a few notes to help you get the best results.
- All-purpose flour (3 ½ cups / 440 grams): The foundation of our dough. I recommend King Arthur for reliable texture.
- Active dry yeast (2 ¼ teaspoons / 1 packet): Make sure it’s fresh to get a good rise.
- Warm milk (1 cup / 240 ml): Around 110°F (43°C), the warmth wakes up the yeast without killing it.
- Honey (¼ cup / 85 grams), plus extra for glaze: Adds natural sweetness and helps keep the rolls soft.
- Unsalted butter (6 tablespoons / 85 grams), softened, plus extra for glaze: Butter is key for tenderness and richness.
- Large eggs (2), room temperature: Bring structure and moisture.
- Salt (1 teaspoon): Just enough to balance the sweetness and deepen flavor.
- Optional: Baking spray or extra butter for greasing your pan.
For the glaze, I like to melt together butter and honey to brush over the warm rolls, which gives them that signature golden shine and sticky sweetness. If you want a dairy-free option, swap the butter for coconut oil and use a plant-based milk like almond or oat milk — it still turns out wonderfully fluffy.
Equipment Needed
- Mixing bowls: One large for the dough, and a smaller one for proofing the yeast.
- Measuring cups and spoons: Accuracy matters here, especially with yeast and liquids.
- Stand mixer with dough hook (optional): Makes kneading easier, but you can definitely knead by hand.
- 9×13 inch (23×33 cm) baking dish or similar-sized baking pan: Holds the rolls snugly so they rise nicely together.
- Pastry brush: For that all-important honey butter glaze.
- Kitchen thermometer (optional): Helpful for checking milk temperature to avoid killing the yeast.
I started making these rolls with just a wooden spoon and a bowl — no fancy equipment needed. A stand mixer will save you some elbow grease, but honestly, the hand-kneading process is oddly satisfying when you have the time. Just remember to grease your pan well or use parchment paper to prevent sticking. If you’re on a budget, a simple baking dish and a whisk will get you through just fine.
Preparation Method
- Activate the yeast (10 minutes): In a small bowl, combine the warm milk (about 110°F / 43°C) with the honey and active dry yeast. Stir gently and let it sit until foamy—about 5 to 10 minutes. If it doesn’t foam, your yeast might be old, so start over with fresh yeast.
- Mix the dough (10 minutes): In a large mixing bowl or stand mixer, combine the flour and salt. Add the softened butter, eggs, and the foamy yeast mixture. Mix until everything comes together into a shaggy dough.
- Knead the dough (8-10 minutes): On a lightly floured surface or in your stand mixer with a dough hook, knead the dough until it’s smooth and slightly tacky but not sticky. It should spring back when poked gently. If it’s too sticky, add a tablespoon of flour at a time. If too dry, add a splash of warm milk.
- First rise (1 to 1½ hours): Shape the dough into a ball and place it in a large greased bowl. Cover loosely with a clean kitchen towel or plastic wrap. Let it rise in a warm, draft-free spot until doubled in size. (Pro tip: I sometimes put my oven on the lowest setting for a minute, then turn it off and let the dough rise inside.)
- Shape the rolls (15 minutes): Punch down the dough gently to release air. Divide it into 12 equal pieces (about 2 ounces / 55 grams each). Shape each piece into a smooth ball by pulling the dough edges underneath. Arrange the rolls in your greased baking dish, close but not squished.
- Second rise (30 to 45 minutes): Cover the rolls again and let them puff up until nearly doubled. They’ll look soft and billowy.
- Preheat and bake (20 to 25 minutes): Preheat your oven to 375°F (190°C). Bake the rolls in the middle rack until they’re golden brown on top and sound hollow when tapped. The internal temperature should be around 190°F (88°C).
- Glaze immediately (5 minutes): While the rolls are still warm, brush the tops generously with a mixture of melted butter and honey. This step seals in moisture and adds that signature shine and sweetness.
- Cool slightly and serve: Let the rolls cool for about 10 minutes in the pan before serving. They’re best enjoyed warm, fresh from the oven.
One time, I left mine rising a bit too long—about two hours—and they still turned out fluffy, but the texture was a little denser. So, keep an eye on your dough, especially if your kitchen is warm. Also, don’t skip that honey butter glaze—it makes all the difference.
Cooking Tips & Techniques
There’s a little bit of art to making these rolls just right, but most of what I learned came from trial and error:
- Milk temperature is crucial: Too hot and it kills the yeast; too cold and the yeast won’t activate properly. Aim for about 110°F (43°C). I use a kitchen thermometer to be sure.
- Don’t skip kneading: It develops the gluten structure that gives you that perfect fluffy texture. If you’re short on time, a stand mixer is a lifesaver.
- Watch your rising times: Over-proofed dough can collapse, resulting in dense rolls. Under-proofed dough won’t rise enough, leaving them tough.
- Use fresh yeast: Old yeast loses potency, leading to flat rolls. If your yeast doesn’t foam during activation, it’s time for new yeast.
- Glaze while warm: Brushing the honey butter glaze immediately after baking locks in moisture and adds that irresistible sticky sweetness.
I once forgot to glaze until the rolls cooled down, and honestly, they tasted fine but missed that glossy, pull-apart magic. Timing is everything here. Also, if you’re making these for a crowd, prepare the dough the night before and refrigerate after the first rise to slow fermentation. Just bring them back to room temperature before shaping and continuing.
Variations & Adaptations
Want to change things up? Here are some easy tweaks to keep these fluffy honey butter dinner rolls fresh:
- Herb-Infused Rolls: Add 2 tablespoons of finely chopped fresh rosemary or thyme to the dough for a savory twist that pairs beautifully with roast dinners.
- Gluten-Free Option: Substitute the all-purpose flour with a gluten-free blend (like Bob’s Red Mill 1-to-1). The texture will be a bit different but still delicious. Add a teaspoon of xanthan gum if your blend doesn’t include it.
- Vegan Version: Use plant-based milk (almond or oat), swap butter for coconut oil or vegan margarine, and replace eggs with flax eggs (1 tablespoon ground flaxseed + 3 tablespoons water per egg, let sit 5 minutes).
- Sweet Cinnamon Rolls: Roll out the dough before shaping, spread with cinnamon sugar and butter, then roll up and cut into spirals for a cozy morning treat.
Personally, I once made these with a splash of orange zest in the dough and a sprinkle of coarse sea salt on top of the glaze. It was unexpected but delightful — a little zing that balanced the honey’s sweetness. Feel free to experiment based on your mood or the season!
Serving & Storage Suggestions
These honey butter dinner rolls are best served warm, ideally just out of the oven, when the glaze is sticky and the crumb is at its softest. They pair wonderfully with hearty soups, stews, or alongside a holiday roast.
For a full meal, try serving them with a rich pot roast or alongside your favorite comfort food recipes to make the meal extra special. I often bring a batch to friends’ homes, and they’ve told me these rolls are perfect alongside fresh salads or even a spread of cheeses and preserves.
To store, place cooled rolls in an airtight container at room temperature for up to 2 days. For longer storage, freeze them in a resealable bag for up to 3 months. When ready to eat, thaw overnight in the fridge and warm in a 350°F (175°C) oven for 10 minutes, brushing with a little extra honey butter if you like.
Over time, the rolls develop more depth of flavor, especially when refrigerated overnight before reheating. The crumb remains moist, and the honey butter glaze mellows into a gentle sweetness that keeps you coming back for one more.
Nutritional Information & Benefits
Each fluffy honey butter dinner roll contains approximately:
| Nutrient | Amount per Roll |
|---|---|
| Calories | 150 kcal |
| Carbohydrates | 22 g |
| Protein | 4 g |
| Fat | 5 g |
| Sugar | 4 g (from honey) |
| Fiber | 1 g |
Honey provides natural antioxidants and trace minerals, making these rolls a slightly better alternative to those sweetened with refined sugars. The butter adds richness and fat that helps with satiety. If you’re looking for a gluten-free or vegan adaptation, the recipe can be adjusted without losing too much of that comforting feel. Just be mindful of potential allergens like dairy, eggs, and gluten when serving.
Conclusion
Fluffy honey butter dinner rolls are more than just a side dish—they’re a little burst of comfort that brings people together. They’re straightforward enough for anyone to make, yet special enough to make your cozy gatherings feel just a bit more memorable. I love how each batch fills the kitchen with warmth and the promise of good company.
Feel free to personalize the recipe with your favorite herbs, spices, or dairy-free options. And if you ever want to add a sweet finish to your meal, try pairing these with the tangy and luscious mini lemon blueberry cheesecakes for dessert — they’re a match made in cozy heaven.
Give these rolls a try and let me know how your version turns out. There’s something special about sharing a recipe that sparks joy around the table, and I can’t wait to hear your stories.
FAQs
Can I make these honey butter dinner rolls ahead of time?
Yes! You can prepare the dough up to the first rise, then refrigerate it overnight. The next day, shape, let rise again, and bake. This also helps deepen the flavor.
What if I don’t have active dry yeast?
You can use instant yeast in the same amount but mix it directly with the flour instead of activating it in milk. The rising time might be slightly shorter.
How do I keep the rolls soft after baking?
Brush them with honey butter glaze right after baking and store them in an airtight container once cooled. Reheat gently to refresh softness.
Can I freeze these rolls?
Absolutely. Freeze after baking and cooling, then thaw and warm in the oven before serving. They freeze and reheat beautifully.
What can I serve with these rolls for a complete meal?
They pair well with hearty soups, stews, roasted meats, and even fresh salads. For something sweet, try pairing with a dessert like the lemon blueberry cheesecakes linked above.
Pin This Recipe!
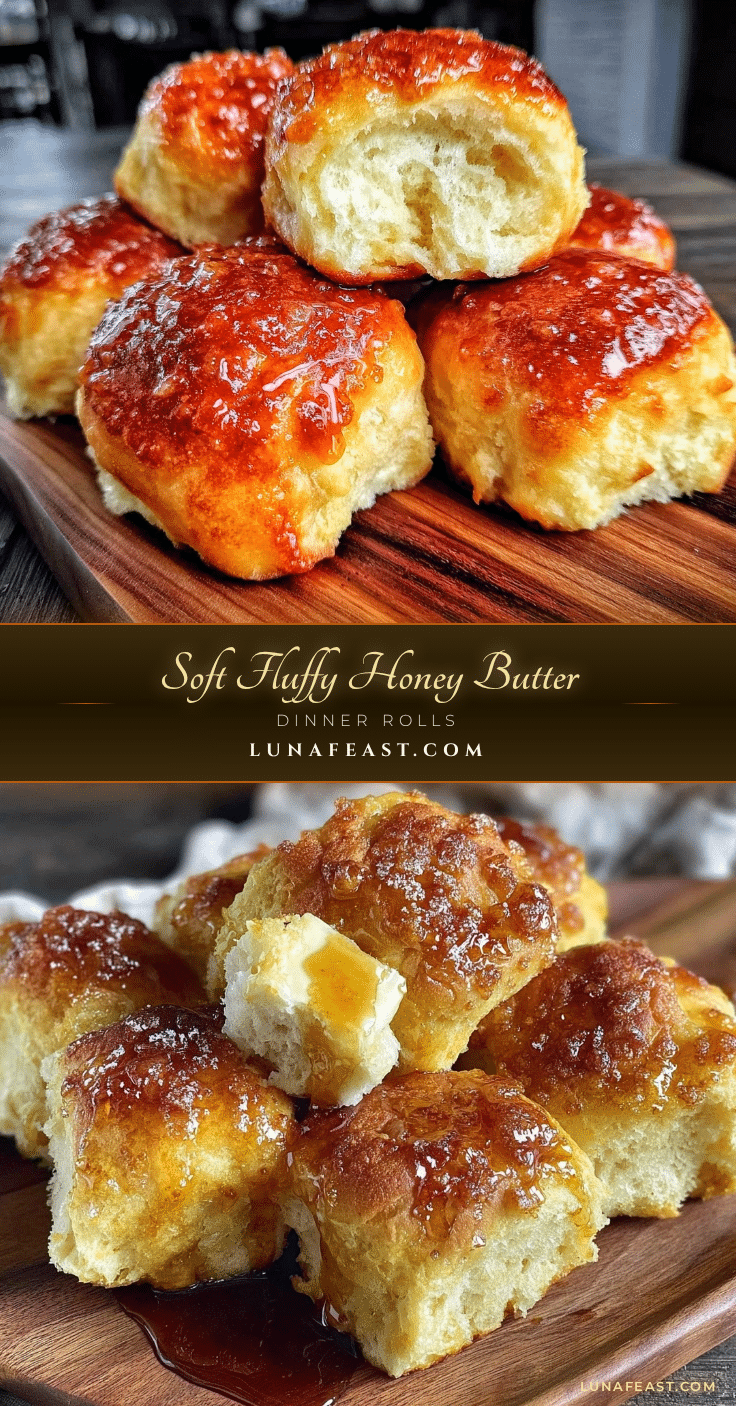
Fluffy Honey Butter Dinner Rolls

These fluffy honey butter dinner rolls are soft, pillowy, and glazed with a sweet honey butter mixture, perfect for cozy gatherings and easy to make with simple ingredients.
- Prep Time: 25 minutes
- Cook Time: 25 minutes
- Total Time: 1 hour 50 minutes
- Yield: 12 rolls 1x
- Category: Side Dish
- Cuisine: American
Ingredients
- 3 ½ cups (440 grams) all-purpose flour
- 2 ¼ teaspoons (1 packet) active dry yeast
- 1 cup (240 ml) warm milk (about 110°F / 43°C)
- ¼ cup (85 grams) honey, plus extra for glaze
- 6 tablespoons (85 grams) unsalted butter, softened, plus extra for glaze
- 2 large eggs, room temperature
- 1 teaspoon salt
- Optional: baking spray or extra butter for greasing pan
Instructions
- Activate the yeast: In a small bowl, combine warm milk (about 110°F / 43°C) with honey and active dry yeast. Stir gently and let sit until foamy, about 5 to 10 minutes.
- Mix the dough: In a large mixing bowl or stand mixer, combine flour and salt. Add softened butter, eggs, and the foamy yeast mixture. Mix until a shaggy dough forms.
- Knead the dough: Knead on a lightly floured surface or with a stand mixer dough hook for 8-10 minutes until smooth and slightly tacky but not sticky. Adjust flour or milk as needed.
- First rise: Shape dough into a ball and place in a greased bowl. Cover loosely and let rise in a warm, draft-free spot until doubled in size, about 1 to 1½ hours.
- Shape the rolls: Punch down dough, divide into 12 equal pieces (~2 ounces / 55 grams each). Shape each into a smooth ball and arrange in a greased 9×13 inch baking dish.
- Second rise: Cover rolls and let rise until nearly doubled, about 30 to 45 minutes.
- Preheat oven to 375°F (190°C). Bake rolls on middle rack for 20 to 25 minutes until golden brown and hollow sounding when tapped. Internal temperature should be about 190°F (88°C).
- Glaze immediately: Brush warm rolls generously with melted butter and honey mixture to seal in moisture and add shine.
- Cool slightly and serve: Let rolls cool about 10 minutes in pan before serving. Best enjoyed warm.
Notes
Milk temperature is crucial; aim for about 110°F to activate yeast without killing it. Kneading develops gluten for fluffy texture. Watch rising times to avoid dense or flat rolls. Use fresh yeast for best results. Glaze rolls immediately after baking for best shine and moisture. Dough can be refrigerated after first rise for overnight preparation.
Nutrition
- Serving Size: 1 roll
- Calories: 150
- Sugar: 4
- Fat: 5
- Carbohydrates: 22
- Fiber: 1
- Protein: 4
Keywords: honey butter dinner rolls, fluffy rolls, easy dinner rolls, homemade rolls, cozy gathering bread, soft rolls, quick bread recipe