“Are you sure this only takes 15 minutes?” my friend asked, eyebrows raised as the sweet aroma of cocoa and cream cheese wafted through my tiny kitchen. Honestly, I was skeptical myself the first time I whipped up these Decadent Red Velvet Molten Lava Cakes for Two. I was aiming for a quick dessert to impress on a casual date night, not some fussy pastry that demands hours and a fancy setup.
What started as a last-minute idea—because, let’s face it, running out of dessert options on a weeknight is a tragedy—turned into a little obsession. I found myself making these red velvet lava cakes almost every weekend, tweaking the balance of cocoa and cream cheese until that gooey center was just right. The rich, velvety texture paired with the slightly tangy cream cheese filling was such a surprise I couldn’t keep it to myself.
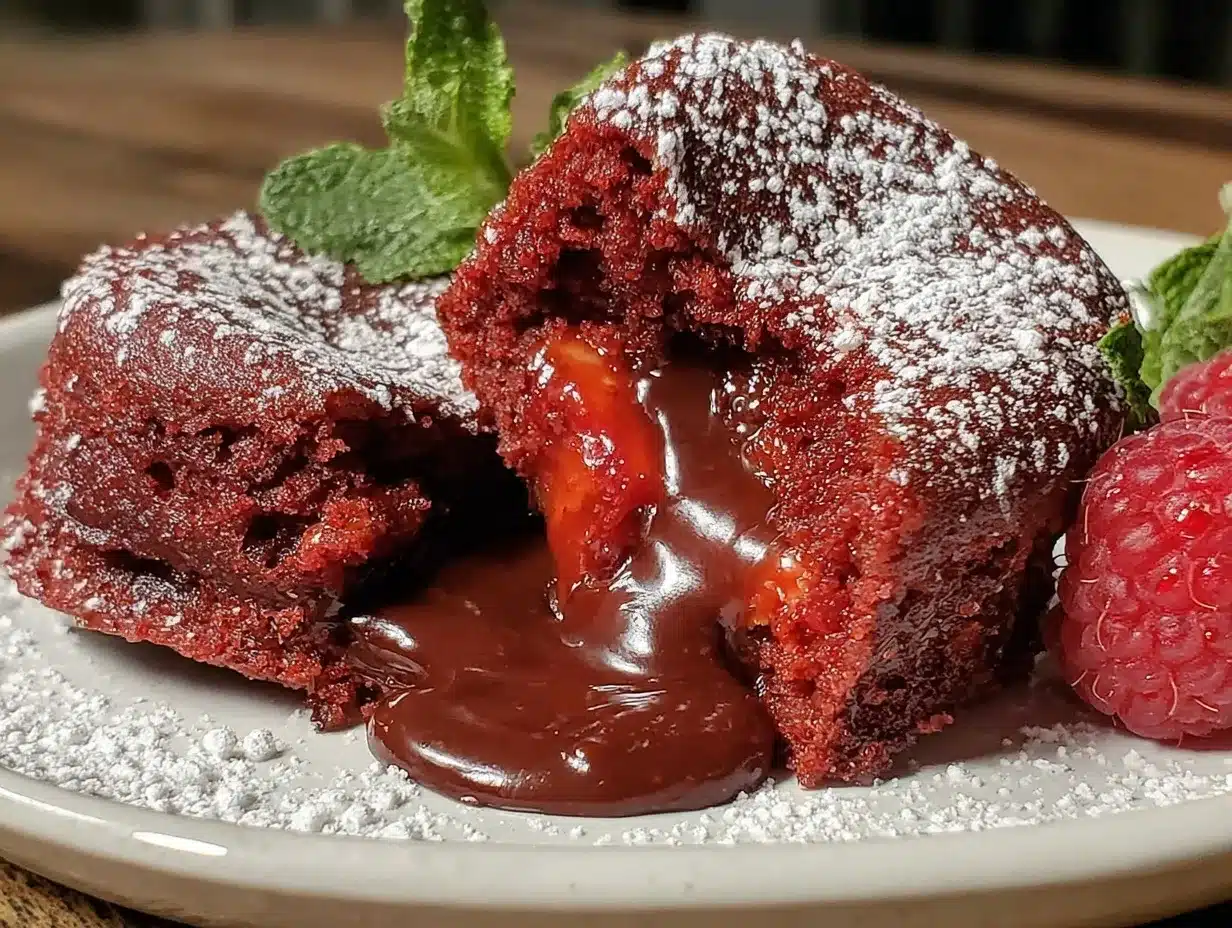
There’s something about the way the warm cake oozes molten sweetness when you poke the center that makes you pause, savor, and forget the chaos of the day. It’s not just dessert; it’s a quiet, indulgent moment shared with someone special. That’s why this recipe stuck with me—not because it’s complicated, but because it’s perfect for those intimate, unplanned celebrations when you want to say “I care” without a fuss.
Why You’ll Love This Recipe
After testing countless red velvet recipes and molten cakes, I can tell you this one hits the sweet spot every time. It’s designed to deliver maximum flavor and that dreamy molten texture, all while being simple enough for any home cook. Here’s why this recipe stands out:
- Quick & Easy: Ready in under 30 minutes, ideal for spontaneous dessert cravings or a cozy date night.
- Simple Ingredients: No need for specialty stores—most of these are pantry staples you probably already have.
- Perfect for Two: Just the right size to avoid leftovers and make the moment feel exclusive.
- Crowd-Pleaser: The rich red velvet flavor combined with a molten cream cheese center wins over both kids and adults.
- Unbelievably Delicious: The contrast of a tender cake exterior with a gooey, luscious filling is pure comfort food magic.
What makes this version different? It’s the way the molten center is crafted—not just melted chocolate but a cream cheese blend that adds a subtle tang and creamy richness. Plus, the batter has the perfect balance of cocoa and buttermilk to keep it moist without feeling heavy. Honestly, it feels like a little secret indulgence every time. If you’ve ever enjoyed the charm of mini lemon blueberry cheesecakes, you’ll appreciate how this recipe brings that same personal touch of elegance but in a quick, molten cake form.
What Ingredients You Will Need
This recipe uses simple, wholesome ingredients to deliver bold flavor and that satisfying molten texture without the fuss. Here’s what you’ll need:
- All-purpose flour – ½ cup (65g), sifted for a tender crumb
- Cocoa powder – 2 tablespoons, unsweetened (I prefer Valrhona for richness)
- Granulated sugar – ½ cup (100g), for just the right amount of sweetness
- Salt – a pinch, to balance flavors
- Baking powder – ¼ teaspoon, for a slight lift
- Unsalted butter – 4 tablespoons (60g), melted and slightly cooled (adds richness)
- Buttermilk – ¼ cup (60ml), room temperature (for moisture and that classic red velvet tang)
- Vanilla extract – ½ teaspoon, pure for best flavor
- Egg – 1 large, room temperature (for structure)
- Red food coloring – 1 tablespoon (gel recommended for vibrant color without thinning batter)
- Cream cheese – ¼ cup (60g), softened (this forms the molten center)
- Powdered sugar – 2 tablespoons, for the cream cheese filling
- Vanilla extract – ¼ teaspoon (for the filling)
If you want a dairy-free twist, swap buttermilk with almond milk mixed with a splash of lemon juice, and use vegan butter and cream cheese alternatives. For a gluten-free version, almond flour works well but the texture will be a bit different.
Equipment Needed
- Two 6-ounce ramekins or small oven-safe bowls: These hold the cakes perfectly for individual servings. I’ve tried mini silicone molds but ramekins give a better crust.
- Mixing bowls: One for the batter and one for the cream cheese filling.
- Whisk and spatula: For mixing the batter smoothly without overworking.
- Measuring cups and spoons: Accuracy is key, especially with baking powder and cocoa.
- Oven mitts and cooling rack: For safe handling and letting the cakes rest briefly.
If you don’t have ramekins, small coffee mugs can work but watch the baking time carefully. And honestly, a small hand mixer makes cream cheese mixing easier but a fork and some elbow grease do the trick just fine. Keeping your ramekins well-greased or lightly dusted with cocoa powder helps the cakes release cleanly.
Preparation Method
- Preheat your oven to 425°F (220°C). Grease your ramekins generously with butter, then dust with cocoa powder to prevent sticking. Set them aside.
- Prepare the cream cheese filling: In a small bowl, blend ¼ cup softened cream cheese, 2 tablespoons powdered sugar, and ¼ teaspoon vanilla extract until smooth and creamy. Cover and chill while you make the batter.
- Mix dry ingredients: In a medium bowl, sift together ½ cup all-purpose flour, 2 tablespoons unsweetened cocoa powder, ½ cup granulated sugar, ¼ teaspoon baking powder, and a pinch of salt. This ensures no lumps and a light texture.
- Combine wet ingredients: In another bowl, whisk 1 large room-temperature egg with 4 tablespoons melted butter, ¼ cup buttermilk, 1 tablespoon red food coloring, and ½ teaspoon vanilla extract until smooth and evenly colored.
- Make the batter: Pour the wet ingredients into the dry and gently fold with a spatula until just combined. Overmixing can make the cakes tough, so stop when you see no streaks of flour.
- Fill ramekins: Spoon half the batter equally into the ramekins (about ⅓ cup or 80ml each). Add a dollop (about 2 tablespoons) of the cream cheese mixture in the center of each. Then, cover with the remaining batter, smoothing the tops with a spoon.
- Bake: Place ramekins on a baking sheet and bake for 12-14 minutes. The edges should be firm but the center still soft and slightly jiggly (that’s your molten magic!).
- Rest and serve: Let cakes cool for 5 minutes before carefully running a knife around the edges and inverting onto plates. Serve immediately for that warm, molten experience.
Watch out not to overbake or the molten center will set and lose its gooey charm. If your oven runs hot, try checking at 11 minutes first. The cakes should smell rich with cocoa and have a slight crust on top but still feel soft when touched.
Cooking Tips & Techniques
One trick I learned the hard way was how crucial temperature and timing are for molten cakes. Preheating the oven fully is non-negotiable; otherwise, you get uneven rising and a flat center. Also, letting the batter rest a few minutes before baking helps the flavors meld.
When mixing the batter, be gentle. You want a tender crumb, not a dense brick. Folding rather than whisking aggressively keeps the cake light. For the cream cheese filling, make sure it’s softened enough to blend smoothly; cold cream cheese will create lumps.
Timing the bake is the real test. Use the jiggly center as your clue—if it’s too liquid, the cake might collapse when unmolding; too firm and you lose that molten texture. I usually set a timer for 12 minutes but peek at 11 if I’m feeling impatient.
Also, greasing and dusting the ramekins with cocoa powder instead of flour adds a subtle chocolate hint and prevents sticking better. I’ve found that silicone molds sometimes yield a less crisp edge, so stick to ceramic if you want that classic texture.
If you want to multitask, get the filling chilling while you preheat and measure ingredients. This way, everything flows smoothly, and you’re not scrambling to finish the filling last minute.
Variations & Adaptations
Want to mix things up? Here are some tasty twists I’ve played around with:
- White Chocolate Lava: Swap the cocoa powder in the batter for white chocolate chips melted into the batter, and use a white chocolate ganache for the molten center instead of cream cheese.
- Vegan Version: Use flax egg (1 tbsp flaxseed meal + 3 tbsp water), coconut oil instead of butter, almond milk with lemon juice in place of buttermilk, and vegan cream cheese. Bake a little longer—around 15 minutes.
- Spiced Red Velvet: Add ¼ teaspoon cinnamon and a pinch of nutmeg to the dry ingredients for a warm, cozy twist perfect for fall evenings.
- Berry Surprise: Drop a few fresh raspberries or a spoonful of raspberry jam into the cream cheese center before baking. The tartness adds a lovely pop.
I’ve also experimented with baking these in mini muffin tins for bite-sized treats, perfect for parties or sharing. For a gluten-free option, almond flour works nicely but expect a slightly denser texture. For more decadent desserts that impress without fuss, you might enjoy browsing the recipe collection on this site for inspiration.
Serving & Storage Suggestions
These Decadent Red Velvet Molten Lava Cakes for Two are best served warm—right out of the oven—so the molten center is at its peak gooeyness. A dusting of powdered sugar or a small scoop of vanilla ice cream on the side complements the richness beautifully.
For drinks, a cup of strong espresso or a glass of rich red wine pairs surprisingly well, balancing the sweetness and enhancing the cocoa notes.
If you have leftovers (though unlikely!), store them tightly covered in the refrigerator for up to 2 days. Reheat gently in the microwave for 20-30 seconds; just be careful not to overheat, or the molten center will firm up.
Flavors tend to mellow and meld beautifully if you let the cakes rest for 10 minutes after baking, so don’t rush the cooling step. The texture firms up slightly, making it easier to unmold without sacrificing that molten center.
Nutritional Information & Benefits
Each serving of these red velvet molten lava cakes clocks in at approximately 350 calories, with about 20 grams of fat and 35 grams of carbohydrates. The cream cheese filling adds a good dose of calcium and protein, while the unsweetened cocoa powder delivers antioxidants.
Though indulgent, this dessert is portion-controlled for two, which helps keep treats reasonable. Using real butter and buttermilk adds wholesome fat and texture, unlike highly processed alternatives.
For those watching allergens, the recipe contains dairy, gluten, and eggs but can be adapted easily for vegan or gluten-free diets (see variations). The balance of ingredients offers a satisfying, comforting dessert without excess fuss or artificial additives.
Conclusion
These Decadent Red Velvet Molten Lava Cakes for Two have become my go-to when I want a special dessert that’s quick, fuss-free, and truly memorable. The way the warm, tender cake embraces the creamy, molten center makes every bite feel like a small celebration.
Feel free to play around with the filling or add a hint of spice to make it your own. Honestly, this recipe is proof that you don’t need fancy ingredients or hours in the kitchen to create something that feels indulgent and heartwarming.
If you give these a try, I’d love to hear your tweaks and stories—drop a comment or share your version. After all, good food is about sharing moments, and this cake is perfect for just that.
FAQs
- Can I make these lava cakes ahead of time? It’s best to bake and serve them fresh for that molten center, but you can prepare the batter and filling a few hours ahead and refrigerate. Just bake when ready.
- What if I don’t have buttermilk? Use regular milk mixed with 1 teaspoon lemon juice or vinegar, let sit 5 minutes before using.
- How do I know when the cakes are done? The edges should be set and the center slightly jiggly when you gently shake the ramekin.
- Can I double this recipe for more servings? Absolutely! Just use appropriately sized ramekins and adjust baking time slightly.
- What’s the best way to prevent sticking? Generously butter the ramekins and dust with cocoa powder instead of flour for easy release.
Pin This Recipe!
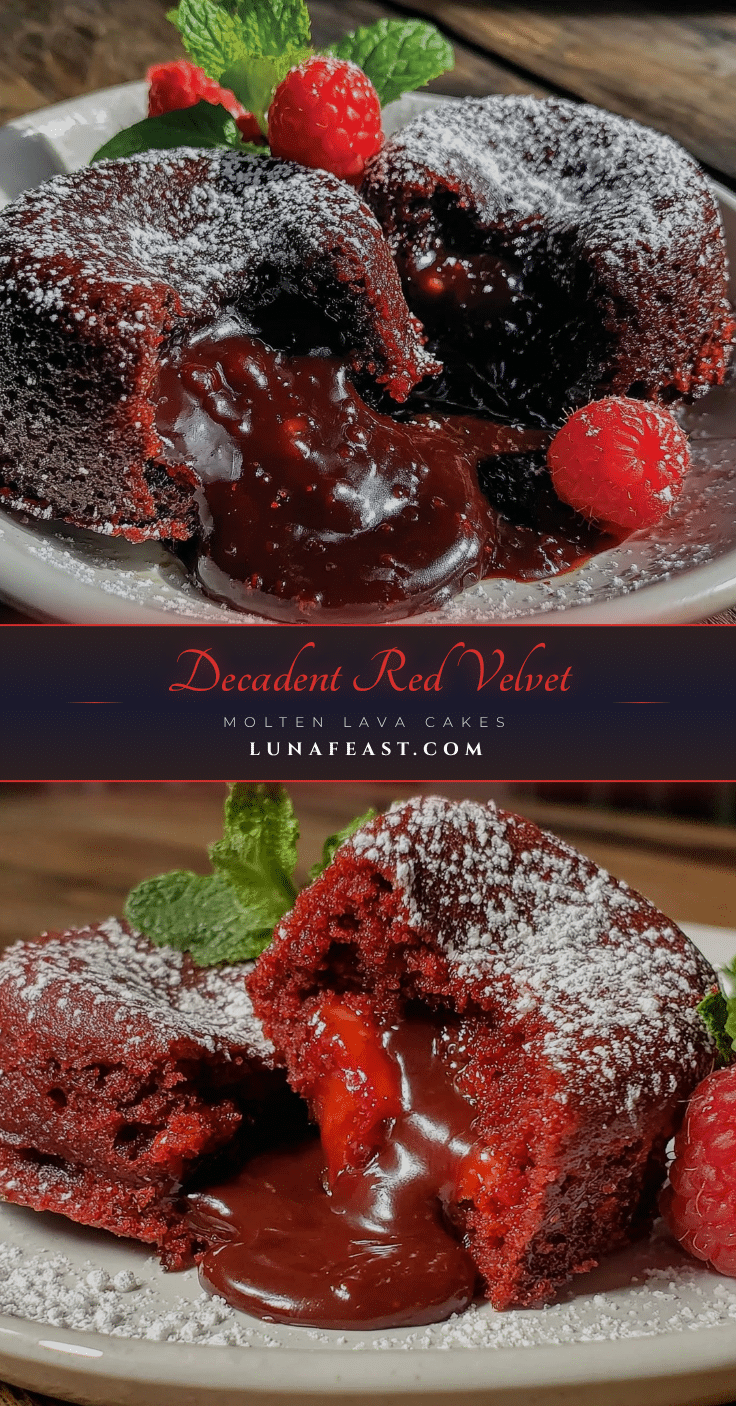
Decadent Red Velvet Molten Lava Cakes for Two
A quick and easy red velvet molten lava cake recipe perfect for two, featuring a rich, velvety cake with a gooey cream cheese molten center. Ideal for intimate celebrations or spontaneous dessert cravings.
- Prep Time: 10 minutes
- Cook Time: 14 minutes
- Total Time: 24 minutes
- Yield: 2 servings 1x
- Category: Dessert
- Cuisine: American
Ingredients
- ½ cup (65g) all-purpose flour, sifted
- 2 tablespoons unsweetened cocoa powder
- ½ cup (100g) granulated sugar
- Pinch of salt
- ¼ teaspoon baking powder
- 4 tablespoons (60g) unsalted butter, melted and slightly cooled
- ¼ cup (60ml) buttermilk, room temperature
- ½ teaspoon vanilla extract
- 1 large egg, room temperature
- 1 tablespoon red food coloring (gel recommended)
- ¼ cup (60g) cream cheese, softened
- 2 tablespoons powdered sugar
- ¼ teaspoon vanilla extract (for filling)
Instructions
- Preheat your oven to 425°F (220°C). Grease your ramekins generously with butter, then dust with cocoa powder to prevent sticking. Set them aside.
- Prepare the cream cheese filling: In a small bowl, blend ¼ cup softened cream cheese, 2 tablespoons powdered sugar, and ¼ teaspoon vanilla extract until smooth and creamy. Cover and chill while you make the batter.
- Mix dry ingredients: In a medium bowl, sift together ½ cup all-purpose flour, 2 tablespoons unsweetened cocoa powder, ½ cup granulated sugar, ¼ teaspoon baking powder, and a pinch of salt.
- Combine wet ingredients: In another bowl, whisk 1 large room-temperature egg with 4 tablespoons melted butter, ¼ cup buttermilk, 1 tablespoon red food coloring, and ½ teaspoon vanilla extract until smooth and evenly colored.
- Make the batter: Pour the wet ingredients into the dry and gently fold with a spatula until just combined. Stop when no streaks of flour remain.
- Fill ramekins: Spoon half the batter equally into the ramekins (about ⅓ cup or 80ml each). Add a dollop (about 2 tablespoons) of the cream cheese mixture in the center of each. Then, cover with the remaining batter, smoothing the tops with a spoon.
- Bake: Place ramekins on a baking sheet and bake for 12-14 minutes. The edges should be firm but the center still soft and slightly jiggly.
- Rest and serve: Let cakes cool for 5 minutes before carefully running a knife around the edges and inverting onto plates. Serve immediately.
Notes
Do not overbake to keep the molten center gooey. Grease ramekins well and dust with cocoa powder for easy release. If oven runs hot, check at 11 minutes. Let cakes rest 5-10 minutes after baking for easier unmolding. For dairy-free or gluten-free versions, see variations in the recipe.
Nutrition
- Serving Size: 1 cake (half recipe)
- Calories: 350
- Sugar: 25
- Sodium: 180
- Fat: 20
- Saturated Fat: 12
- Carbohydrates: 35
- Fiber: 2
- Protein: 6
Keywords: red velvet, molten lava cake, dessert for two, quick dessert, cream cheese filling, easy red velvet cake