Let me tell you, the smell of warm, melty cheese mingling with fresh tomato sauce is enough to make anyone’s mouth water, especially when it’s wrapped up in a fun, bite-sized lunch. The first time I made these Easy Homemade Pizza Lunchables, I was knee-high to a grasshopper, but honestly, it wasn’t until recently that I recreated the magic for my own kids. I was instantly hooked — the kind of moment where you pause, take a deep breath, and just smile because you know you’re onto something truly special.
This recipe brings back memories of lazy weekend afternoons, when my family couldn’t stop sneaking the little pizza bites off the platter (and I can’t really blame them). Years ago, I stumbled upon the idea trying to recreate those store-bought lunch kits but with a wholesome, homemade twist that felt like a warm hug on a plate. You know what? This recipe is dangerously easy and perfect for a sweet treat that’s both nostalgic and kid-approved.
Whether you’re packing lunchboxes for school, planning a picnic, or just need a fun activity that ends with delicious food, these Easy Homemade Pizza Lunchables are a total winner. I’ve tested this recipe more times than I can count (in the name of research, of course), and it’s become a staple for family gatherings and quick lunches. You’re going to want to bookmark this one, trust me.
Why You’ll Love This Recipe
Honestly, this recipe ticks all the boxes for busy parents and snack lovers alike. Here’s why it’s worth making:
- Quick & Easy: Comes together in under 30 minutes, perfect for those hectic mornings or last-minute lunchbox needs.
- Simple Ingredients: No fancy supermarket hunts needed; you likely already have everything in your pantry and fridge.
- Perfect for Kids: Fun, hands-on lunch that kids love assembling themselves — it’s like a mini pizza party every time.
- Crowd-Pleaser: Always gets rave reviews from kiddos and grown-ups alike, making it great for playdates or casual get-togethers.
- Unbelievably Delicious: The soft crust, tangy sauce, and gooey cheese combo is pure comfort food with a playful twist.
What sets this recipe apart is the homemade touch — from making your own dough or opting for easy flatbreads to mixing a quick, flavorful sauce that balances sweetness and herbs just right. Plus, the ability to customize toppings means it’s never boring. This isn’t just another pizza lunchable; it’s your best version of a fun, kid-friendly lunch that feels homemade and heartfelt.
And let’s face it, there’s something so satisfying about watching your kids light up as they build their own mini pizzas. It’s comfort food reimagined—healthier, faster, but with all the same soul-soothing satisfaction you want in a lunch.
What Ingredients You Will Need
This recipe uses simple, wholesome ingredients to deliver bold flavor and satisfying texture without the fuss. Most are pantry staples or fresh basics you can easily find at the store.
- For the Base:
- Mini pita breads or small flour tortillas (great for a quick dough alternative)
- Olive oil (a light brush for crispiness)
- For the Sauce:
- Tomato sauce (preferably canned or jarred, about ½ cup / 120 ml) – I like Rao’s for its rich, natural flavor
- Garlic powder (½ tsp)
- Dried oregano (1 tsp)
- Salt and pepper to taste
- For the Cheese & Toppings:
- Shredded mozzarella cheese (1 to 1½ cups / 100-150 g) – fresh mozzarella works too for creamier bites
- Pepperoni slices or mini turkey pepperoni (optional, about 20 slices)
- Mini bell pepper rings or thinly sliced mushrooms (optional, for a veggie twist)
- Fresh basil leaves (a few for garnish and flavor)
- Extras (Optional):
- Grated Parmesan cheese for topping (adds a salty punch)
- Red pepper flakes (for kids who like a little heat!)
If you want to get creative, you can swap the pita for gluten-free flatbreads or use dairy-free cheese if needed. And hey, in summer, fresh cherry tomatoes sliced thin add a juicy pop that’s irresistible.
Equipment Needed
- Oven or toaster oven – for baking the mini pizzas until the cheese melts perfectly
- Baking sheet – lined with parchment paper for easy cleanup
- Small mixing bowl – to whisk together the tomato sauce and seasoning
- Pastry brush (optional) – helps to evenly brush olive oil on the pizza base
- Sharp knife and cutting board – for slicing veggies and pepperoni
- Measuring cups and spoons – to keep your ingredients on point
If you don’t have a pastry brush, a spoon works just fine for spreading the olive oil. For a budget-friendly option, use store-bought flatbreads instead of making dough from scratch, and you’re good to go. I’ve also found that a toaster oven heats these mini pizzas just right without overcooking, which is perfect if you’re making just a few at a time.
Preparation Method

- Preheat your oven to 375°F (190°C). Line a baking sheet with parchment paper to prevent sticking and make cleanup a breeze.
- Prepare the pizza base: Lay out your mini pitas or tortillas on the baking sheet. Lightly brush each one with olive oil (about 1 tsp each) to give it a golden, crispy edge once baked.
- Mix the sauce: In a small bowl, combine ½ cup (120 ml) tomato sauce with ½ tsp garlic powder, 1 tsp dried oregano, and a pinch of salt and pepper. Stir it all together until smooth and fragrant. Taste and adjust seasonings if needed — the sauce should be bright and flavorful.
- Spread the sauce: Using the back of a spoon, spread about 1 tablespoon of the seasoned tomato sauce evenly over each mini pizza base. Don’t overload it — just enough to cover the surface.
- Add cheese: Sprinkle about 2 tablespoons (15-20 g) of shredded mozzarella evenly over the sauce on each pizza. The cheese layer should be generous enough to melt beautifully but not overwhelm.
- Top with favorites: Add pepperoni slices (4-5 per mini pizza) or your choice of veggies like bell pepper rings or mushrooms. Feel free to get your kids involved here — they love picking their own toppings!
- Bake: Place the baking sheet in the oven and bake for 10-12 minutes, or until the cheese is melted, bubbly, and slightly golden. Keep an eye on them after 8 minutes to avoid burning the edges.
- Garnish and serve: Remove from oven and let cool for a couple of minutes. Add fresh basil leaves and a sprinkle of Parmesan cheese if desired. Cut into halves or quarters for easy eating.
If your cheese isn’t melting evenly, try rotating the baking sheet halfway through. Also, if you notice the crust getting too crisp before the cheese melts, cover loosely with foil and continue baking. These little tips come from experience and make a big difference!
Cooking Tips & Techniques
Making homemade pizza lunchables is fun, but a few tricks help keep things smooth. First, don’t overload the sauce — too much moisture can make the crust soggy. A thin, even layer is your best friend here.
Also, when using mini pitas or tortillas, brushing the base with olive oil before adding toppings helps achieve that perfect crispy bottom. You can thank me later for that one!
One common mistake is baking at too high a temperature — it can burn the edges before the cheese melts. Stick to 375°F (190°C) and watch closely from 8 minutes onward.
If you’re prepping these ahead for lunchboxes, bake them fully and cool completely before packing. To reheat, a quick zap in the microwave or a minute under a broiler brings back that melty magic.
Lastly, multitasking tip: While the pizzas bake, clean up your prep area and start packing those lunchboxes. It saves you a ton of time and keeps the kitchen tidy.
Variations & Adaptations
If you want to switch things up, here are some tasty ideas to customize your Easy Homemade Pizza Lunchables:
- Gluten-Free: Use gluten-free flatbreads or crackers as the base for a safe and satisfying option.
- Vegetarian: Skip the pepperoni and load up on sliced olives, roasted red peppers, or artichoke hearts.
- Seasonal Twist: In fall, try adding thin slices of cooked butternut squash or caramelized onions for cozy flavors.
- Dairy-Free: Swap mozzarella for vegan cheese shreds or nutritional yeast for a cheesy flavor.
- Personal Touch: I once added a touch of pesto under the sauce for a fresh, herby pop — my kids loved it!
Feel free to mix and match toppings based on what’s in your fridge or your kiddo’s taste buds. This recipe is forgiving and flexible, making it perfect for experimenting.
Serving & Storage Suggestions
These mini pizza lunchables are best served warm but also taste great at room temperature, which makes them ideal for packed lunches or picnics. Arrange them on a colorful plate with some fresh fruit or crunchy veggie sticks for a balanced meal.
If you have leftovers, store them in an airtight container in the refrigerator for up to 3 days. To reheat, pop them in the oven at 350°F (175°C) for about 5 minutes or microwave for 30-45 seconds — just enough to warm the cheese without making the crust soggy.
For longer storage, freeze the baked mini pizzas in a single layer on a baking sheet, then transfer to freezer bags for up to 2 months. Reheat straight from frozen, adding a couple of minutes to baking time.
Flavors tend to develop and meld nicely after a day in the fridge, so if you have the patience (and willpower!), prepping them the night before can make lunch even tastier.
Nutritional Information & Benefits
These Easy Homemade Pizza Lunchables offer a balanced mix of carbs, protein, and fats, making them a wholesome choice for kids’ lunches. The whole wheat or pita base provides fiber, while the cheese adds calcium and protein essential for growing bodies.
The tomato sauce is rich in lycopene, a powerful antioxidant linked to heart health. Depending on your toppings, you can boost vitamins and minerals — bell peppers add vitamin C, and basil has anti-inflammatory properties.
For parents watching dietary needs, this recipe is naturally low in added sugars and can be made gluten-free or dairy-free as needed. Just swap ingredients thoughtfully, and you’ve got a lunch that feels good and tastes great.
Conclusion
In short, these Easy Homemade Pizza Lunchables are a total game-changer for kid-friendly lunches. They bring together fun, flavor, and convenience in a way that makes both parents and kids happy. Customize them to fit your family’s tastes, pack them for school or a quick snack, and watch how these little pizzas quickly become a lunchtime favorite.
I love this recipe because it combines the joy of pizza with the simplicity of a lunchbox treat. Plus, the smiles they bring? Priceless. So go ahead, give it a try, and don’t be shy about sharing your own twists and stories in the comments below. Your next fun lunch is just a recipe away!
FAQs
Can I make the pizza bases from scratch?
Absolutely! If you have time, homemade dough is fantastic for these mini pizzas. Just roll out small rounds and bake as directed. But store-bought mini pitas or tortillas work just fine for a quicker option.
How long do the pizza lunchables stay fresh?
Stored in an airtight container in the fridge, they stay fresh for up to 3 days. For longer storage, freeze them and reheat when needed.
Can I prepare these ahead of time for school lunches?
Yes, bake them in advance, cool completely, and pack in lunchboxes. Reheat at school if possible, or serve at room temperature for a tasty meal.
What are some good dipping sauces to serve with these pizza lunchables?
Ranch dressing, garlic aioli, or even extra marinara sauce are great for dipping and add extra flavor that kids love.
Is there a way to make this recipe dairy-free?
Definitely! Use dairy-free cheese alternatives or nutritional yeast for cheesy flavor, and double-check your sauce ingredients to keep it dairy-free.
Pin This Recipe!
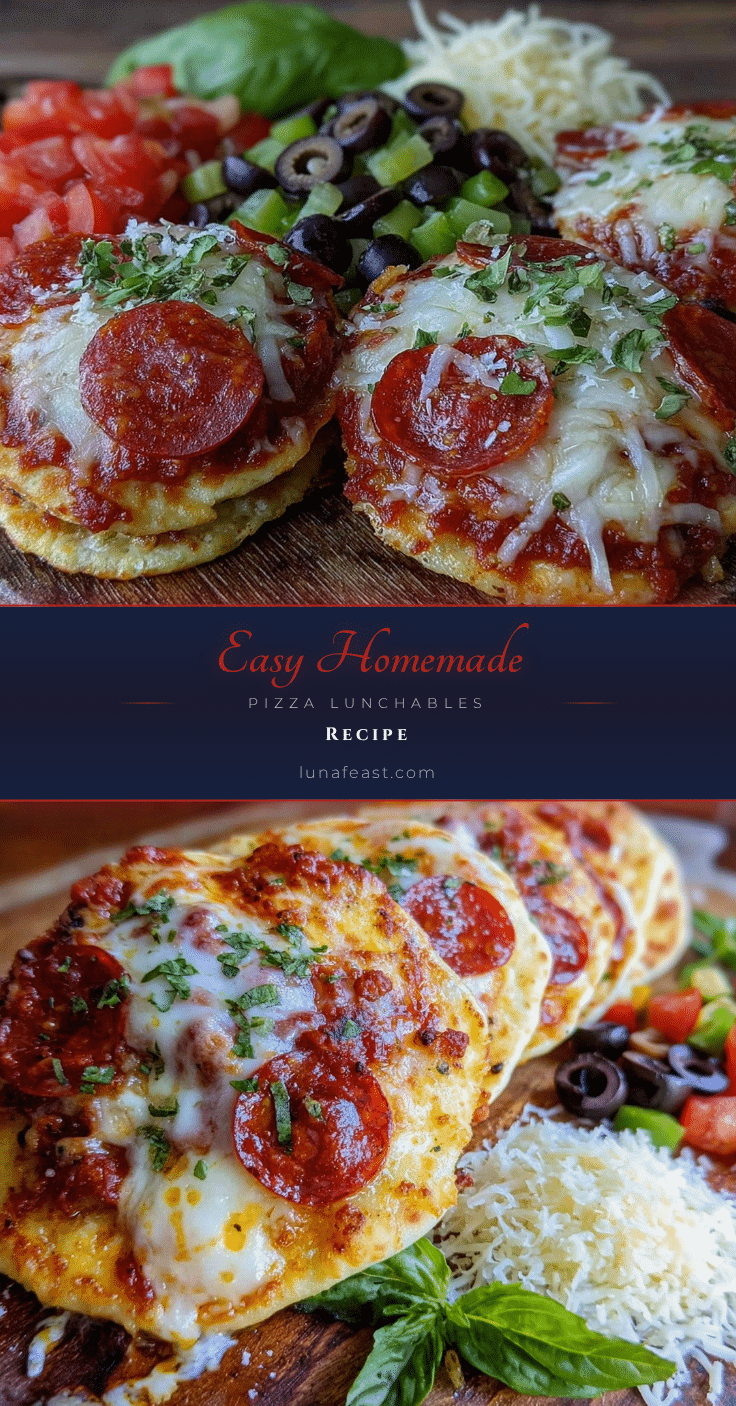
Easy Homemade Pizza Lunchables Recipe for a Fun Kid-Friendly Lunch

These Easy Homemade Pizza Lunchables are a quick, fun, and kid-friendly lunch option featuring mini pizzas with a soft crust, tangy sauce, and gooey cheese. Perfect for school lunches, picnics, or casual get-togethers.
- Prep Time: 10 minutes
- Cook Time: 12 minutes
- Total Time: 22 minutes
- Yield: 4 servings
- Category: Lunch, Snack
- Cuisine: American
Ingredients
- Mini pita breads or small flour tortillas
- Olive oil (about 1 tsp per base)
- Tomato sauce (½ cup / 120 ml)
- Garlic powder (½ tsp)
- Dried oregano (1 tsp)
- Salt and pepper to taste
- Shredded mozzarella cheese (1 to 1½ cups / 100-150 g)
- Pepperoni slices or mini turkey pepperoni (optional, about 20 slices)
- Mini bell pepper rings or thinly sliced mushrooms (optional)
- Fresh basil leaves (a few for garnish)
- Grated Parmesan cheese (optional)
- Red pepper flakes (optional)
Instructions
- Preheat your oven to 375°F (190°C). Line a baking sheet with parchment paper.
- Lay out mini pitas or tortillas on the baking sheet. Lightly brush each with about 1 tsp olive oil.
- In a small bowl, combine ½ cup tomato sauce, ½ tsp garlic powder, 1 tsp dried oregano, and salt and pepper to taste. Stir until smooth.
- Spread about 1 tablespoon of the seasoned tomato sauce evenly over each pizza base.
- Sprinkle about 2 tablespoons (15-20 g) of shredded mozzarella cheese over the sauce on each pizza.
- Add pepperoni slices (4-5 per pizza) or your choice of veggies like bell pepper rings or mushrooms.
- Bake for 10-12 minutes until cheese is melted, bubbly, and slightly golden. Check after 8 minutes to avoid burning.
- Remove from oven and let cool for a couple of minutes. Garnish with fresh basil leaves and Parmesan cheese if desired. Cut into halves or quarters for easy eating.
Notes
Do not overload the sauce to avoid soggy crust. Brush the base with olive oil for a crispy bottom. Bake at 375°F and watch closely after 8 minutes to prevent burning. Rotate baking sheet halfway if cheese isn’t melting evenly. Cover loosely with foil if crust browns too fast. Bake fully and cool before packing for lunchboxes. Reheat in microwave or oven before serving.
Nutrition
- Serving Size: About 2 mini pizzas
- Calories: 280
- Sugar: 3
- Sodium: 520
- Fat: 14
- Saturated Fat: 6
- Carbohydrates: 26
- Fiber: 2
- Protein: 12
Keywords: pizza lunchables, kid-friendly lunch, homemade pizza, mini pizzas, easy lunch recipe, quick pizza snack