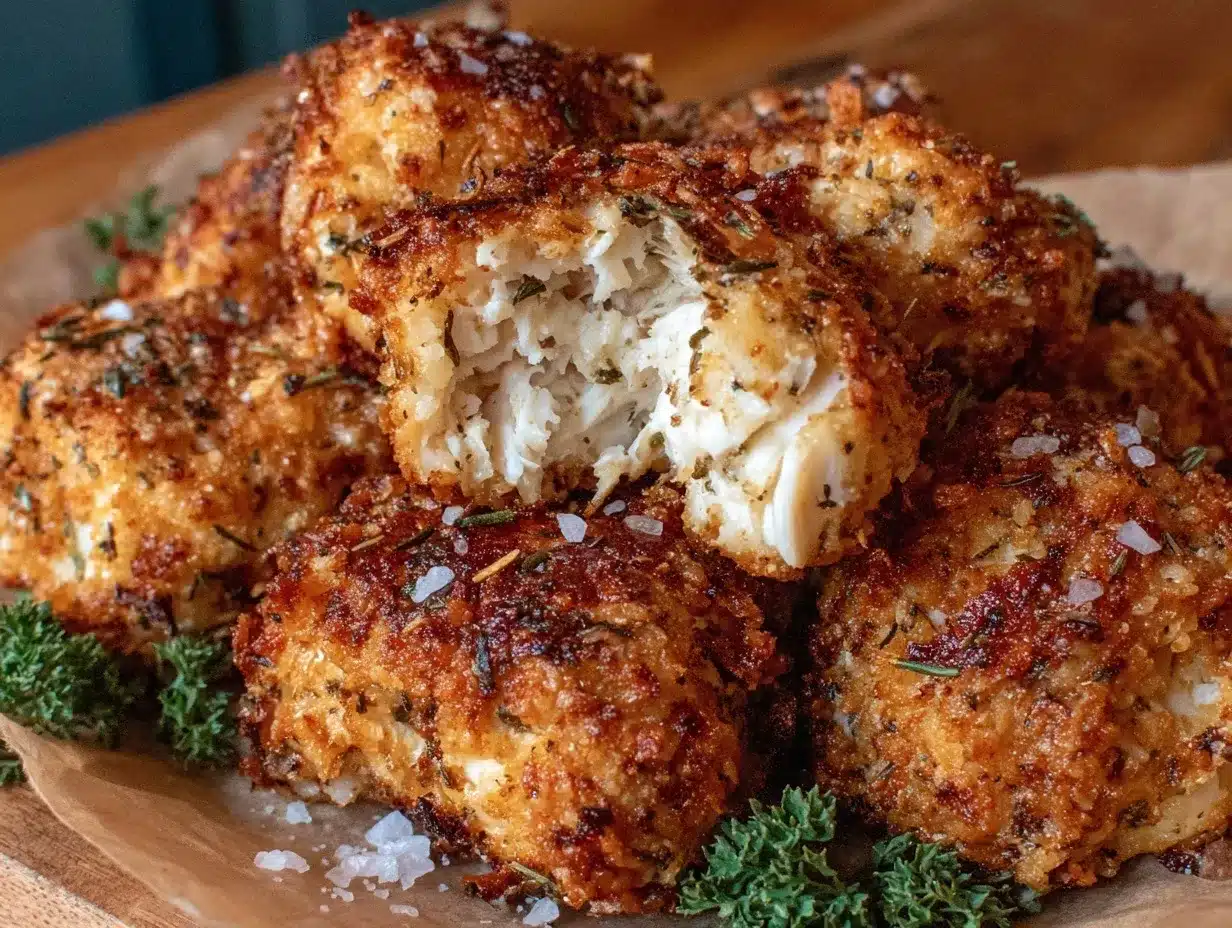
Let me tell you, the scent of golden, crispy chicken nuggets wafting from my oven is enough to make anyone’s mouth water instantly. The first time I baked these homemade chicken nuggets, I was honestly stunned—they were crunchy on the outside, tender and juicy on the inside. It was one of those moments where you pause, take a deep breath, and just smile because you know you’re onto something truly special. When I was knee-high to a grasshopper, chicken nuggets meant fast food, but years ago I stumbled upon this baked version during a rainy weekend experiment, and I wish I’d discovered it much sooner.
My family couldn’t stop sneaking them off the cooling rack (and I can’t really blame them). The way the crispy coating crackled under the fork, paired with the juicy chicken inside, feels like pure, nostalgic comfort—dangerously easy to make, too. You know what? These nuggets are perfect for a quick lunch, a fun snack for the kids, or even to brighten up your Pinterest cookie board with a savory twist. I’ve tested this recipe multiple times (in the name of research, of course), and it’s become a staple for family gatherings and gifting snack plates to friends. If you’re craving that classic comfort food without the deep-fryer hassle, you’re going to want to bookmark this one.
Why You’ll Love This Recipe
Honestly, this crispy homemade chicken nuggets recipe is a game-changer. I’ve tweaked it through several batches to get the perfect balance of crunch and moistness, and here’s why it stands out:
- Quick & Easy: Comes together in under 30 minutes, perfect for busy weeknights or last-minute cravings.
- Simple Ingredients: No fancy grocery trips needed; you likely already have everything in your kitchen pantry.
- Perfect for Any Occasion: Great for lunchboxes, potlucks, casual dinners, or game-day snacks.
- Crowd-Pleaser: Always gets rave reviews from both kids and adults alike—trust me, they’ll be gone before you know it.
- Unbelievably Delicious: The crispy coating combined with juicy, tender chicken is next-level comfort food.
What makes this recipe different? It’s not just breaded and baked; the trick is in the panko and a little seasoning magic that yields a crunch that holds up perfectly without frying. Plus, baking means less mess and guilt—your oven does the heavy lifting. This recipe isn’t just good—it’s the kind that makes you close your eyes after the first bite and say, “Yep, this is it.” Whether you’re impressing guests or just treating yourself, these nuggets bring comfort food with a fresh, healthier spin.
What Ingredients You Will Need
This recipe uses simple, wholesome ingredients to deliver bold flavor and satisfying texture without the fuss. Most are pantry staples, and you can swap a few to fit your taste or dietary needs.
- Chicken breast, boneless and skinless, cut into bite-sized pieces (about 1 pound / 450g) – the star protein, lean and tender
- Panko breadcrumbs (1 cup / 100g) – for that irresistible crunch; I recommend Kikkoman brand for consistent texture
- All-purpose flour (½ cup / 65g) – helps the coating stick; use gluten-free flour if needed
- Eggs (2 large, beaten) – acts as the glue for the coating, room temperature works best
- Garlic powder (1 teaspoon) – adds a subtle savory note
- Onion powder (1 teaspoon) – complements the garlic with a mild sweetness
- Smoked paprika (1 teaspoon) – gives a hint of smoky warmth
- Salt (½ teaspoon) – balances all the flavors
- Black pepper (¼ teaspoon) – a mild kick
- Olive oil spray or any neutral oil spray – to help the nuggets crisp up nicely in the oven
Optional:
- Grated Parmesan cheese (2 tablespoons) – for a cheesy twist in the coating
- Fresh herbs like parsley or thyme (1 tablespoon, chopped) – adds a fresh pop of flavor
Equipment Needed
- Baking sheet: A rimmed one to catch any drips; I like using a non-stick or lined with parchment paper for easy cleanup.
- Wire rack: Optional but highly recommended to let air circulate around the nuggets so they crisp evenly on all sides.
- Three shallow bowls: For flour, beaten eggs, and breadcrumb mixture; makes the breading process smooth and organized.
- Sharp knife and cutting board: To cut your chicken into uniform pieces—consistency means even cooking.
- Measuring cups and spoons: For precise seasoning and coating ratios.
If you don’t have a wire rack, no worries—just flip the nuggets halfway through baking to get that crisp on both sides. I’ve tried silicone mats instead of parchment, which works fine but doesn’t get quite as crisp. For a budget-friendly option, simple parchment paper and a sturdy baking tray do the trick perfectly.
Preparation Method
- Preheat your oven to 425°F (220°C). Line a baking sheet with parchment paper and place a wire rack on top if you have one. This setup helps the nuggets stay crispy all around.
- Prepare the breading stations: In one shallow bowl, place the flour. In the second, beat the eggs until smooth. In the third, combine the panko breadcrumbs, garlic powder, onion powder, smoked paprika, salt, black pepper, and Parmesan if using. Mix well.
- Cut the chicken: Trim any excess fat from the chicken breasts and slice into roughly 1½-inch (3.5 cm) pieces. Try to keep them similar in size for even cooking.
- Coat the chicken: One piece at a time, dredge in the flour, shaking off excess, then dip into the beaten eggs, letting the extra drip off. Finally, press into the breadcrumb mixture, ensuring a thorough, even coating. Set the coated nugget on the rack or baking sheet.
- Arrange the nuggets: Place the breaded chicken pieces spaced slightly apart on the wire rack or directly on the parchment-lined sheet. This spacing helps air circulate and crisp the nuggets perfectly.
- Spray with oil: Lightly mist the nuggets with olive oil spray—this step is key to getting that golden crunch without deep-frying.
- Bake: Place in the oven and bake for 15 minutes. Halfway through (around 7-8 minutes), flip each nugget and spray again lightly with oil. This flipping ensures both sides are crispy and evenly cooked.
- Check doneness: Nuggets should be golden brown and reach an internal temperature of 165°F (74°C). If you don’t have a thermometer, cut one open to ensure it’s no longer pink inside.
- Rest and serve: Let the nuggets rest for 5 minutes before serving. This helps juices redistribute and the coating set to its crispiest state.
Pro tip: If your panko isn’t browning as much as you’d like, you can broil for 1-2 minutes at the end—just keep a close eye to avoid burning. Also, don’t skip the oil spray; it’s a game-changer for that crunch without frying!
Cooking Tips & Techniques
To get your crispy homemade chicken nuggets truly baked to perfection, a few tricks make all the difference. First, cutting your chicken into similar-sized pieces ensures every nugget cooks evenly—no one likes a dry, overcooked edge or a raw center.
Next, I’ve learned that using panko breadcrumbs instead of regular crumbs is essential for that satisfying crunch. Plus, tossing in some smoked paprika and garlic powder gives the flavor an extra kick beyond plain breading.
One common mistake is skipping the oil spray or brushing. Without this step, nuggets bake up pale and soft rather than golden and crispy. Don’t be shy with that spray! Also, flipping halfway through baking helps both sides brown evenly, especially if you don’t have a wire rack.
If you have time, refrigerating the breaded nuggets for 15-20 minutes before baking helps the coating stick better and crisp more reliably. I learned this one after a few batches where crumbs fell off during baking.
Timing is key—baking at a higher temperature like 425°F (220°C) crisps the outside quickly without drying out the chicken. If your oven runs hot, keep an eye starting at 12 minutes to avoid burning. Multitasking tip: prep your dipping sauces while the nuggets bake—homemade honey mustard or classic ketchup never disappoint.
Variations & Adaptations
This recipe is wonderfully flexible, so you can tweak it for different tastes or dietary needs. Here are some variations I’ve tried and loved:
- Gluten-Free: Swap all-purpose flour with almond flour or a gluten-free blend, and use gluten-free panko breadcrumbs. The texture changes slightly but remains deliciously crispy.
- Spicy Kick: Add ½ teaspoon cayenne pepper or chili powder to the breadcrumb mix for a subtle heat that wakes up the flavor.
- Herb-Infused: Mix fresh chopped rosemary, thyme, or parsley into the panko for a fresh, aromatic twist.
- Air Fryer Adaptation: If you have an air fryer, you can cook the nuggets at 400°F (200°C) for about 10-12 minutes, flipping halfway. Air frying keeps them extra crispy with less oil.
- Dairy-Free: Simply omit Parmesan cheese and use dairy-free milk or water for the egg wash substitute if needed.
I personally tried adding a bit of shredded sharp cheddar to the breadcrumb mix once—dangerously good! Feel free to experiment with dipping sauces too; spicy ranch and garlic aioli are personal favorites that bring a whole new level of yum.
Serving & Storage Suggestions
Serve your crispy homemade chicken nuggets hot for the ultimate crunch. They go great with classic dipping sauces like honey mustard, barbecue, ranch, or even a spicy sriracha mayo. For a fun platter, add carrot and celery sticks or a side of sweet potato fries.
Leftovers? No problem. Store cooled nuggets in an airtight container in the refrigerator for up to 3 days. To reheat, pop them back in the oven at 375°F (190°C) for 8-10 minutes or use an air fryer for a few minutes to bring back that crispiness. Avoid microwaving if possible—it tends to make the coating soggy.
Flavors actually deepen after a day, making these nuggets a great make-ahead snack or lunchbox treat. Just remember to keep them sealed well to maintain freshness.
Nutritional Information & Benefits
These crispy homemade chicken nuggets offer a lean protein punch with about 250-300 calories per serving (roughly 6 nuggets). Using baking instead of frying cuts down on unnecessary fats, making them a healthier option without sacrificing flavor or texture.
Chicken breast is a great source of protein, low in saturated fat, and provides essential nutrients like niacin and selenium. The seasoning adds flavor without extra sodium, especially when you control the salt levels yourself.
This recipe can easily fit into gluten-free, low-carb (with flour substitutions), and dairy-free diets with minor tweaks. Just watch for allergens like eggs and wheat if serving to sensitive guests.
From my wellness perspective, this recipe strikes a nice balance between comfort and nutrition—perfect when you want a satisfying meal that feels homemade and wholesome.
Conclusion
If you’re craving that perfectly crispy, juicy, and homemade chicken nugget experience, this recipe is worth every minute of prep. It’s simple, uses ingredients you probably already have, and delivers that golden crunch without the deep-frying mess. Honestly, it’s become one of my go-to recipes for quick dinners and crowd-pleasing snacks.
Feel free to customize with your favorite spices, coatings, or dipping sauces—after all, cooking should be fun and personal. I love how this recipe brings back those nostalgic flavors but with a fresh, healthier twist.
Give it a try, and don’t forget to share how your crispy homemade chicken nuggets turned out—I’m always excited to hear your adaptations or tips! Here’s to many cozy, crunchy bites ahead.
FAQs About Crispy Homemade Chicken Nuggets
Can I use chicken thighs instead of chicken breasts?
Absolutely! Chicken thighs are juicier and add more flavor but may require slightly longer cooking time. Just make sure to cut them into similar-sized pieces and check for doneness.
How do I make these nuggets dairy-free?
Simply omit the Parmesan cheese and use a dairy-free milk or water mixed with a little cornstarch as the egg wash substitute. The crunch will still be great!
Can I freeze these chicken nuggets?
Yes! Freeze the baked and cooled nuggets in an airtight container or freezer bag for up to 2 months. Reheat in the oven or air fryer straight from frozen for best results.
What dipping sauces go best with these homemade chicken nuggets?
Classic choices like honey mustard, barbecue sauce, ranch, or ketchup are always winners. For something different, try sriracha mayo or garlic aioli.
Is it necessary to flip the nuggets during baking?
Flipping halfway through baking helps both sides get evenly crisp and golden, especially if you’re not using a wire rack. If you have a wire rack, flipping is optional but still recommended for best results.
Pin This Recipe!
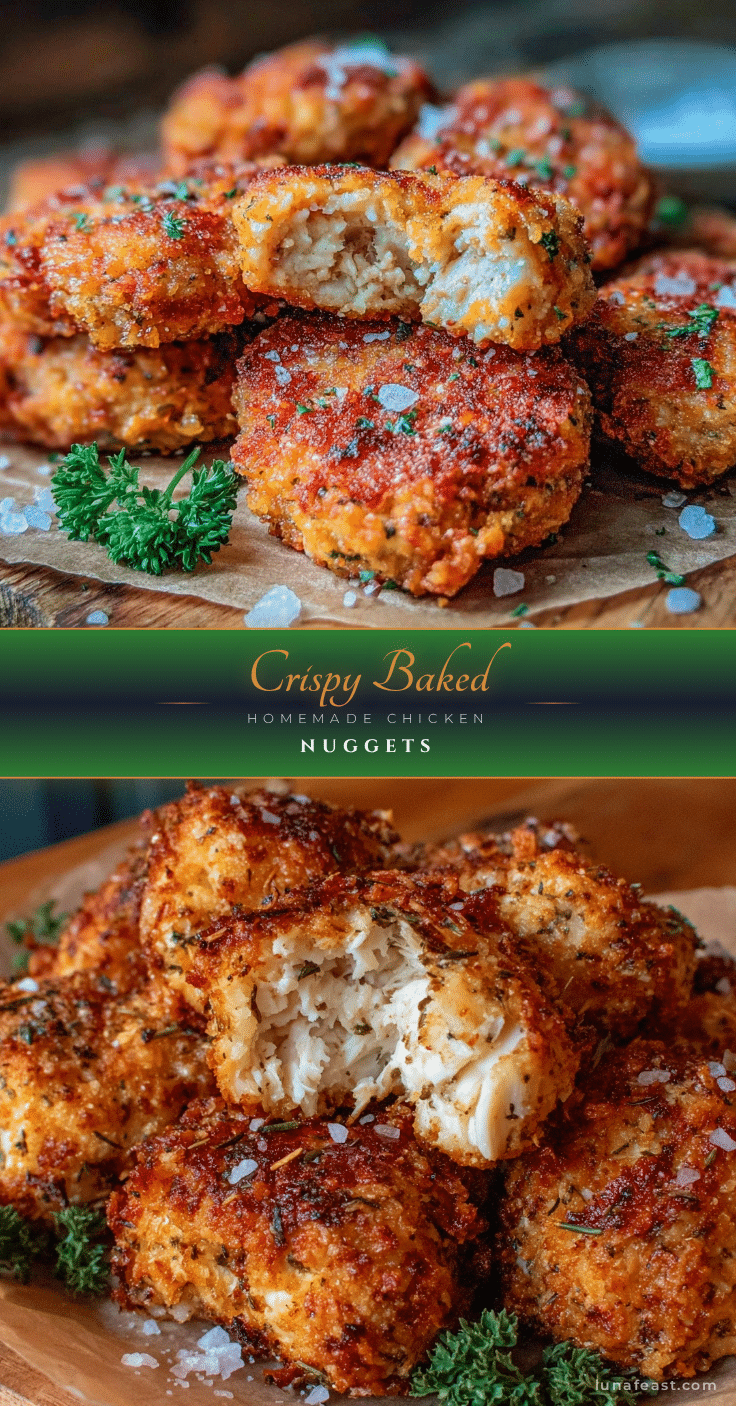
Crispy Homemade Chicken Nuggets Recipe Easy Baked to Perfection

These crispy homemade chicken nuggets are baked to golden perfection with a crunchy panko coating and juicy chicken inside. Perfect for quick lunches, snacks, or family gatherings without the deep-fryer hassle.
- Prep Time: 15 minutes
- Cook Time: 15 minutes
- Total Time: 30 minutes
- Yield: About 4 servings (roughly 24 nuggets) 1x
- Category: Main Course
- Cuisine: American
Ingredients
- 1 pound (450g) boneless, skinless chicken breast, cut into bite-sized pieces
- 1 cup (100g) panko breadcrumbs
- ½ cup (65g) all-purpose flour (use gluten-free flour if needed)
- 2 large eggs, beaten
- 1 teaspoon garlic powder
- 1 teaspoon onion powder
- 1 teaspoon smoked paprika
- ½ teaspoon salt
- ¼ teaspoon black pepper
- Olive oil spray or any neutral oil spray
- Optional: 2 tablespoons grated Parmesan cheese
- Optional: 1 tablespoon fresh herbs (parsley or thyme), chopped
Instructions
- Preheat your oven to 425°F (220°C). Line a baking sheet with parchment paper and place a wire rack on top if available.
- Prepare the breading stations: place flour in one shallow bowl, beaten eggs in a second, and combine panko breadcrumbs, garlic powder, onion powder, smoked paprika, salt, black pepper, and Parmesan (if using) in a third bowl.
- Trim excess fat from chicken breasts and cut into roughly 1½-inch (3.5 cm) pieces, keeping sizes uniform.
- Dredge each chicken piece in flour, shaking off excess, dip into beaten eggs, then press into the breadcrumb mixture to coat evenly. Place coated nuggets on the wire rack or baking sheet.
- Arrange nuggets spaced slightly apart to allow air circulation.
- Lightly spray the nuggets with olive oil spray to help crisping.
- Bake for 15 minutes, flipping nuggets halfway through (7-8 minutes) and spraying again with oil.
- Check that nuggets are golden brown and reach an internal temperature of 165°F (74°C). If no thermometer, cut one open to ensure no pink remains.
- Let nuggets rest for 5 minutes before serving to allow juices to redistribute and coating to set.
Notes
If panko isn’t browning enough, broil for 1-2 minutes at the end but watch closely to avoid burning. Flipping halfway through baking ensures even crispiness, especially without a wire rack. Refrigerate breaded nuggets for 15-20 minutes before baking to help coating stick better. Avoid microwaving leftovers to maintain crispiness; reheat in oven or air fryer instead.
Nutrition
- Serving Size: Approximately 6 nugg
- Calories: 275
- Sugar: 1
- Sodium: 400
- Fat: 10
- Saturated Fat: 2
- Carbohydrates: 18
- Fiber: 1
- Protein: 28
Keywords: chicken nuggets, homemade chicken nuggets, crispy chicken nuggets, baked chicken nuggets, easy chicken nuggets, kid-friendly snack, healthy chicken nuggets